Adding Users in the NEO UI
Complete the following steps to add a user:
L og in to the ONE system.
Click Menus/Favs > Administration > User > Search User.
The Search User screen displays.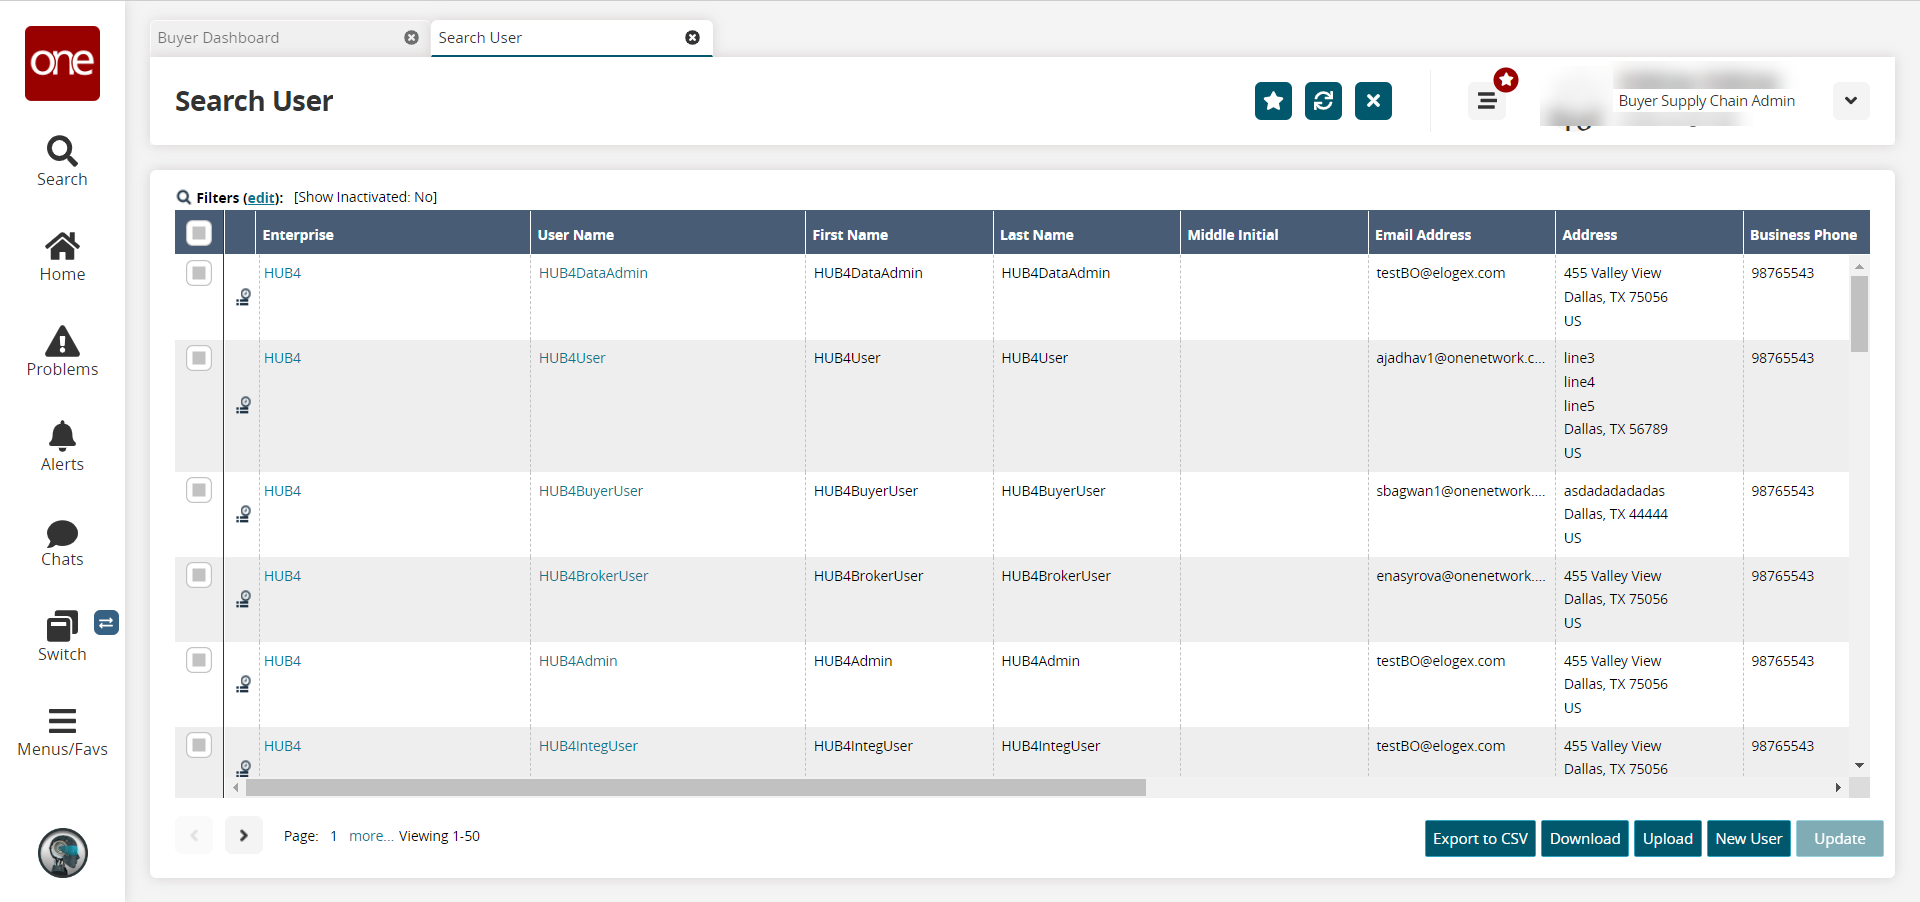
Click the New User button. Not all users and roles have access to this particular feature.
The New User screen displays.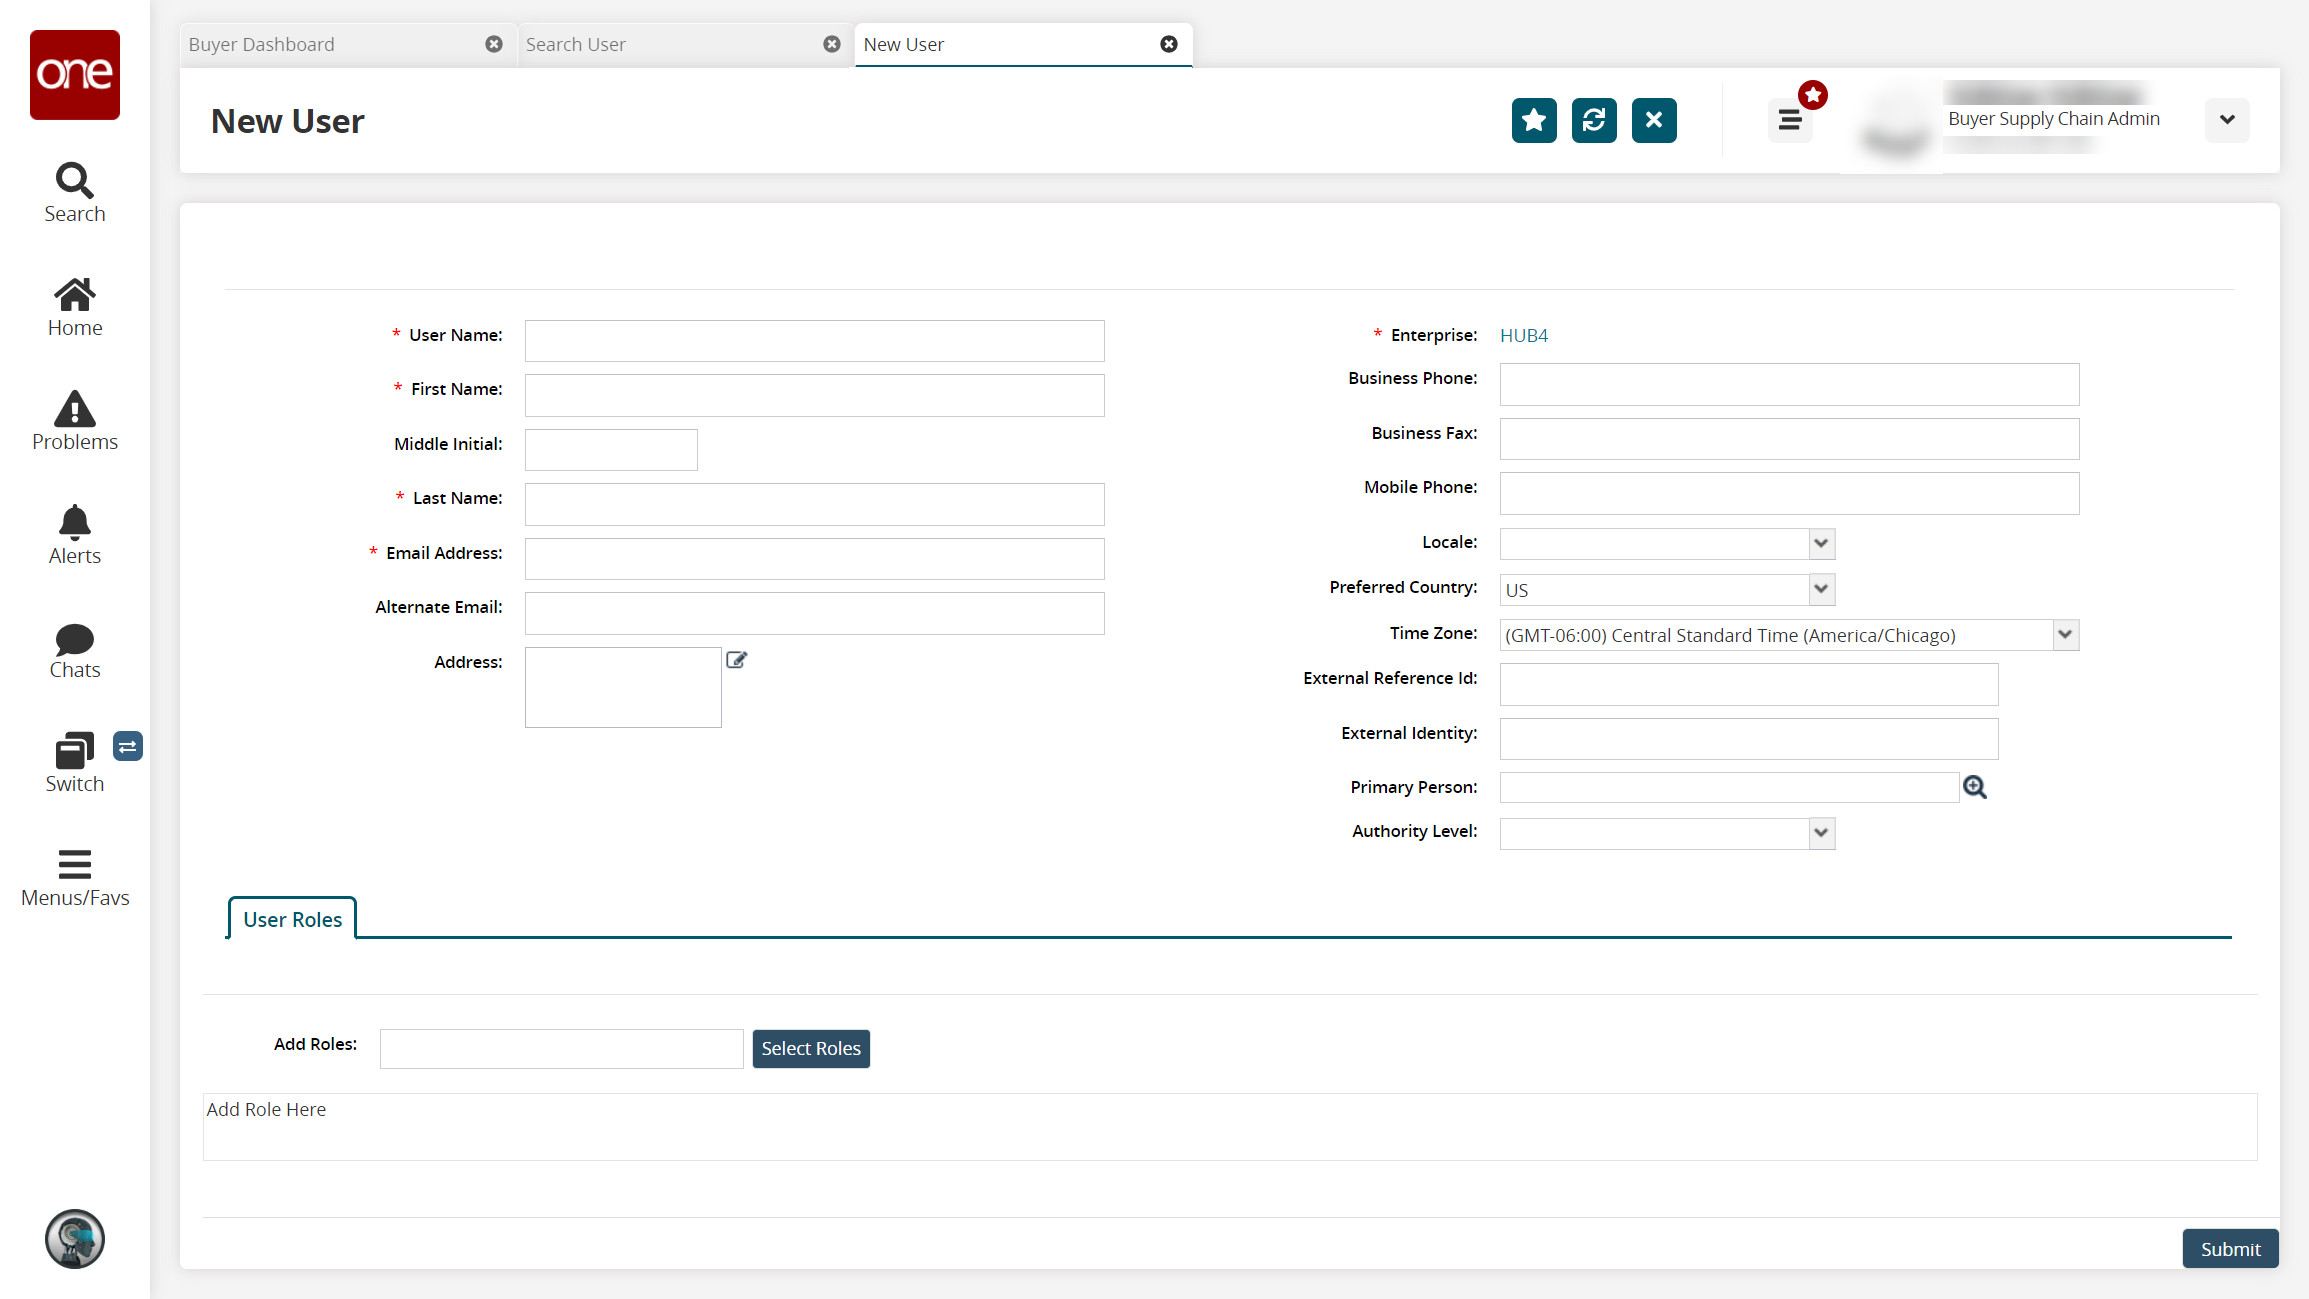
Fill out the following fields. Fields with an asterisk ( * ) are required.
* User Name
Enter a unique user name.
* First Name
Enter the user's first name.
Middle Initial
Enter the user's middle initial.
* Last Name
Enter the user's last name.
* Email Address
Enter the user's email address.
Alternate Email
Enter an alternate email if one exists.
* Enterprise
The system auto-populates enterprise information based on the administrator role.
Business Phone
Enter the user's business phone number.
Business Fax
Enter the user's fax number.
Mobile Phone
Enter the user's mobile phone number.
Locale
Select the user's language from the drop-down menu.
Preferred Country
Select the user's preferred country from the dropdown list.
Time Zone
Select the user's time zone from the dropdown list.
Address
Click the Edit icon. A dialog box displays. Enter the user's address information.
Primary Person
User the picker tool to select the user's primary person.
External Reference Id
Enter the user's external reference identification information.
External Identity
Enter the user's external identity.
In the Add Roles field, type in the role, and the system will use predictive text to display roles matching the characters typed.
Select the role desired, and the role is added to the User Roles table.
To select multiple roles at once, click the Select Roles button.
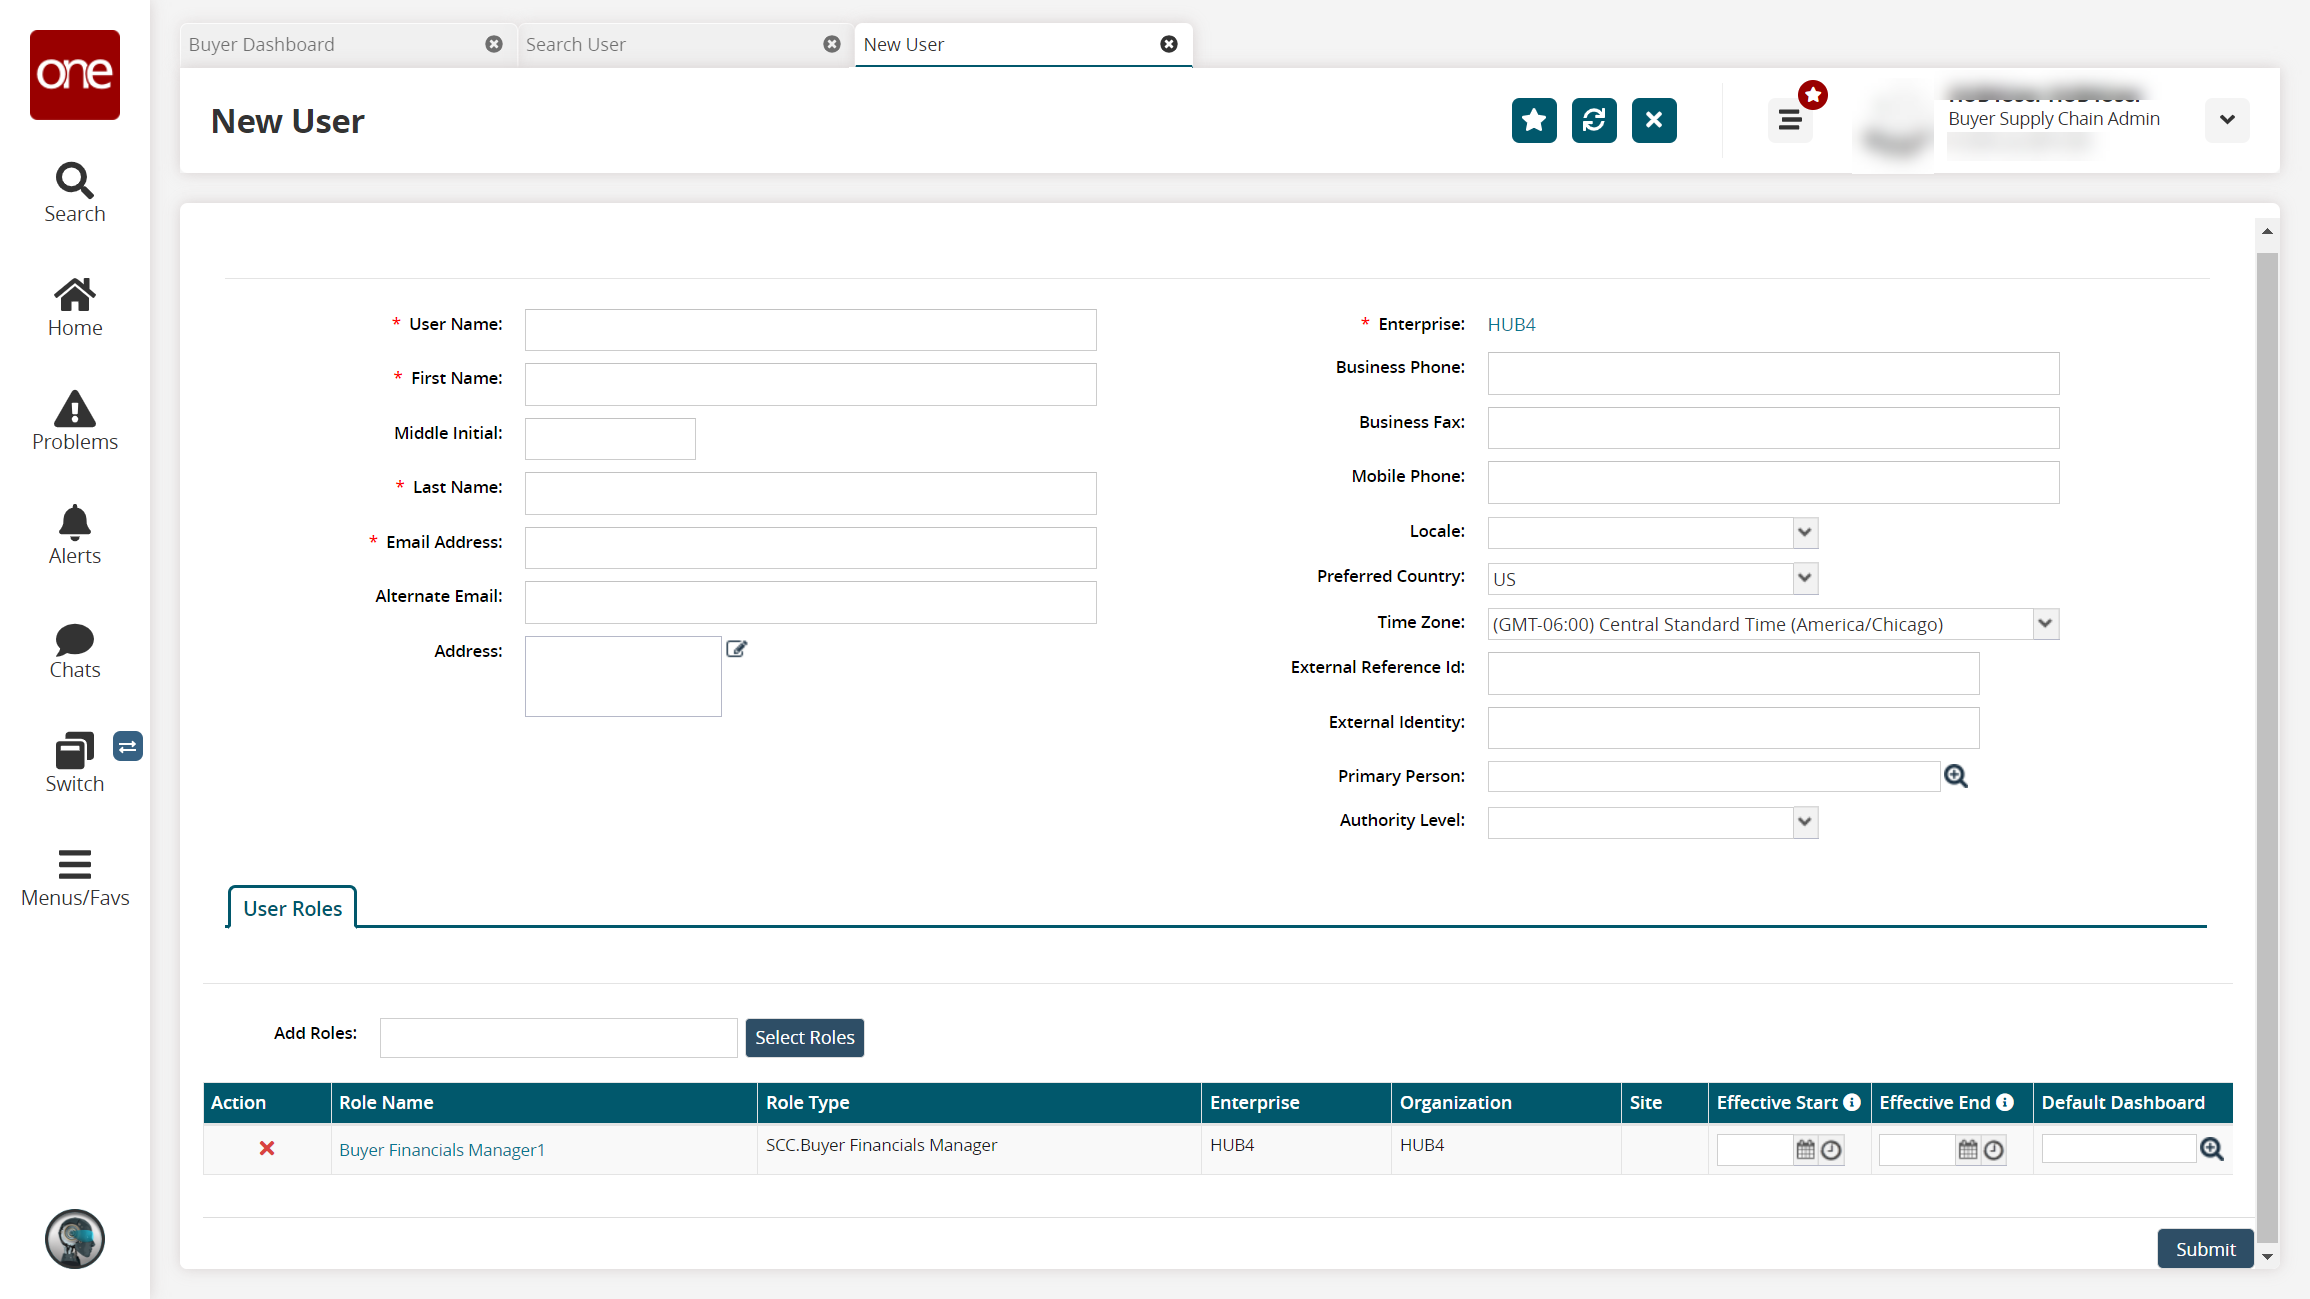
The Role popup displays.Click the checkboxes for the desired roles, and click OK. A user can be assigned more than one role.
The User Role table updates with the roles and associated information.In the User Role table for the desired role, click the calendar icons to select the Effective Start and Effective End dates.
In the Default Dashboard column, click the picker tool icon to select a default dashboard for that role.
Click the Submit button.
A green success bar displays on the screen.