Administering Timeline Data
Administer Timeline Data supports recurring as well as override capacity for the following data measures:
Receiving Appointment Capacity
Receiving Pallet Capacity
Receiving Case Capacity
Shipping Appointment Capacity
Shipping Pallet Capacity
Shipping Case Capacity
Putaway Labor Capacity (defines available workforce for unloading)
Putaway Receive Rate (defines rate of receiving)
Rack Storage Capacity (defines rack storage capacity which can be computed in terms of Pallet Capacity and Weekly Forecast)
Demand Factor (defines expected daily shipments that can be used in Daily Forecast computation)
Operating Hour Capacity (defines number of working hours available for the day)
QA Inspection Rate (defines speed of QA inspection of the receiving shipments)
Complete the following steps to administer timeline data:
L og in to the ONE system.
Select Menu/Favs > Scheduling > Projected Capacity Views > Administer Timeline Data.
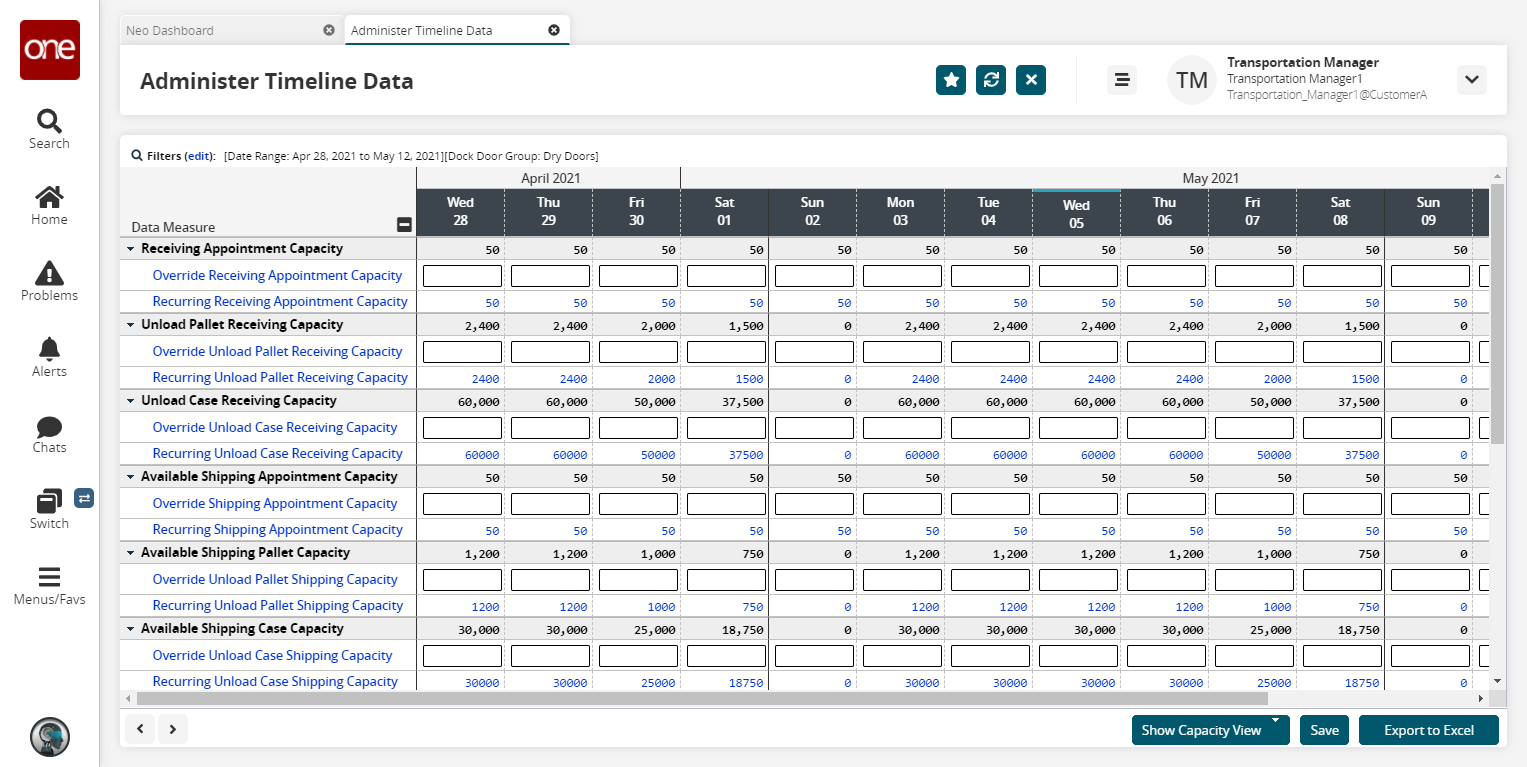
The Administer Timeline Data screen appears.
In Dock Door Group, select a dock door group using the picker tool.
Select start and end dates for the Date Range
Click the Search link. A table showing data measures for the specified dock door group appears.
As required, you can override a capacity. Click inside an override field, and then type a value.

To commit the override, click Save.
The override value becomes the capacity value.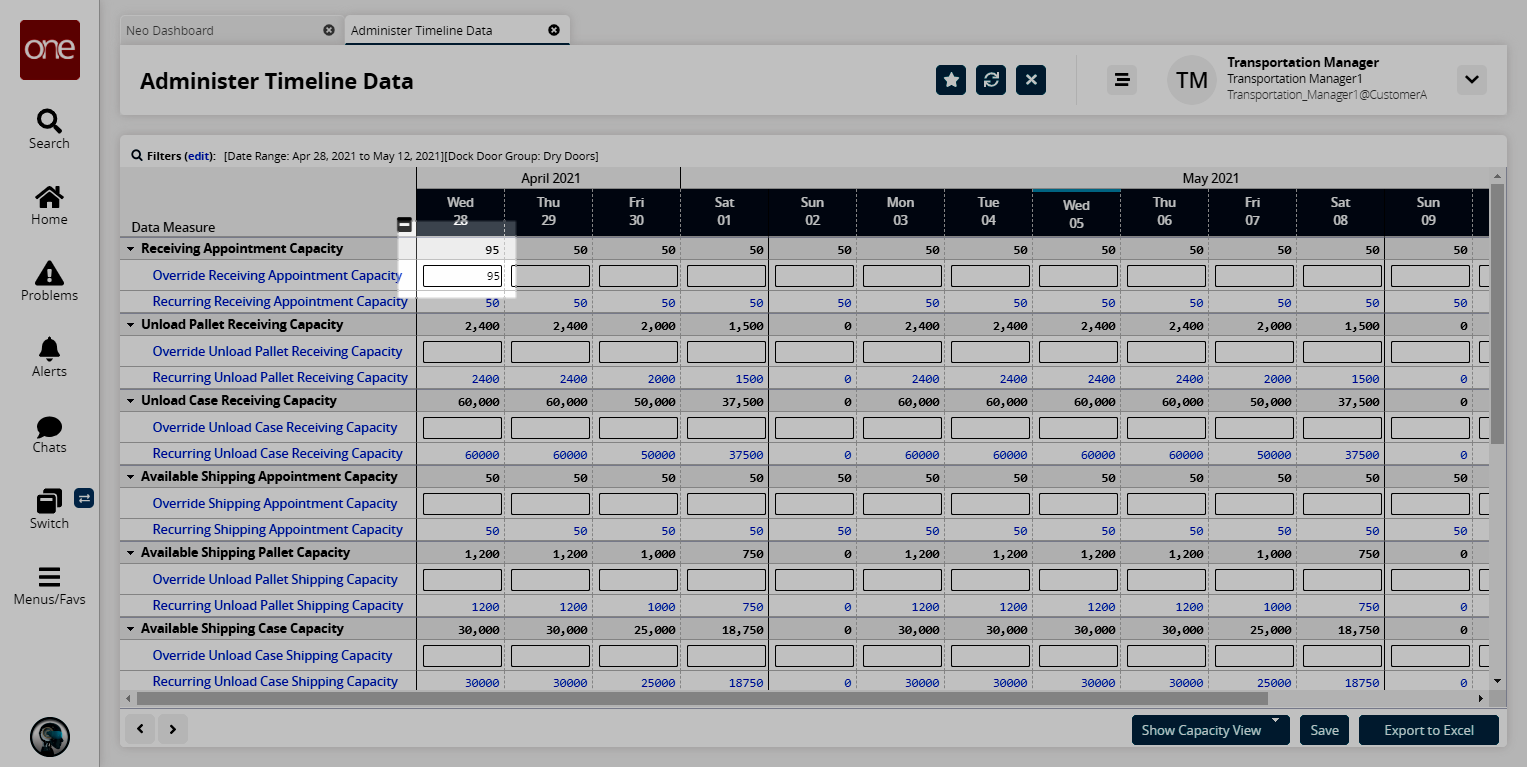
To select a capacity view, click the Show Capacity View button, and then select a capacity view option.
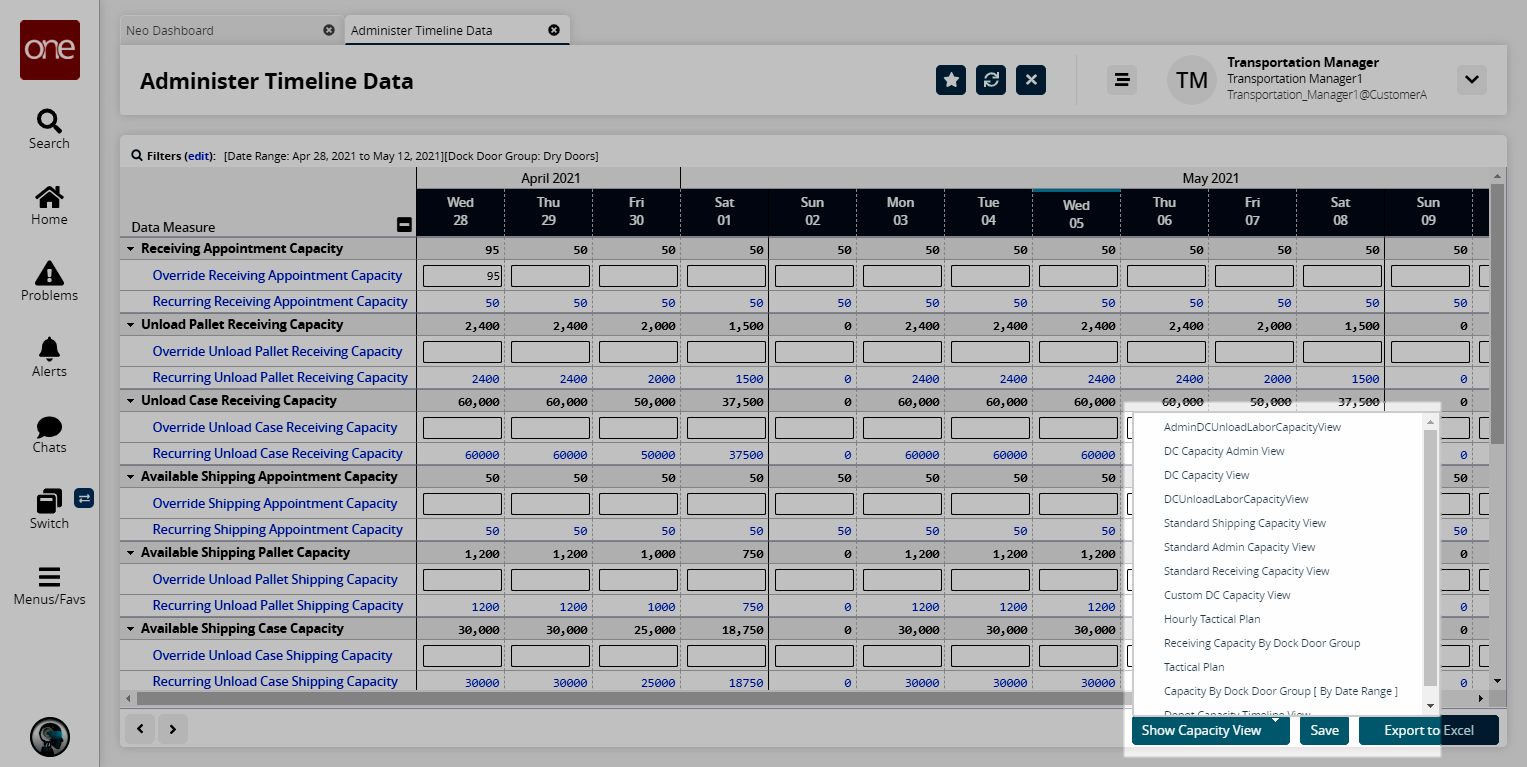
The following figure shows the DC capacity view in the DC Capacity View tab.
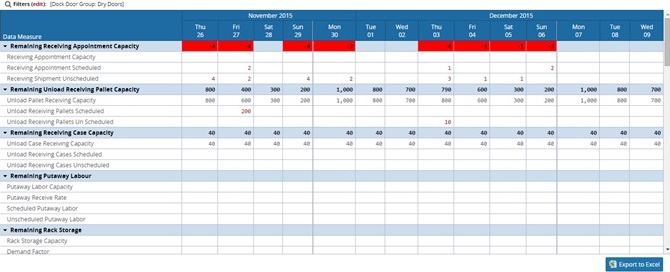
Each data measure appears in a blue row that shows its net capacity value for each bucket in a time range. By default, the data measure row appears expanded to show timelines for values such as capacity, scheduled and unscheduled activities, and demand factor per day. Clicking the data measure row alternately expands and collapses the row. If the capacity for a time bucket is 0 or less, the cell background color appears red.To view detailed information about scheduled and unscheduled values for a specific date, click its link.
The detailed information appears in a <data measure> tab.
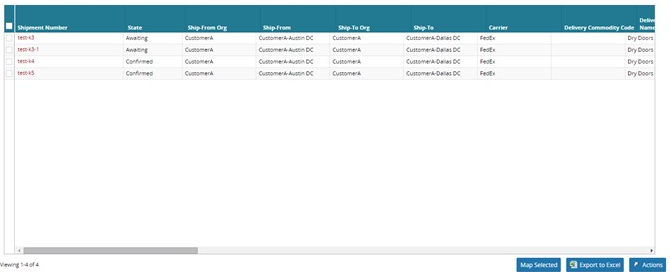
To perform an action on one or more shipments, select check boxes in the shipment rows, and then click the Actions button.
The Actions list appears.

Select an Actions option.
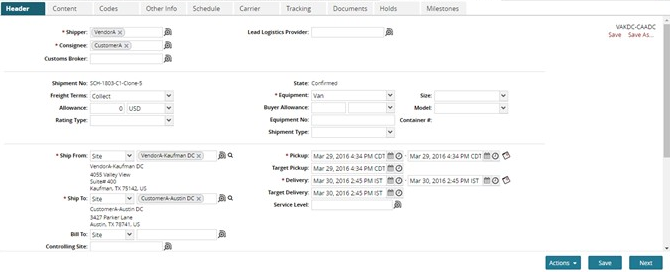
A dialog box for the selected option appears. The following figure shows the Shipment Line Tracking dialog box.
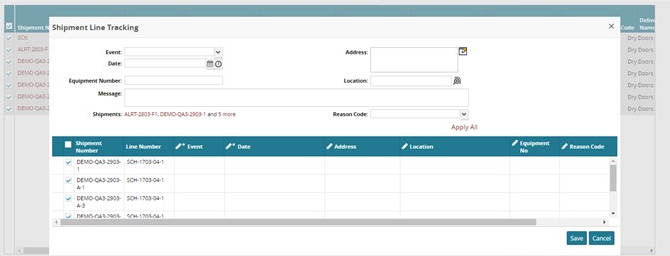
As appropriate for each dialog box, edit fields, then click the <action> button to commit the action. In the previous example, click the Shipment Line Tracking button. A success message appears to confirm the action.
To view details about shipments, click a Shipment Number link.
Details about the shipment appear in a new tab.