Creating Batch Itineraries
Complete the following steps to create batch itineraries:
L og in to the ONE system.
Select Menu/Favs > Transportation > Search Shipments.
In the NEO UI, users can click on the Menu/Favs icon on the left sidebar and type in the name of the screen in the menu search bar. For more information, see "Using the Menu Search Bar."
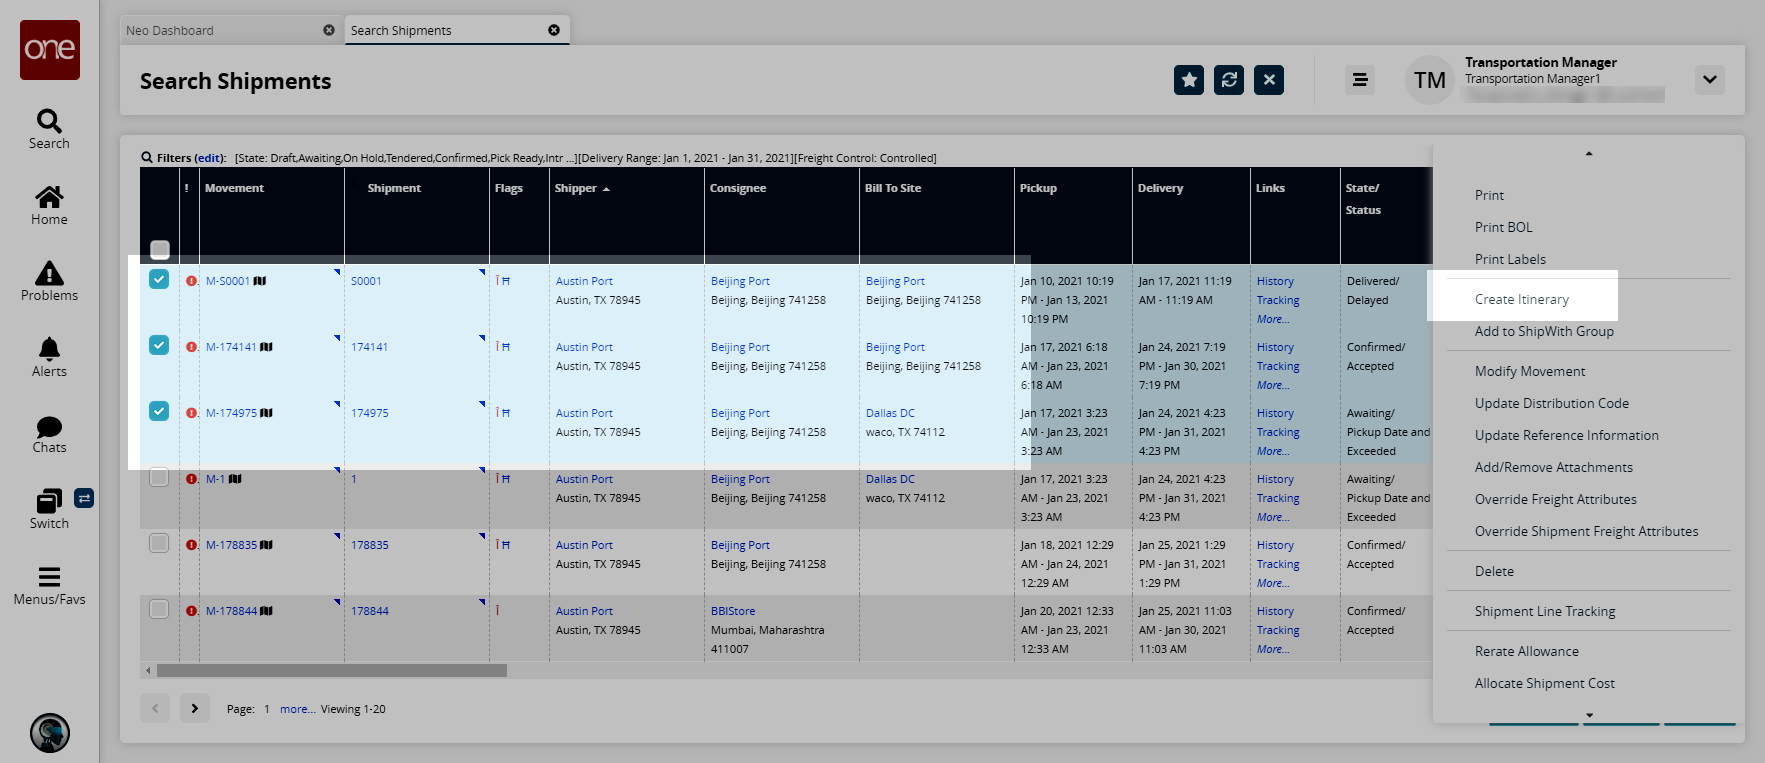
The Search Shipments screen appears .Select shipments that share the same Shipper and Consignee and require itineraries.
Click Actions > Create Itinerary.
The Create Shipment Legs screen appears.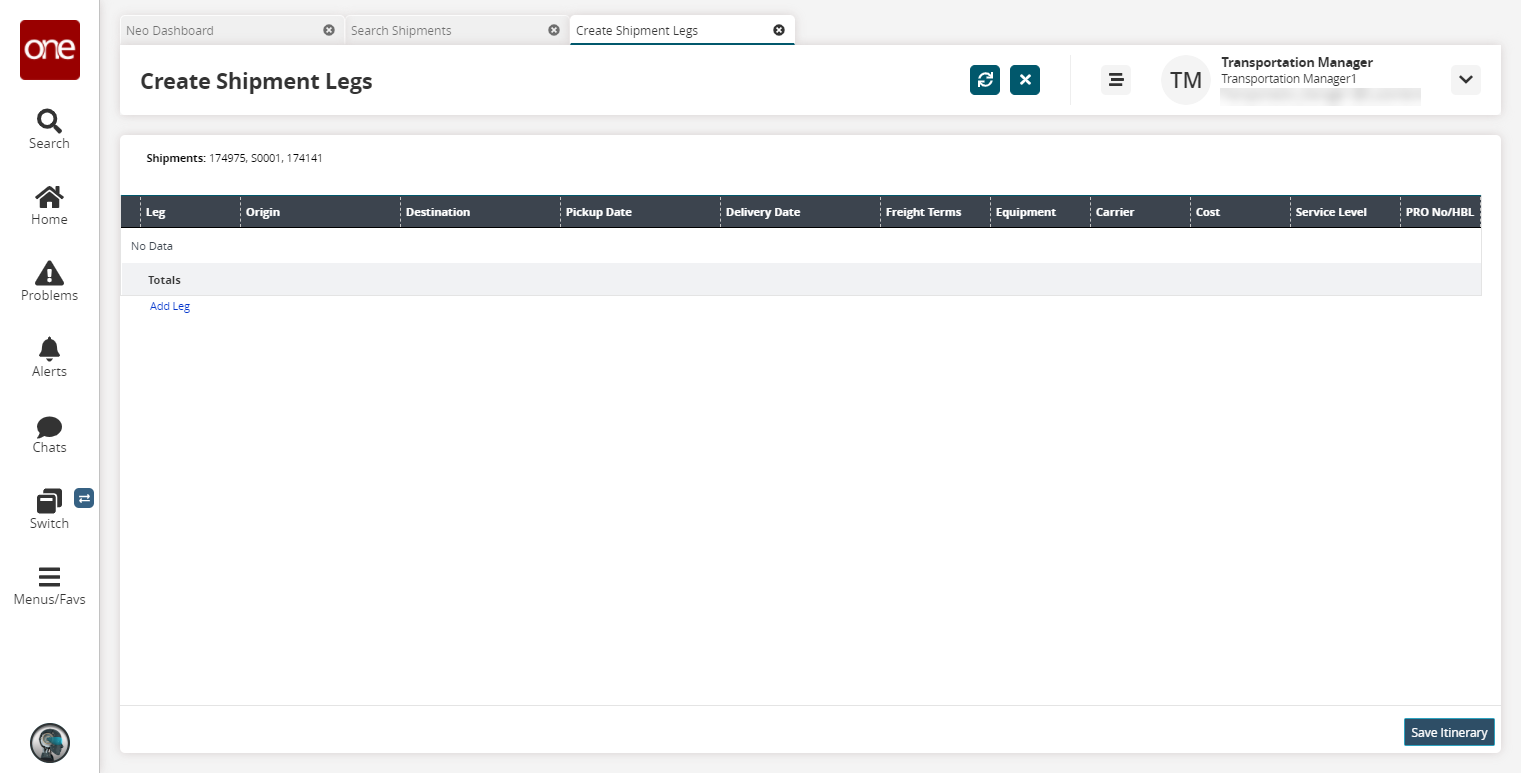
To add a leg to all of the selected shipments, click Add Leg .
The New Shipment Leg popup appears.
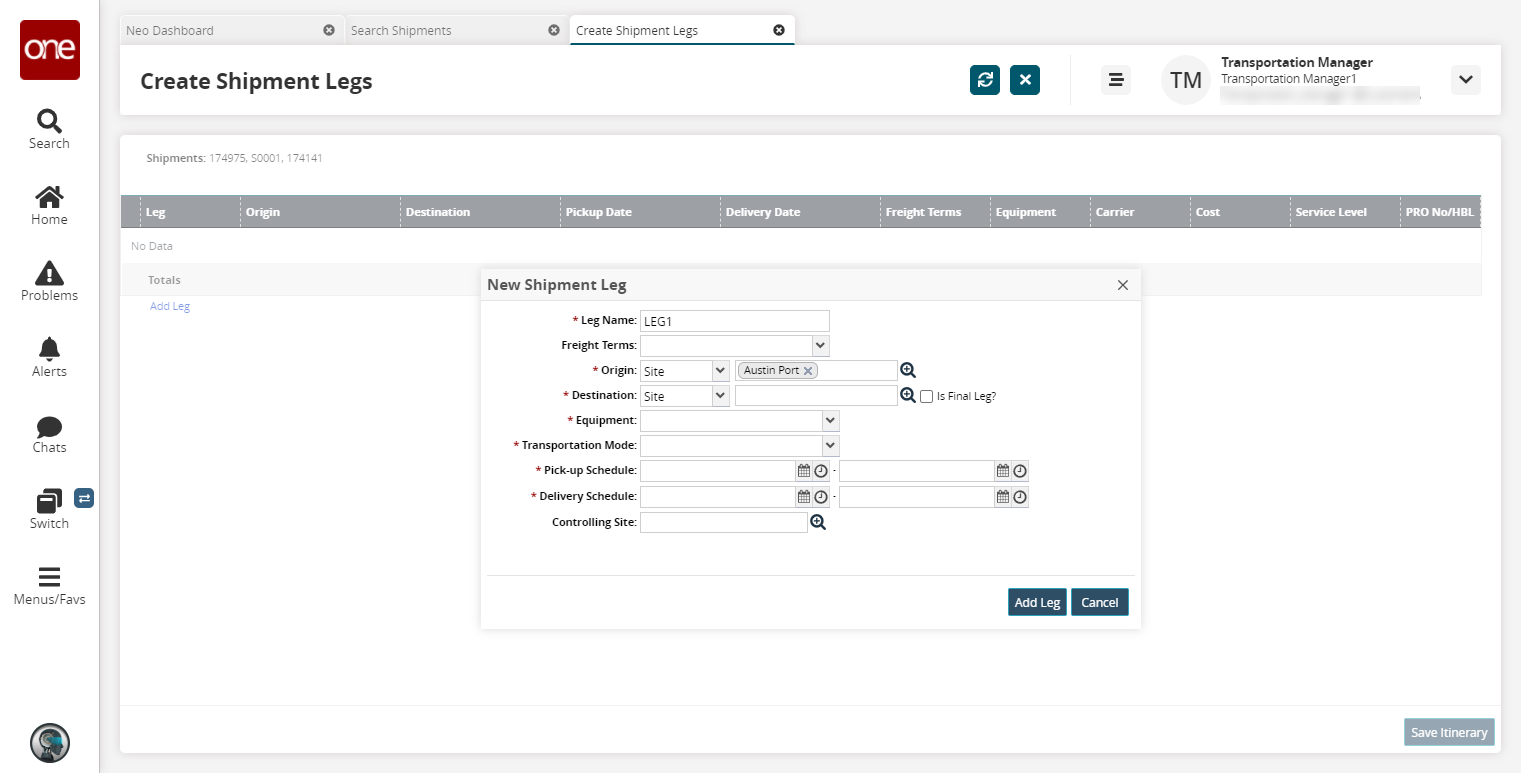
Fill out the following fields. Fields with an asterisk ( * ) are required.
Field
Description
* Leg Name
Enter a leg name.
Freight Terms
Select the freight terms from the drop-down menu. The available options are Collect, Prepaid, or Third Party.
* Origin
Select an origin site, address, or location using the picker tool.
* Destination
Select a destination site, address, or location using the picker tool. Select the Is Final Leg? checkbox if this leg is the final leg of the itinerary.
* Equipment
Select equipment from the drop-down menu.
* Transportation Mode
Select a transportation mode from the drop-down menu.
* Pick-up Schedule
Select a pick-up schedule date and time range using the calendar and clock icons.
* Delivery Schedule
Select a delivery schedule date and time range using the calendar and clock icons.
Controlling Site
Select a controlling site using the picker tool.
When finished, click Add Leg .
Click Save Itinerary .
The itinerary is saved to all of the selected shipments. A success message appears.