Creating Inventory Move Orders
Users have the ability to create new inventory move orders in the One Network system.
Complete the following steps to create an Inventory Move Order:
Click the Menu/Favs icon and navigate to Warehouse Mgmt > Inventory Move Orders. The Inventory Move Orders screen appears displaying the Explorer pane.
Select the site where the inventory move order will be created.
The Inventory Move Orders Report for the selected site appears to the right of the explorer pane.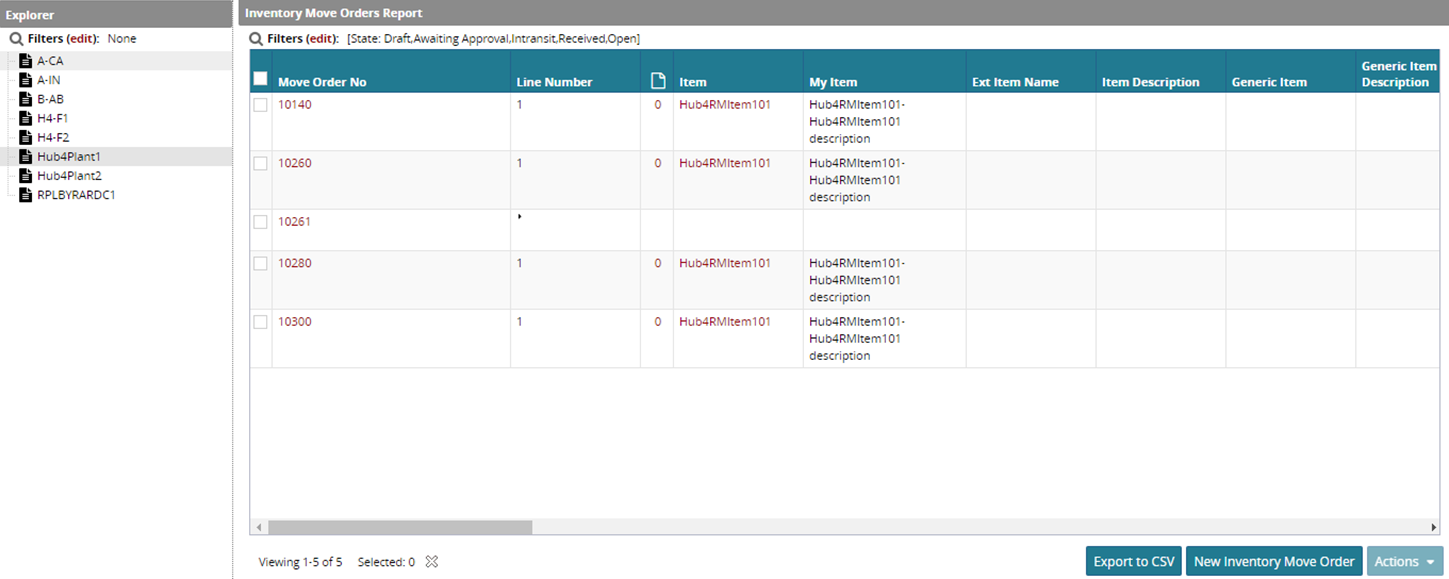
Click New Inventory Move Order.
The Create Inventory Move Order screen appears.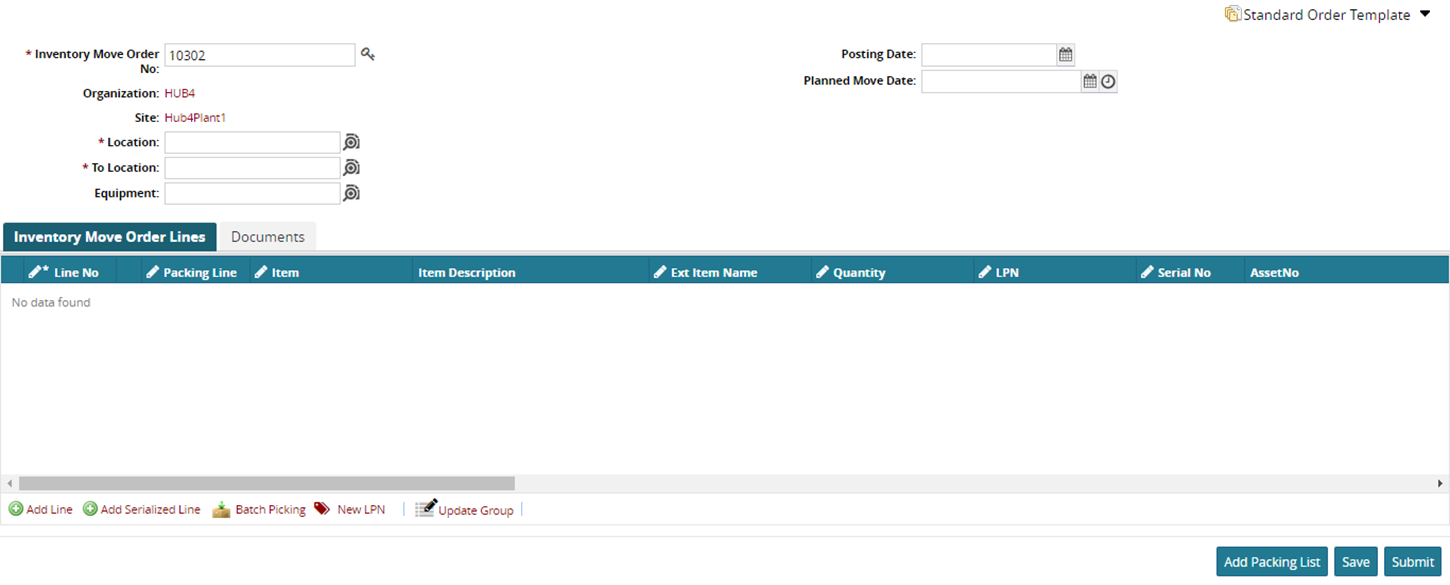
The Inventory Move Order No field, which contains the putaway list number, is automatically populated when you create a new putaway list. If you would like to generate a new number, click the Inventory Move Order Number icon to the right of the Inventory Move Order No field.
Select the Location and the To Location.
Click Add Line or Add Serialized Line if you require more lines on the Inventory Move Order Lines.
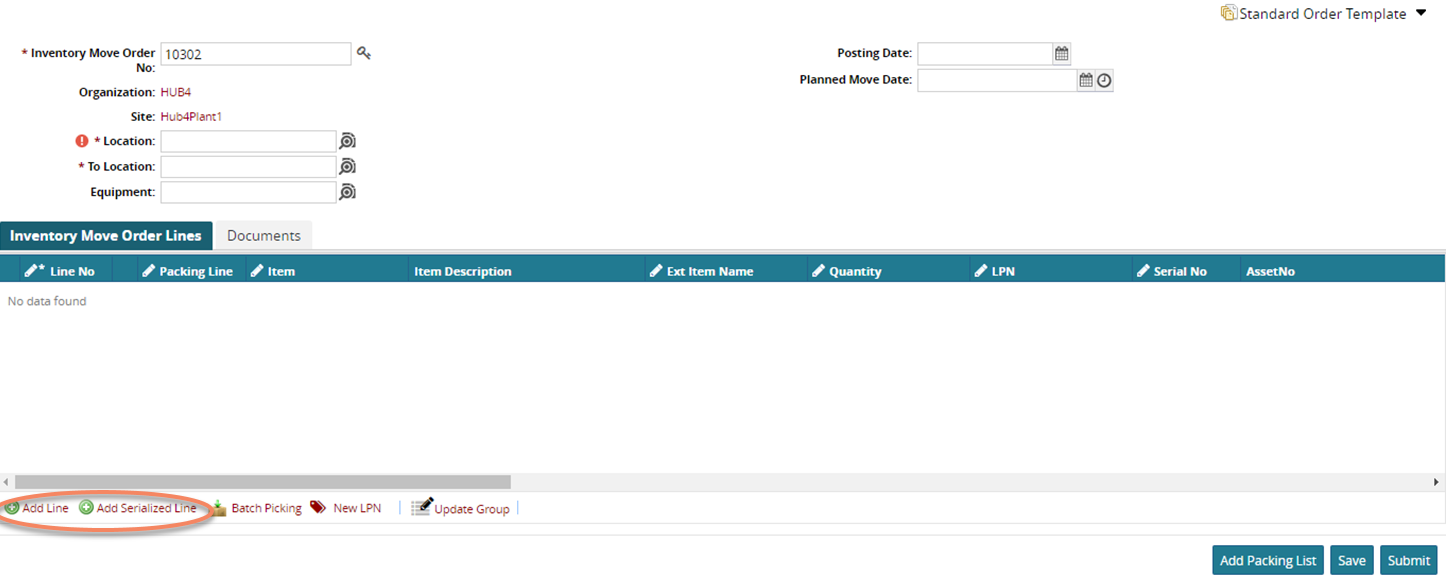
You can add more information in the field marked with the pencil.
The fields marked with a pencil icon are editable.Click on Add Packing List button, and select the checkbox for the desired packing list.
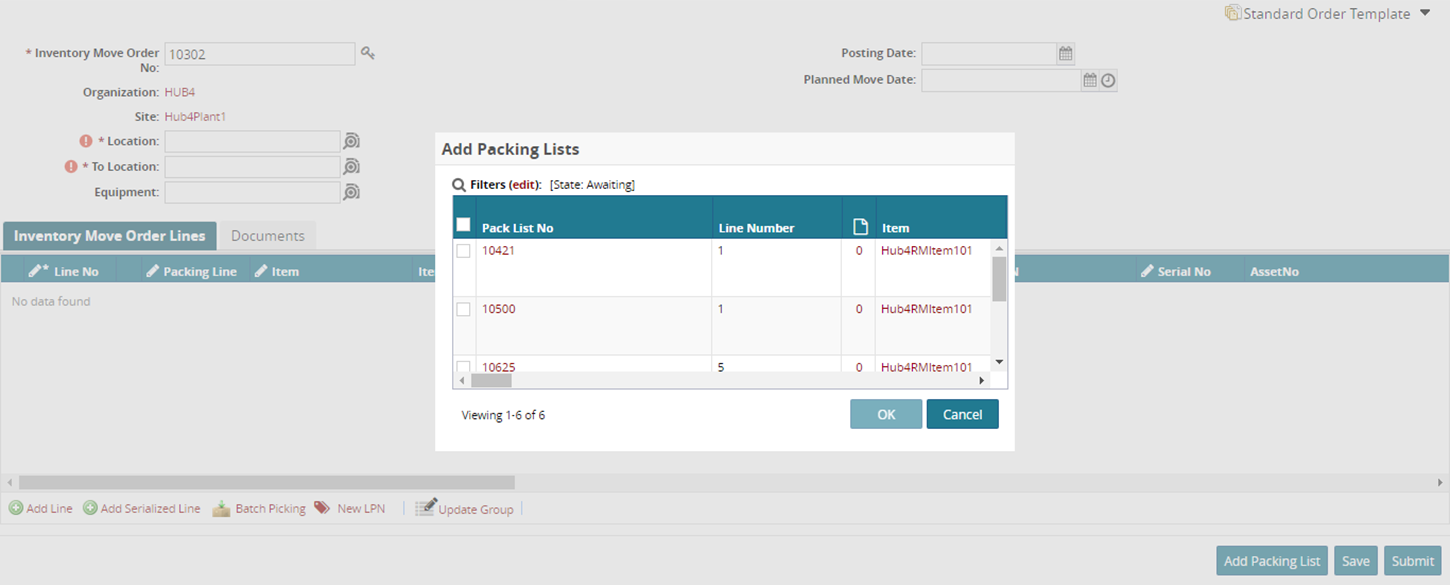
Click OK to add the receipt or Cancel to cancel.
Click Submit to submit the packing list or Save to save the changes. A success message appears.