Managing Integration Subscriptions
Users can search for active subscriptions and create a new integration subscription using the procedures described in this section.
Search for Integration Subscriptions
Complete the following steps to search for existing integration subscriptions:
Log in to the ONE system.
Click Menus/Favs > Integration > Search Integration Subscription. In the NEO UI, users can click on the Menu/Favs icon on the left sidebar and type in the name of the screen in the menu search bar. For more information, see "Using the Menu Search Bar."
The Search Integration Subscription screen appears.To search for an active subscription, click the Filters (edit) link.
The Search window pop-up appears.Select Yes from the Active? drop-down box.
Click the Search link.
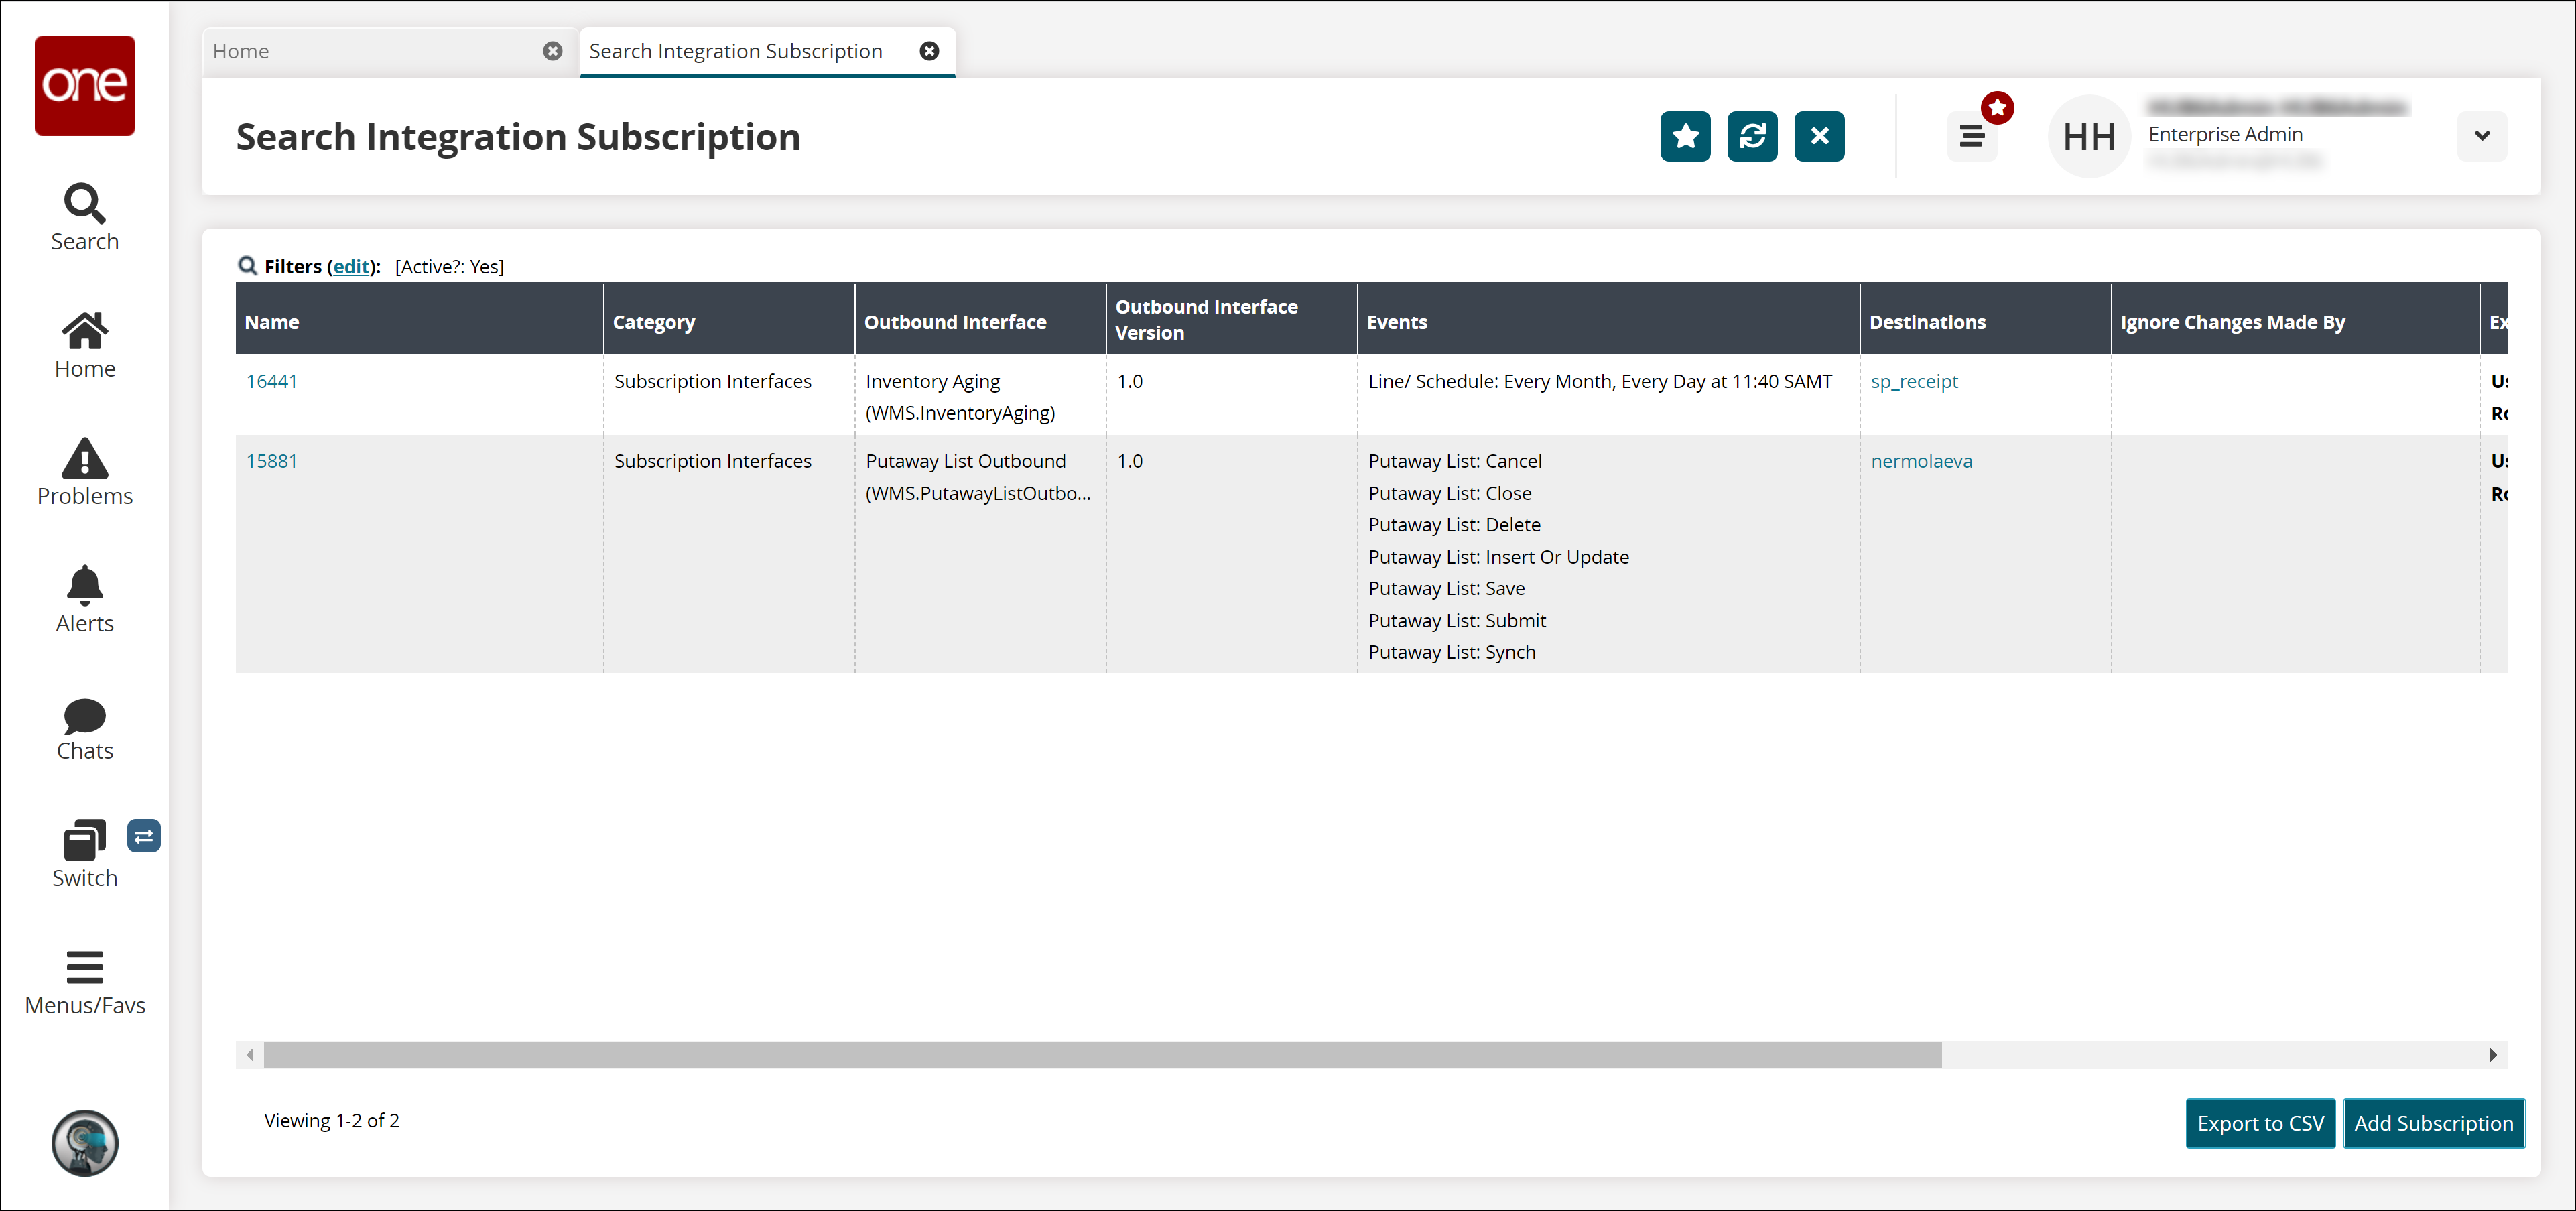
The search result screen appears.Click the Export to CSV button to export the report to a CSV file.
Creating an Integration Subscription
Complete the following steps to create an integration subscription:
Navigate to Menus/Favs > Integration > New Integration Subscription. In the NEO UI, users can click on the Menu/Favs icon on the left sidebar and type in the name of the screen in the menu search bar. For more information, see "Using the Menu Search Bar."
The New Integration Subscription screen appears.
To create new integration subscriptions, you can also:
Click the Add Subscription button on the Search Integration Subscriptions screen.
Click the Schedule Report button on an outbound report.
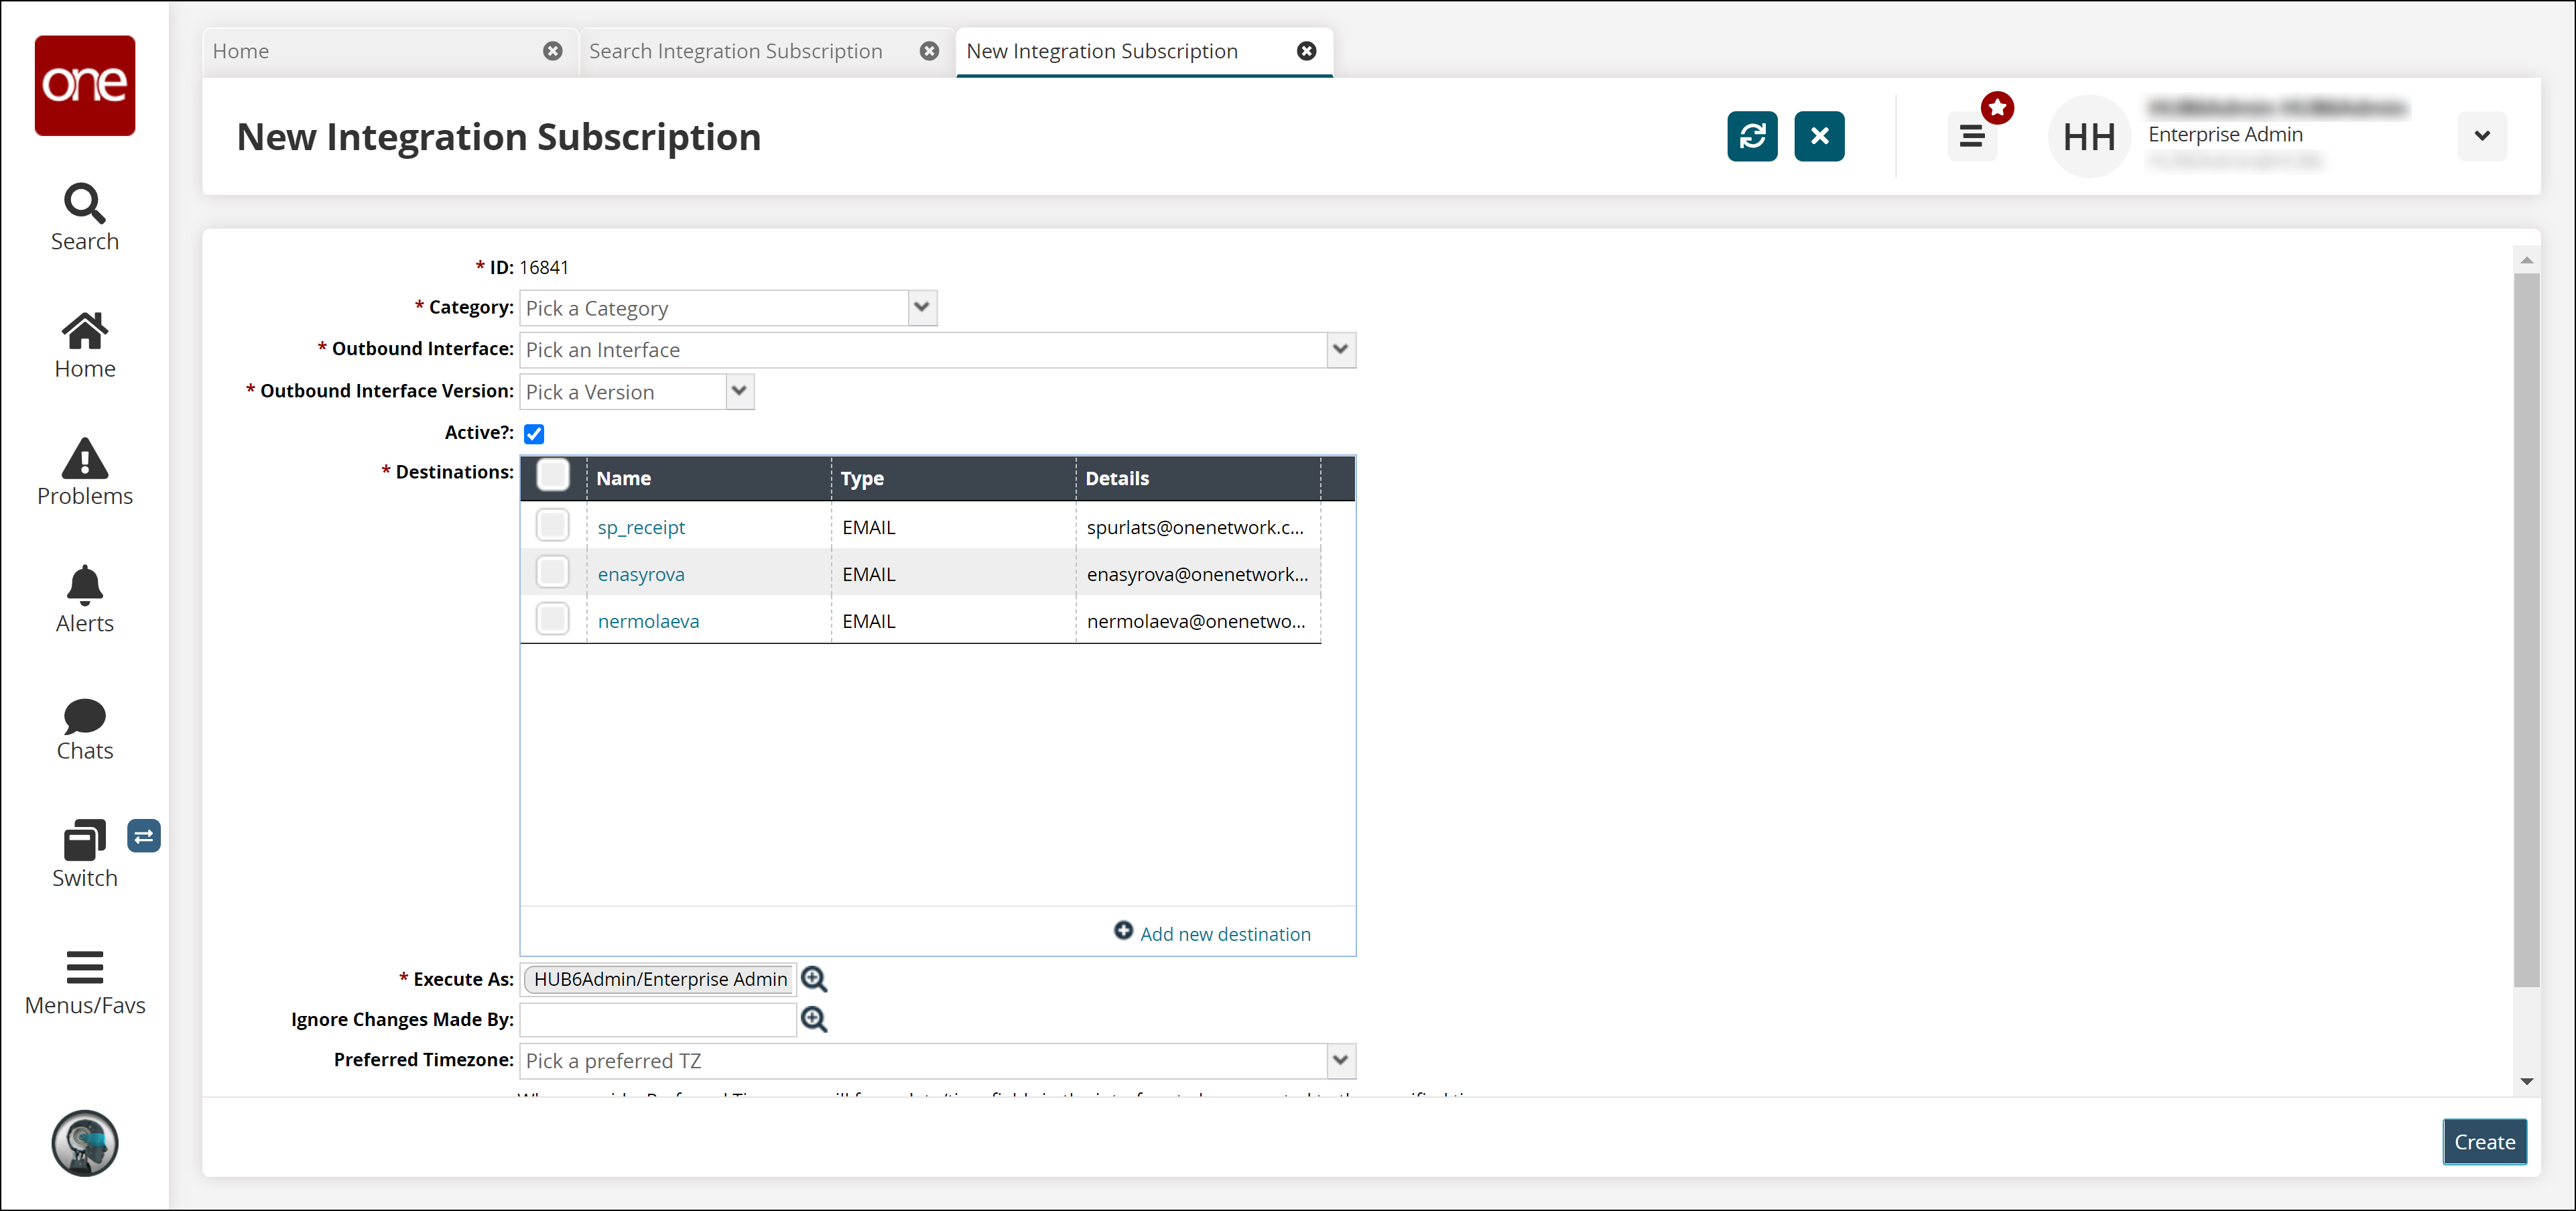
Enter values for fields described in the table below. Fields with an asterisk ( * ) are required.
Field Name
Description
* Category
Select the category from the drop-down list.
* Outbound Interface
Select the outbound interface from the drop-down list.
* Outbound Interface Version
Select the outbound interface version from the drop-down list.
Active?
Select the checkbox to create a subscription active.
Destinations
Select the recipients from the table. See below for instructions on adding a new destination.
* Execute As
Use the picker tool to select a role for executing the subscription.
Ignore Changes Made By
Use the picker tool to select a user to ignore changes made by them.
Preferred Timezone
Select a preferred timezone from the drop-down list.
Active Date Range
Select the date and time range during which the integration subscription will remain active.
Click the Add new destination link to add a new destination for receiving messages.
The New Message Destination pop-up window appears.
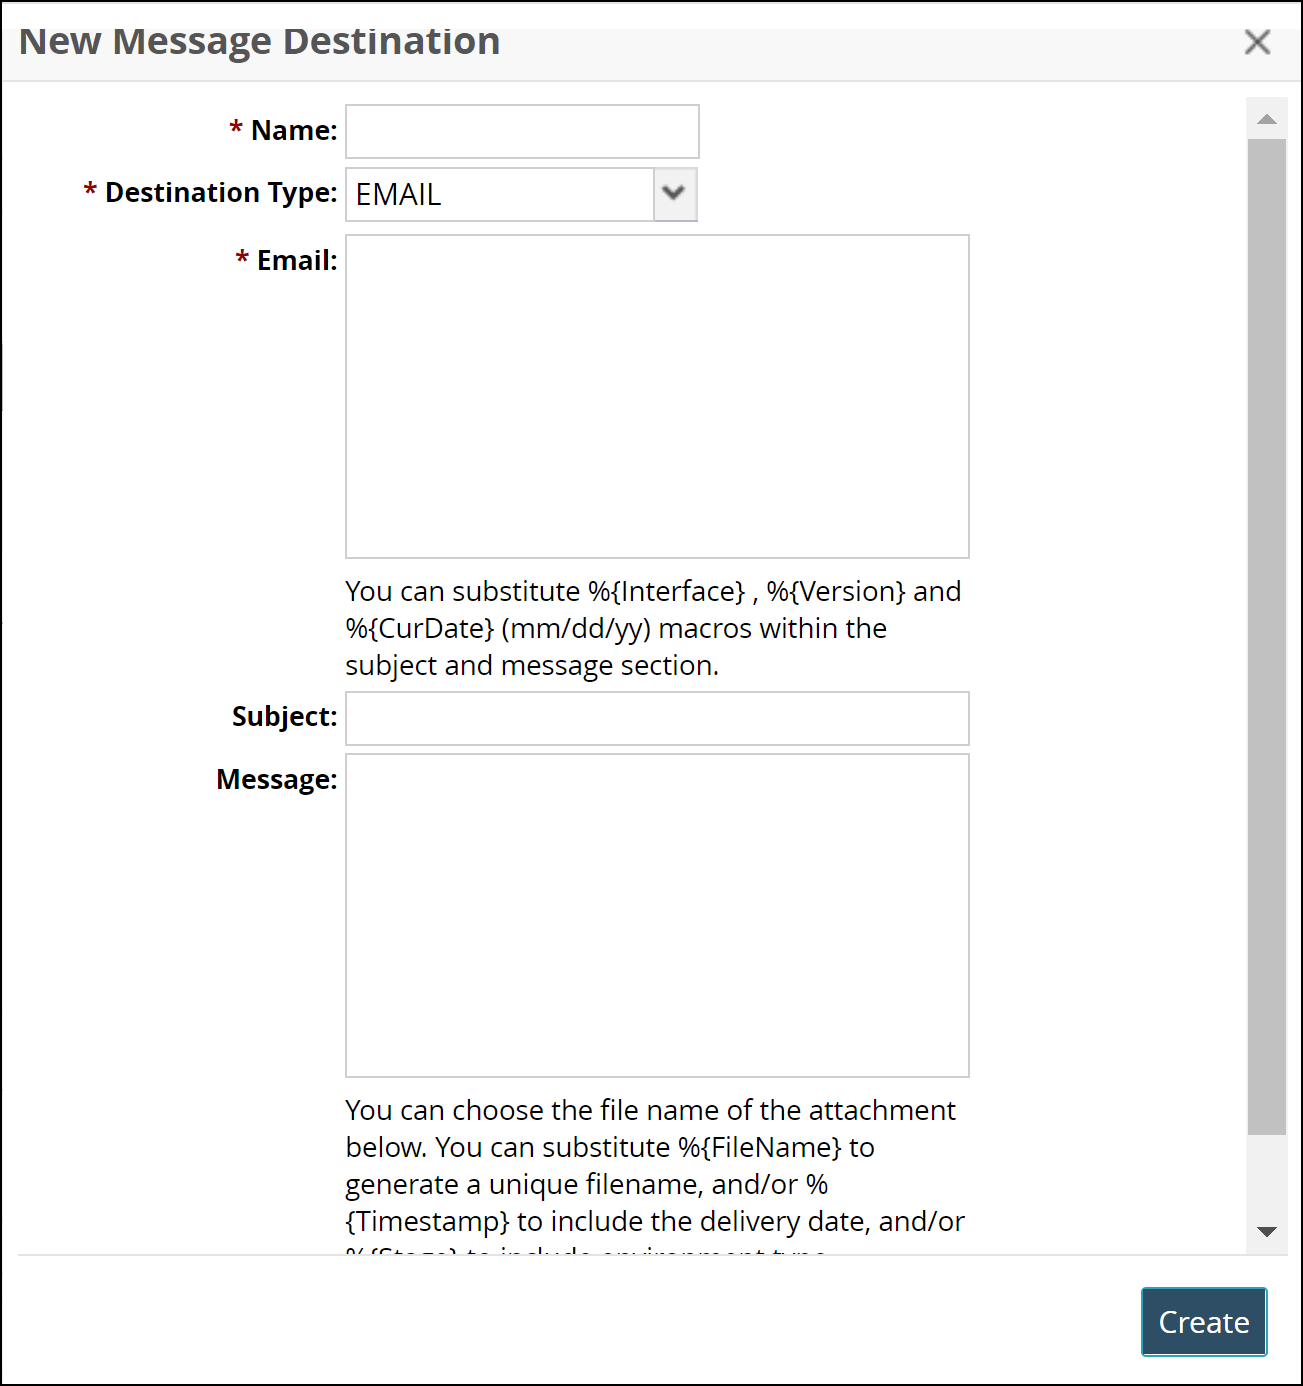
Enter values for fields described in the table below. Fields with an asterisk ( * ) are required.
Field Name
Description
* Name
Enter the name of the message destination.
* Destination Type
Select the destination type from the drop-down list. Please note that the fields will change when you select different destination types.
* Email
Enter the email address.
Subject
Enter the subject of the message.
Message
Enter the message.
Attached File Name
Enter the attached file name.
Click the Create button on the popup to add the destination.
The newly added destination appears in the Destinations table.Click the Create button on the tab to create the subscription.
A success message appears.