A Basic Example
This example is mostly for learning purposes. If you need to create a simple model form for a single model level, it's recommended that you use User-Defined Pages.
This basic example features a simple create page that changes to a detail page after the user clicks the 'Create' button. We will start by creating a new file: web/public/jsmodules/TaskDetail.js. In this, we'll define a JS class that extends One.model.ModelFormContainer, as has been done in this Showcase example:
define(function(){Ext.ns('SHOW');SHOW.TaskDetail = Ext.extend(One.model.ModelFormContainer, {});});The first config option we need to add is the modelInfo object, which holds 2 properties: modelLevelType and customModelName. At least 1 is required to sufficiently describe the Model that the page is going to interact with. For our example, we will set the modelLevelType to "SHOW.Task", a model in the Showcase module.
If you only provide modelLevelType then the framework will try to derive the customModelName given the model and surrogate id. If there is no surrogate id (as in the case of a create page) it will use the default, which is "Standard <ModelName>".
Next, we'll add a createActionName. This property dictates what action the framework will use when trying to create and persist an instance of our Model in the database. So far we have the following code:
define(function(){Ext.ns('SHOW');SHOW.TaskDetail = Ext.extend(One.model.ModelFormContainer, {modelInfo: { modelLevelType:'SHOW.Task'}createActionName:'SHOW.CreateTask'});});In the MPT, we add a create action called CreateTask:
After giving permissions to the new action for your user's role type, select the Action Screen tab, and select the Detail View tab. As you can see, there are two options: Reuse and Define view. Reuse allows you to reuse an existing detail view (created in the Views tab), and Define view allows you to create a new view especially for this particular action; it cannot be reused by other actions and will not show up with the other views in the Views tab. For this example, we will use this feature, so select Define View:
As you can see in the image above, it shows a listbox with the natural key fields automatically populated. Add other fields using the Add Fields dialog by clicking the Add button:
Now that we have our create action added, let's a detailViewName property, which dictates which detail view to use when displaying the values for an existing Model instance. Here's the updated code for our example in Showcase:
define(function(){Ext.ns('SHOW');SHOW.TaskDetail = Ext.extend(One.model.ModelFormContainer, {modelInfo: { modelLevelType:'SHOW.Task'},createActionName:'SHOW.CreateTask',detailViewName:'SHOW.TaskDetail'});});Go back into the MPT and add a view of type Detail whose name matches the detailViewName used in the JS class.
Finally, we need to register our new detail page. This has to be done in a way that all pages are aware of this registry, even if they have not loaded our TaskDetail js module. To achieve this, we add a line to the GlobalRegistry.js of our module. This file is referenced by build.jsb so that this code goes into instance.js, which is loaded on every page:
One.PageMgr.regDetail('SHOW.Task','SHOW.TaskDetail');Because it is loaded by every page, you should minimize the content of this as much as possible, keeping the lion's share of your javascript code in require.js modules like TaskDetail.js!
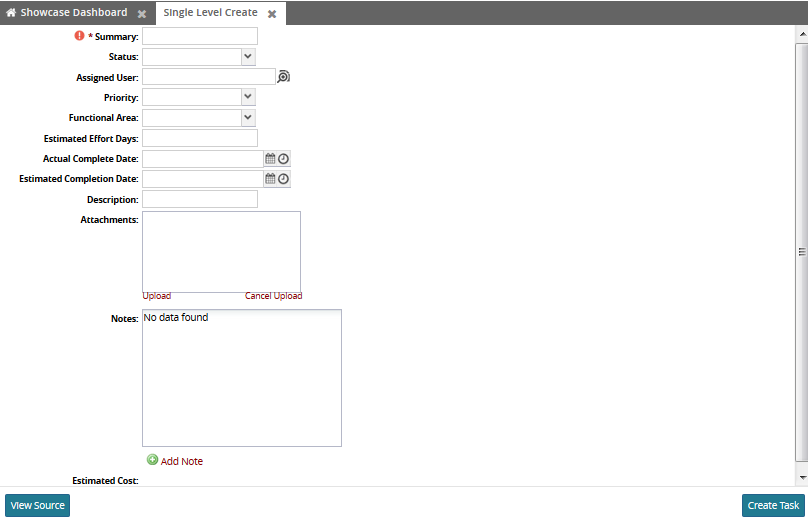
That's all you have to do for a basic Create -> Detail page. Add your class (without any config) under a WebAction and reference it in the RoleTypeUiConfig in your UiMetaModel. Then open it in NEO. As you can see below, you get the create page with the fields that were specified in the Action Screen tab:
Execute the create action, you should see the detail page-load with a success message:

It's important to note here that your Model Form JS class can be opened with a sysId property set (to the surrogate id of an existing Model instance), and it will open the default page.