Building an Inbound Interface
The One Network Platform provides a facility for uploading model data. The data can come in any format, assuming the developer implements a suitable processor. But to make life easier, the Platform provides a built-in mechanism for processing data in CSV (Comma-Separated Values) format. This CSV load facility can be used by developers, by end-users through the user interface, or by other enterprise systems that can generate CSV.
To accept inbound data, we create something called an Inbound Interface in studio. The Inbound Interface will define the format of the data, any necessary transformations, and the mechanism used to write the data to the database.
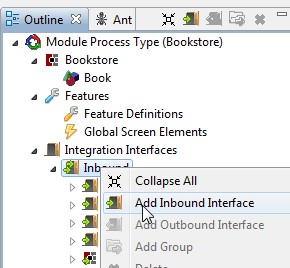
Let's create an inbound interface for loading Books into our Bookstore application. To begin, open your MPT and navigate to the Inbound Interfaces node of the Outline tree. Right click and choose "Add Inbound Interface".
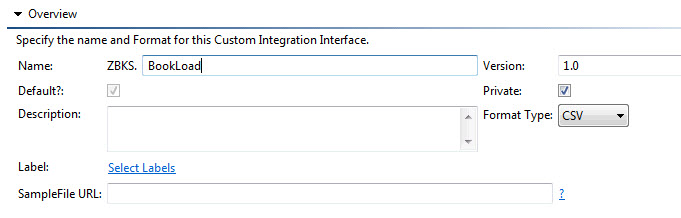
We'll call the interface "ZBKS.BookLoad". Notice that it has automatically been given a version of 1.0. All interfaces are versioned to ensure that when we need to change an interface, we can create a new interface with the same name and different version to guarantee backward compatibility for clients using the old version.
Let's add some fields to our interface. Select the Format tab.
Press the Add Fields button. Then choose "ZBKS.Book" from the Model Type drop-down menu. We will add the Title field first.
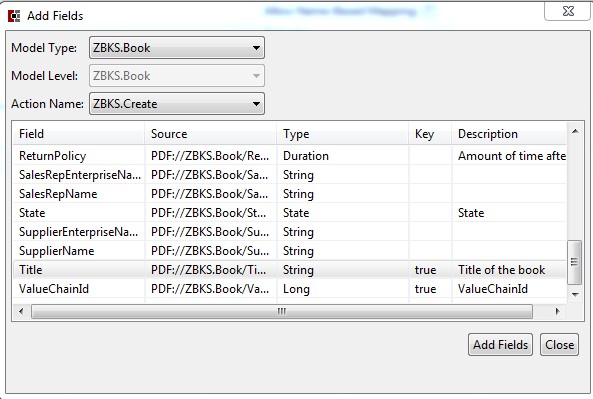
Note that Title is a natural key field. All inbound interfaces which use the default Platform processor need to have all key fields provided (either by the user or in a transform - more on this later). ValueChainId is exempted from this, as it appears on every model and is automatically defaulted based on the user context.
Let's select a couple other fields: PublishedDate and Rating. That's enough for now. Close the Add Fields dialog.
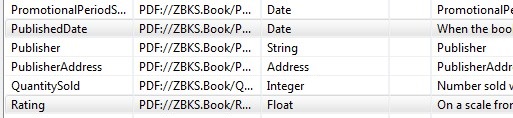
So we now have the format of our interface defined ... a required Title field, along with two optional fields for PublishedDate and Rating.

Let's tweak this a little further ... we don't care about the exact time the publication occurred, so let's choose a simpler date format for PublishedDate. Click its format cell and choose a format of MM/dd/yyyy.
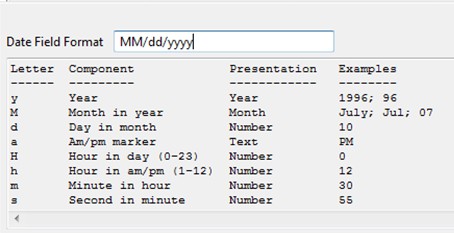
You can configure other types as well, including numerics, enumerations, etc. But for now, we'll leave everything else as-is.
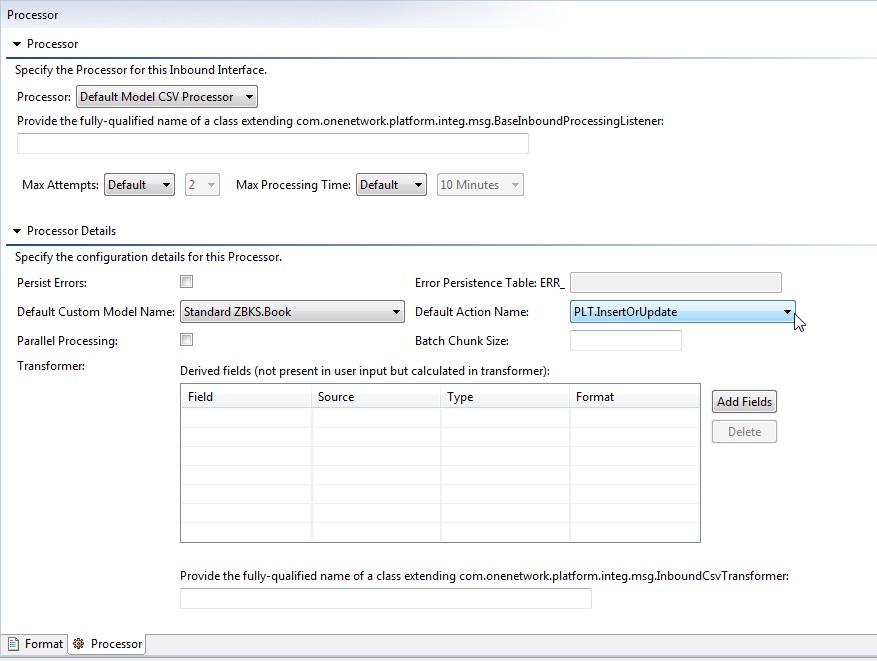
Let's proceed by setting up the Processor to actually write this data into the database. Navigate to the Processor tab. We are going to use the "Default Model CSV Processor", a processor which understands Model definitions and Actions. It will write models to the database by executing actions from your MPT. Choose "Standard ZBKS.Book" as the Default Custom Model Name and "PLT.InsertOrUpdate" as the Default Action.
We now have a fully-functional Inbound Interface. Let's test it! First, submit your MPT. Then, navigate back to the Format tab and click Import/Export then click Export Sample CSV. This will create a new sample csv you can use as a template for uploading your data.
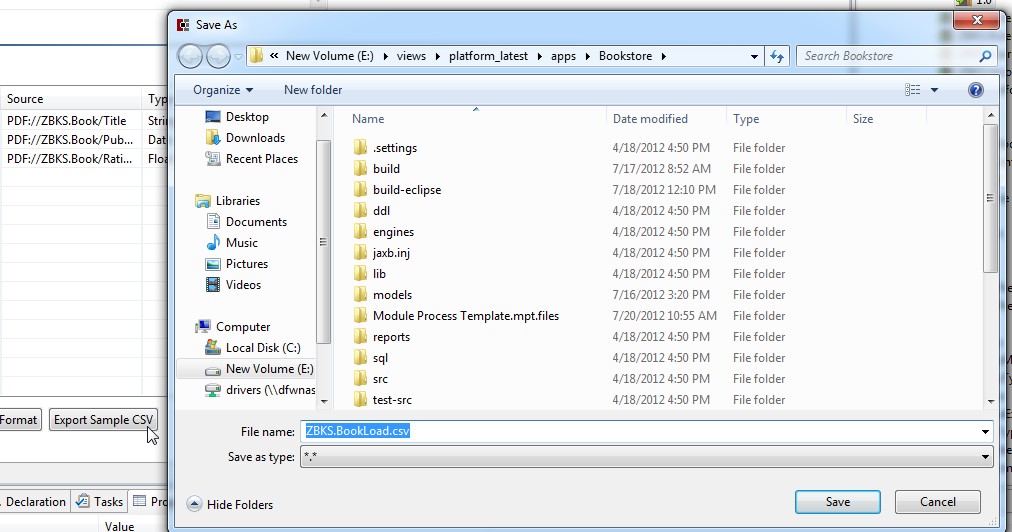
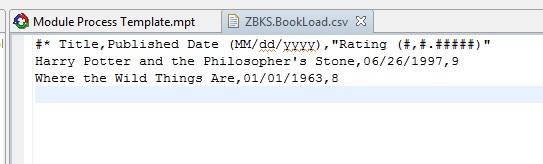
Save the file, refresh your Bookstore project, and then open the new file (named ZBKS.BookLoad.csv by default). You can see that it includes column headers and a row of sample data. Let's modify this to something like the following:
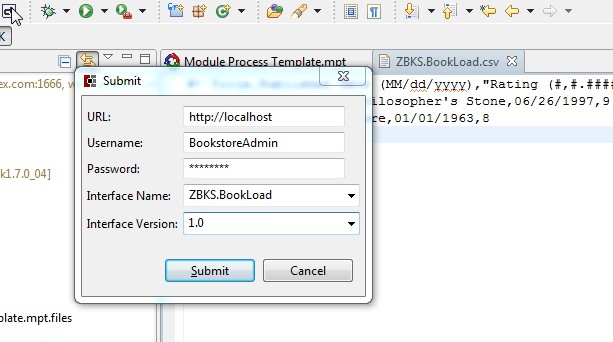
Now click the "Submit" button. This will bring up a dialog asking for login credentials, and the name/version of the interface to which you want to submit. Let's provide "BookstoreAdmin" as the user (password will just be "password" in your dev environment), and "ZBKS.BookLoad" for name and "1.0" for version. (The dialog will remember this so you don't have to type it again later!)
When you submit this, the file is handed off to the Inbound processor, which validates the input fields and executes the PLT.InsertOrUpdate action. Assuming all goes well, you will see the following status:

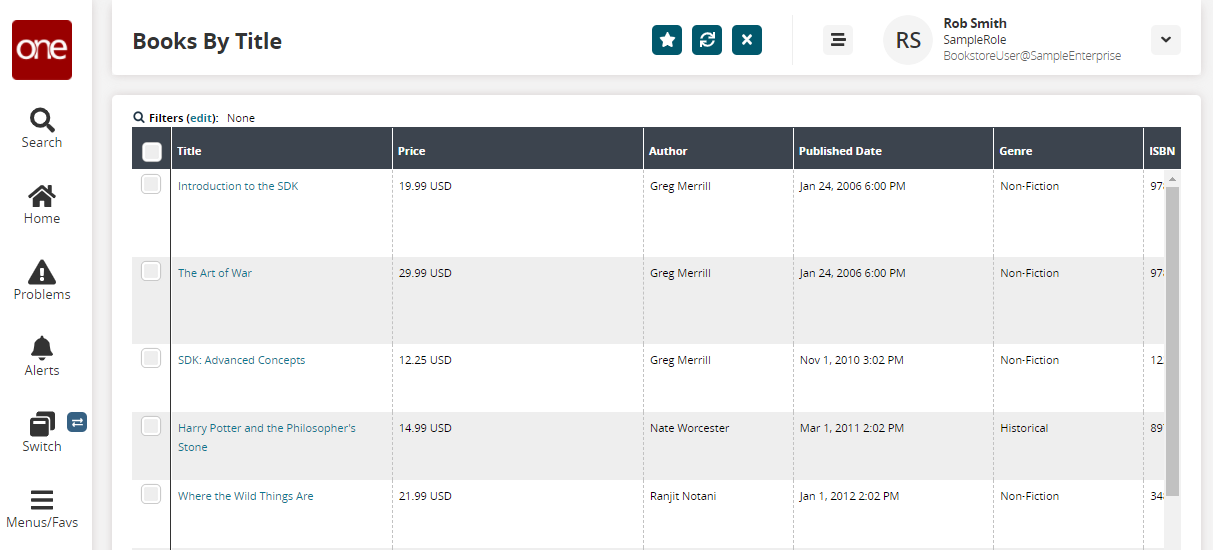
Afterward, you should be able to login to the UI and see these records:
If you make a mistake (for example, let's say you forget to fill in the Title field), a detailed error message will be provided for you:

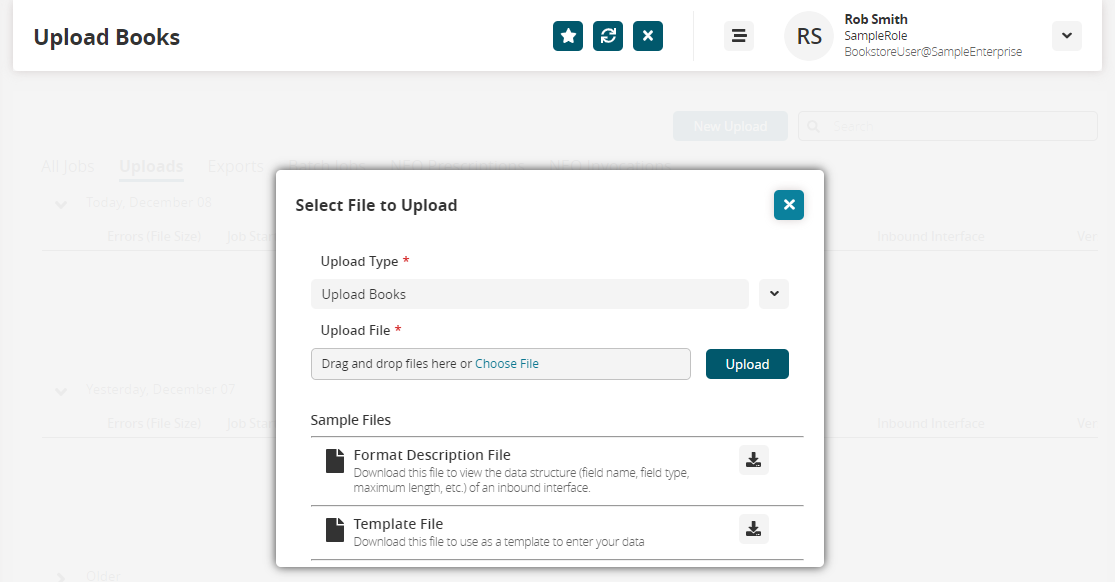
Now that the interface has been added and tested, let's expose it to our end users. A standard Platform component "One.ext.misc.UploadPanel" is provided for uploading inbound interface data through the UI. You can add a WebAction to your UI Meta Model as follows:
<WebAction name="UploadBooks"> <PanelOptions> <PanelClass>One.ext.misc.UploadPanel</PanelClass> <PanelConfig>{interfaceName: 'ZBKS.BookLoad', interfaceVersion: '1.0'}</PanelConfig> </PanelOptions></WebAction> <RoleTypeUiConfig menuType="tree"> <RoleTypeRef> <IntrinsicRoleType>ZBKS.SampleRoleType</IntrinsicRoleType> </RoleTypeRef> <WebActionRef name="BooksByTitle"/> <WebActionRef name="CreateBook"/> <WebActionRef name="UserSearch"/> <WebActionRef name="UploadBooks"/> <!-- this row is new --></RoleTypeUiConfig>Submit your MPT and refresh the UI. Now can navigate to that menu item - it provides a standard upload form, including a sample file download and a "format description" download which describes each field in detail.
Try uploading your own file ... you should be able to create new books through this UI.
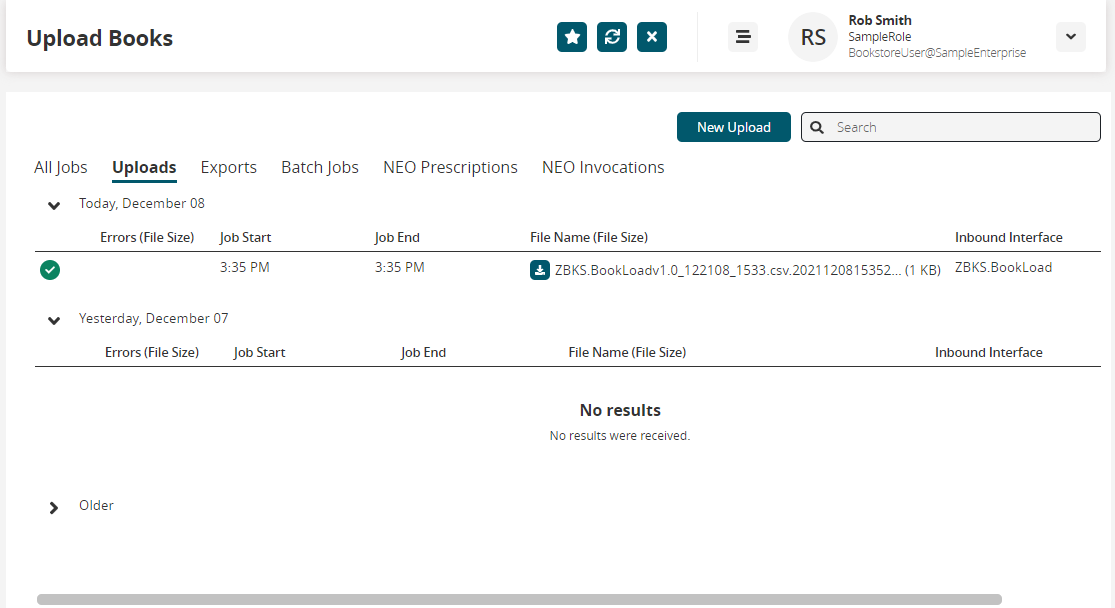
You can also use "UploadStatus" menu provided by PLT for checking on upload status:
<RoleTypeUiConfig menuType="tree"> <RoleTypeRef> <IntrinsicRoleType>ZBKS.SampleRoleType</IntrinsicRoleType> </RoleTypeRef> <WebActionRef name="BooksByTitle"/> <WebActionRef name="CreateBook"/> <WebActionRef name="UserSearch"/> <WebActionRef name="UploadBooks"/> <WebActionRef name="UploadStatus" module="PLT"/> <!-- this row is new --></RoleTypeUiConfig>