Building an Outbound Interface
To send data feeds from Platform to an external system, we use Outbound Interfaces. Similar to an Inbound Interface, an Outbound Interface specifies a "format" to indicate what data is being sent. It also specifies a "generator" which indicates how the outbound data is fetched.
To illustrate how this works, we will build on our Bookstore example. Let's assume that we have another legacy system within our company that keeps a catalog of all Books. Any time a Book is added to Platform, we want to make sure it gets reflected in that legacy system. To enable this integration, we will use an outbound interface to drop a file every hour containing all books which were added since we last sent the file. (This is sometimes called a "net change" integration.)
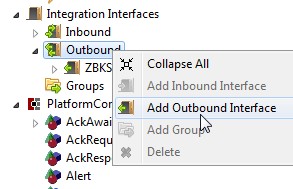
Let's start by defining a new Outbound Interface. Go to the Outline Tree and add a new Outbound Interface called "ZBKS.NetChangeBooks".
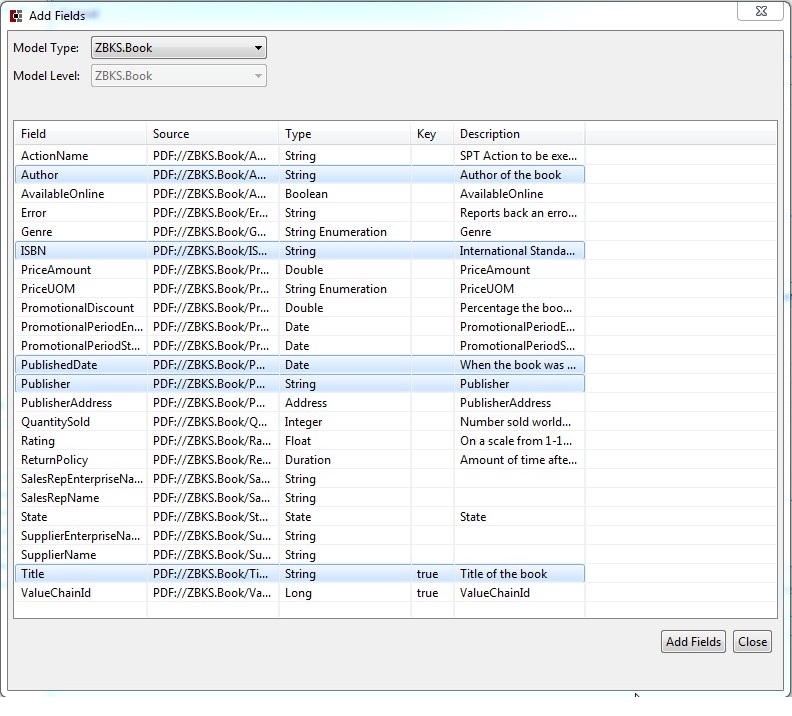
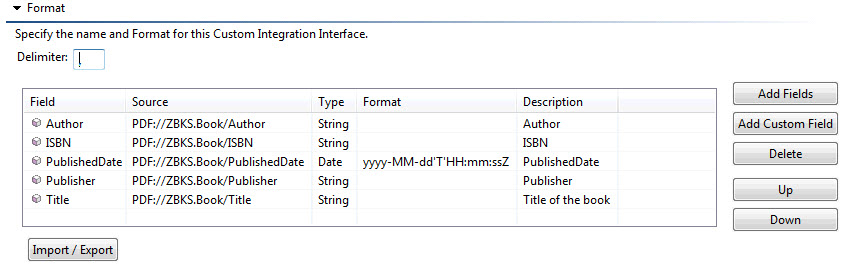
Let's add the following fields from model ZBKS.Book: Title, Author, ISBN, Publisher and PublishedDate.
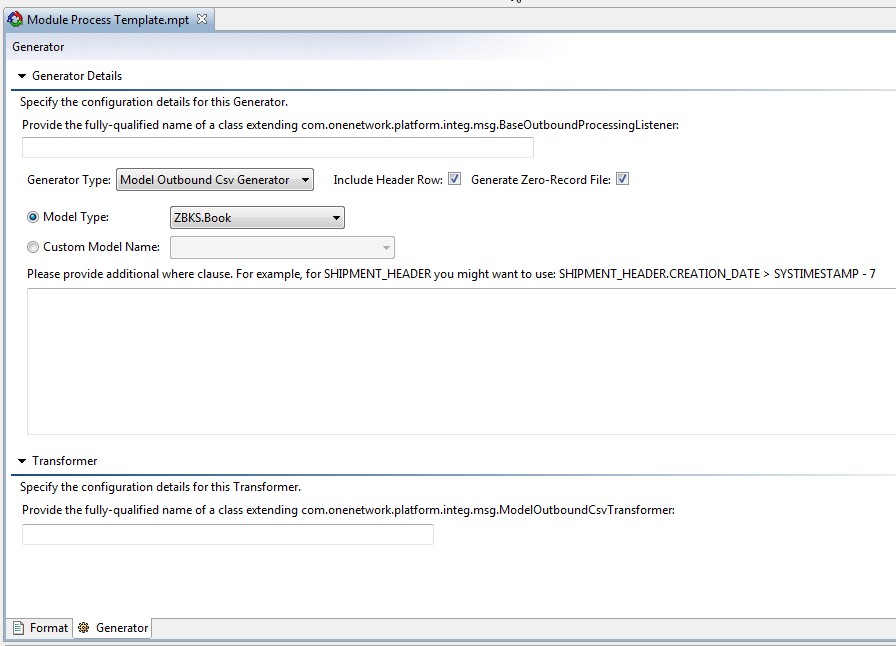
Now that we've specified what fields will appear in the outbound file, let's configure the generator. There are three types of generators supported:
Model-based: Generates outbound data based on a Model definition. You must select fields from a single model to use this.
Sql-based: Generates outbound data based on an arbitrary SQL. You can return anything you like from this interface as long as it is the result of a single SQL query.
Custom: Generates outbound data based on a java class you provide, giving you the power to send pretty much anything.
For this example we'll keep it simple - we're using only fields for the Book model, so we'll choose a Model Outbound Csv Generator. The only thing we need to configure is the Model Type; it already knows how to apply the net change query to the model.
Now that we have an Outbound Interface in place, we need to trigger this interface at some point in the code. There are many ways to do this - we could do it from a UI page, we could do it whenever a Model action is called, we could call it on a scheduled basis, etc. For this example, we will call it on a schedule.
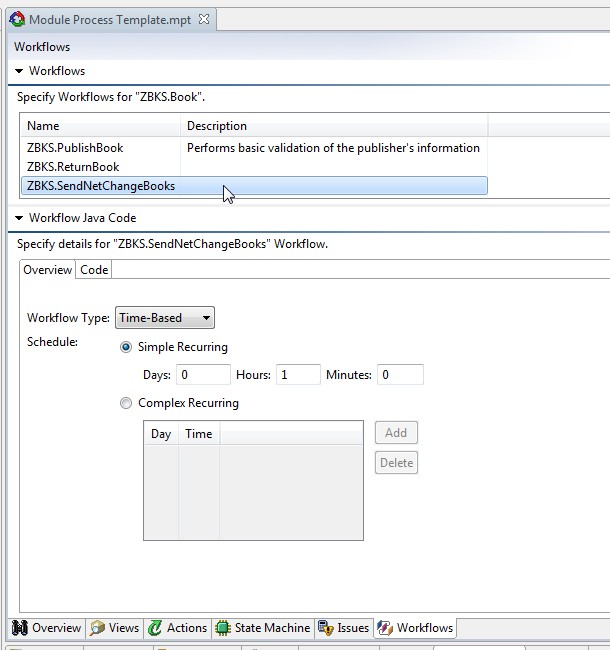
Platform supports scheduled tasks through something called a Time-Based Workflow. You can add a Time-Based Workflow to any model. Let's navigate to Book, navigate to the Workflows tab and add a new workflow called ZBKS.SendNetChangeBooks.
After adding the workflow, modify the Workflow Type to "Time-based". Then provide a schedule. We will stick with Hourly for now.
Now navigate to the Code tab. Click Edit to edit the source code.
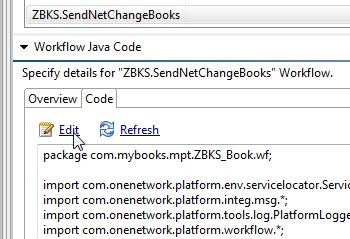
From our time-based workflow, we will send book data to a particular Queue using the outbound interface we created earlier. Here is our code:
package com.mybooks.mpt.ZBKS_Book.wf; import com.onenetwork.platform.env.servicelocator.Services;import com.onenetwork.platform.integ.msg.*;import com.onenetwork.platform.tools.log.PlatformLogger;import com.onenetwork.platform.workflow.*; public class SendNetChangeBooks extends AbstractTimeBasedWorkflowActivity { private static PlatformLogger LOG = PlatformLogger.get(SendNetChangeBooks.class); @Override public void execute(TimeBasedWorkflowContext context) { try { QueueRef queueRef = Services.get(MessageQueueService.class).newQueueRef( context.getPlatformUserContext().getValueChainId(), "outbox/Bookstore", null); OutboundMessageService outboundService = Services.get(OutboundMessageService.class); OutboundInterfaceWriteRequest req = new OutboundInterfaceWriteRequest( "ZBKS.NetChangeBooks", "1.0", queueRef, null); outboundService.writeNetChangeOutbound(req, context.getPlatformUserContext()); } catch (Exception e) { LOG.error("Failed to send net change books", e); } } }The key points to note here are:
We identify what queue we will put the data into; in this case, the "outbox/Bookstore" queue.
We create an OutboundInterfaceWriteRequest which identifies the interface to be run and the queue into which the data should be placed. We use the "ZBKS.NetChangeBooks" interface that we created earlier.
We invoke the actual net change outbound and log any exceptions.
As you can see above, we always enqueue outbound data to a queue. To create the outbox/Bookstore queue referenced above, you can modify the "MessageQueues.csv" example you created in the previous tutorial topic, add outbox/Bookstore to the list and submit the file. Note that we have used "Outbox" as the Classification for this queue.
#* Name,Enterprise Name,Classification,"Exclusive Consumer (0 or 1 (0=false, 1=true))","Paused (0 or 1 (0=false, 1=true))"
inbox/Bookstore,,Inbox,1,0
outbox/Bookstore,,Outbox,1,0
Now, because we have modified java code to create our workflow, we need to build the project and restart Platform Server. Run the "build" target using ant, shut down Platform Server, then restart it using the ant "run-server-jdwp" target.
Once Platform Server comes up, let's test our workflow. We setup our workflow to run hourly as that's what our requirements call for. But that's too long to wait to test it. Fortunately, there is a JMX control for executing workflows. Navigate to http://localhost/jmx-console and choose the "Grid Scheduler=Grid Scheduler" link. There you will find a list of all workflows available to be run. Find the ZBKS.Book~ZBKS.SendNetChangeBooks workflow and click "run".

After execution, you will see logs along the following lines in your Platform Server:
17:09:08,915    INFO (er_0 zombie 208) [OutboundInterfaceExecutor] Writing outbound data using OutboundInterface ZBKS.NetChangeBooks version 1.0 and Model Csv Generator implementation.
17:09:08,916    INFO (er_0 zombie 208) [OutboundInterfaceExecutor] Executing net change query for 9123~outbox/Bookstore/ZBKS.NetChangeBooksv1.0
17:09:08,927    INFO (er_0 zombie 208) [OutboundInterfaceExecutor] Enqueueing message for the generated outbound data 2012-07-27/9123~outbox/Bookstore/ZBKS.NetChangeBooksv1.0_wks-gmerrill2.elogex.com_8099_20120727170908914
17:09:12,837    INFO (eue_0 zombie 16) [         DequeueTaskPerformer] Dequeue message: {id = 'a67f-8d04-1e9d-4471-8144-f852-5477-7694', payloadRef = '2012-07-27/9123~outbox/Bookstore/ZBKS.NetChangeBooksv1.0_wks-gmerrill2.elogex.com_8099_20120727170908914'}
17:09:12,885    WARN (eue_0 zombie 16) [     OutboundMessageHandler] Found no route applicable to message: a67f-8d04-1e9d-4471-8144-f852-5477-7694
This indicates that the data was successfully generated!
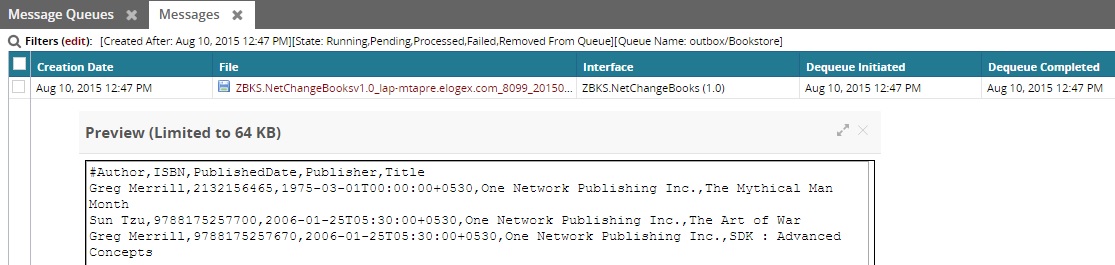
Now if you log in as InstanceAdminUser and navigate to the Message Queues page, you should be able to see the new outbox/Bookstore queue, with 1 Processed message.
![]()
If you drill into that queue and Download the payload for that message, you should get a text file containing all Books currently in the system.
Now execute the workflow again. You will find that a new empty message is generated ... that is because no Books were modified since we last ran the outbound interface!
If you go back and modify a book (either through the user interface or through the database directly) and run the workflow once more, you should see a new message being dropped containing only the modified books.
Hopefully, this gives you a sense of what's possible with Outbound Interfaces. You are encouraged to experiment with different types of generators (including SQL and Custom), as well as different methods of invocation (model-based, net change based and sys id based).
To finish our example, we still need to make sure these Messages are delivered as files. To achieve this, we need to setup a MessageDestination and a MessageRoute.
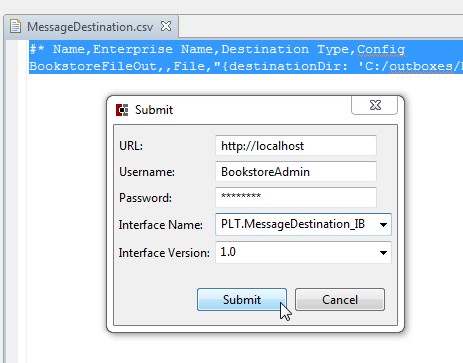
A MessageDestination is a location to which a payload can be delivered. You will find it to be similar to the MessageSource used for inbound processing. Supported MessageDestination types include File, SFTP and P2PI. In this example, we will use File. Create a new file called MessageDestination.csv and add the following.
#* Name,Enterprise Name,Destination Type,Config
BookstoreFileOut,,File,"{destinationDir: 'C:/outboxes/books', fileNamePattern: 'Books.%{Timestamp}.csv'}"
Now submit it using the interface PLT.MessageDestination_IB, version 1.0
Note that we are routing the file to a destination directory of C:/outboxes/books, and that when we write the file, it should be given a name that includes a timestamp to uniquely identify it.
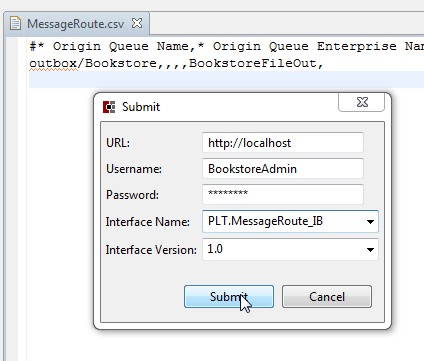
In addition to a MessageDestination, we need a MessageRoute to tell the Platform which Outbox Messages should be sent to which MessageDestinations. A MessageRoute specifies an Origin Queue, optionally an Origin Interface, and a MessageDestination. Create a file called MessageRoute.csv and add the following:
#* Origin Queue Name,* Origin Queue Enterprise Name,Origin Interface,Origin Interface Version,Destination Name,Destination Enterprise Name
outbox/Bookstore,,,,BookstoreFileOut,
Now submit it using the interface PLT.MessageRoute_IB, version 1.0
Now, try modifying a Book and executing your workflow again. You should see a file delivered to C:/outboxes/Books.
