Configuring the THRD Instance
In order to set up the Third Party Instance to start receiving requests and proxying those calls, one needs to follow the below steps:
Creating User and OAuthIBClient
Make sure that the THRD Instance has a user with the 'THRD.Admin' role, such as TPSMAdminUser.
Login with this user, TPSMAdminUser for our example.
Create a new client user that will be used to establish the connection between the calling RTVN instance and the THRD instance.
The Webaction is available with the TPSMAdminUser menu. (Administration/Add User). Open the page and create a client user as below.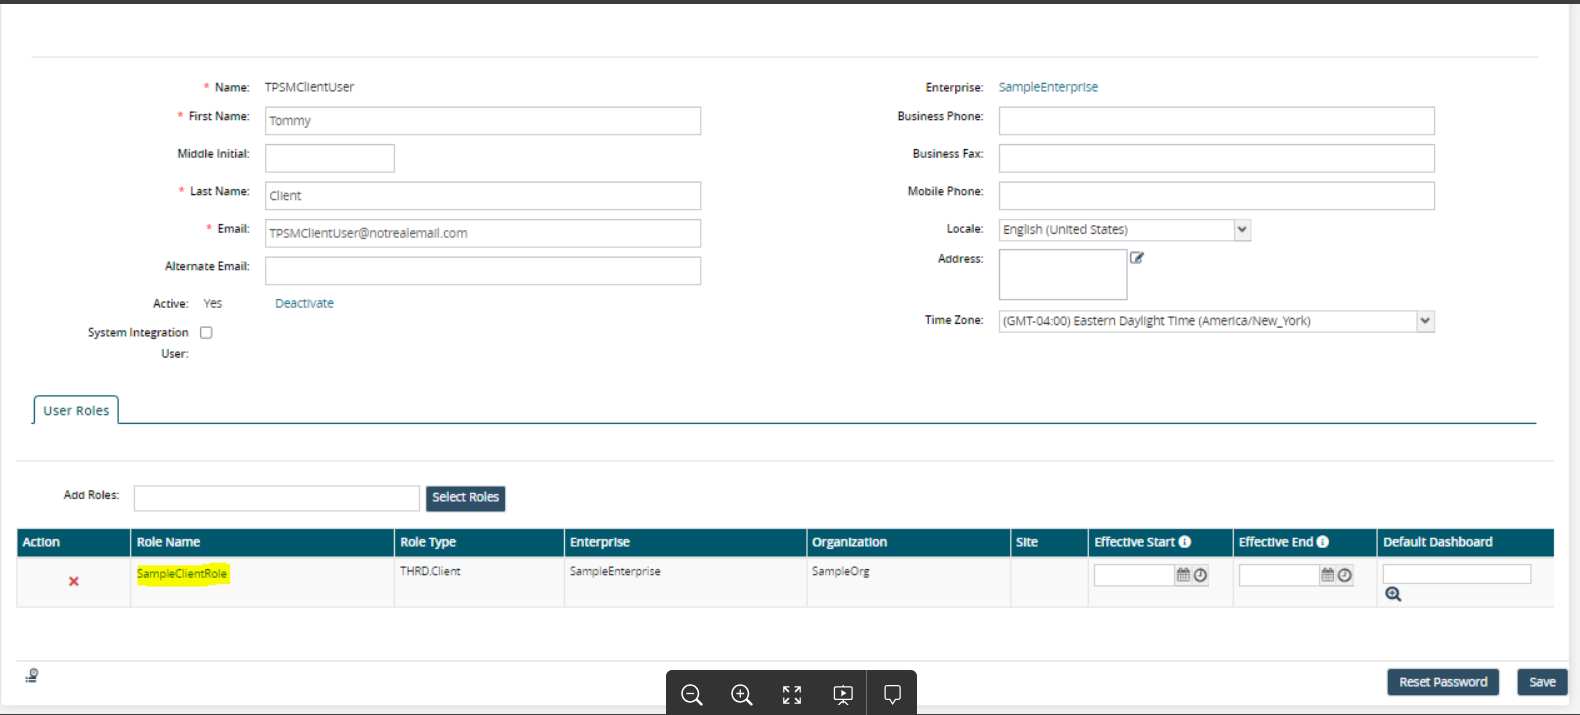
User Role
Make sure to add the highlighted role(Role with type THRD.Client ) for the intended user
Once the user is created, next step is to create the OAuthIBClient to allow for the instances to access the THRD instance using access token.
The WebAction to create the OAuthIBClient is available in the menu Third-Party Services Client App Report.
The above WebAction opens a report. In order to create a new IB Client, click on the create button which redirects to below screen.
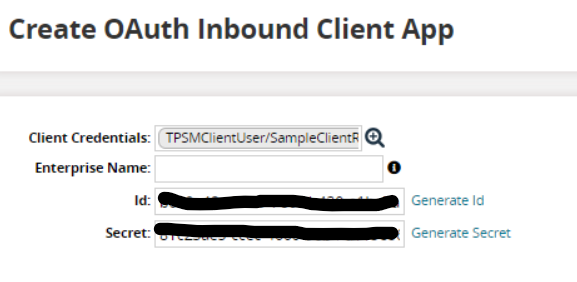
Under "Client Credentials", select the client created in the previous step from the picker report.
The Generate Id and Generate Secret links can be used to generate the Id and Secret on the UI. If not, the PLT workflow auto-generates it.
Click Create and should see a success message.
Setting up Proxy Services and Proxy Service License
The next step is to configure the Proxied Services and the Proxied Services License for the configured services.
To configure the Proxied Services, the WebAction is available in the menu. (Proxied Service Group → Proxy Service Report)
To create a new service, click Create action and should be directed to CRUD screen below.

Fill in the details and click Create.
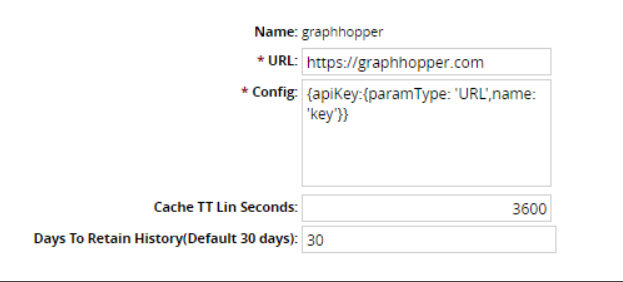
Proxy Service Config
URL is the actual URL of the Third Party Service to be called.
The Config value is a JSON specifying how the API key needs to be passed towards the third party provider. The paramType value specifies whether the key will be part of URL or some other part of request. (Currently only URL is supported).The attribute "name" is the param key which will be used to create the key Name-Value pair while generating the Proxied call.
Cache TTL in seconds is the amount of time the cache will be considered alive and a response needs to be returned from this cache. Once TTL is expired, a new call towards the provider will be made.
Now that the service is configured, the next step is to set the license key for this service. In order to set the license for the service against a client, a WebAction is available in the menu found at the location
(Proxied Service Group → Proxy Service License Report)The above WebAction opens a license report. Clicking on the create action in the report open a CRUD screen.

To set the license for a particular service against a client, select the desired Proxy Service and Client from their respective pickers. Next add the license key that needs to be used. Finally, Click create to persist the changes.