Creating a UI Test
Create a Java class in your module, and put it in the "test-src/com/onenetwork/<module>/selenium/" directory. The class name should end in "UITest". The following is a simple example of a UI test.
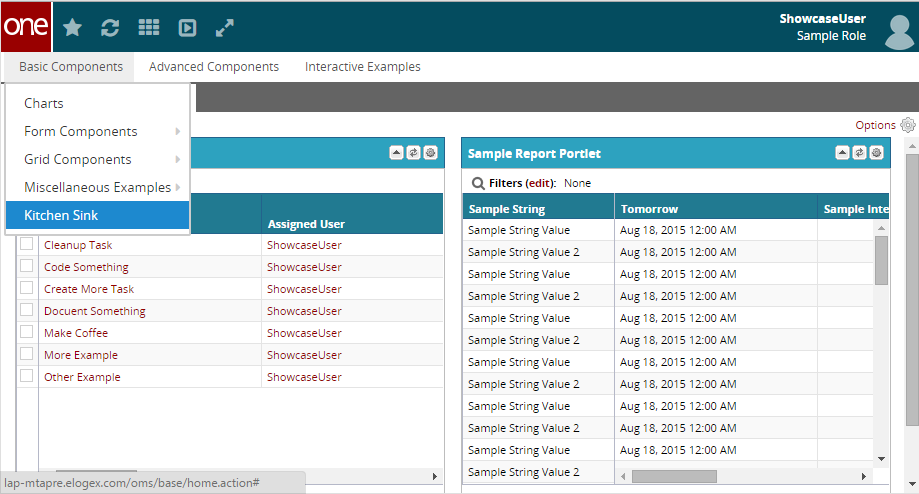
packagecom.onenetwork.showcase.selenium;importorg.junit.*;importcom.onenetwork.platform.tools.test.ui.CommandCenter;importcom.onenetwork.platform.tools.test.ui.components.Tab;publicclassExampleUITest {privatestaticCommandCenter cc;// Log into Command Center as "ShowcaseUser".@BeforeClasspublicstaticvoidsetUp() {cc =newCommandCenter();cc.login("ShowcaseUser","password");}// Open the Kitchen Sink tab by going to Basic Components > Kitchen Sink.// Then verify the tab's name is correct.@Testpublicvoidtest() {Tab tab = cc.openTabFromMenu("Basic Components","Kitchen Sink");Assert.assertEquals("Kitchen Sink", tab.getTitle());}// Log out of Command Center.@AfterClasspublicstaticvoidtearDown() {cc.logout();}}To run your UI tests, you need to have Platform Server running and your data already loaded, because it needs to log into NEO to simulate a user's actions. Once Platform Server is running, execute "ant ui-test" within your module. To run a single test, you can optionally provide a parameter "-Duitest=<testname>". You can also run them using JUnit inside Studio, but that might require adding the Selenium JARs to your module's ".classpath" file. As you can see from the image below, the openTabFromMenu() call in the example test will tell Selenium to traverse each menu in NEO until it reaches the last item, which it clicks to open the tab.
