Customizing Actions With Workflows
So at this point, you have learned how to create actions and make use of them within views and reports. Actions provide for the basic write operations of a model: creating, updating, and deleting. But what if you need special functionality, such as performing advanced validation, for when an action is executed? Workflows allow you to do that. There are two types of workflows: time-based and action-based. We will be creating an action-based workflow that performs some simple validation in this part of the tutorial.
Open the MPT editor in Studio. Click Book in the Outline tree, and then click the Workflows tab.
In the Workflows section, click the Add button to add a new workflow. The dialog ZBKS.Book Workflow Properties should pop up. Enter the following information:
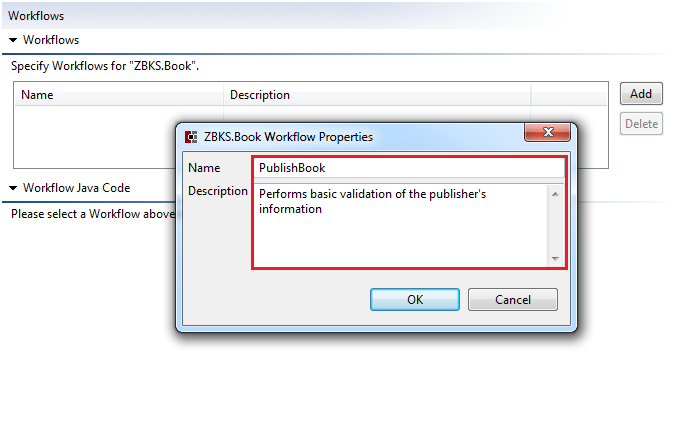
Then click OK.
Leave the Workflow Type set as Action-Based, and click the Code tab. The default workflow code is displayed on the code tab. To edit the code, click Edit.
A file, PublishBook.java should open which shows the default workflow code. As you can see, it is comprised of a constructor and an execute method. To understand what's going on, you have to know a little bit about workflows.
The basic idea behind workflows is that they're simply a way for you to customize what happens when an action gets executed. You have two lists of models inside every workflow context (which is the parameter passed into the execute method):
input: holds all the models that were called with the action. For example, when the user invokes the Publish action from a view in NEO with some records selected, input will hold those rows with new values for AvailableOnline and Price.
current: the list of models that will get written to the database.
You have a couple of functions that you can utilize to get the data from the input list to the database, and you can see two of them in use in the default workflow code. They are members of the WorkflowService interface.
populateCurrentFromDatabase: Fetches the corresponding records of the input from the database and puts them into the current list.
mergeInputToCurrent: Merge values from the input list down onto the current list; any value provided in the input will replace the corresponding value in current; any value not provided in the input will remain untouched in current.
write: Writes the values in the current list to the database.
You can get more detailed documentation about these functions in the Server API. As you can see, the default functionality for a workflow is to just copy the values from the input to the current and then write the current to the database.
Replace the code in theexecute method with the following code:
// fetch data from existing records in DBworkflowService.populateCurrentFromDatabase(context);// merge records from input to currentworkflowService.mergeInputToCurrent(context);ModelList<Book> books = context.getCurrent();for(Book book : books.getModels()) {boolean isValid = book.isSetPriceAmount()&& book.getPriceAmount() >= 5.00;if(!isValid) {book.setError("Book must have a price of at least 5.00 in order to be published.");}}// write records to databaseworkflowService.write(context.getCurrent().getModels(), context);Then add the following import statements at the top:
import com.onenetwork.platform.data.model.ModelList;
Alternatively, you can press Ctrl + Shift + o to organize imports automatically.
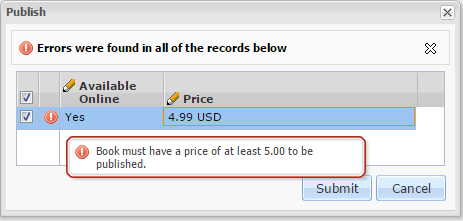
Then save the file. This workflow will perform validation to ensure the price of the book must have at least 5.00. If it is, the validator sets an error on the Book instance. That error will get passed up to the UI layer for the end-user.
Go back to the MPT editor and click the Actions tab. Double-click the Publish action to edit it. In the dialog, select the newly created ZBKS.PublishBook workflow for the Launch Workflow field. Then click OK.
Save the MPT. Double-click Bookstore's build target in the Ant tile. Once finished, you should see a BUILD SUCCESSFUL message in the console.
Restart your Platform Server. When you log in as BookstoreUser, initiate the Publish action on the record you just added (with the title The Art of War).
Double-click on the record's cell for the Price column, so the text editor opens. Enter a value less than 5.00, and then click Submit. Internally, when the user tries to execute this action, it will call the PublishBook workflow's execute method, which performs the basic validation for price. After clicking Submit, you should get the following error: