Adding Lanes
Lanes can be configured to specify transportation legs between sites, cities, states, countries, and regions. The origination and destination can be at different geographic levels. For instance, a lane could be region- to-site, state-to-city, or state-to-region.
Some lanes require multiple stops; you can add multiple stops to a lane using Via-Points. Via-Points can be Site or Partner Site only. Lanes with Via-Points can be used only on Base Rates. Users can add lanes and multi-stop lanes as required.
To add lanes:
On the Administration menu, click Regions and Lanes.
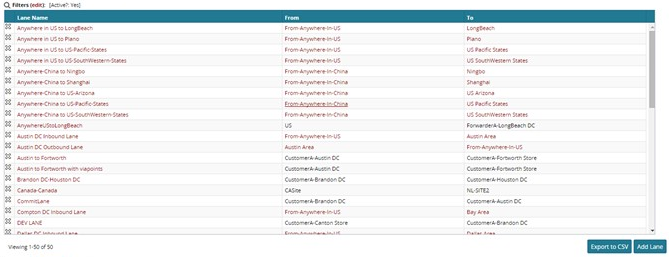
The Regions and Lanes tab appears with three tabs at the bottom: Regions (default), Lanes, and Zones.
Click the Lanes tab.
The list of Lanes appears in the window.
Click Add Lane.
The New Lane tab appears.
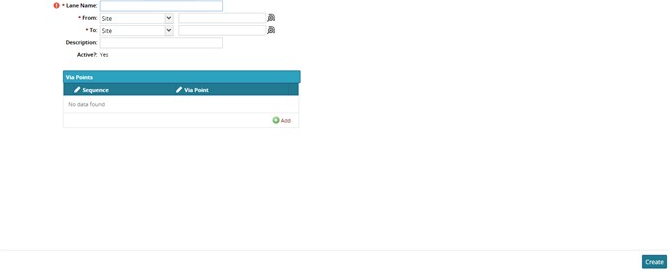
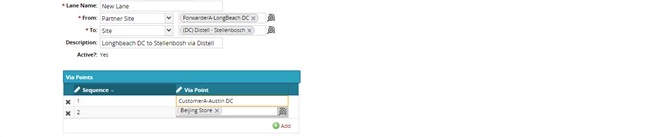
In Lane Name, type a lane name for the new lane.
Select a From location or range.
In the Description box, type a description of the new lane.
If the lane is a multi-stop lane, click the Add button to add a new Via Point. Via points are the sites or partner sites of a lane which are not the origin or destination.
Note
Lanes with Via-Points can be used only on Base Rates.
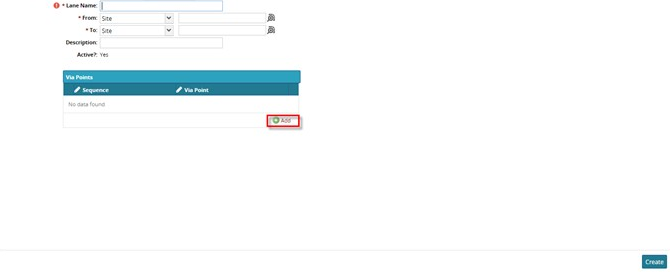
A new via point line appears in the table.
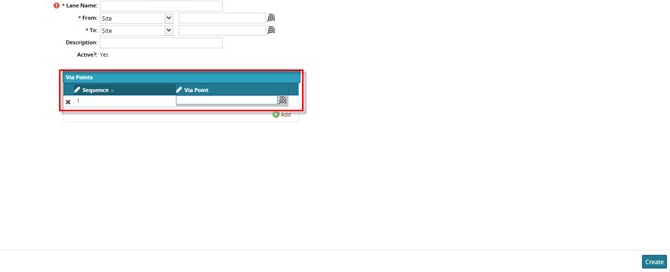
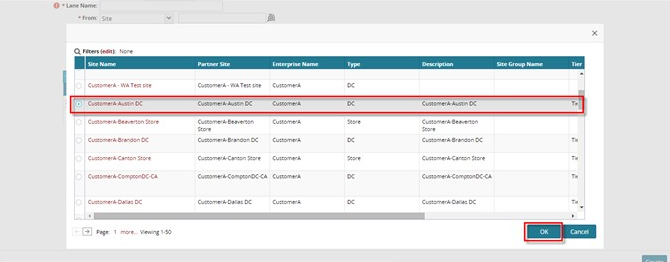
Use the search button to locate a site or partner site for the new via point. The site selection window appears.
Select a site or partner site from the selection window and then click OK.
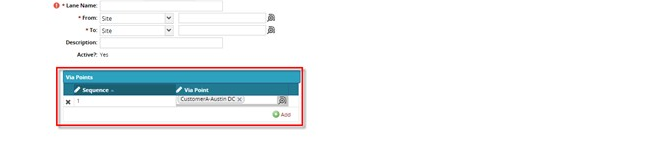
The selected site appears as a via point in the Via Points table.
Note
Via points can only be created with sites or partner sites.
Click Add to add another via point as required.
Change the sequence of the via points by clicking inside a Sequence field in the Sequence column and then typing in the new sequence number.
Note that this does not change the order in which the via points appear in the list.
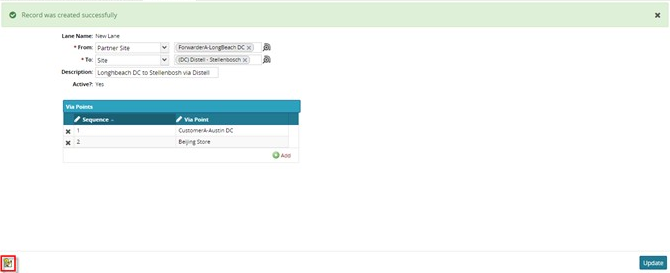
When finished, click Create.
A success message appears.
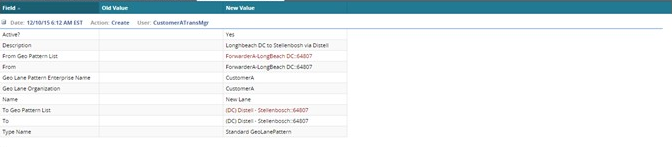
Audit Trail
To view the audit trail for a lane, click the Audit Trail icon from the lane's tab.
The audit trail for the lane appears.