Configuring Approvals for Cost Limits
Users have the ability to define and configure an approval routing hierarchy at the cost limit level for a particular lane, as well as an approval amount range and approval time limitation.
A new approval hierarchy grid displays in the details screen for existing cost limits. The grid is not available when creating a new cost limit setting until it has been saved.
Complete the following steps to configure approvals for cost limits.
Log into the ONE system.
Click Menu/Favs > Contract Mgmt > Cost Limits.
The Cost Limits screen displays.Select the + next to the cost limit name.
The menu expands.Click on Cost Limit Setting.
A list of cost limits displays.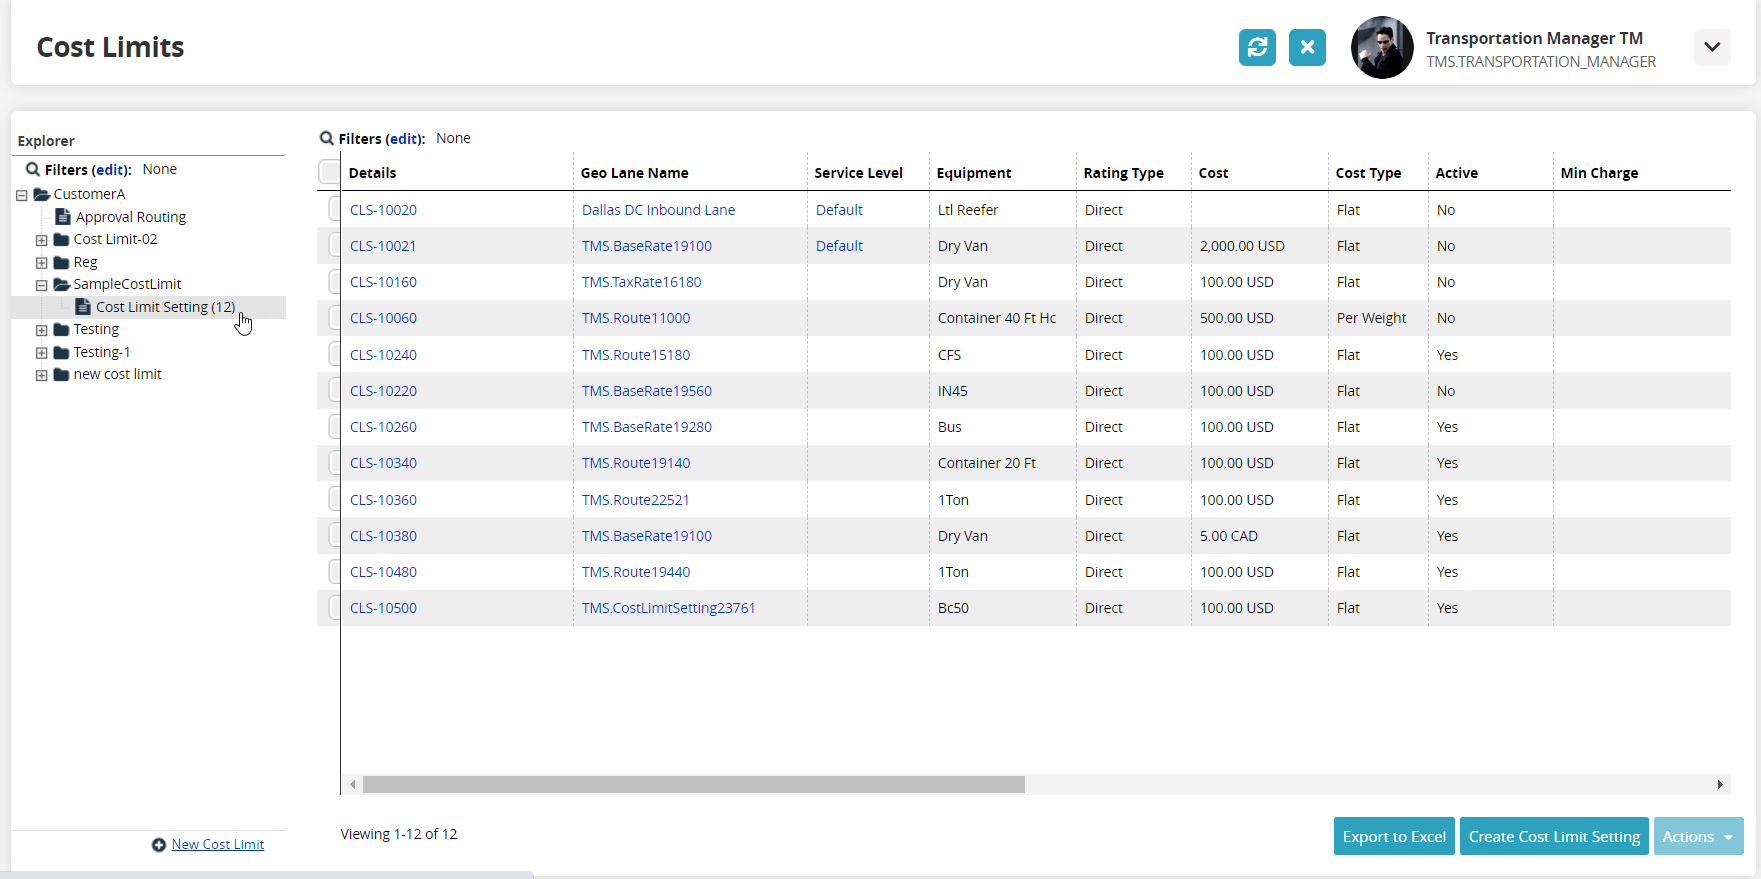
Click on the cost limit setting number under the Details column.
The detail screen for that cost limit displays.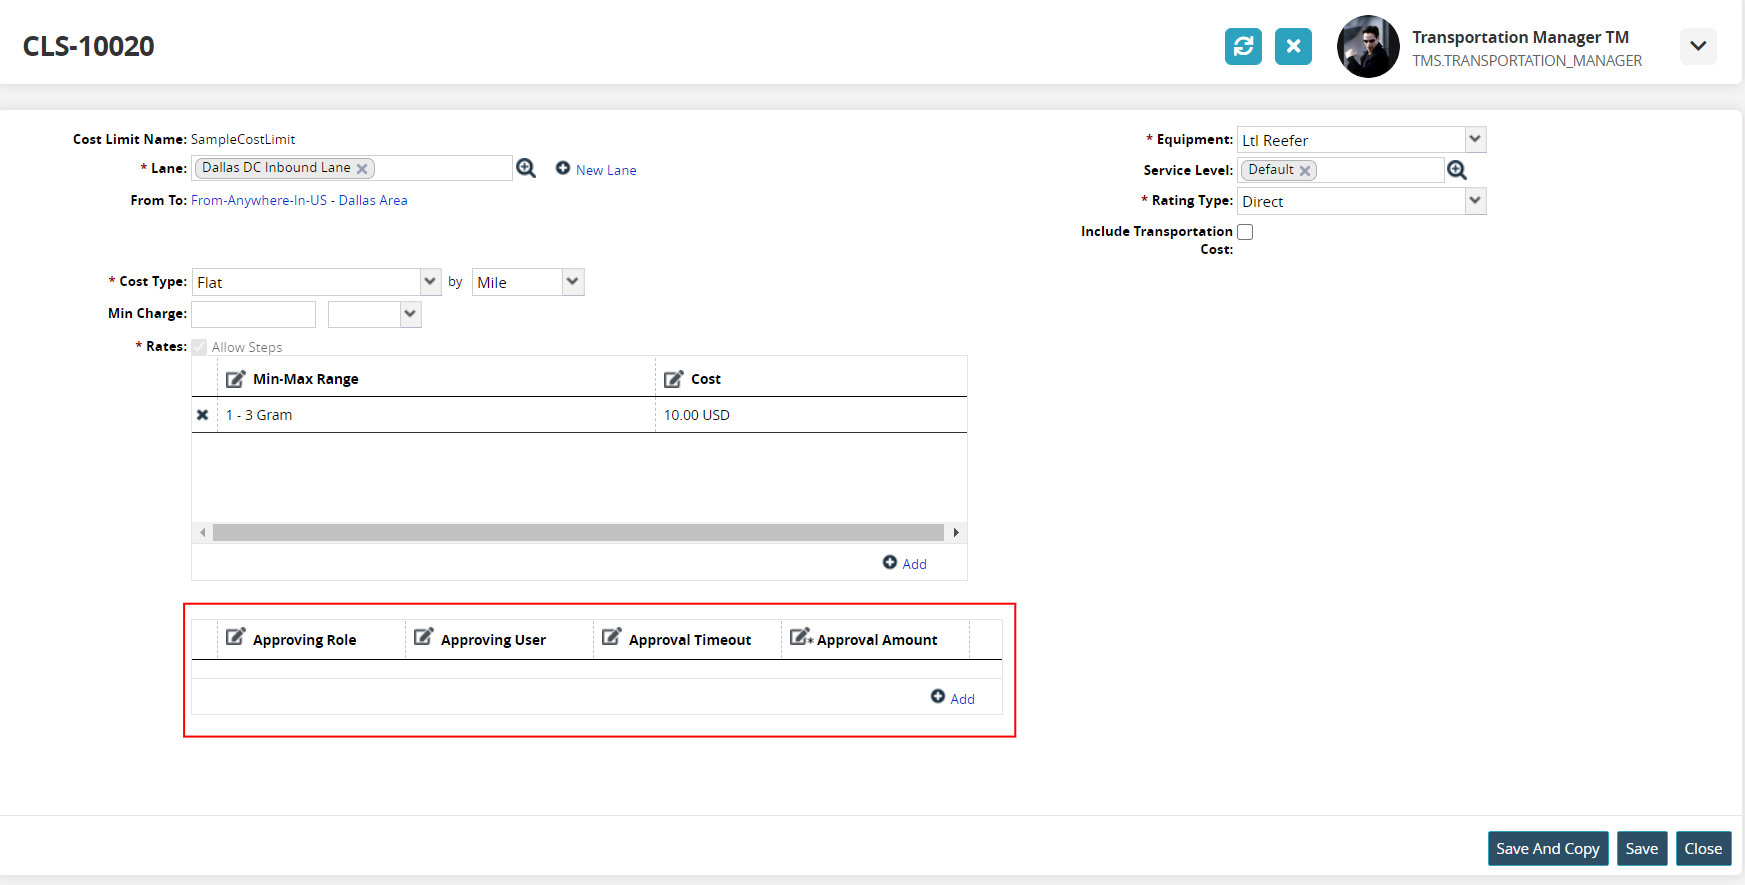
Click on the Add link under the approval policy grid.
A new row displays in the grid. When another level of approval is necessary for escalation, add a new row, and the next role/user is notified in the process.Click in the field under Approving Role and click the picker tool.
A popup window of existing roles displays.Click on the radio button next to the role.
Click on the OK button.
Select either an Approving Role or an Approving User.
Click in the field under Approving User and click the picker tool.
A popup window of existing users displays.Click on the radio button next to the user.
Click on the OK button.
Click in the field under Approval Timeout and type in the days (D), hours (H), and minutes (M) to set the timeout amount.
Click on the field under the * Approval Amount. Fields with an asterisk ( * ) are required.
Type in the approval amount to set the cost amount that triggers the approval process.
Click on the Save button.
A green success bar displays.When one user in the approval chain approves a tender, subsequent users will see the tender approval in a Canceled state.