General Warehouse Policies
Complete the following steps to manage general warehouse policies for a warehouse:
Click Menu/Favs > Warehouse Mgmt >Warehouse Policies .
The Warehouse Policies screen appears .
The list of all active warehouses is contained on the left side of the screen in the Explorer pane.Optionally, you can search for a specific warehouse using the Filters link. You can also include inactive warehouses in your search using the Filters link.
Click Filters to open the Filters menu.
For the Site field, enter or select a value using the picker tool.
Note
You can use an asterisk as a wild card in your search if you do not know the full name of a warehouse.
To include inactive warehouses in your search, select the Include Inactive checkbox.
For the Site Group Level field, enter or select a value using the picker tool.
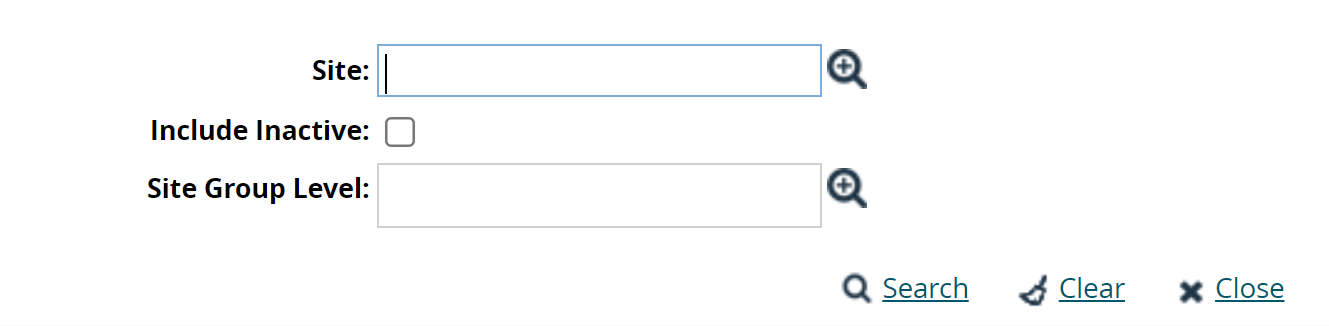
When finished entering search parameters, select Search.
Select a warehouse from the Explorer area.
The General and By Item tabs appear to the right of the explorer pane.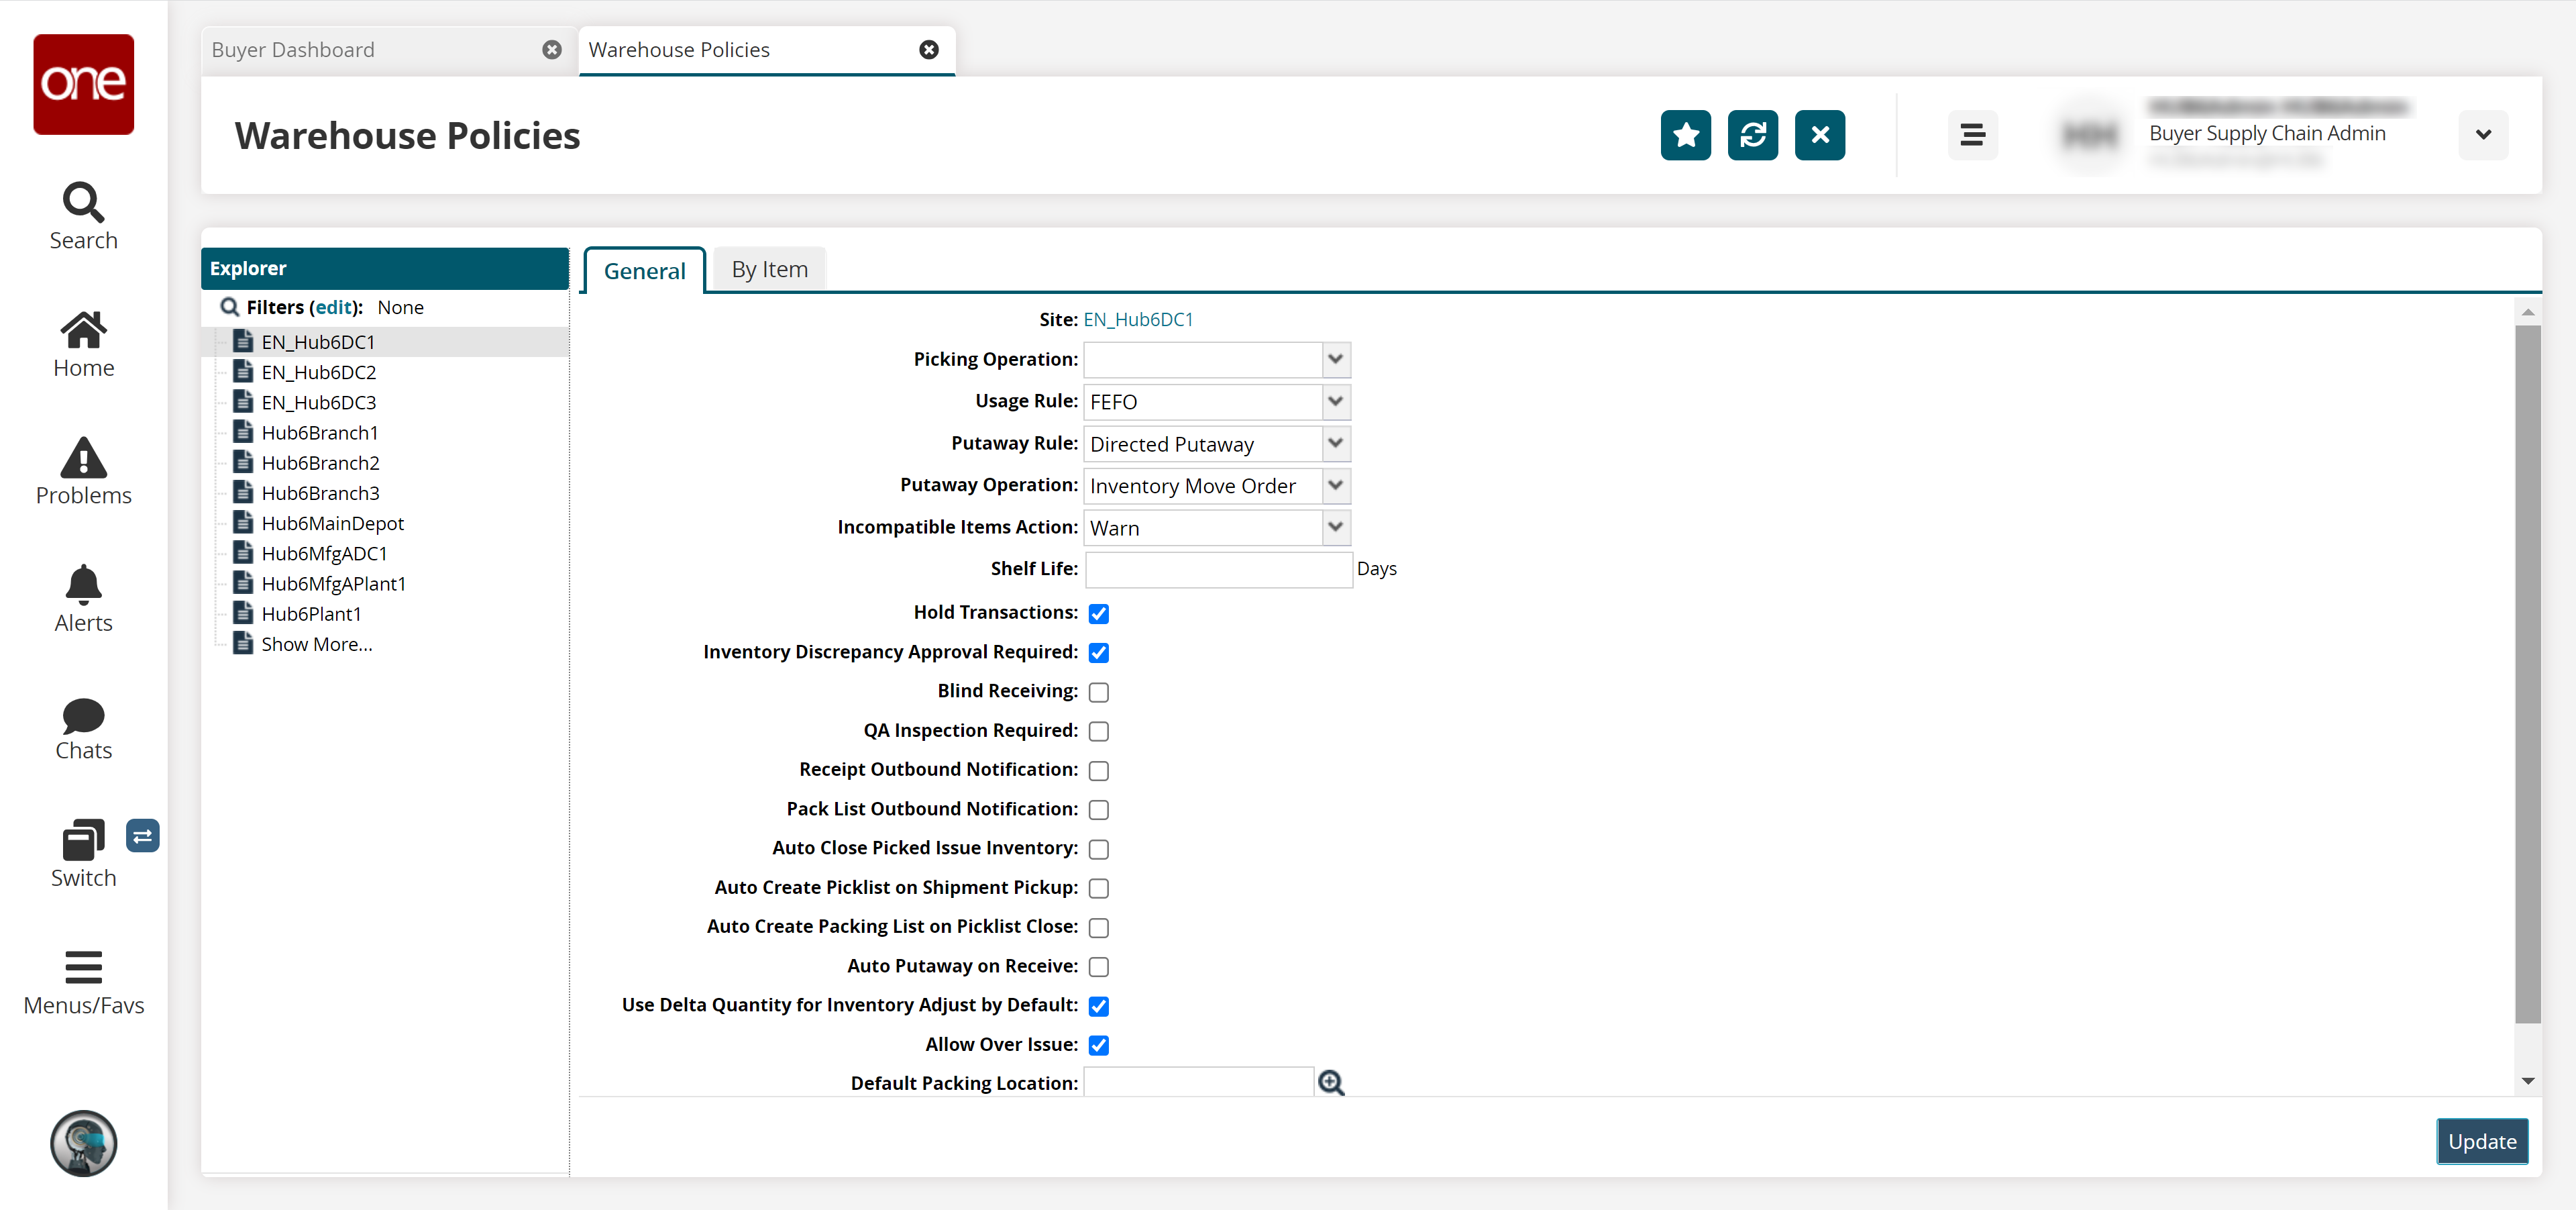
Use the table below to select the available options from the drop-down menus and checkboxes. None of the policies are required.
The following table provides more information about search filters.Field
Description
Picking Operation
Select between Zone Picking and Pick To Order.
Usage Rule
Choose between the following options:
FEFO
FIFO
SLED
Leave blank for none.
Putaway Rule
This policy determines if you want to use a putaway rule or not. Select an option from the drop-down menu.
Putaway Operation
This policy allows you to specify a putaway operation. Select an option from the drop-down menu.
Incompatible Items Action
This policy establishes what action is taken when items are incompatible. Leave blank for no option. You can choose between the following options:
Allow with Reason Code
Restrict
Warn
Leave blank for none.
Shelf Life (Days)
Enter a shelf life in days in this field.
Hold Transactions
Inventory Discrepancy Approval Required
Select this check box to require approval when there is an inventory discrepancy.
Blind Receiving
When this policy is enabled, the system does not display the ordered or shipped quantity to the user creating or updating the receipt.
QA Inspection Required
Select this policy to require a QA inspection.
Receipt Outbound Notification
Select this policy to be notified of an outbound receipt.
Pack List Outbound Notification
Select this policy to be notified of an outbound pack list.
Auto Close Picked Issue Inventory
Select this policy to automatically close picked inventory.
Auto Create Picklist on Shipment Pickup
Select this policy to automatically create a picklist upon shipment pickup.
Auto Create Packing List on Picklist Close
Select this policy to automatically create a packing list when a picklist is closed.
Auto Putaway on Receive
Select this policy when your warehouse automatically puts away inventory when it is received.
Use Delta Quantity for Inventory Adjust by Default
Select this policy to automatically adjust inventory based on the delta quantity.
Allow Over Issue
Select this policy to allow an over the issue.
Default Packing Location
Set the default packing location using the Auto-complete Data Entry and Pickers.
Default Packaging UOM
Set the default UOM for packing by making a selection from the drop-down list.
Click Update to update the policies.