Moving Trailers in a Yard
Using the Trailer Summary, you can apply actions to trailers in a yard.
Complete the following steps to perform actions on trailers:
L og in to the ONE system.
Select Menu/Favs > Yard Management > Yard Explorer.
In the NEO UI, users can click on the Menu/Favs icon on the left sidebar and type in the name of the screen in the menu search bar. For more information, see "Using the Menu Search Bar."
The Yard Explorer screen appears, showing all sites in the organization in the Explorer pane.In the expanded site folder of the Explorer pane, click Trailer Summary.
The Trailer Summary pane appears.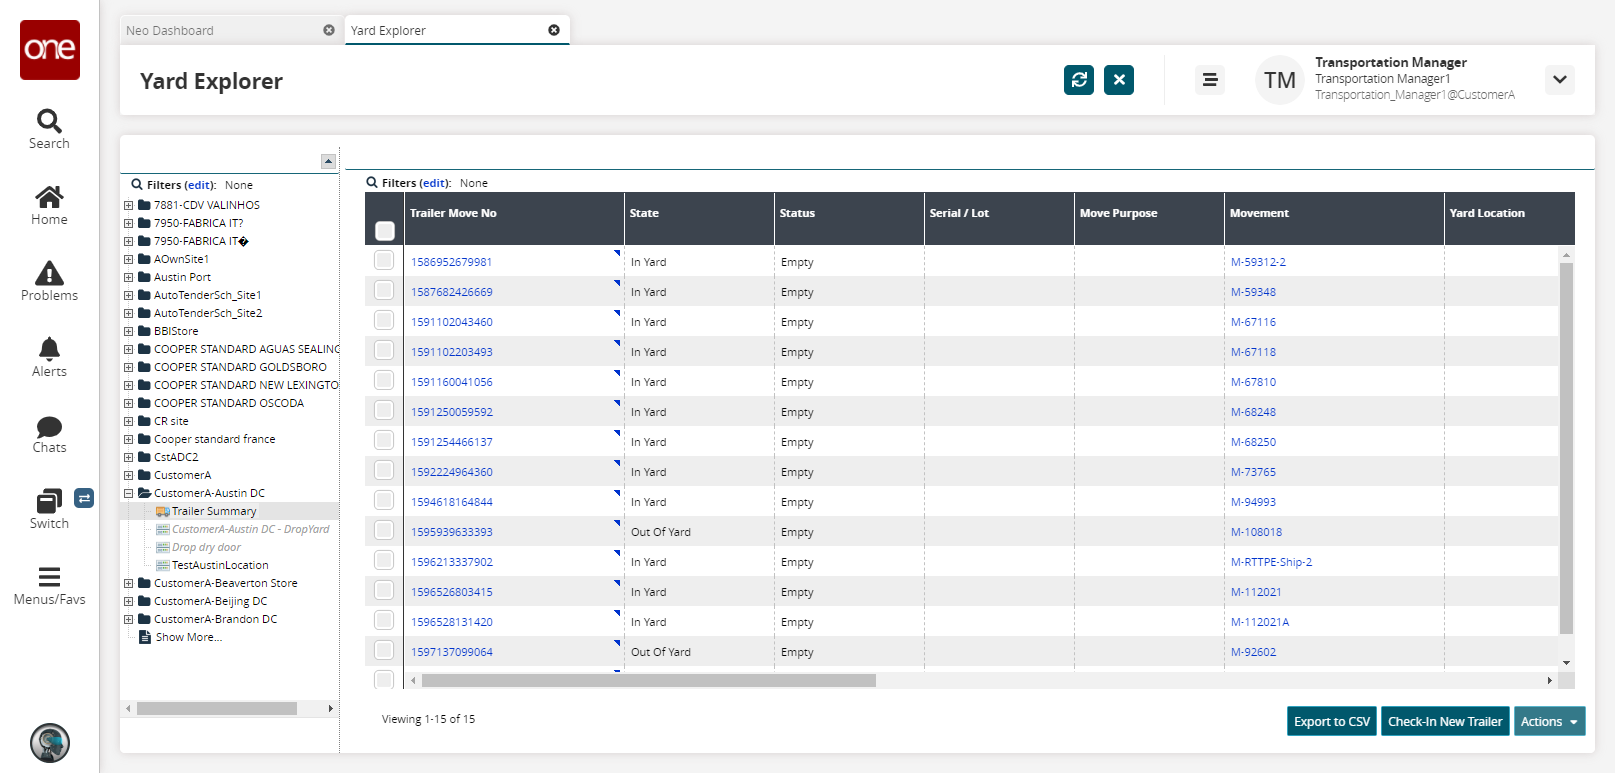
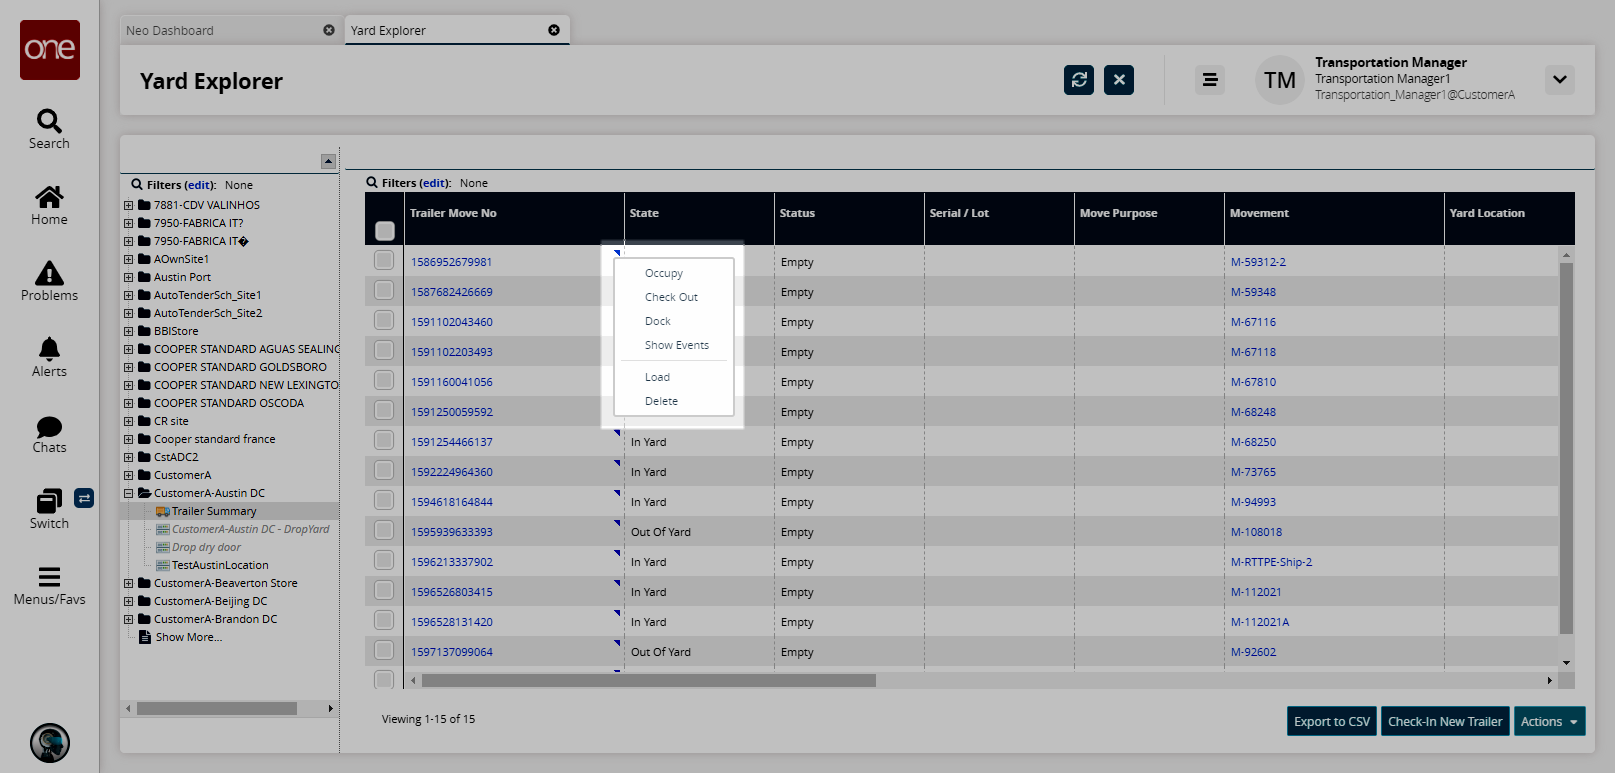
To perform an action on a single trailer, click the triangular icon in the upper right-hand corner of a Trailer Move No cell, and then select an option. The available options are Occupy, Check Out, Dock, Show Events, Load, and Delete.
The available actions depend on the State. The following figure shows options for a trailer with a State of In Yard.
The following table describes the available actions.
Option
Description
Steps
Occupy
Select this option to move a trailer into a slot.
Select the Occupy option to move a trailer with a State of In Yard
The Occupy popup appears.
Select a Yard Slot using the picker tool.
Click Submit.
A success message appears. The Trailer Move No now has a State of At Slot.
Vacate
Select this option to move a trailer out of a slot.
Select the Vacate option to move a trailer with a State of At Slot out of a slot.
The Vacate popup appears.
Click Submit.
A success message appears. The Trailer Move No now has a State of In Yard.
Check Out
Select this option to move a trailer out of a yard.
Select the Check Out option.
The Check Out popup appears.
Click Submit.
A success message appears. The Trailer Move No now has a State of Out of Yard.
Dock
Select this option to move a trailer to a dock door.
Select the Dock option.
The Dock popup appears.Select a Dock Door using the picker tool.
Click Submit.
A success message appears. The Trailer Move No now has a State of At Dock.
Undock
Select this option to move a trailer back to a yard.
Select the Undock option.
The Undock popup appears.Click Submit.
A success message appears. The Trailer Move No now has a State of In Yard.
Show Events
Select this option to view a history of trailer move events for the trailer move number.
Select the Show Events option.
The Trailer Move Events screen appears.Click the Export to CSV button to export the report to a CSV file.
Load
Select this option to load a trailer with a State of At Dock and a Status of Empty.
Select the Load option.
The Load popup appears.Select a Content Type using the picker tool
Click Submit.
A success message appears. The Trailer Move No now has a Status of Full.
Delete
Select this option to delete a trailer number.
Select the Delete option.
The Delete popup appears.Click Submit.
A success message appears. The Trailer Move No now has a State of Deleted.
To perform an action on more than one trailer, select the checkboxes next to each trailer to be affected, and then click the Actions button.
The action options available for the selected trailers appear in the Actions list.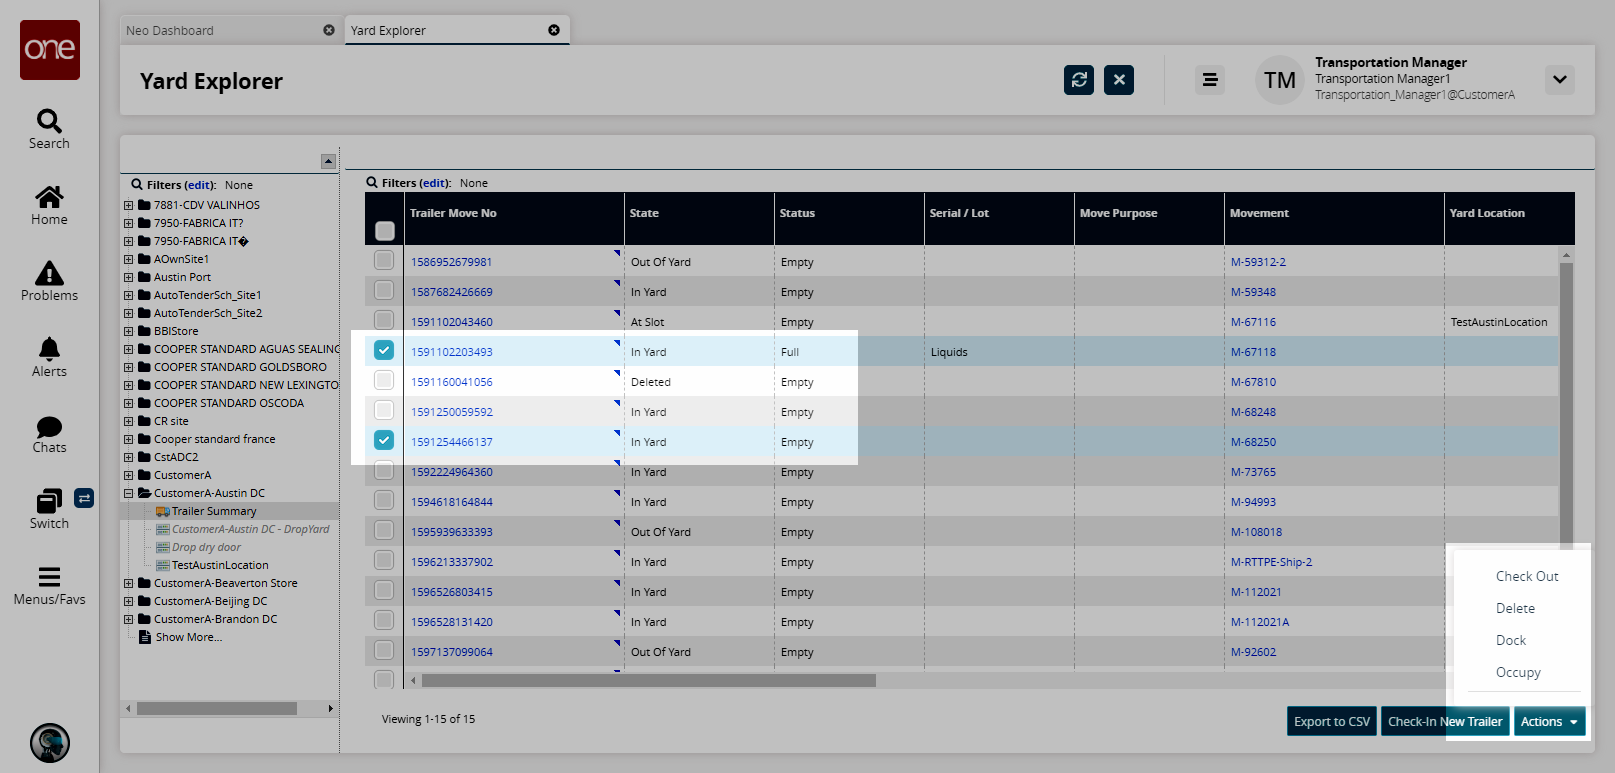
Select an action option. The respective dialog box shows a row for each selected trailer. The following figure shows the Dock popup window.
Fill out the relevant fields and click Submit.