Rerate Movement When Dimensions Updated
When the volume of a shipment header or of shipment lines is updated, the related movement is rerated. Volume is calculated using the length, width, and height values of the individual shipment lines or from the shipment header. Volume is first calculated at the shipment header level, if this information is unavailable, the system instead sums the volume of the individual shipment lines.
This page includes instructions that are described elsewhere, however, specific fields are filled in or defined as part of the larger workflow that is required to complete the rerating.
Complete the following steps to define the base rate:
L og in to the ONE system.
Select Menu/Favs > Contract Mgmt > Carrier Contracts.
In the NEO UI, users can click on the Menu/Favs icon on the left sidebar and type in the name of the screen in the menu search bar. For more information, see "Using the Menu Search Bar."
The Carrier Contracts screen appears.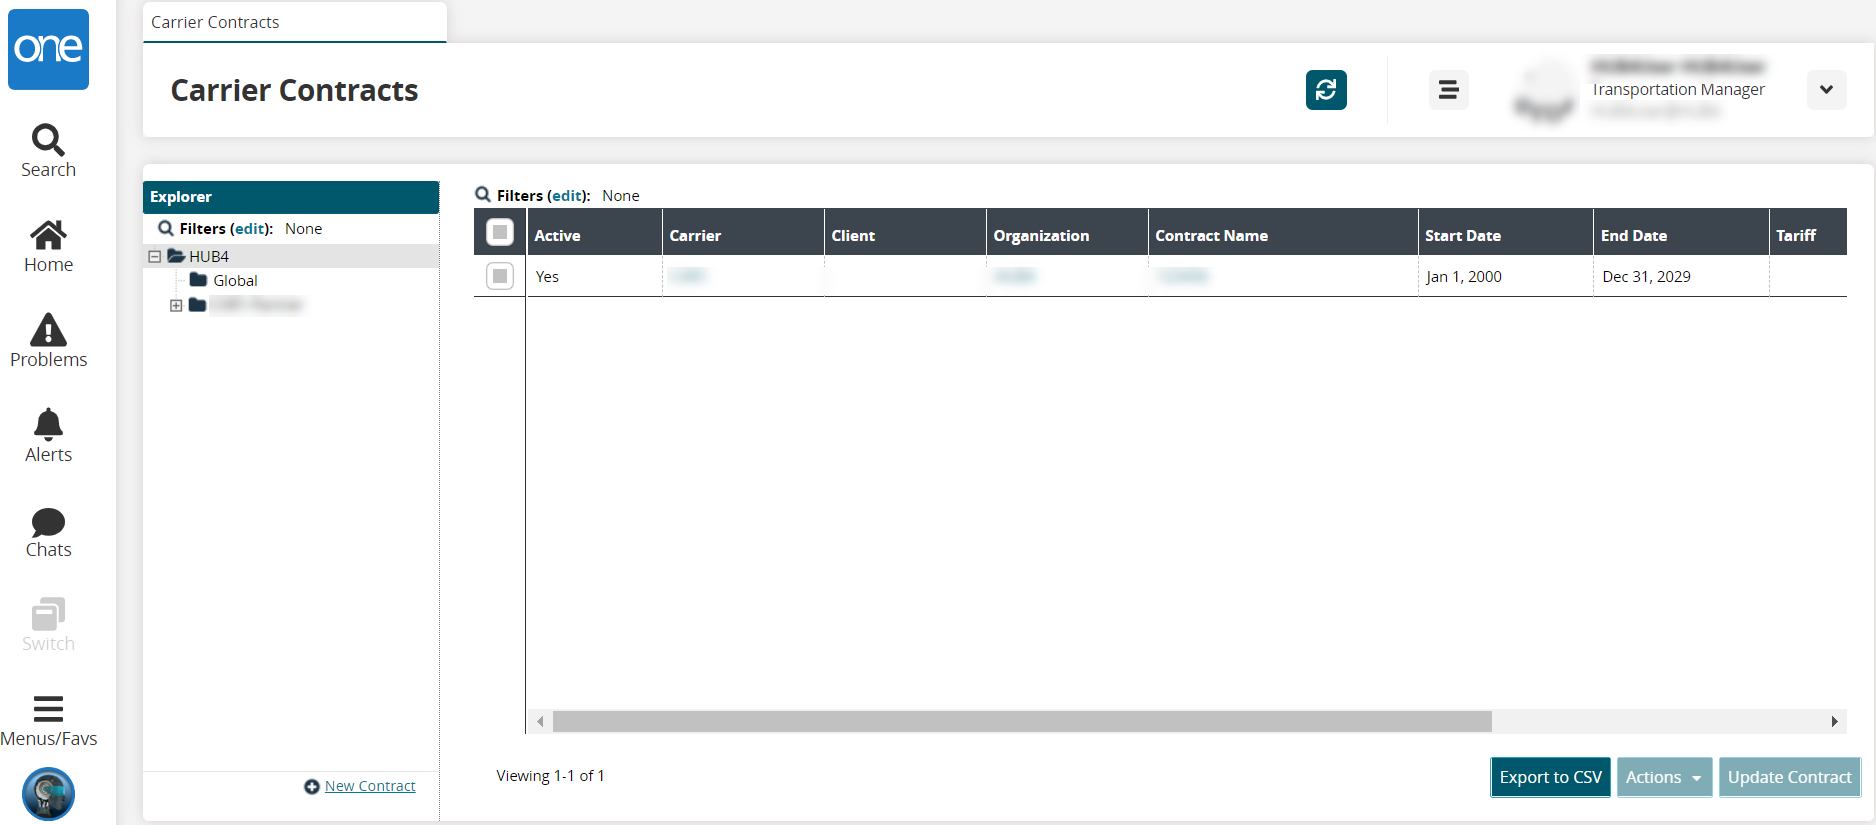
Expand the Explorer panel until the Base Rate option is visible.
Select the Base Rate option.
The right panel updates.Click the Create Base Rate button.
The Create Base Rate screen appears.Here we will define a base rate for a given lane (a from-to pair). Defining a specific base rate for this lane is critical later in the workflow.
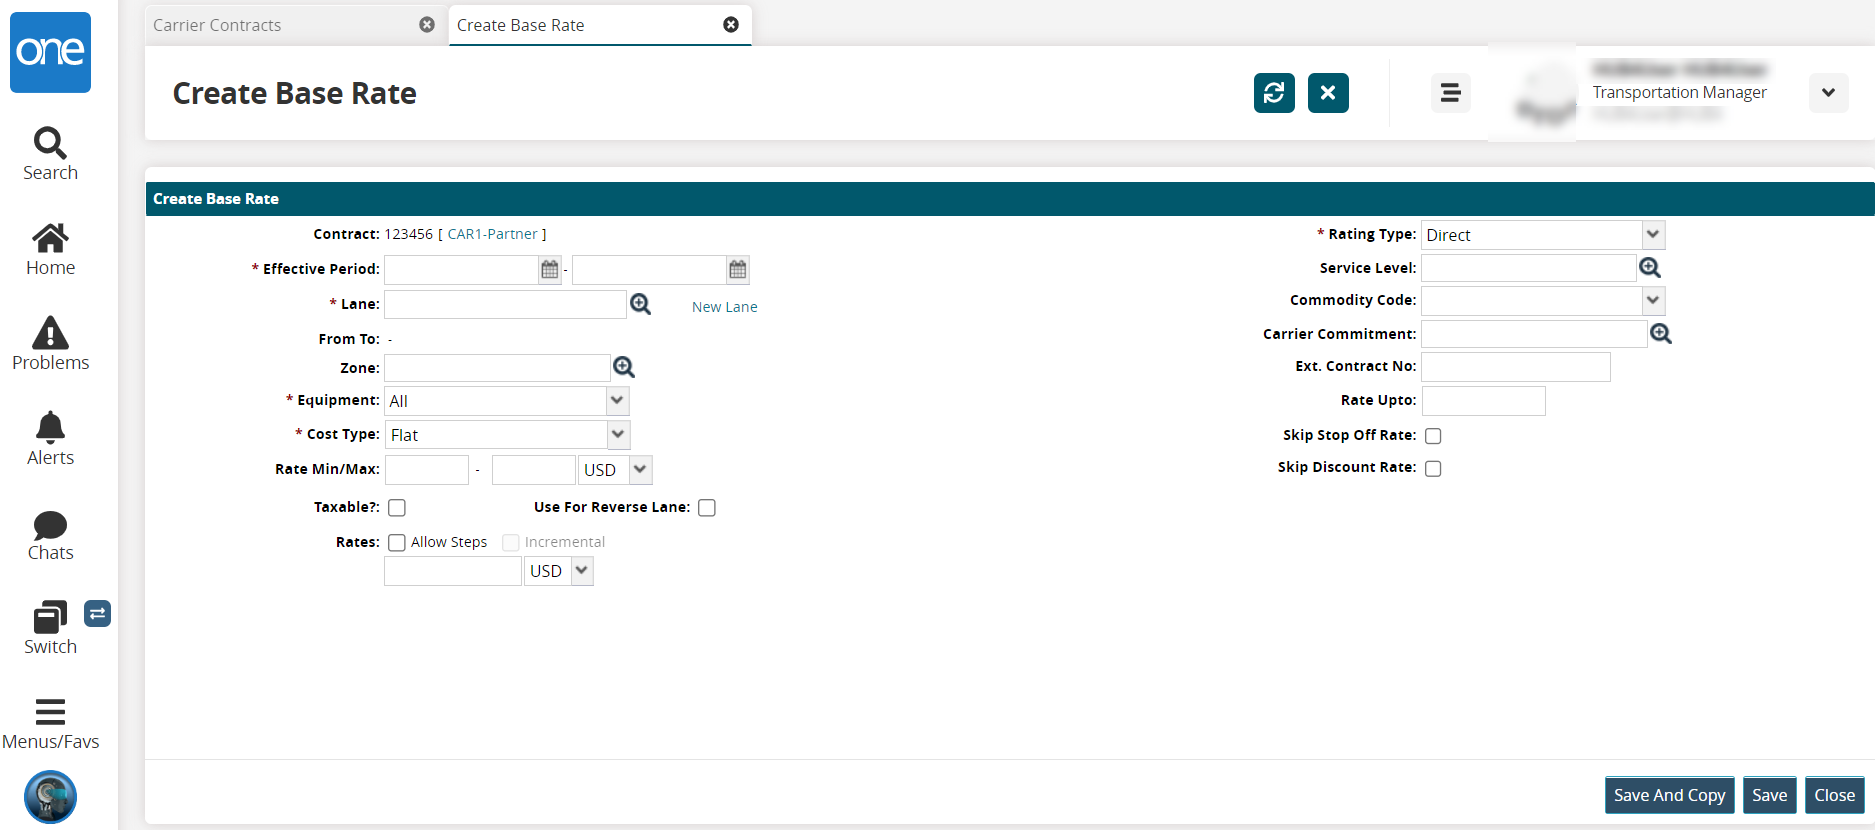
Fill out the following fields. Fields with an asterisk ( * ) are required.
Field
Description
Contract
This field auto-populates.
* Effective Period
Enter the date range the base rate will be in effect.
For this example, from June 1 to June 30.* Lane
Enter or use the picker tool to select an existing lane.
New Lane
Click the New Lane link. New fields display for from/to data.
Lane From
Select the type of location that the shipment starts and enter or use the picker tool to select a from location. For this example, we will select CustomerA-Beijing DC.
To
Select the type of location that the shipment starts and enter or use the picker tool to select a to location. For this example, we will select CustomerA-Brandon DC.
Zone
Enter or use the picker tool to select a zone.
* Equipment
Select an equipment type from the drop-down list.
For this example, we will select Dry Van.* Cost Type
Select a cost type and a unit of measure from the drop-down lists.
For this example, we will select Per Volume and Cucm.Rate Min/Max
Enter a numeric value. For this example, we will select 50 USD.
Taxable
Check the box to set this contract rate as taxable.
Use For Reverse Lane
Check the box to apply this rate for reverse lanes.
Rates
Check the Allow Steps box to apply rating steps.
A checkbox to set Incremental rates displays and a table for rating steps. Fields with an asterisk (*) are required.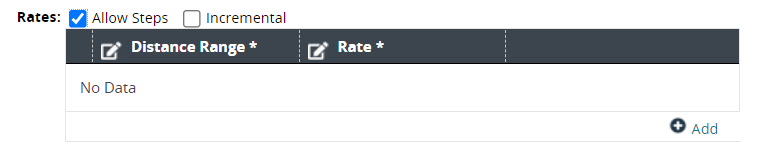
Click the Add link to add a row to the table.
Click the Distance Range* cell to enter a minimum and maximum range.
Click the Rate* cell to add a numerical value for the rate and select the country currency code from the dropdown list.
* Rating Type
Select a rating type from the drop-down list. For this example, we will select Direct.
Service Level
Enter or use the picker tool to select a service level.
Commodity Code
Select a commodity code from the dropdown list.
Carrier Commitment
Enter or use the picker tool to select a carrier commitment.
Ext. Contract No
Enter an external contract number.
Rate Upto
Enter a numerical value for the maximum rate value.
Skip Stop Off Rate
Check the box to skip a stop-off rate.
Skip Discount Rate
Check the box to skip a discount rate if one is set for the carrier.
Click the Save and Copy button to save this base rate and open a new page to set another one.
Click the Save button to save this base rate.
A success message appears, and new buttons display at the bottom of the screen.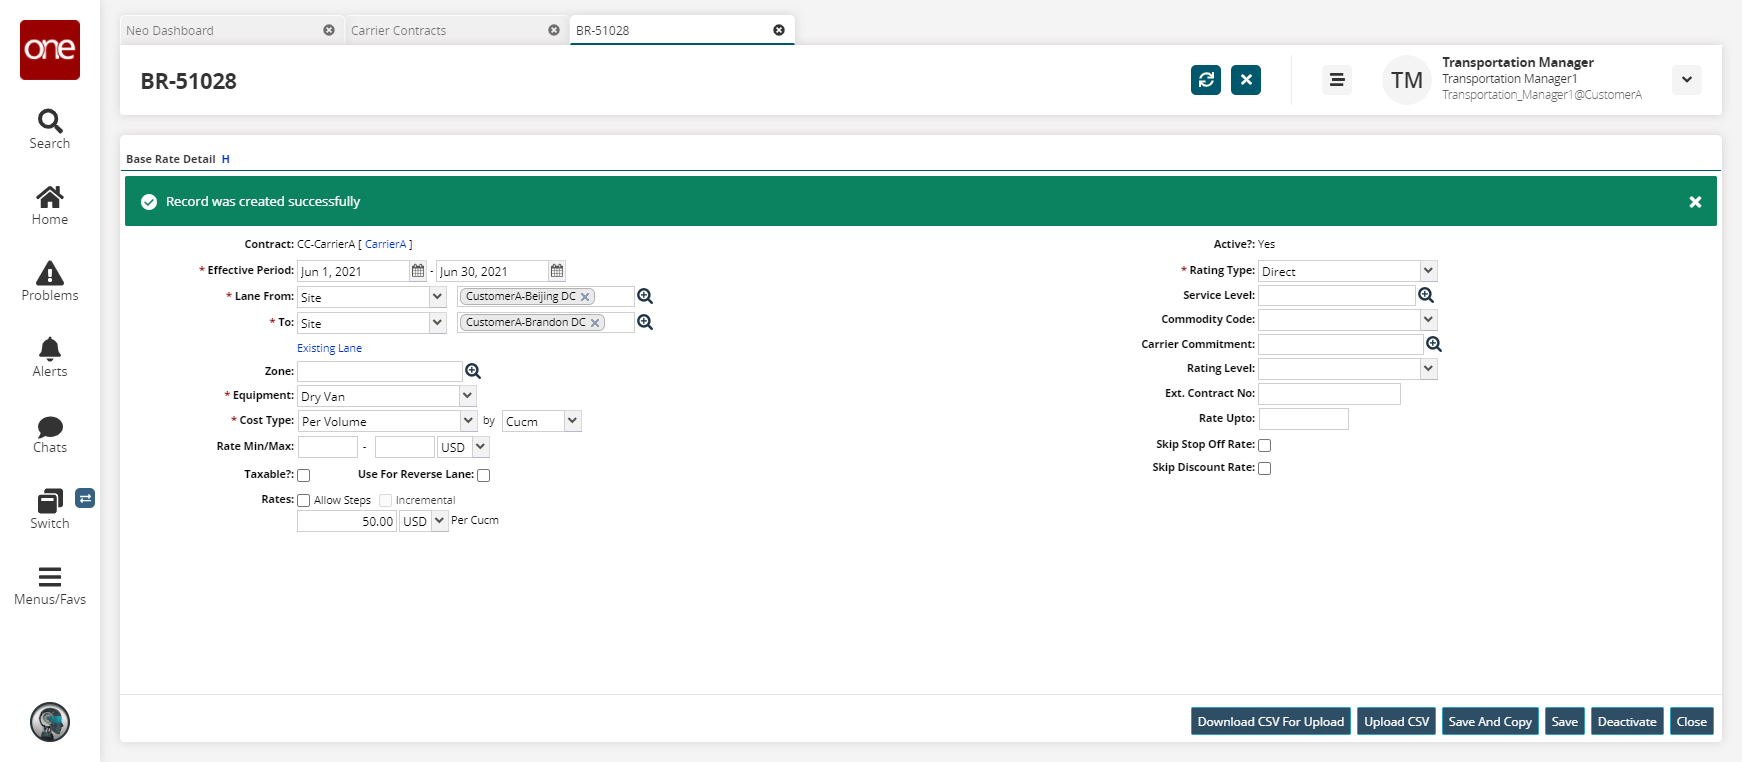
Click the Download CSV For Upload button to download a file of the rate to your computer.
Click the Upload button to upload a file to the ONE system for batch uploads. Please see the "Uploading Files" section in the Online Help for more information.
Click the Deactivate this base rate.
Click the Close button to close the page without saving any changes.
Complete the following steps to define the rerating policy:
L og in to the ONE system.
Select Menu/Favs > Contract Mgmt > Rating Policies.
In the NEO UI, users can click on the Menu/Favs icon on the left sidebar and type in the name of the screen in the menu search bar. For more information, see "Using the Menu Search Bar."
The Rating Policies screen appears.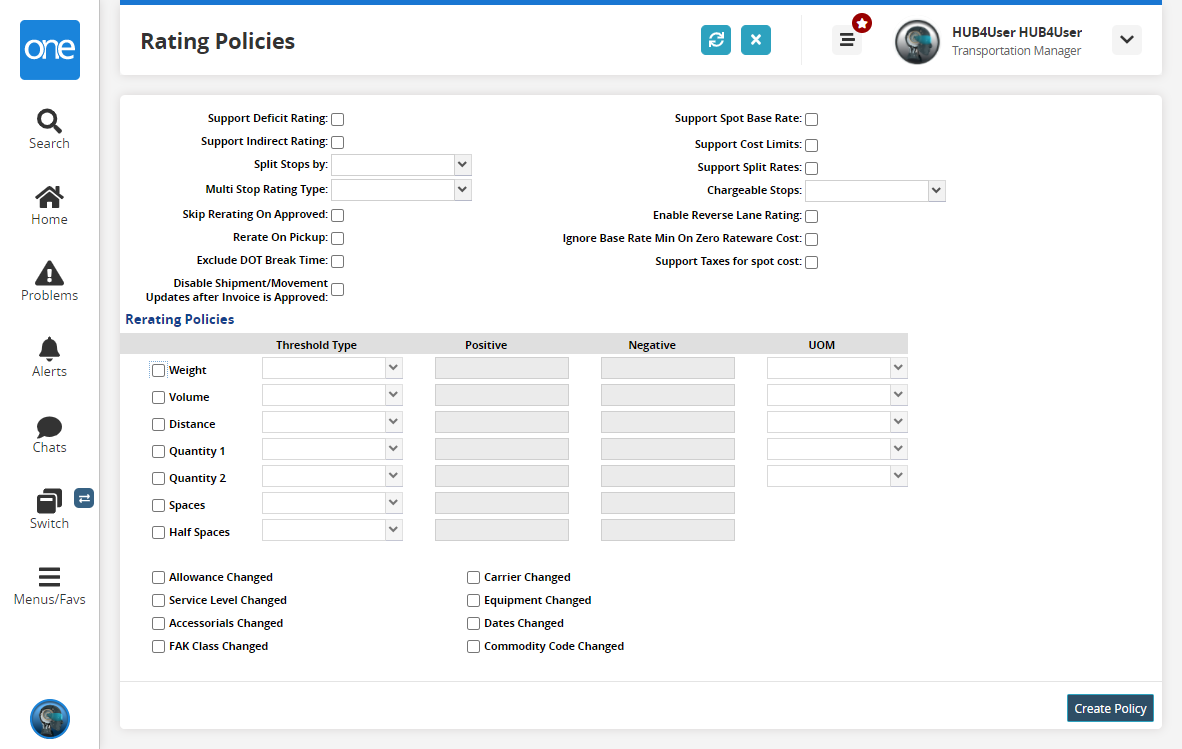
Fill out the fields as described below. For more information, see the "Rating Policies" section in the Online Help.
The following fields are specific to this workflow example.Field
Description
Volume
Select this checkbox.
Threshold Type
Select Absolute from the drop-down menu.
Positive
Enter the value of 10.
Negative
Enter the value of 10.
UOM
Select Cucm from the drop-down menu.
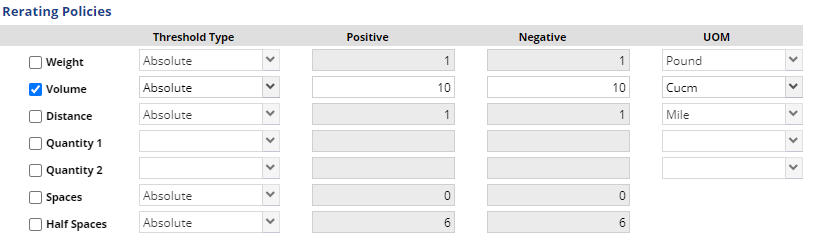
These policies set up a rerating policy that triggers a recalculation of the rate if the absolute volume of a shipment change by 10 cubic centimeters.
Click Update Policy.
A success message appears.
Complete the following steps to create a shipment and movement:
L og in to the ONE system.
Select Menu/Favs > Transportation > New Shipment.
In the NEO UI, users can click on the Menu/Favs icon on the left sidebar and type in the name of the screen in the menu search bar. For more information, see "Using the Menu Search Bar."
The New Shipment screen appears.On the Header tab, fill out the match the fields set up when defining the base rate.
The following values must match the previous workflow steps.
In the Consignee field, enter CustomerA.
Next to the Shipment No field, click the Auto Generate link.
In the Ship From field, select the CustomerA-Beijing DC site.
In the Ship To field, select the CustomerA-Brandon DC site.
Enter a Pickup date range and a Delivery date range. To match our base rate definition, we must select dates between June 1 and June 30.
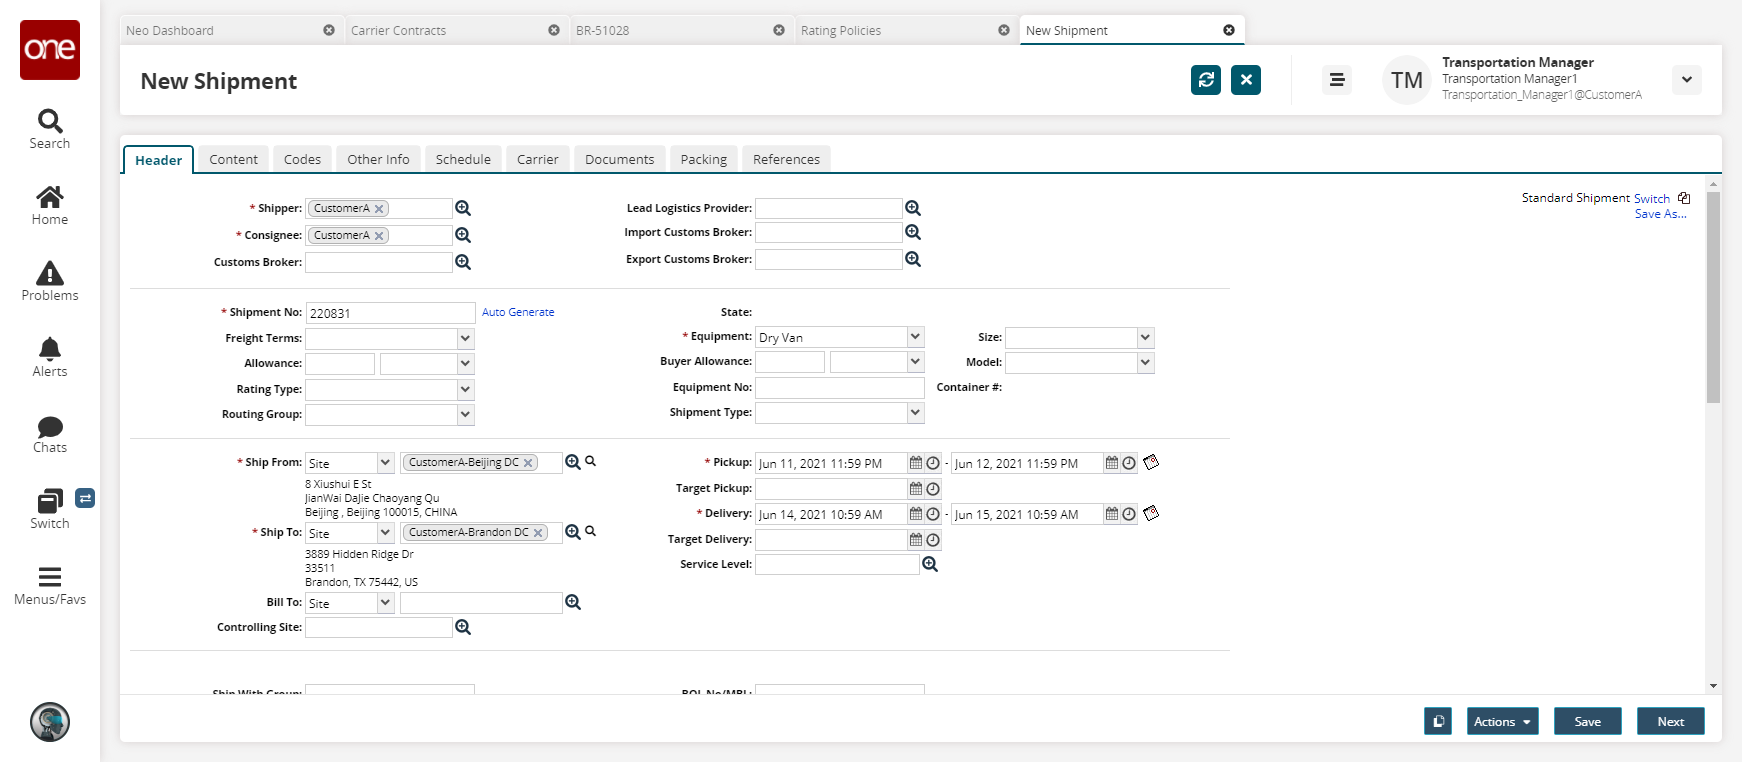
Click Next.
The Content tab appears.In the L x W x H field, enter dimensions. For this example, 2 x 3 x 4.
Click Actions > Save to Confirmed.
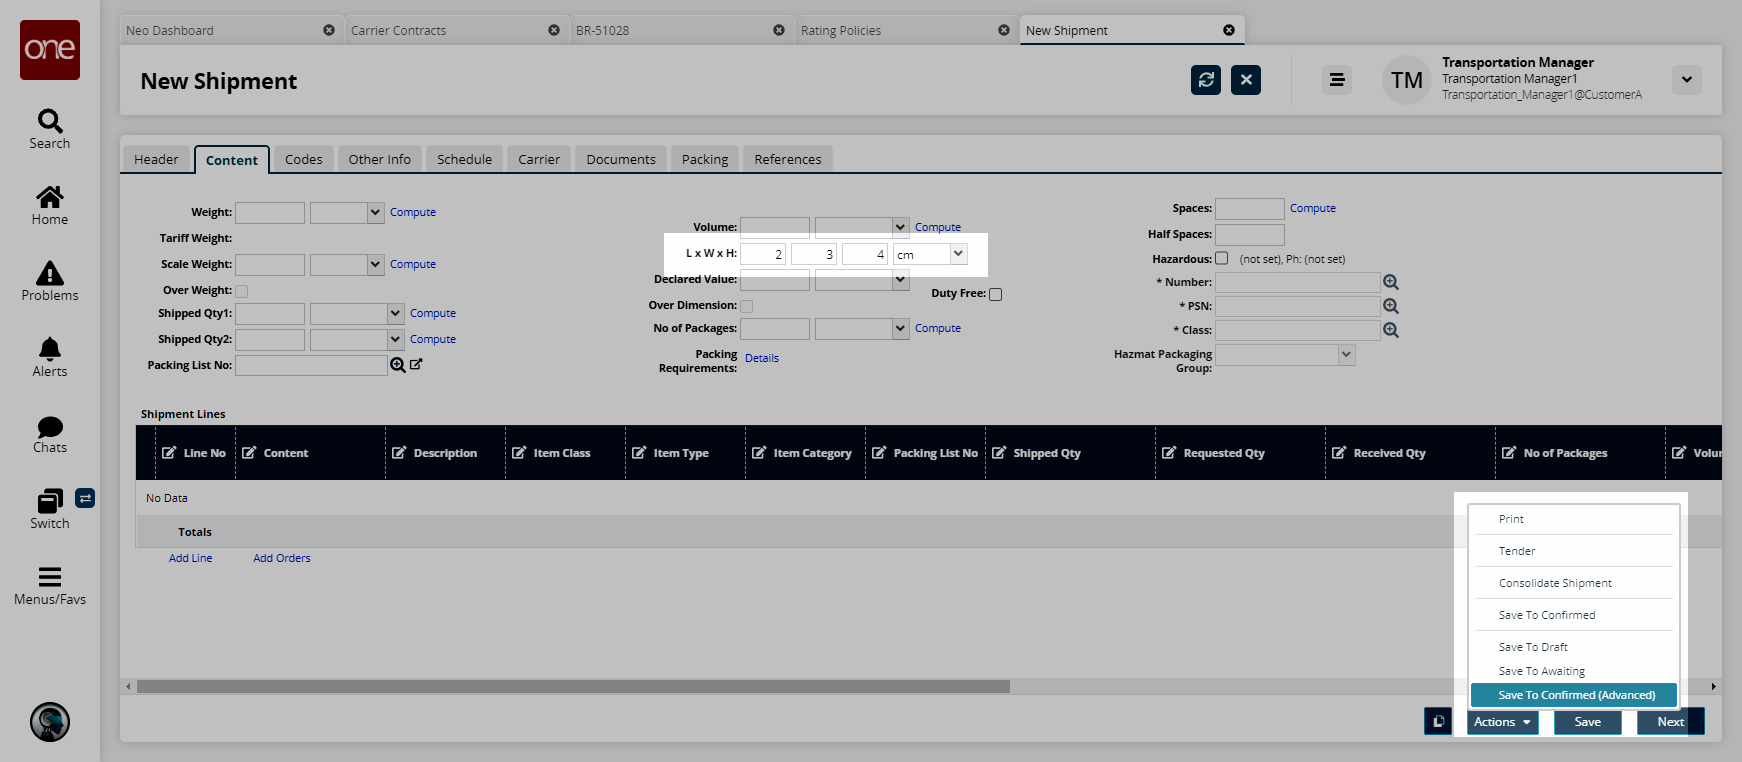
A popup appears.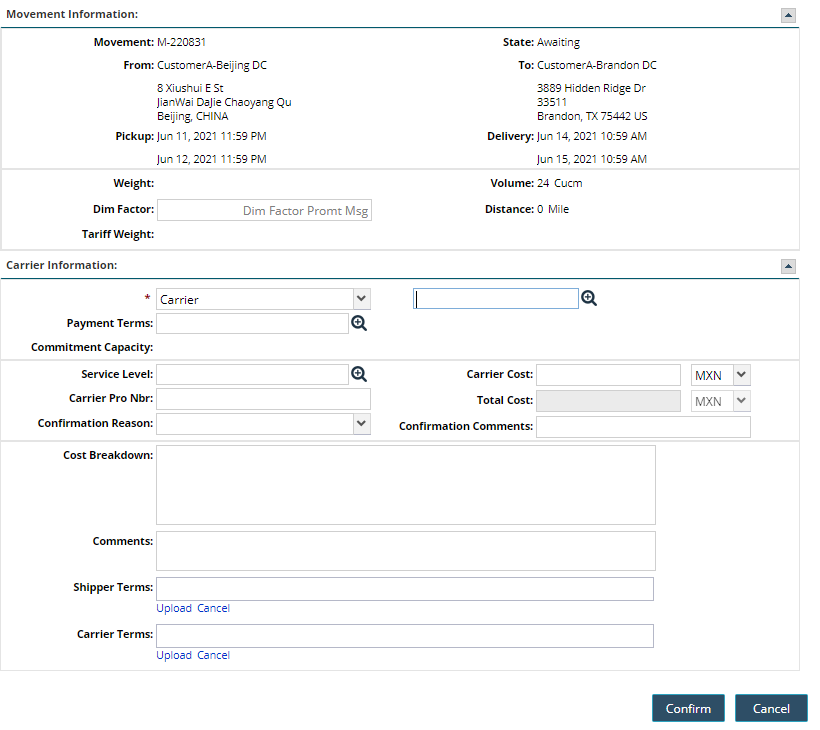
In the Carrier field, select CarrierA.
The Carrier Cost, Total Cost, and Cost Breakdown fields update.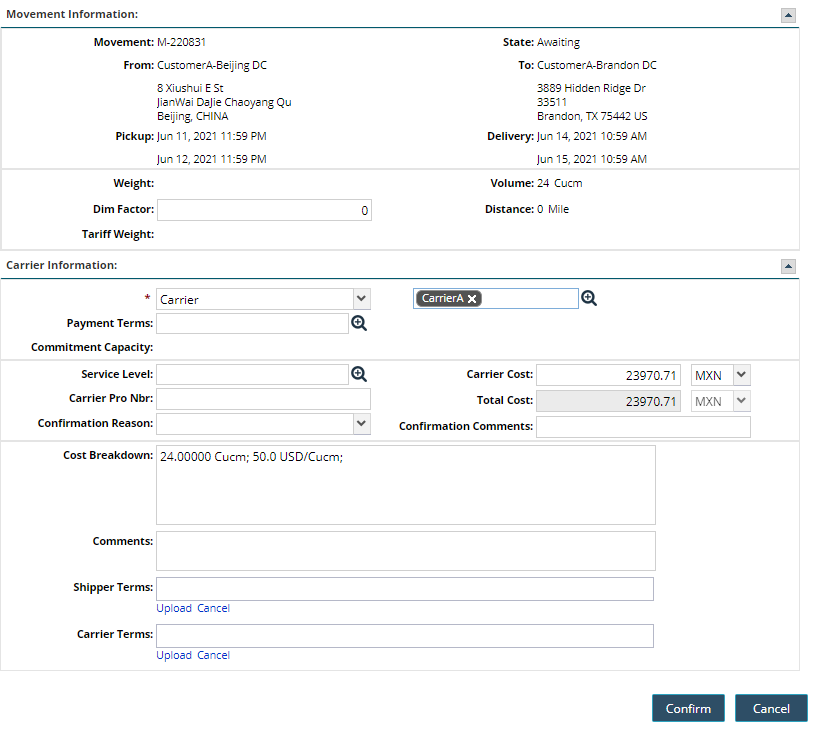
Click Confirm.
A success message appears.
Complete the following steps to rerate a movement by updating the dimensions:
With the Shipment Details screen open, click the Carrier tab.
The Carrier tab appears. Note the Movement Cost is 23970.71 MXN.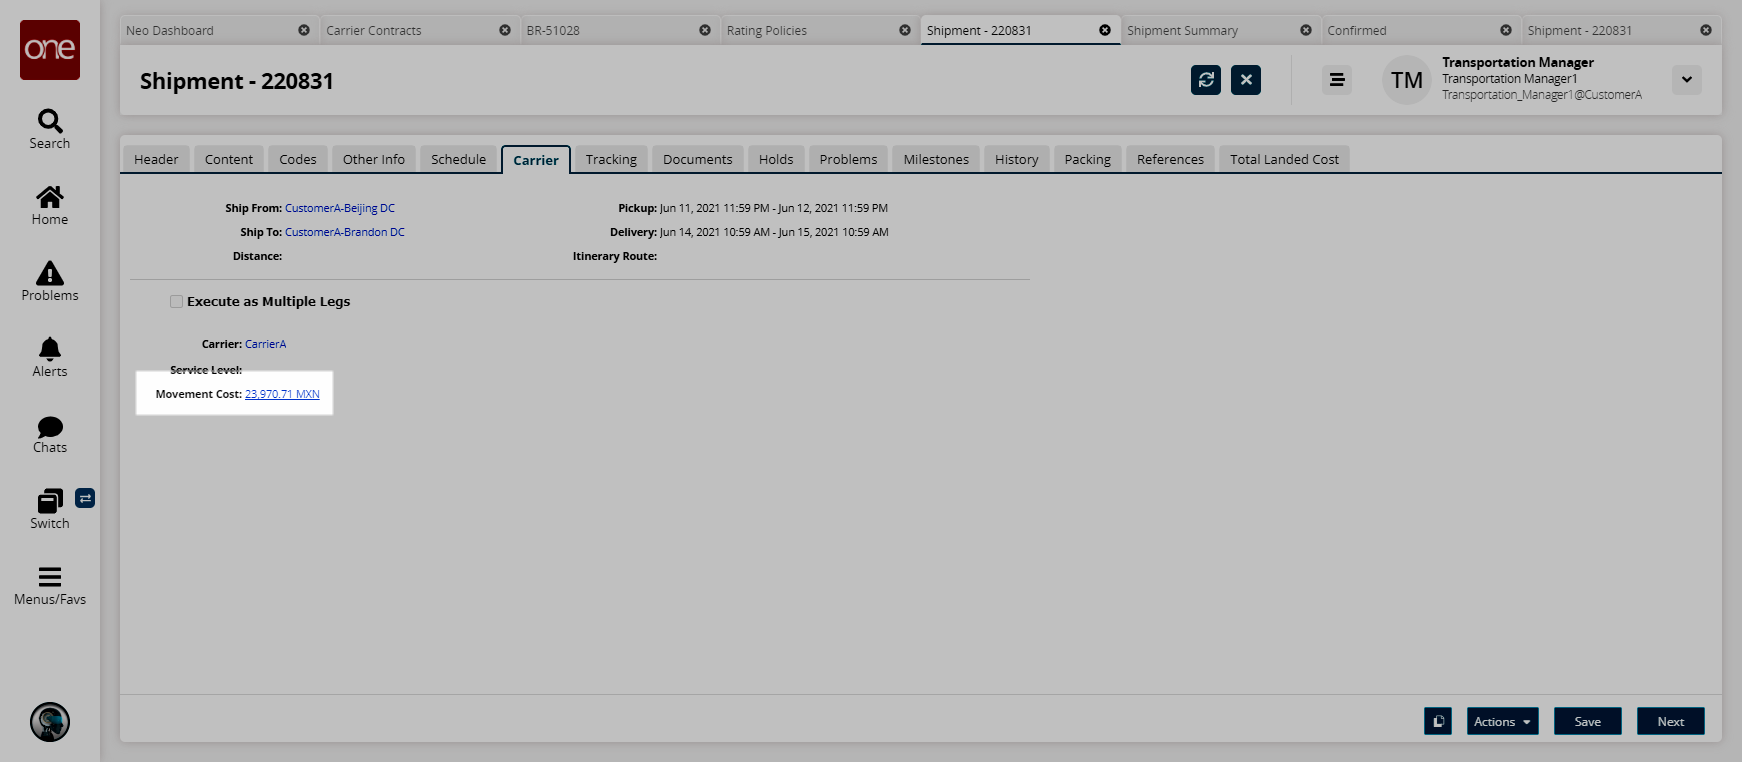
Click the Contents tab.
The Contents tab appears. Note the L x W x H field has dimensions of 2 x 3 x 4. This was defined previously.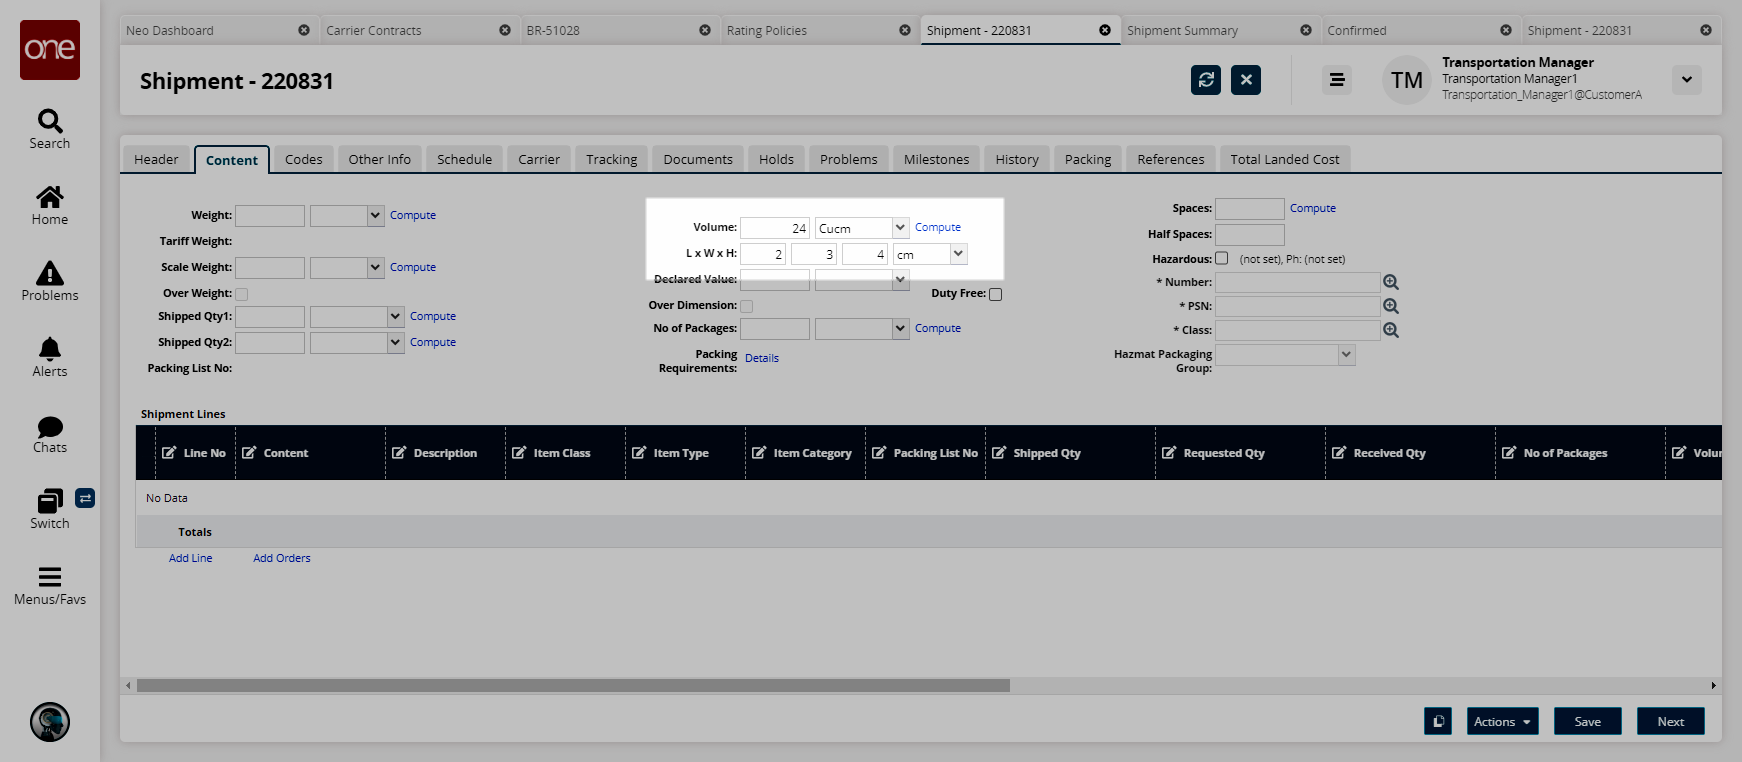
Update the L x W x H field to a higher to a larger volume. For this example, enter 7 x 8 x 9.
Click the Compute link next to the Volume field.
The Volume field updates.
Click Save.
A success message appears.Click back to the Carrier tab.
The Carrier tab appears. Note the Movement Cost is now much higher at 503057.55 MXN.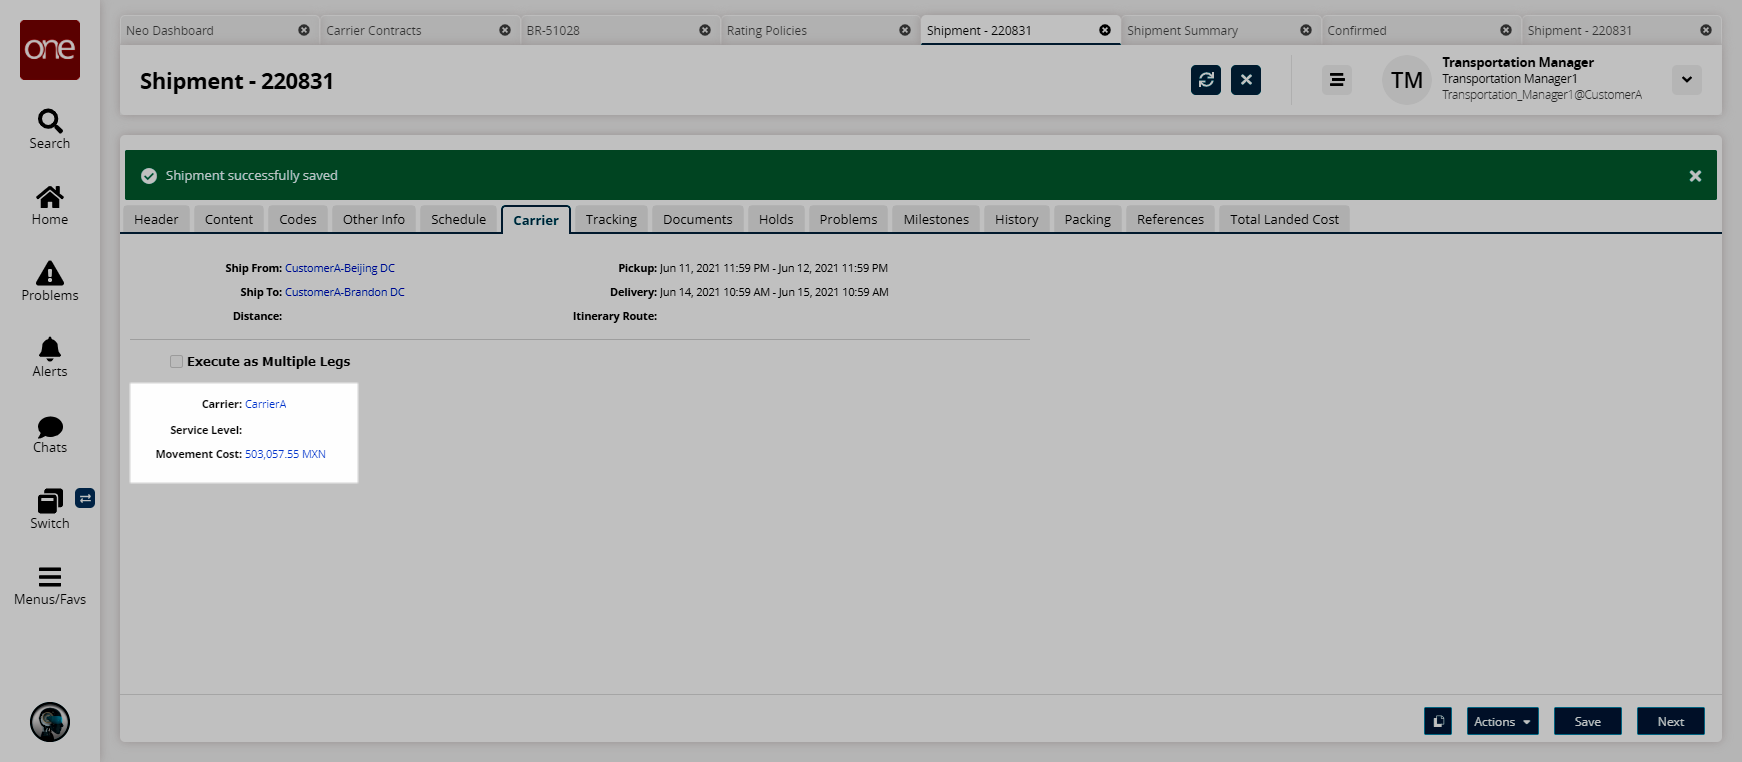
This process can be repeated and the Movement Cost will update each time.