Searching Appointment Requests
Users can search appointment requests, view appointment requests in detail, and select an appointment reservation. Users can also add additional shipments to an existing appointment request.
Complete the following steps to search appointment requests:
L og in to the ONE system.
Click Menu/Favs > Scheduling > Appointment Requests.
In the NEO UI, users can click on the Menu/Favs icon on the left sidebar and type in the name of the screen in the menu search bar. For more information, see "Using the Menu Search Bar."
The Appointment Requests screen appears showing an Explorer panel and a Details panel.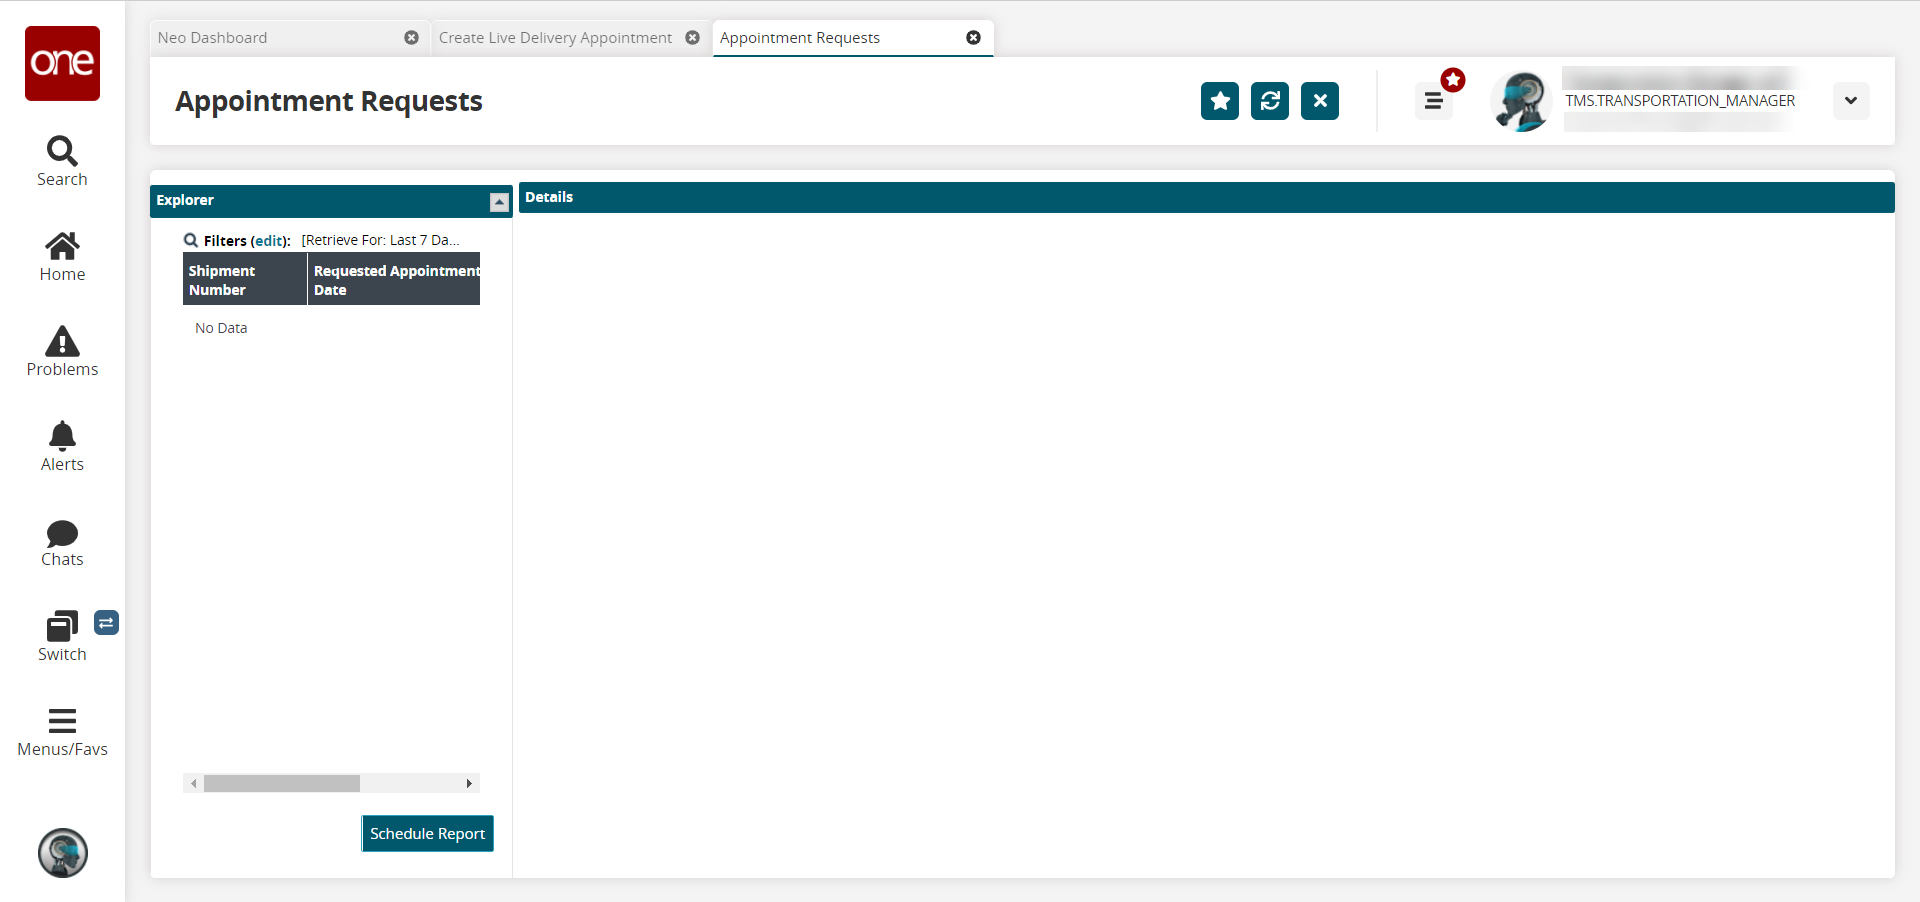
Click the Filters (edit) link to apply search criteria to reduce the number of entries shown.
The Filters menu appears.
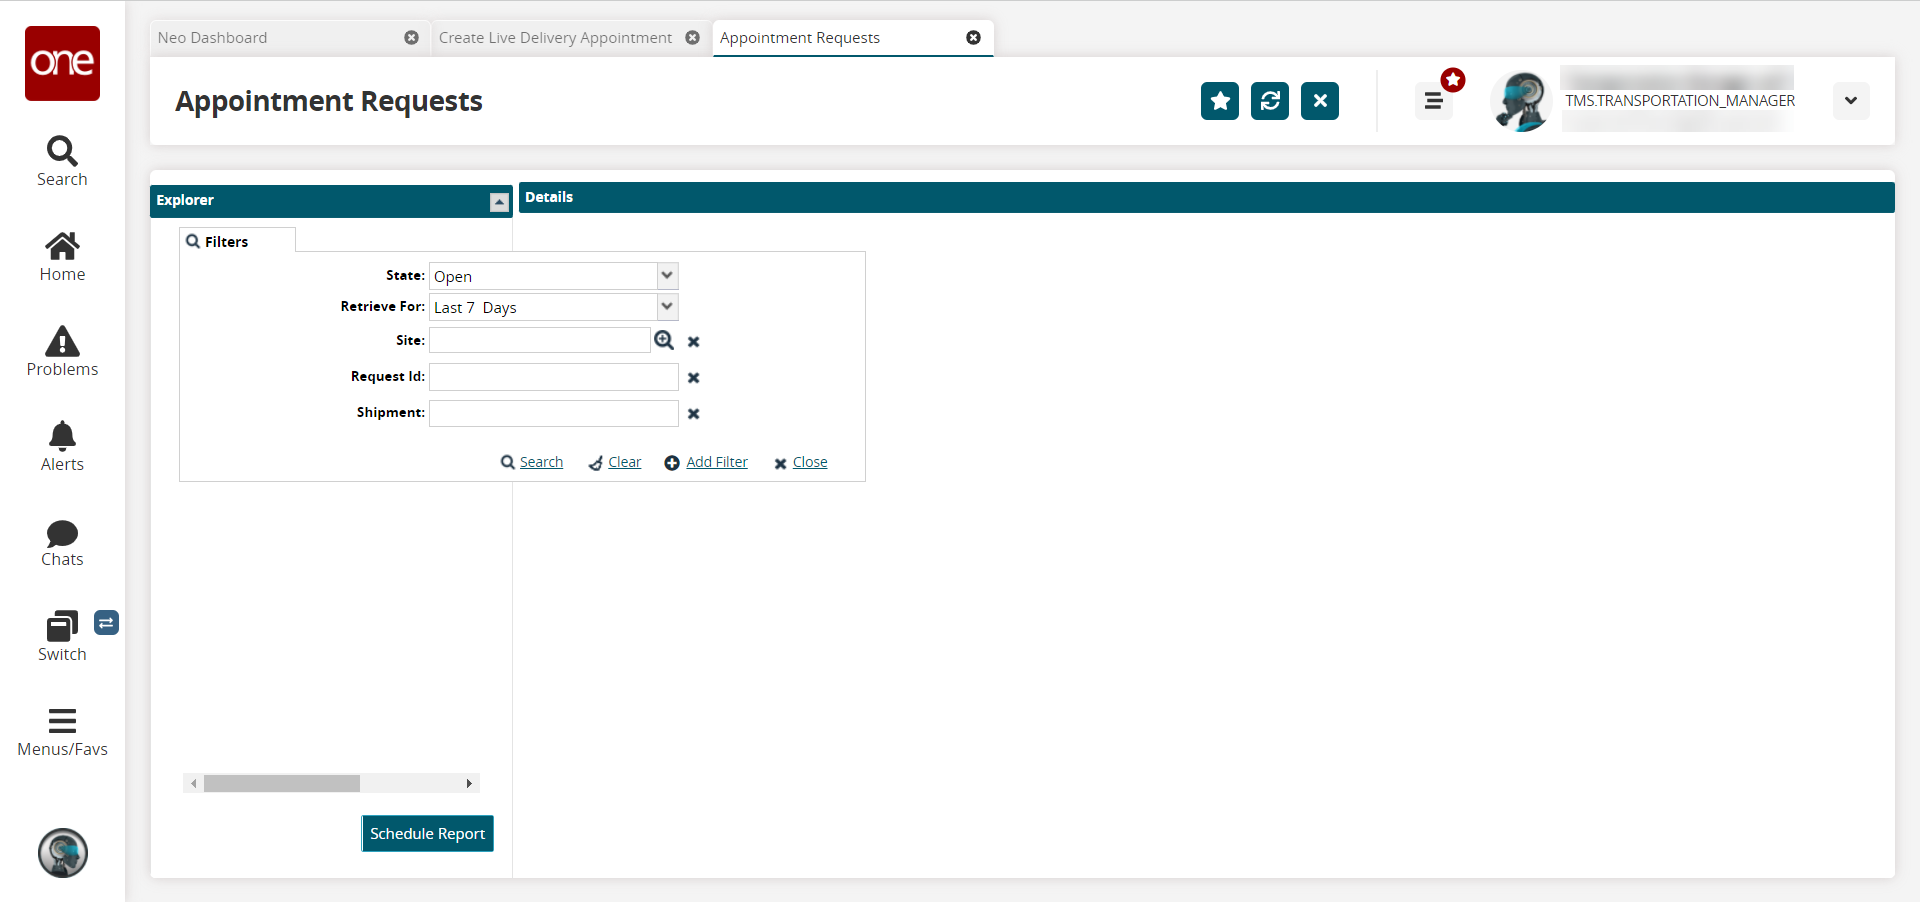
To add more search filters, click the Add Filter link, and then click one or more filter options from the Add Filter list.
Fill out the filters as desired and click the Search link.
The search results appear., In the Shipment Number column, click a shipment number to view the details of an appointment request.
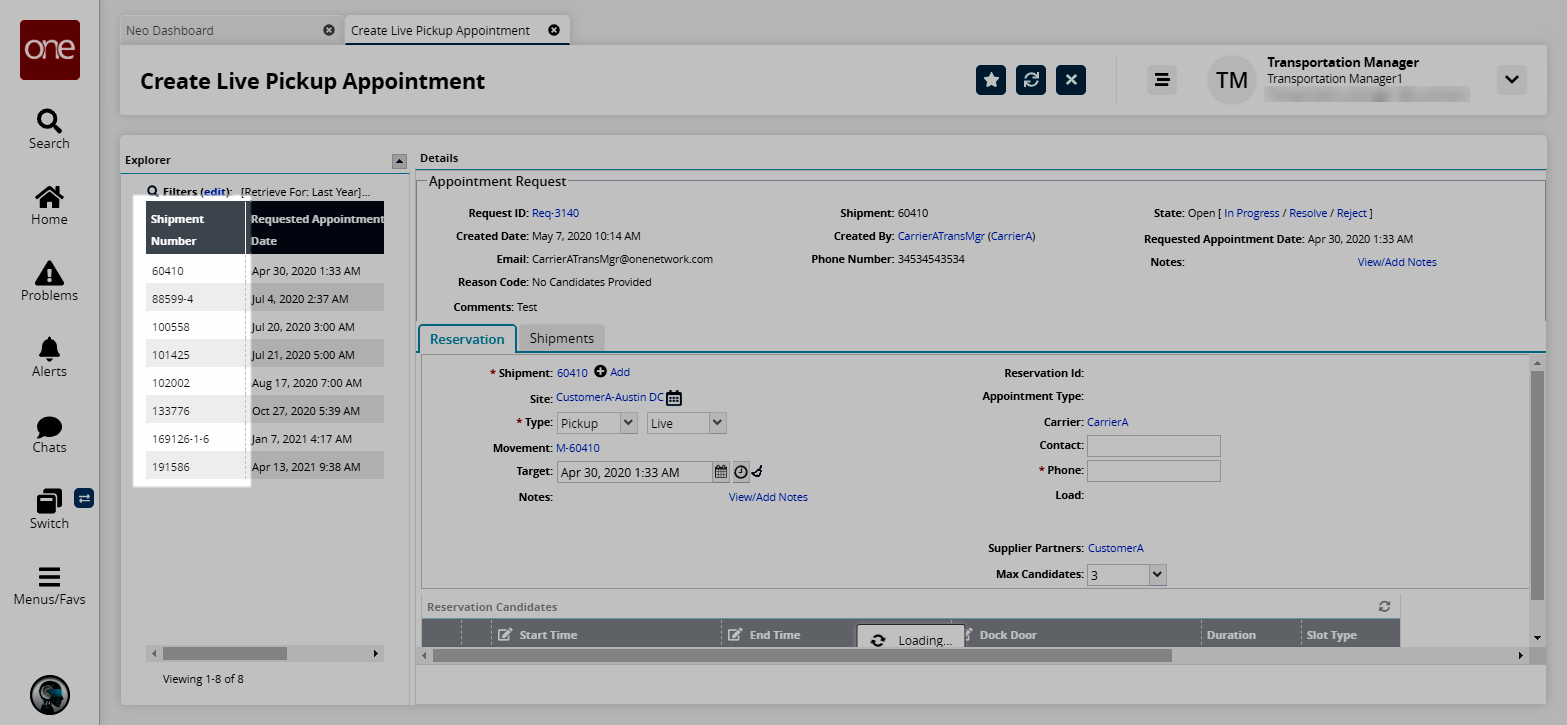
The Details panel shows the selected Appointment Request.
In the Details panel, click the +Add link next to the shipment number to add a shipment to the appointment request.
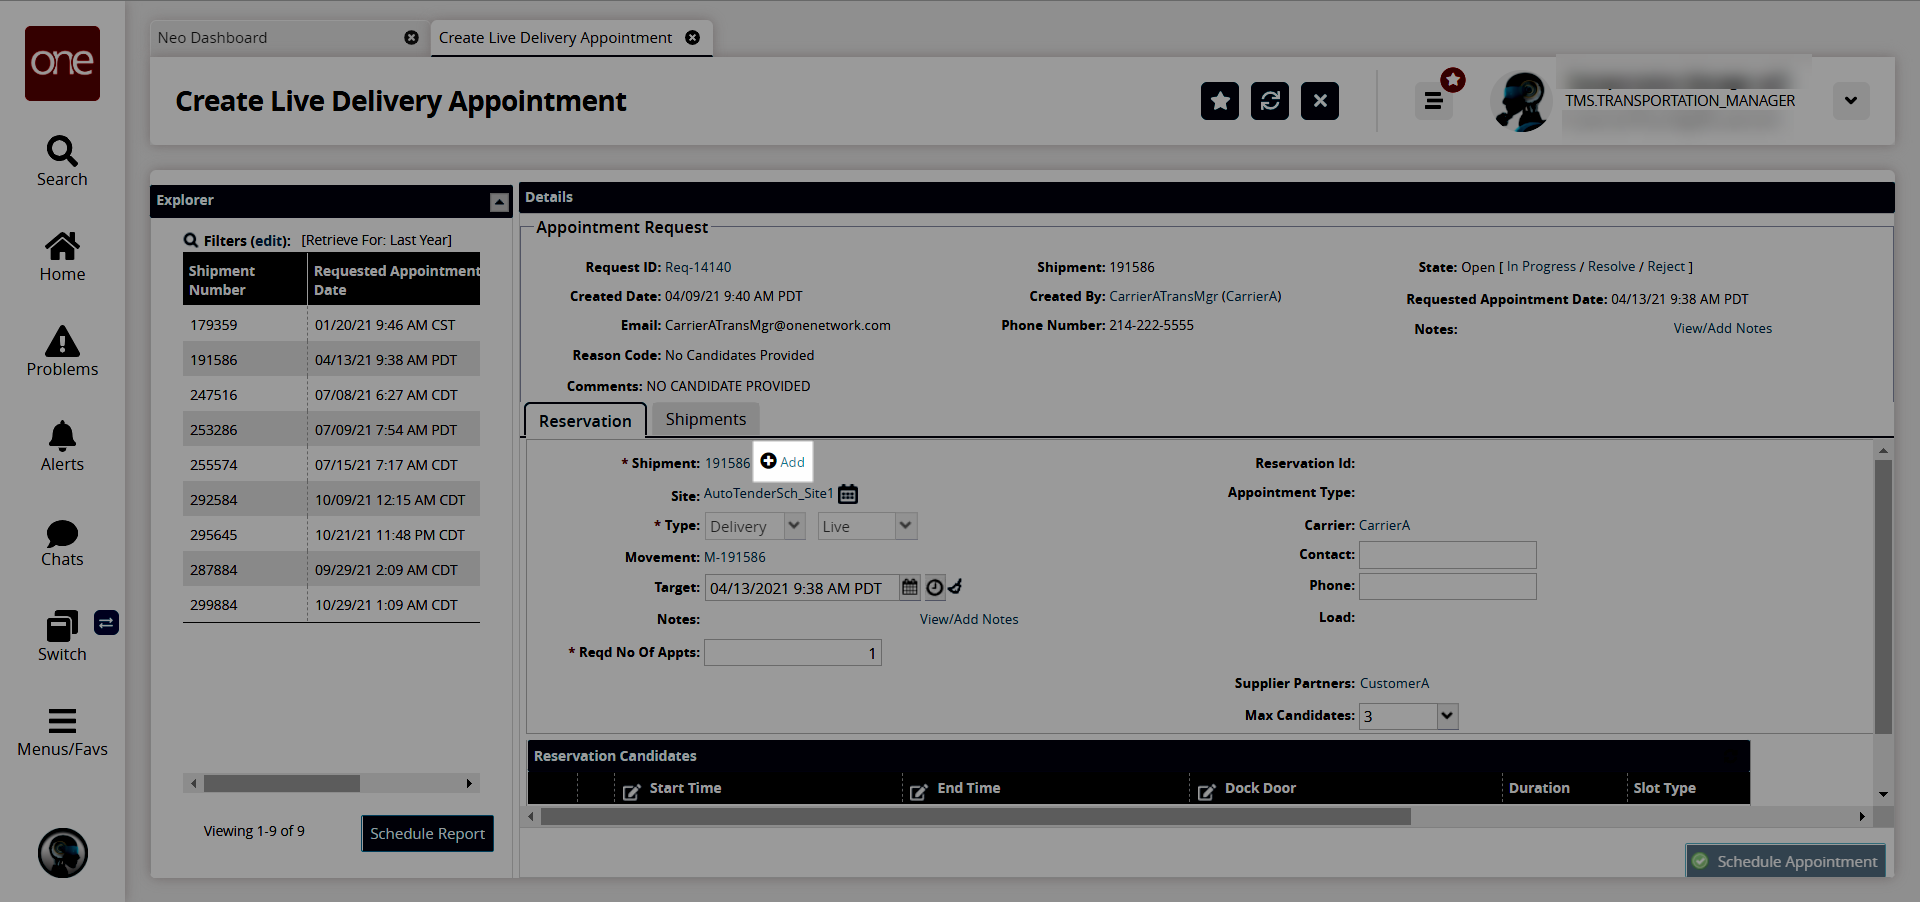
Click Select Shipments.
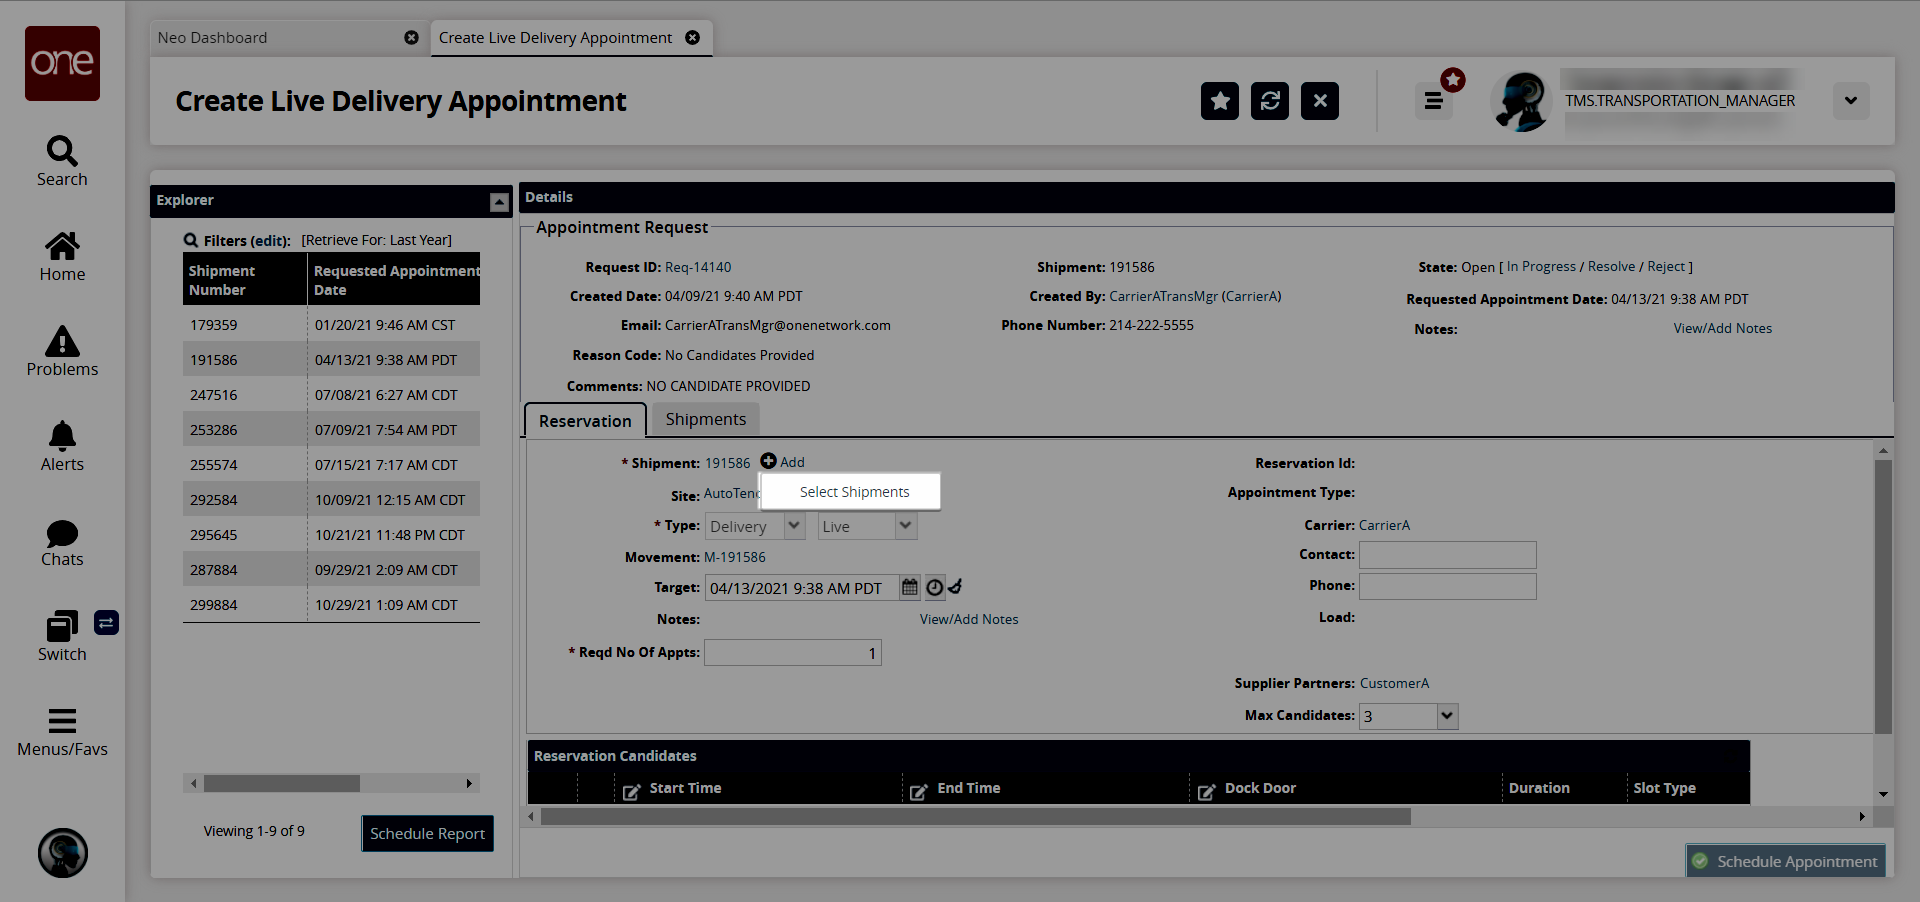
The Select Shipments popup window appears.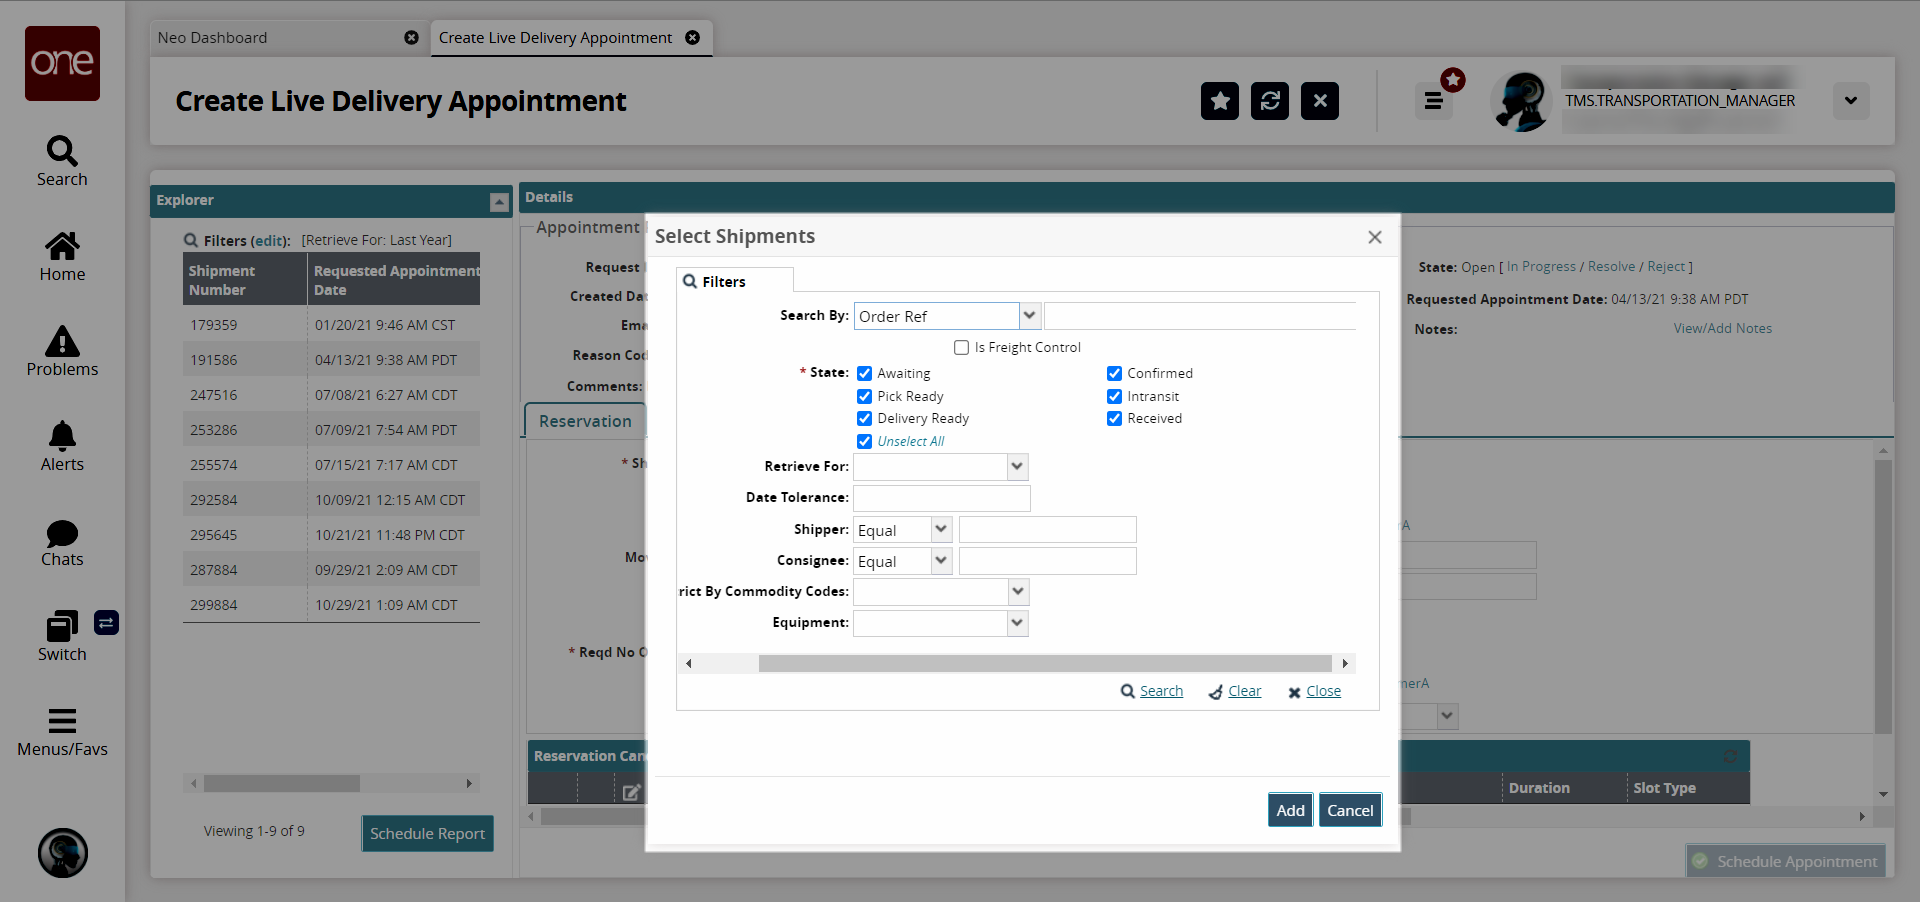
Fill out the following fields. Fields with an asterisk ( * ) are required.
Field
Description
Search By
Select the search criteria from the dropdown list and enter the value you're searching by in the text box.
* State
Select the possible states of the shipment you want to add to this appointment request.
Retrieve For
Enter the date range of the shipments you want to include in your search.
Date Tolerance
Enter the date tolerance.
Shipper
Select Equal or Not Equal from the dropdown list and enter the shipper for that value in the text box.
Consignee
Select Equal or Not Equal from the dropdown list and enter the consignee for that value in the text box.
Restrict by Commodity Codes
Select Yes or No.
Equipment
Select the equipment used for the desired shipment.
Click the Search link.
A list of shipments that match the search criteria appears.Click the checkbox next to the shipment(s) you want to add.
Click the Add button.
The newly added Shipment number populates in the Shipment field in the Details pane for the appointment.