Appointment Scheduling in the NEO Workbench UI
The NEO Workbench UI uses a scalable, responsive framework that works on web browsers, tablets, and mobile devices. In addition to other transportation functions, the workbench provides inline NEO prescriptions for reservation candidates for appointment scheduling.
Viewing Appointments in the NEO Workbench
Complete the following steps to view appointment scheduling in the NEO Workbench UI:
Log in to the ONE system.
Search for an open shipment using the global search function in the left navigation panel or click Menu/Favs > Transportation > Search Shipments.
The Search Shipments screen displays.Click an appointment link for either pickup or delivery; the shipment must be in one of the open states with a pickup or delivery link in the respective columns.
Users have the option to select the following types of appointment reservations for pickups and deliveries:
Live - appointment for a pickup or delivery where the equipment type (a truck, for example) is loaded or unloaded with the driver in attendance and waiting
Drop - appointment for a pickup or delivery where the driver can pick up or delivery the shipment without staying
Combined - combined appointment requests show options for both live and drop appointments
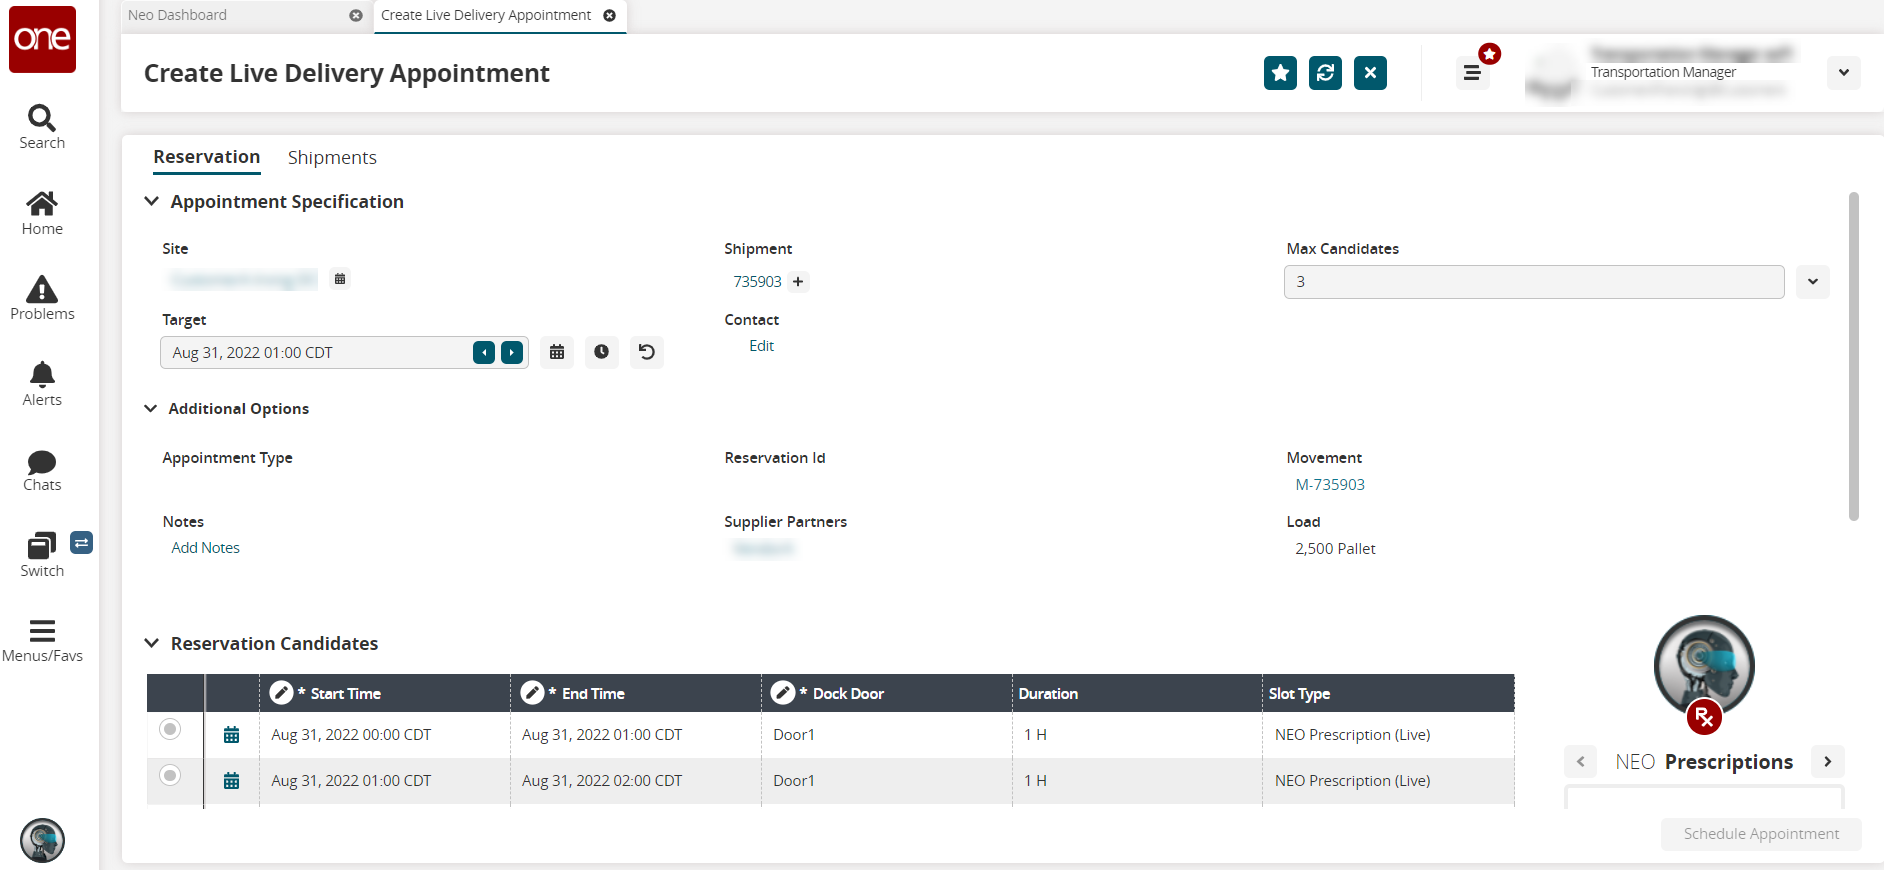
In this example, we clicked on the link for a live pickup. The new NEO workbench for appointment scheduling displays the Reservation tab as the default.
Complete the following fields to set requirements for your desired appointment. Fields with an asterisk (*) are required.
Section
Field
Description
Appointment Specification Section
Site
This field auto-populates with a live link to the site details screen.
Click the calendar icon to view a read-only calendar of the site's dock door availability. The candidate's calendar timeline displays. This helps if you get a red warning bar explaining problems with showing candidates who can accommodate the site's dock door availability windows.
Shipment
This field auto-populates with a live link for the shipment that opens the shipment's details screen. Users can also add shipments to this appointment.
To add more shipments to this appointment, click the plus icon and the Select Shipments button in the Shipment field.
The Filter Options popup displays.
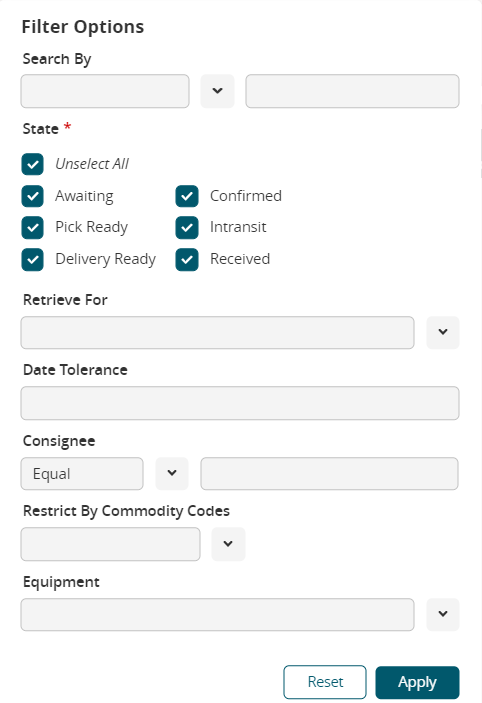
Complete the following fields to filter for your desired shipment(s). Fields with an asterisk (*) are required.
Field
Description
Search By
Select the criteria to search by from the dropdown list, and fill in specific details in the second field. Please note that different fields may display when a different search criterion is selected from the list.
State *
Check the box(es) for the state of the shipments.
Retrieve For
Select the time frame for the search from the dropdown list.
Date Tolerance
Enter a date tolerance for the allowed limit before and after the target date.
Consignee
Select Equal or Not Equal from the dropdown list, and enter the consignee.
Restrict by Commodity Codes
Select Yes or No to restrict the shipment search by commodity codes.
Equipment
Select the equipment type from the dropdown list.
Click the Apply button.
The filtered shipments display in the Select Shipments popup.Check the selection box for your desired shipment(s). A filter button is available on the popup for further specific shipment results.
The Add button is now active.Click the Add button.
The shipment is now added to the Shipments field.
Max Candidates
Select the maximum number of available candidates to display in the table below.
Target
Use any of the following icons to set the target date for the pickup or delivery.
Arrows - move the date one day forward or backward
Calendar - select a date
Clock - select a time
Undo - reset any changes back to the last displayed date
Contact
Click the Edit link.
The Phone and Contact popup displays.Enter a Phone number.
Enter a Contact name.
Click the OK button.
Additional Options
Appointment Type
This field auto-populates once the appointment has been set.
Notes
Click the Add Notes link.
The Notes popup displays.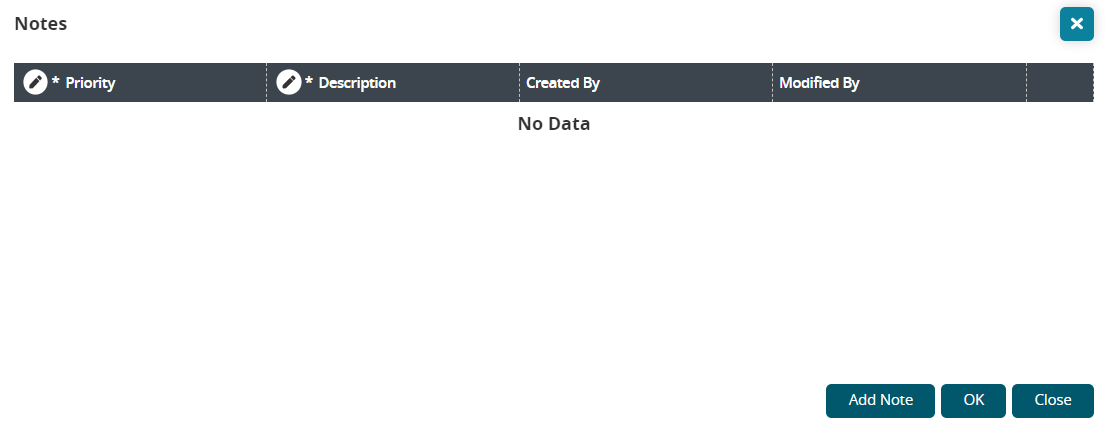
Click the Add Note button.
A row displays the Created By and Modified By fields filled in.Click the Priority cell. Fields with an asterisk (*) are required.
Select a priority level from the dropdown list.
Click the Apply button.
The priority displays.Click the *Description cell.
Enter a description.
Click the Apply button.
The description displays.Click the OK button.
Load
This field displays the load information for the shipment.
Reservation ID
This field populates when the appointment is created.
Reqd No of Appts
Enter a numerical value for the required number of appointments.
Movement
This field auto-populates based on the shipment information. Click the link to view the movement details screen.
Supplier Partners
This field auto-populates based on the shipment information. Click the link to view the supplier partner details screen.
Reservation Candidates Section
The Reservation Candidates section displays candidates who have appointments available based on the criteria set above.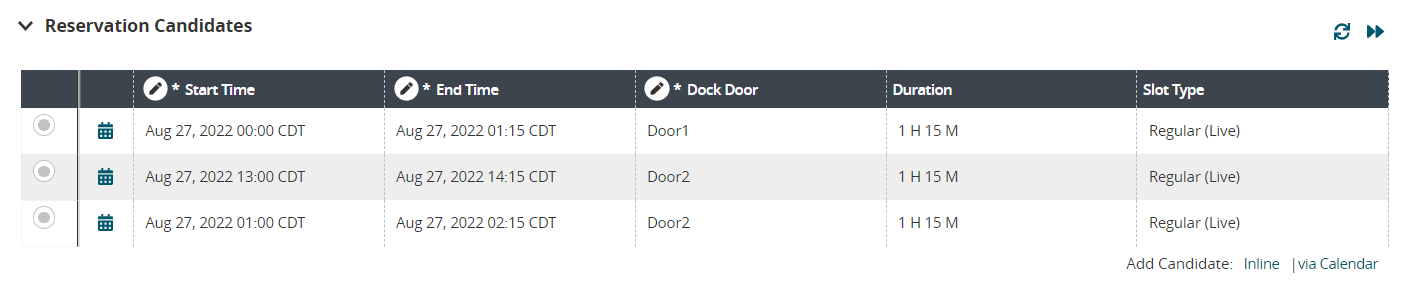
Complete the following steps to view possible appointment candidates:
Click the Get Candidates icon (
 ) to refresh the table.
Click the Get Next Candidates icon (
 ) to show more possible appointment candidates.
Select one of the available appointment candidates from the Reservation Candidates table. Please note that the existing candidate information is not editable.
If you wish to add another candidate directly to the table, click the Inline link.
A new row displays in the Reservation Candidates table. Fields with an asterisk (*) are required, and fields with a pencil icon are editable.Click the cell under *Start Time.
The Start Time popup displays.Use the calendar and clock icons to select the start time for the appointment. The forward and backward arrows will move the date by one day respectively.
Click the Apply button.
Click the cell under *End Time.
The End Time popup displays.Use the calendar and clock icons to select the end time for the appointment. The forward and backward arrows will move the date by one day respectively.
Click the Apply button.
The Duration and Slot Type fields auto-populate.Click the *Dock Door cell.
The Dock Door popup displays.Select the available dock door from the dropdown list.
Click the Apply button.
If you wish to add another candidate by viewing a calendar of available appointments, click the via Calendar link.
The Add Candidate via Calendar popup displays the available doors and the open times (shown in gray) for appointments.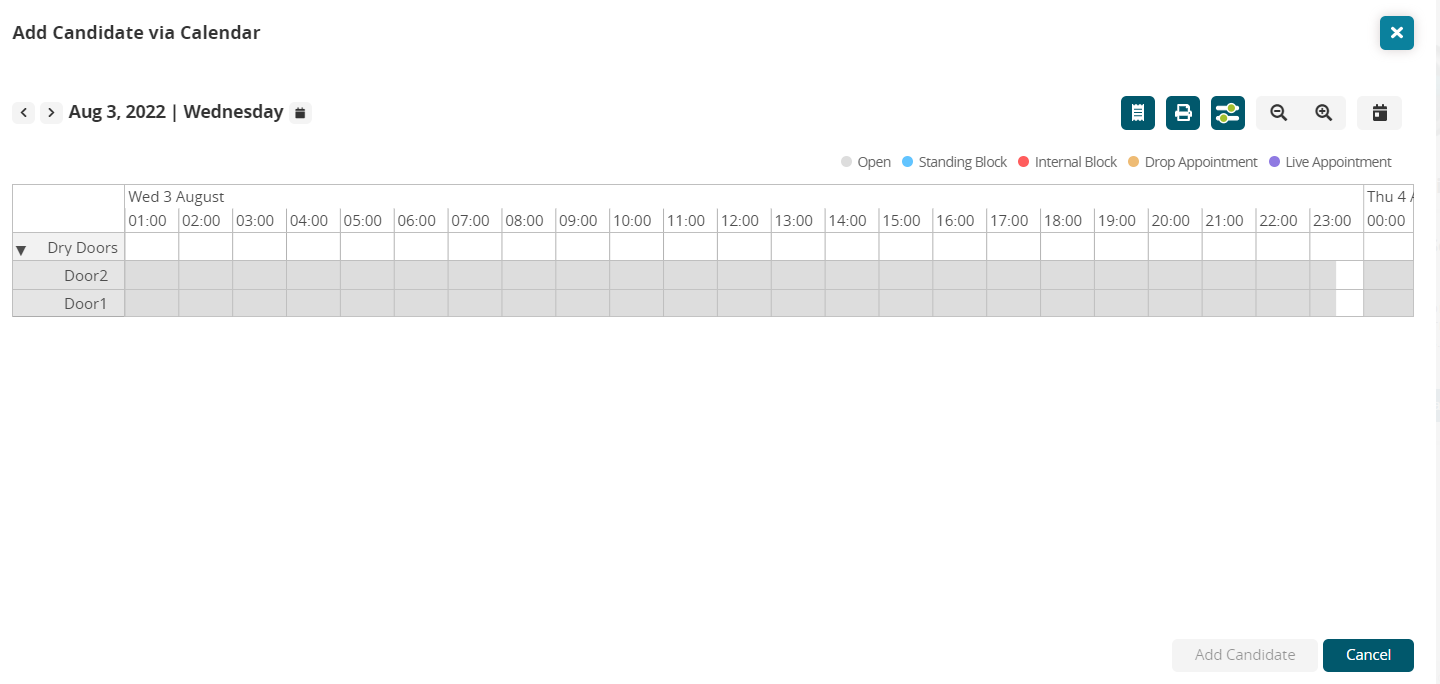
Users can perform the following tasks in the popup:
Click the Summaries button to open the Summaries page displaying dock door information.
Click the Print button to download a PDF to your computer for printing.
Click the Filters button to open a Filter Options popup to narrow your search.
Click the Zoom Out and Zoom In icons to see different timeline views (hours, days, etc.).
Click the Reset Zoom (calendar) icon to reset the zoom to the original view.
Click a gray/available block on the calendar, and click the Add Candidate button.
The appointment candidate is added to the Reservation Candidate table.
Reservation Capacity Section
The Reservation Capacity section is read-only and displays existing capacities for a site. The operational hours plus capacity types (Appointment and Each as shown below) display values for appointments: Maximum, Used, Remaining, and Standing Block Unscheduled. An additional text field, also read-only, for Reason Unable to Schedule On Target Date provides additional information.


NEO Prescriptions
The NEO Prescriptions provide users with more candidates/shipments based on requirements for candidates.
Complete the following steps to use NEO for additional candidates/shipments:
Use the left and right arrows to view the available NEO Prescriptions options. Not every NEO prescription will display for every shipment reservation.
Candidates for Overridden Policies
Appointment Request Candidates
Intelligent Scheduling Candidates
Added Shipment Recommendations
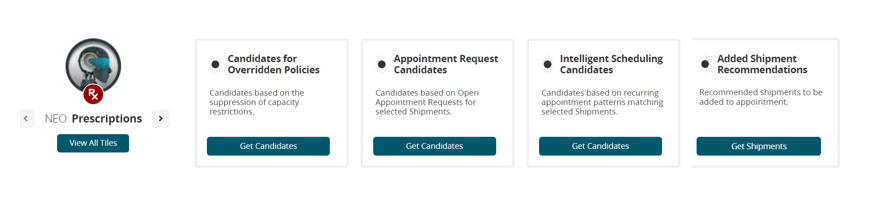
Click the Get Candidates/Get Shipments button for the desired prescription.
Any available candidates or shipments display on a popup.Click the plus (+) sign.
New candidates are added to the Reservation Candidates table. New shipments are added to the Shipments tab.Click the radio button to select the candidate/shipment.
The Schedule Appointment button becomes active.
Click the Schedule Appointment button.
A greens success message displays.
Selecting an Appointment Schedule
Complete the following steps to select an appointment if the flag/policy for enabling soft appointments has not been set for this site:
Click radio button to select an appointment in the Reservation Candidates section.
The Schedule Appointment button becomes active.Click the Schedule Appointment button.
A green success message displays.
Complete the following steps to select an appointment if the flag/policy for enabling soft appointments has been set for this site:
Click the radio button to select an appointment in the Reservation Candidates section.
The Schedule Confirmed Appointment and the Schedule Soft Appointment buttons are now active.To set a confirmed appointment, click the Schedule Confirmed Appointment button.
A green success message displays.To set a soft appointment, click the Schedule Soft Appointment button.
The Schedule Soft Appointment popup displays.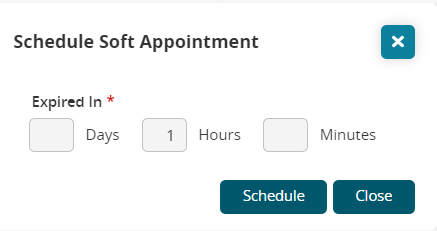
In the Expired In * field, enter numerical values for Days, Hours, and/or Minutes to set the timeframe that allows the candidate to consider and approve the appointment request.
Click the Schedule button.
A green success message displays.
Rescheduling and Canceling an Appointment
Users can reschedule or cancel appointments using the same process. In the example below, we outline the steps to reschedule an appointment, but the steps for canceling are the same.
Complete the following steps to reschedule or cancel an appointment:
From the relevant appointment screen, click the Reschedule Appointment button.
The Reason for Rescheduling popup displays.Select the Reason Code * f rom the dropdown list.
Enter further information in the Description field.
Click the Reschedule Appointment button.
A green success messageClick the Save button.
A green success message displays.
Actions for Appointments
Users have the following actions available for scheduled appointments:
Print - downloads a pdf to your computer
Email - displays an email template with the appointment information. Enter email addresses in the Recipient * field. The Subject * and Message * fields contain auto-populated appointment data, but are editable.
Arrived - displays a green success message and indicates that a new event has been created
Departed - displays a green success message and indicates that a new event has been created
In Progress - displays a green success message and indicates that the status has been changed
Viewing Shipments
Complete the following steps to view shipments from the workbench UI:
Click the Shipments tab.
The shipment details display. Each shipment associated with this reservation has its own section as described in the following steps.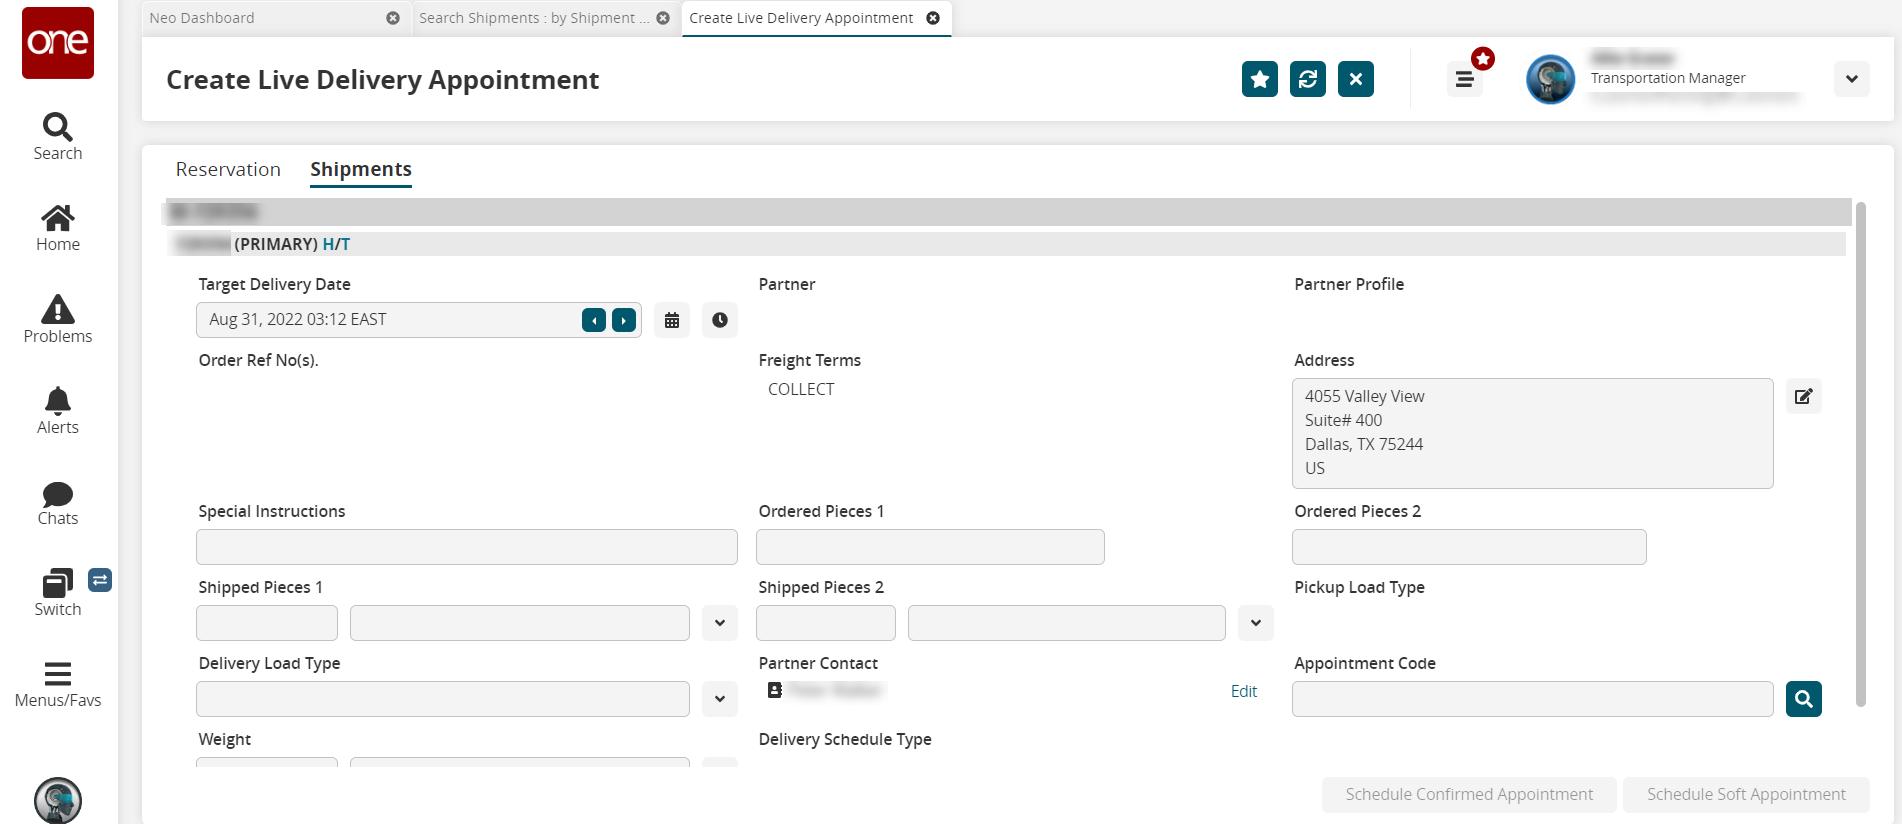
Click the trash can icon in the section header bar.
The shipment is deleted from the reservation.Click the H in the section header bar.
The shipment's history displays in a new tab.Click the T in the section header bar.
The shipment's tracking displays in a new tab.Enter values for fields described in the table below. Fields with an asterisk ( * ) are required.
Field
Description
Target Delivery Date
Select the target delivery date using the arrows to move forward and backward by one day, or use the calendar and clock tools.
Order Ref No(s)
This field auto-populates order reference numbers associated with the shipment.
Special Instructions
Enter any special instructions.
Shipped Pieces 1
Enter a numerical value for the shipped pieces and select a unit of measure from the dropdown list.
Delivery Load Type
Select a delivery load type from the dropdown list.
Weight
Enter a numerical value for the weight and select a unit of measure from the dropdown list.
Partner
This field auto-populates if it is provided in the shipment details.
Freight Terms
This field auto-populates if it is provided in the shipment details.
Ordered Pieces 1
Enter a numerical value for the ordered pieces.
Shipped Pieces 2
Enter a numerical value for the shipped pieces and select a unit of measure from the dropdown list.
Partner Contact
This field auto-populates. Click the Edit link to enter contact information for Phone and Contact (name).
Delivery Schedule Type
This field auto-populates based.
Partner Profile
This field auto-populates if it is provided in the shipment details.
Address
This field auto-populates. Click the edit icon to enter the fields described below. Fields with an asterisk ( * ) are required, and they will change based on the country code selected.
Field
Description
Country *
Select the country abbreviation from the dropdown list.
Line 1 *
Enter address information.
Line 2
Enter additional address information if necessary.
Line 3
Enter additional address information if necessary.
City *
Enter the city.
State *
Select the state from the dropdown list.
Zip *
Enter the ZIP code.
Ordered Pieces 2
Enter a numerical value for the ordered pieces.
Pickup Load Type
This field auto-populates.
Appointment Code
Enter or select the appointment code using the picker tool.