Creating Approval Routes
ONE's order approval process is configured through our Approval Route Framework UI and uses action-based approvals . Users can create approval routes for orders, items, partners, or requisitions.
Complete the following steps to create order approval routes in the Approval Route Framework:
Log in to the ONE system.
Click Menus/Favs > Administration > Approval Routing > Approval. In the NEO UI, users can click on the Menus/Favs icon on the left sidebar and type in the name of the screen in the menu search bar. For more information, see "Using the Menu Search Bar."
The Approval screen displays the Approval Plans tab by default.Click the Approval Routes tab.
The Approval Routes tab displays any existing approval routes.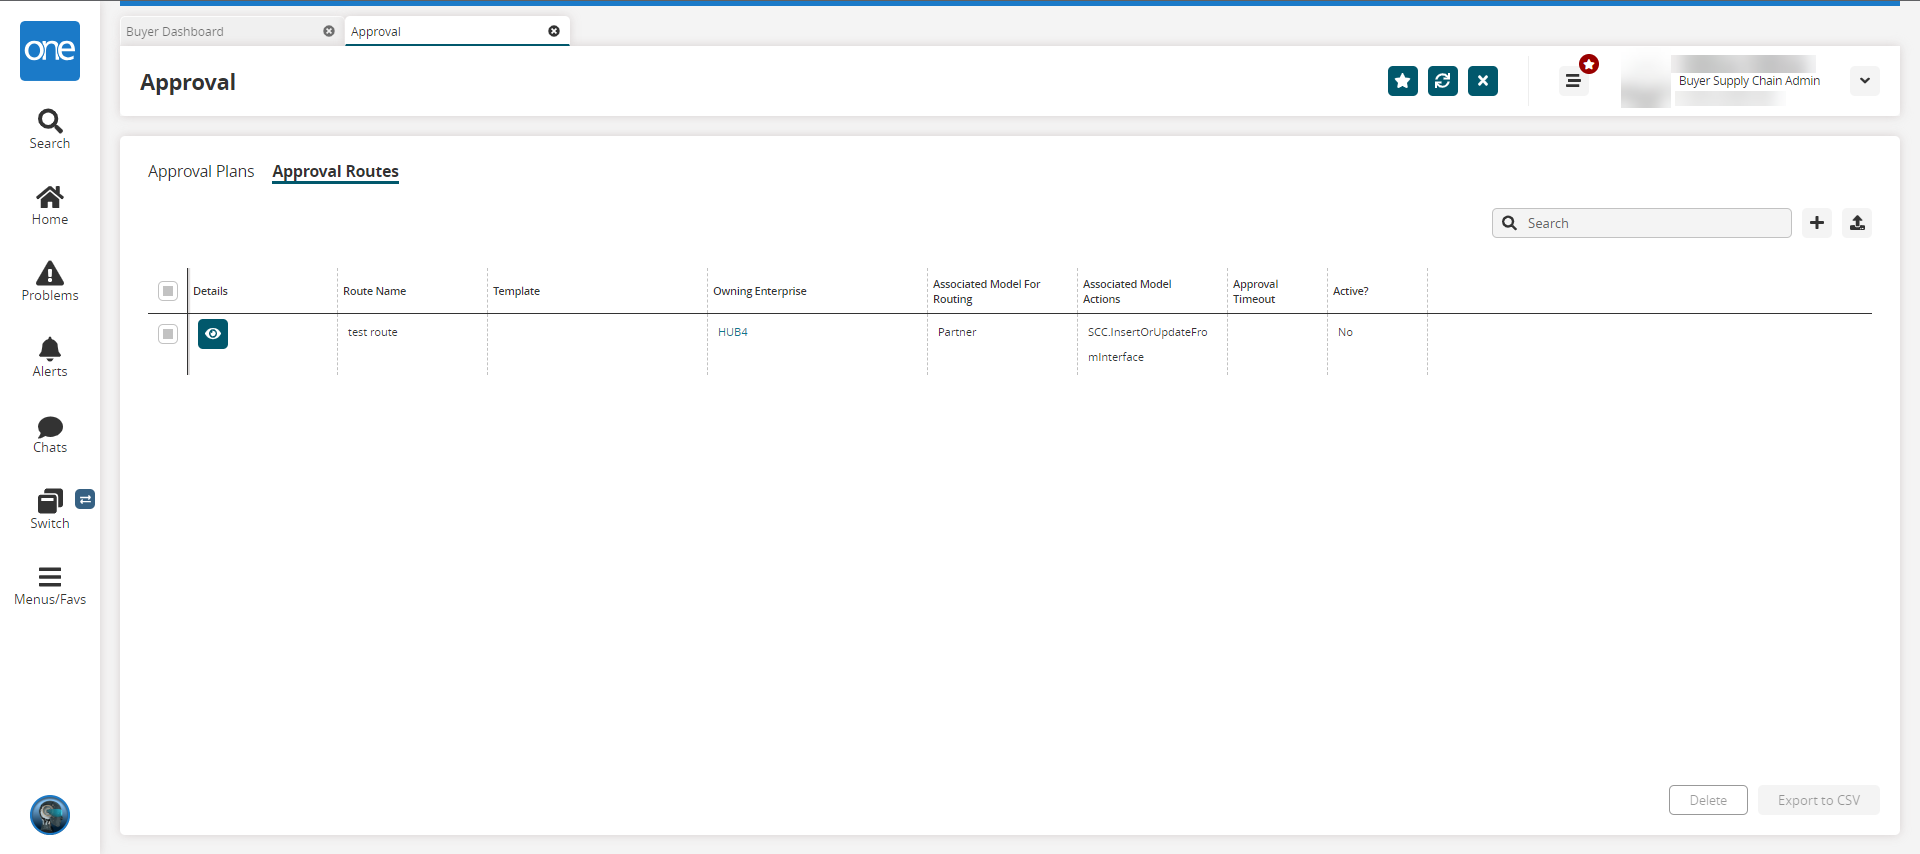
Click the + in the upper right corner to create a new approval route.
The Create An Approval Route screen displays the Approval Route Creator tab by default.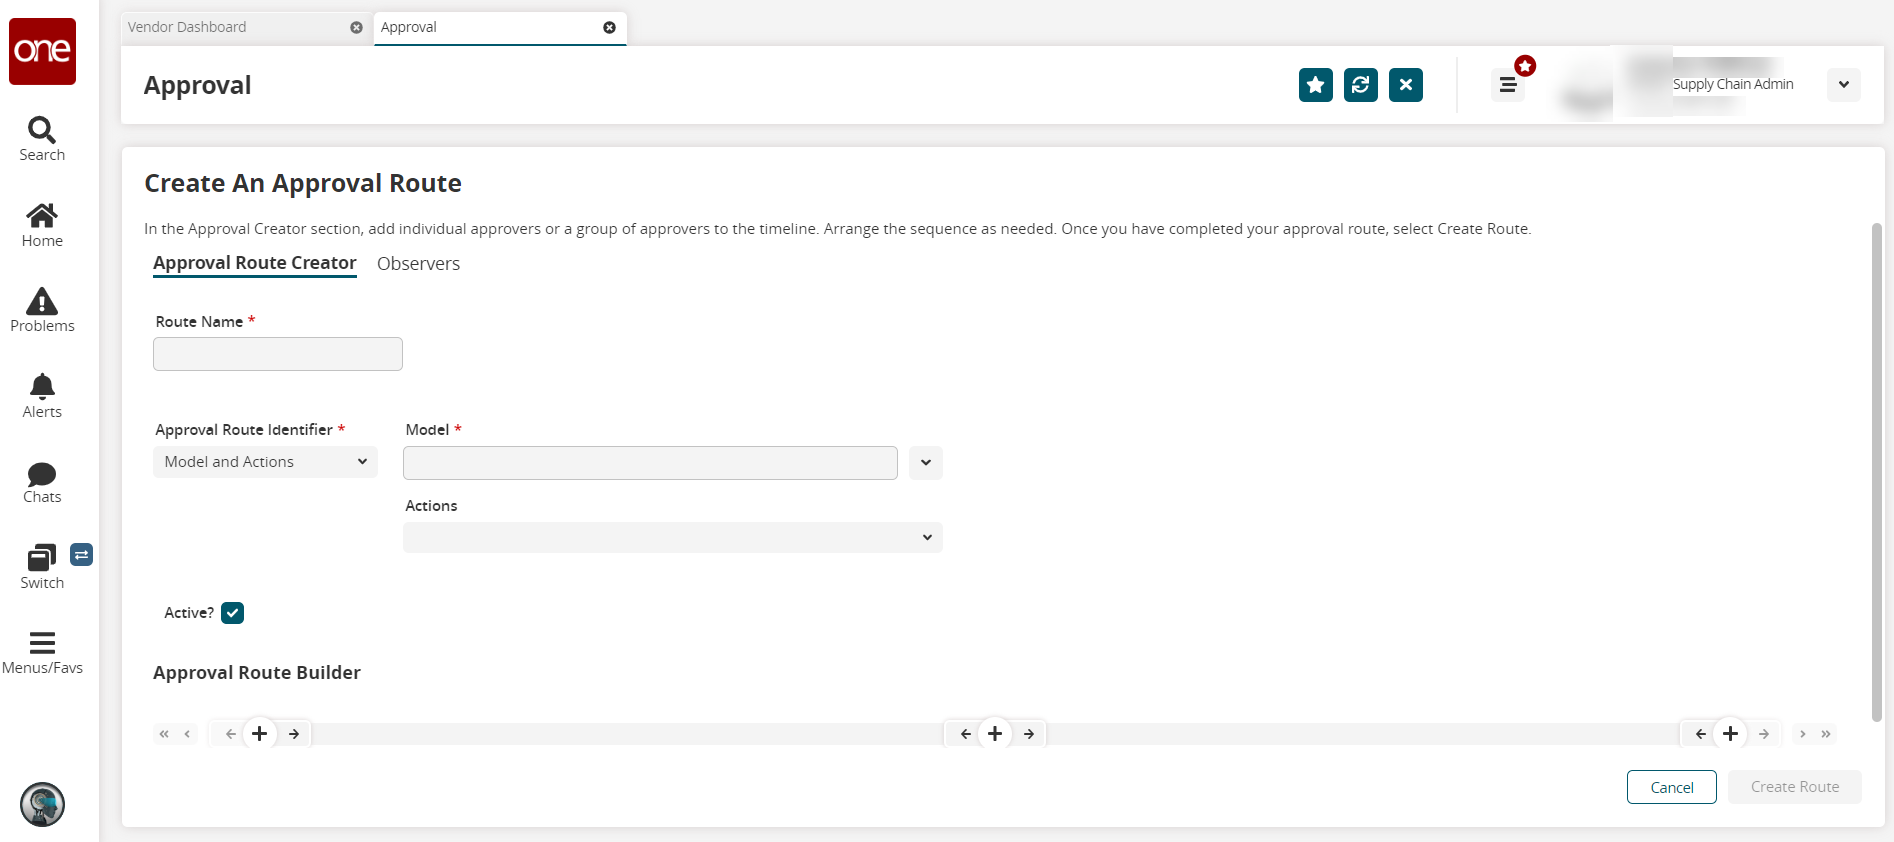
Enter values for the fields as described in the table below. Fields with an asterisk ( * ) are required.
Field
Description
Route Name *
Enter an approval route name.
Approval Route Identifier *
Select Models and Actions from the dropdown list to identify an order approval route.
Model *
Select Enhanced Order or Order for the model from the dropdown list.
Actions
Select an action from the dropdown list.
Active?
Check the box to activate or deactivate this approval route.
Click the + under the Approval Route Builder label and select any of the following options from the menu.
Click Add Single Approver.
The Select A User For Approval popup displays.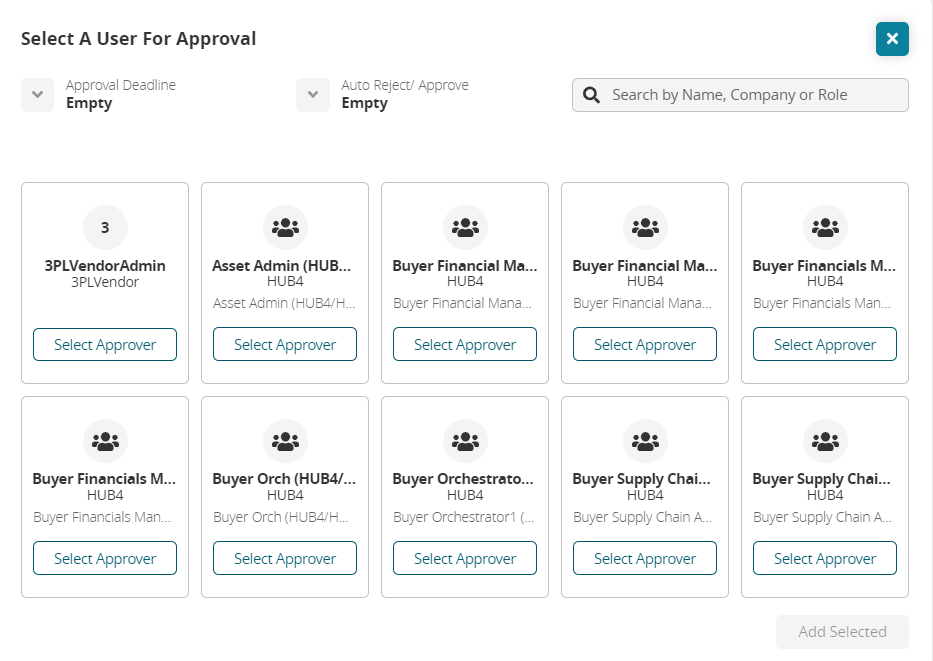
Select a value from the Approval Deadline dropdown list.
Select a value from the Auto Reject/Approve dropdown list.
Click the Select Approver button for a user.
The Add Selected button activates.Click the Add Selected button.
The user is added to the approval route.
Click Add Approver Group.
The Group Settings popup displays. Fields with an asterisk ( * ) are required.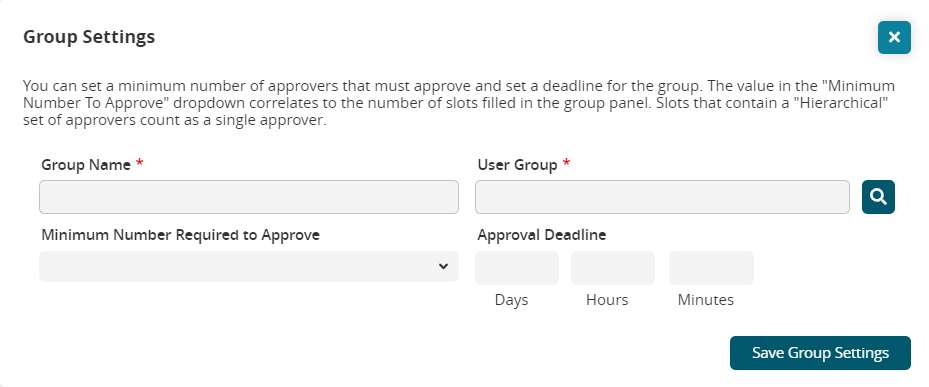
Enter a name for the group in the Group Name * field.
Use the picker tool to select a group for the User Group * field.
Select a value from the dropdown list for the Minimum Number Required to Approve.
Enter numerical values for Days, Hours, and Minutes for the Approval Deadline field.
Click the Save Group Settings button.
The group is added to the approval route.
Click Delete Step. This option is only available for the middle approval selection.
The middle option is deleted from the route.Click the outside double arrows or single arrows to navigate backward or forward to view the steps in the route.
Click the arrows on either side of the approver step to move that step to a different location in the route.
Click the three vertical dots to edit or delete an individual or group approver.
Click the Observers tab to add observers to the approval route.
The Observers tab displays.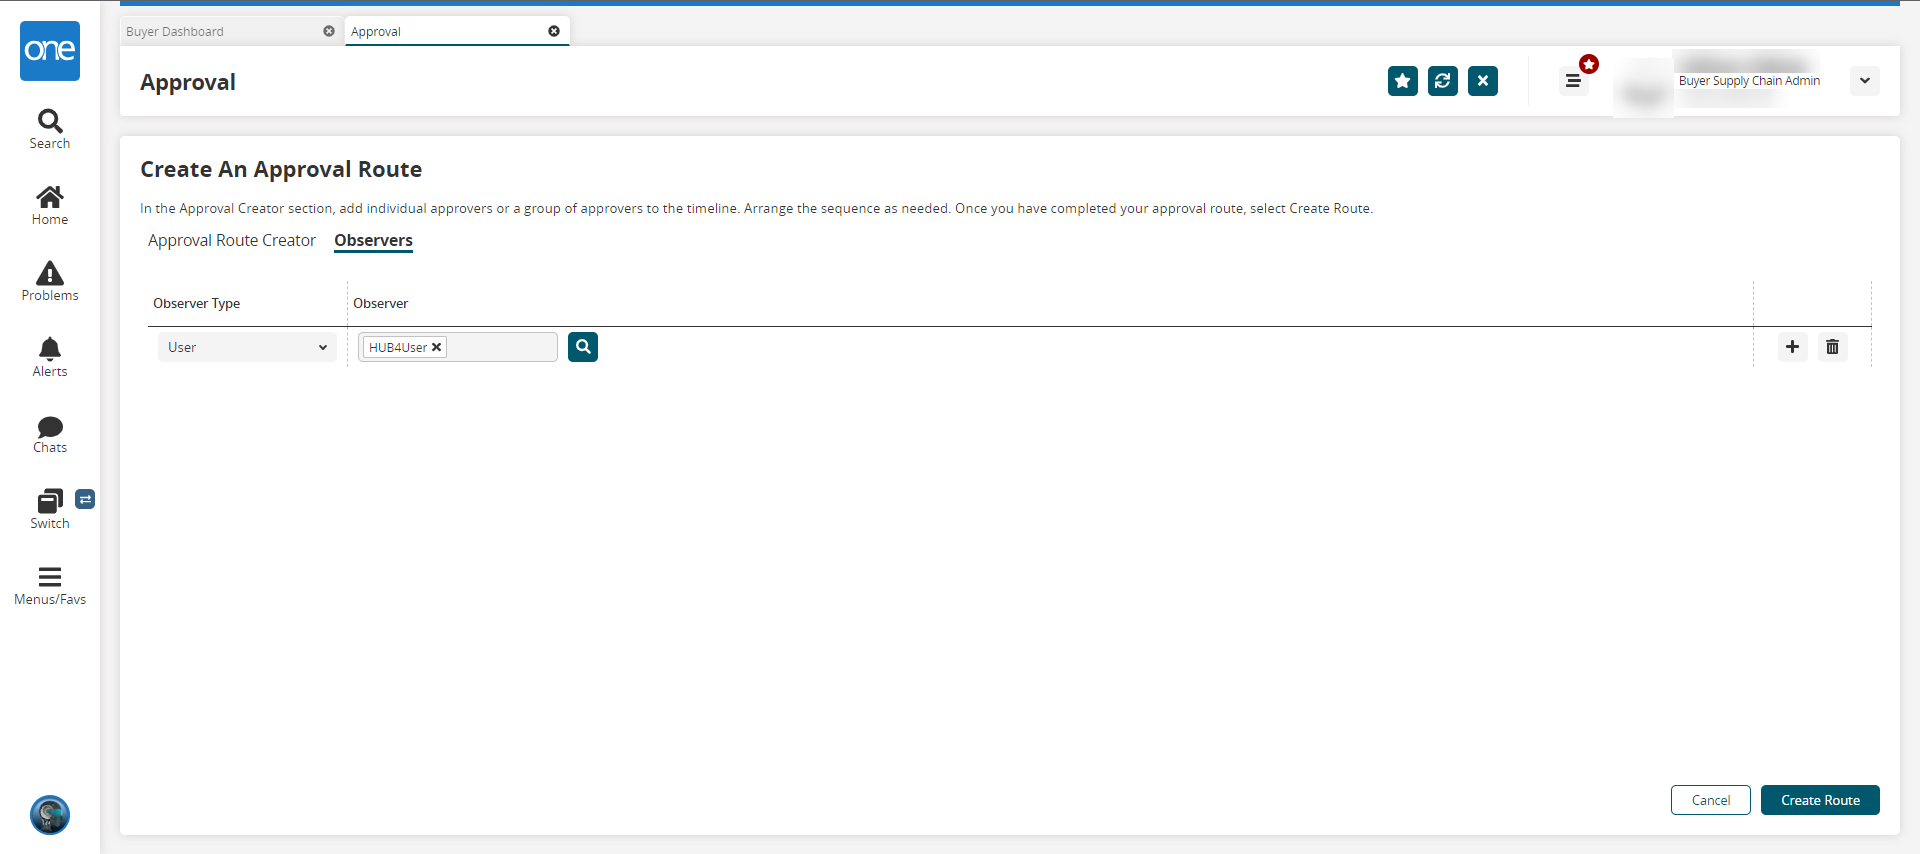
Select a type of observer to add from the dropdown menu in the Observer Type field.
Type or use the picker tool to select the specific value in the Observer field.
Click the + to add as many observers as needed.
Click the trashcan icon to delete an observer.
Click the Create Route button.
The new approval route displays in the table for the Approval Routes tab.
See the " Approval Route Framework UI for Order Approvals " section in the current version of the Release Notes for more information.