GLG: Scheduling Appointments for Shipments
Users can use the ONE network to schedule pickup and delivery appointments for assigned shipments and for non-controlled shipments. Instructions for a live pickup, a live delivery, and a drop delivery are provided below.
Schedule a Live Pickup Appointment
Complete the following steps to schedule a live pickup appointment:
L og in to the ONE system.
Use the Search icon on the left navigation panel or click Menu/Favs > Transportation > Search Shipments to locate a shipment. For more instructions how to search for a shipment, see the "Searching Shipments" section. In the NEO UI, users can click on the Menus/Favs icon on the left sidebar and type in the name of the screen in the menu search bar. For more information, see "Using the Menu Search Bar."
Locate the desired shipment.
Click the Live link located under the Pickup column.
The Create Live Pickup Appointment screen displays, showing the fields from the Reservations tab.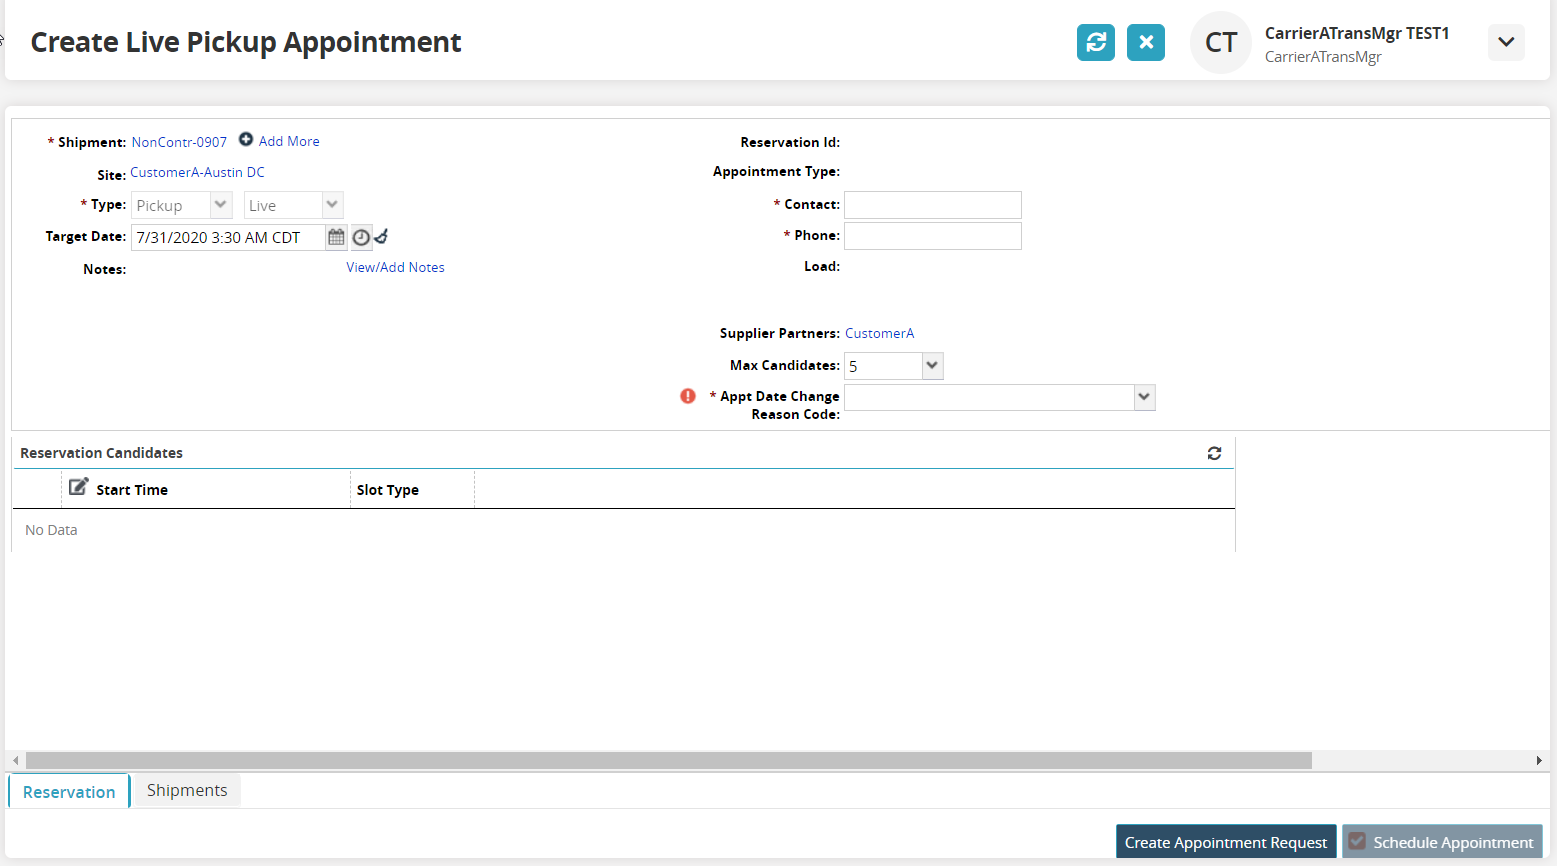
Fill out the following fields. Fields with an asterisk ( * ) are required.
Field
Description
* Shipment
This field auto-populates with a shipment number. Users can add more shipments by completing the following instructions:
a. Click the +Add More link.Site
This field auto-populates with a site name.
Target Date
This field auto-populates with the target date. If you need to revert back to the original target date, click the Reset Target Date icon
 .
.Notes
Click the View/Add Notes link.
Reservation ID
This field auto-populates.
Appointment Type
This field auto-populates.
* Contact
Enter a contact name.
* Phone Number
Enter a phone number.
Load
Supplier Partners
This field auto-populates.
Max Candidates
Select the maximum number of appointment candidates to display.
* Appt Date Change Reason Code
Select the reason code for making a date change from the dropdown list.
Appointment times display in the Reservation Candidates table. If there are no appointment times available in the system, the page shows "No Data." See Creating Appointment Requests for instructions. You can also request a new appointment if none of the available appointment times work.
On the Reservations tab, select the desired appointment time.
The Create Appointment Request button deactivates, and the Schedule Appointment activates.Click Schedule Appointment to schedule an appointment.
A green success bar displays and new action buttons are available at the bottom of the screen.
Scheduling a Live Delivery Appointment
Complete the following steps to schedule a live delivery appointment:
Locate the desired PO number located under the Shipment column.
Click the Live link located under the Delivery column.
The Create Live Delivery Appointment screen displays, showing the fields from the Reservations tab, which is located at the bottom of the screen.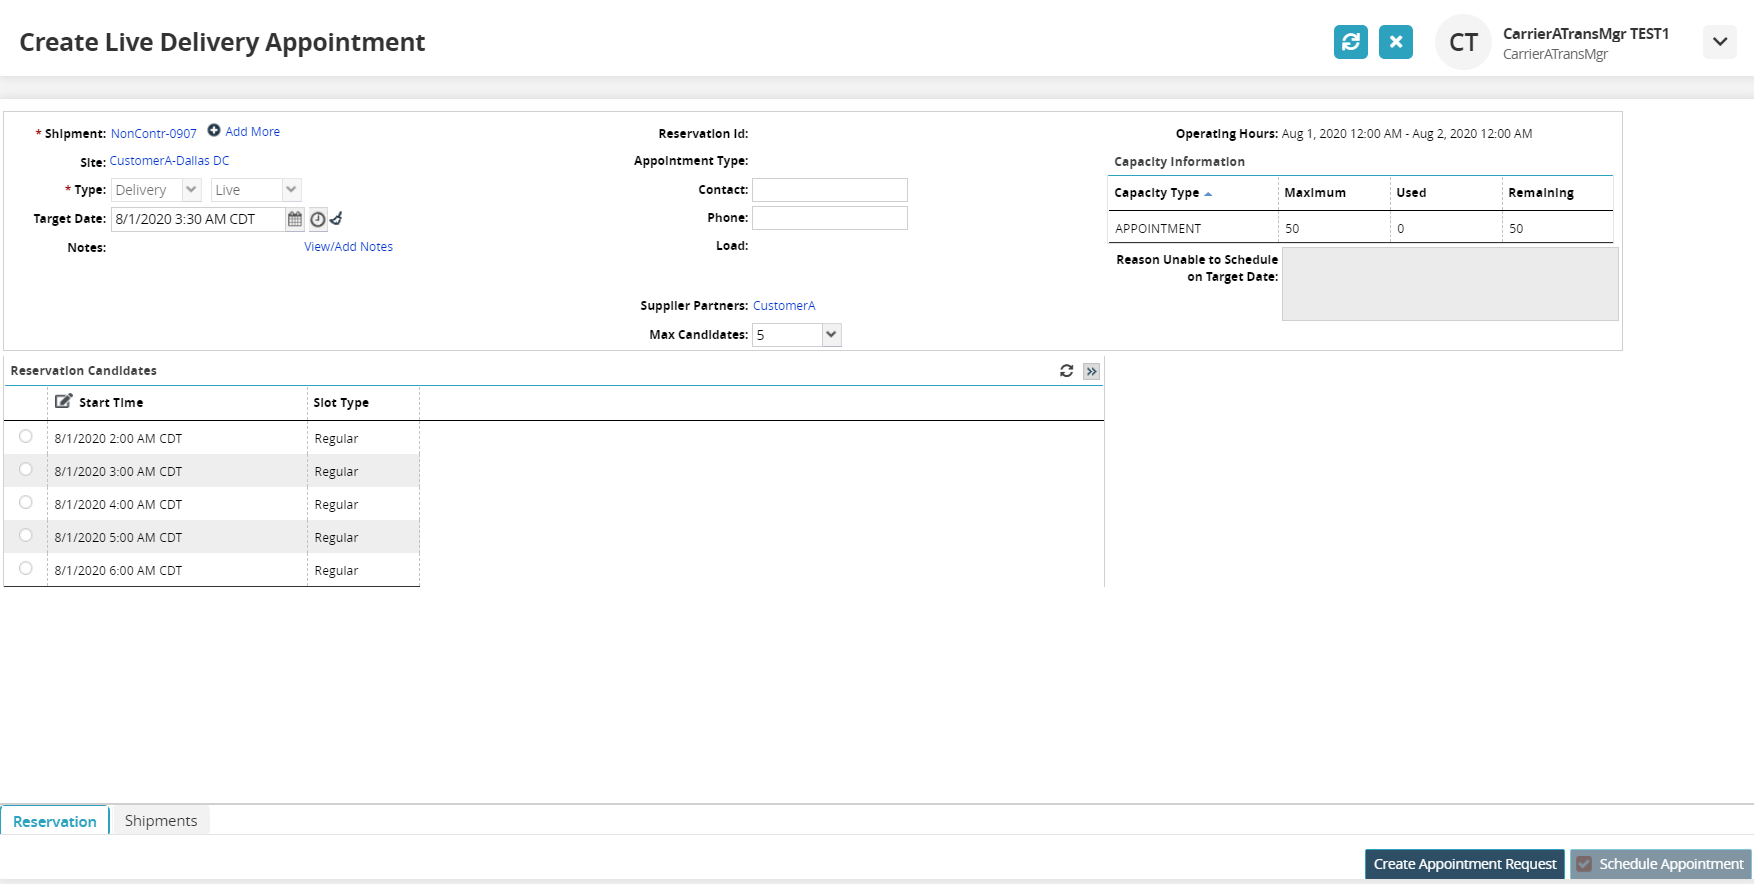
Select the Target Date using the calendar tool.
If you need to revert back to the original target date, click on the Reset Target Date icon
.
The appointments in the Reservations Candidates table update for the new target date.Input the information for the Contact and Phone fields.
In the Max Candidates field, select one of the choices from the dropdown list.
Appointment times display under Reservation Candidates. If there are no appointment times available in the system, the page shows "No Data." See the "Creating Appointment Requests" section for instructions. You can also request a new appointment if none of the available appointment times work.Click the Shipments tab if you need to review shipment information.
On the Reservations tab, select the desired appointment time.
The Create Appointment Request button deactivates, and the Schedule Appointment activates.Click Schedule Appointment to schedule an appointment.
A green success bar displays and new action buttons are available at the bottom of the screen.
Scheduling a Drop Delivery Appointment
Complete the following steps to schedule a drop delivery appointment:
Locate the desired PO number located under the Shipment column.
Click the Drop link located under the Delivery column.
The Create Drop Delivery Appointment screen displays, showing the fields from the Reservations tab, which is located at the bottom of the screen.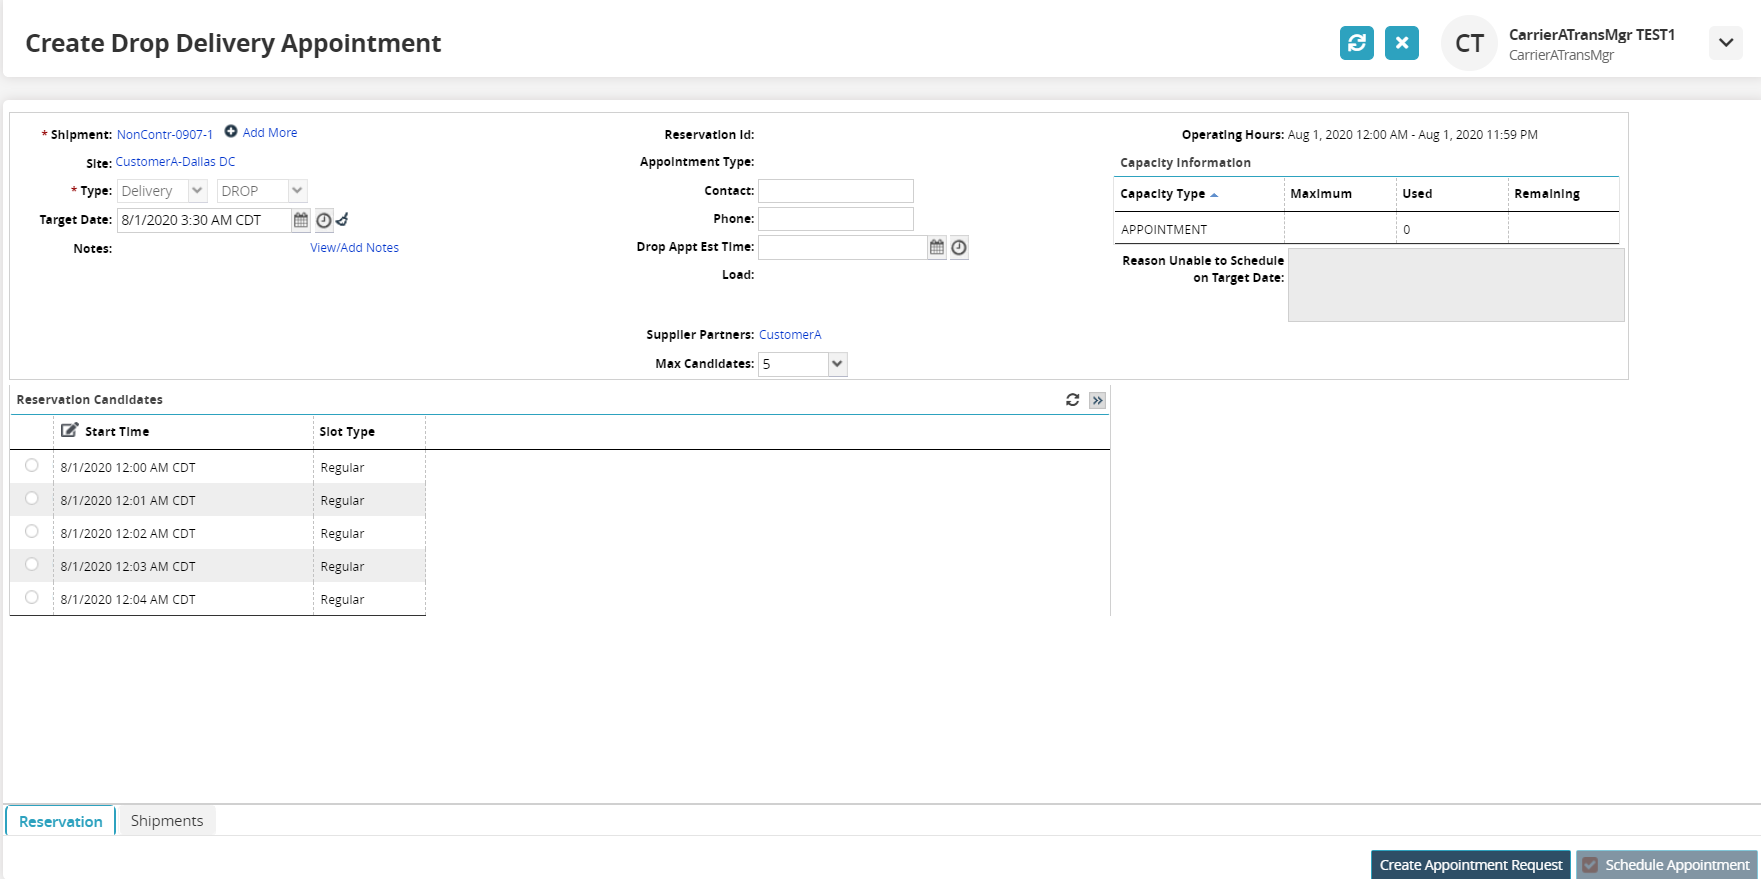
Select the Target Date using the calendar tool.
If you need to revert back to the original target date, click on the Reset Target Date icon
.
The appointments in the Reservations Candidates table updates for the new target date.In the Contact and Phone fields, enter the contact's name and phone number.
In the Drop Appt Est Date field, click the calendar and clock icons to select the date for the estimated drop appointment.
In the Max Candidates field, select one of the choices from the dropdown list.
Appointment times display under Reservation Candidates. If there are no appointment times available in the system, the page shows "No Data." See the "Creating Appointment Requests" section for instructions. You can also request a new appointment if none of the available appointment times work.Click the Shipments tab if you need to review shipment information.
On the Reservations tab, select the desired appointment time.
The Create Appointment Request button deactivates, and the Schedule Appointment activates.Click Schedule Appointment to schedule an appointment.
A green success bar displays, and new action buttons are available at the bottom of the screen.