Movement Shipment Report for Clients
Users can search for records by the order reference number and view the Movement Shipment report.
Complete the following steps to search records by shipment number:
L og in to the ONE system.
Click the Search icon on the sidebar.
The Search side panel appears.
From the Search By drop-down list, select Shipments - by Shipment No.
Enter the shipment number in the search field.
Click the Search Options expansion arrow.
Filter options displays.In the Retrieve For drop-down list, select a time range.
The available options are Last 30 Days, Last 60 Days, Last 90 Days, Last 4 Months, Last 6 Months, or Last Year.
Click Search to view the report.
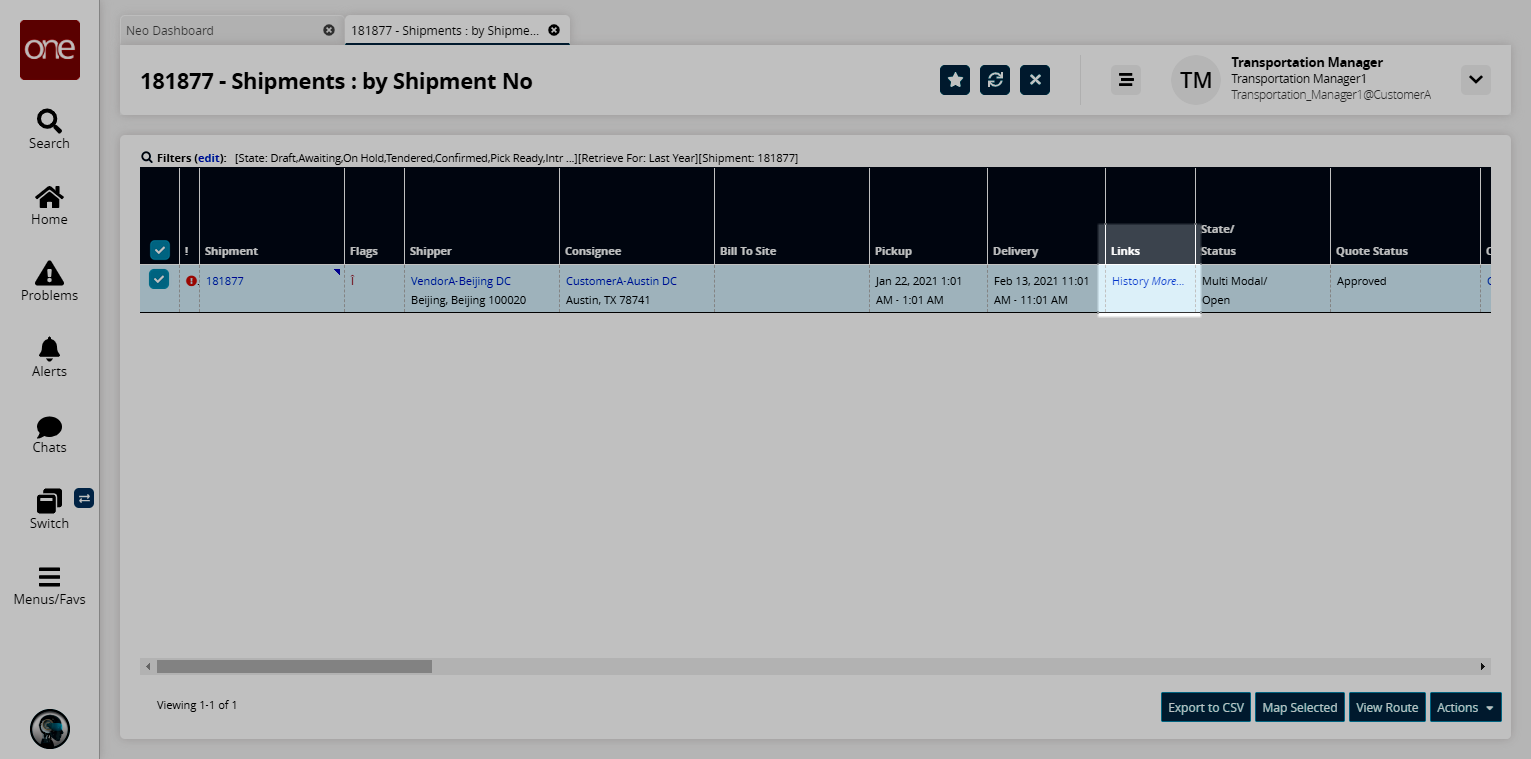
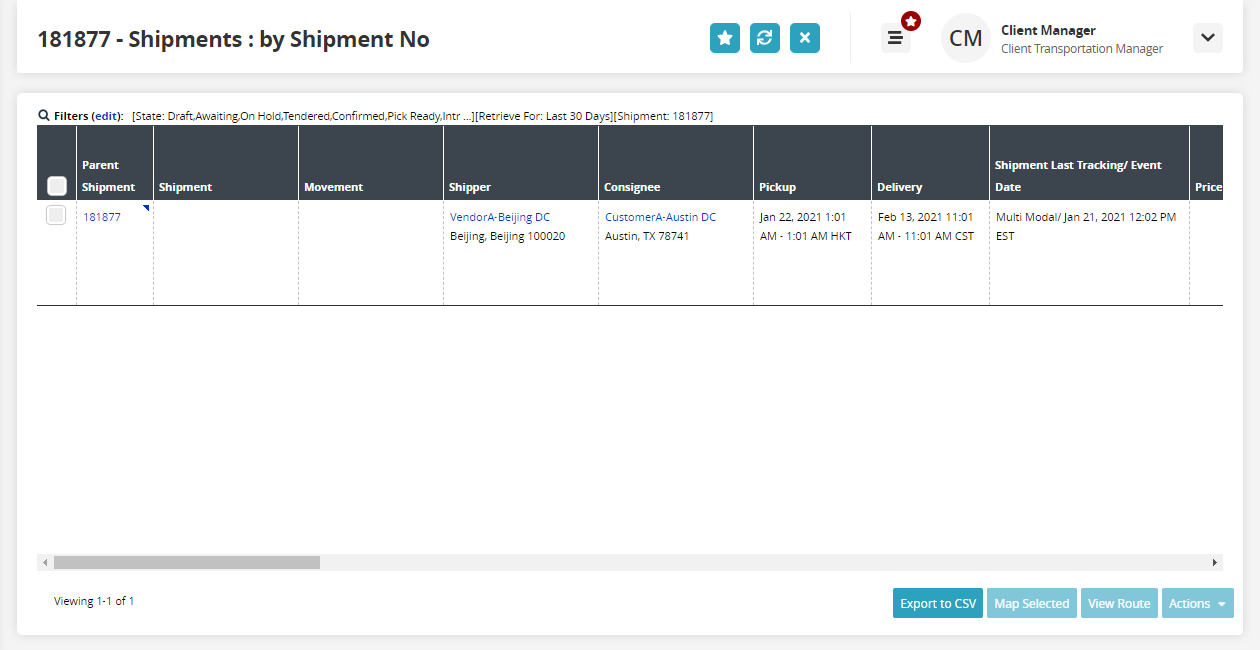
The shipment details screen appears.
Click the Filters (edit) link to apply search criteria to reduce the number of entries shown.
The Filters menu displays.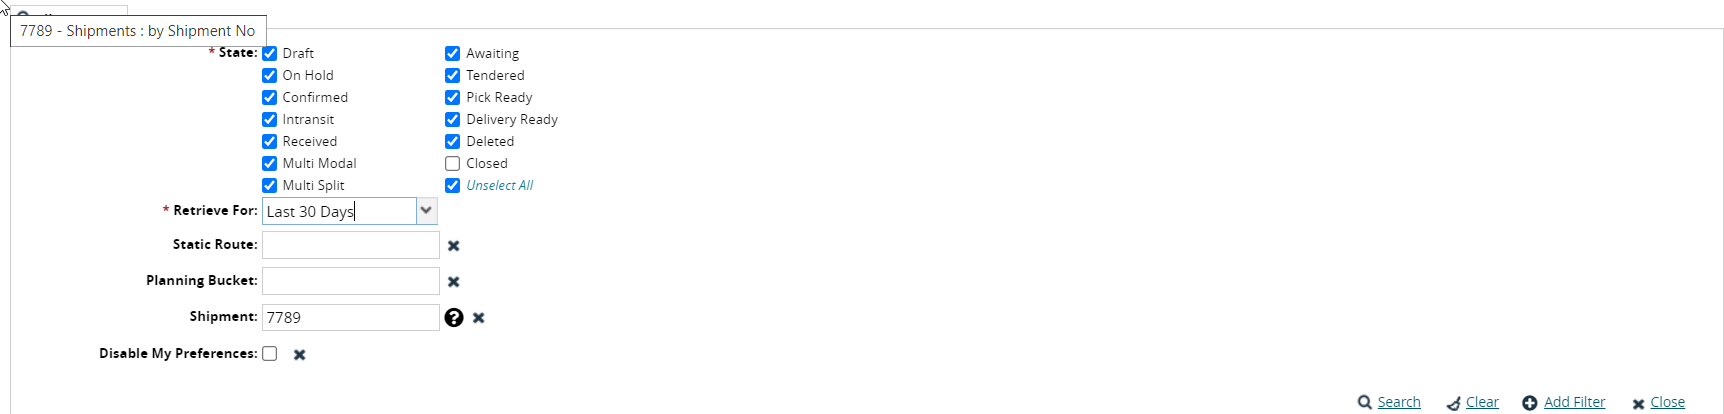
Enter values for fields described in the table below. Fields with an asterisk ( * ) are required.
Field
Description
*State
Check the box for any or all shipment states as a filter.
*Retrieve For
Select a time frame to retrieve shipments from the dropdown list.
Static Route
Enter a value for the static route.
Planning Bucket
Enter a value for the planning time frame (bucket).
Shipment
Enter the shipment number.
Disable My Preferences
Check the box to disable previously set preferences for the user.
To add more search filters, click the Add Filter link, and then click one or more filter options from the Add Filter list.
Fill out the filters as desired, and click the Search link.
The search results display.Click the Export to CSV button to export the report to a CSV file.
Click the checkbox for the shipment and click the Map Selected button to view the Geo View for the shipment.
The Geo View screen appears.Click the checkbox for the shipment and click the View Route button to view the routes for the shipment.
The route for the shipment displays.
Click the checkbox for the shipment and click the Actions button to select the desired action from the list.
Click the Shipment link to view the details of the shipment.
The shipment details screen appears.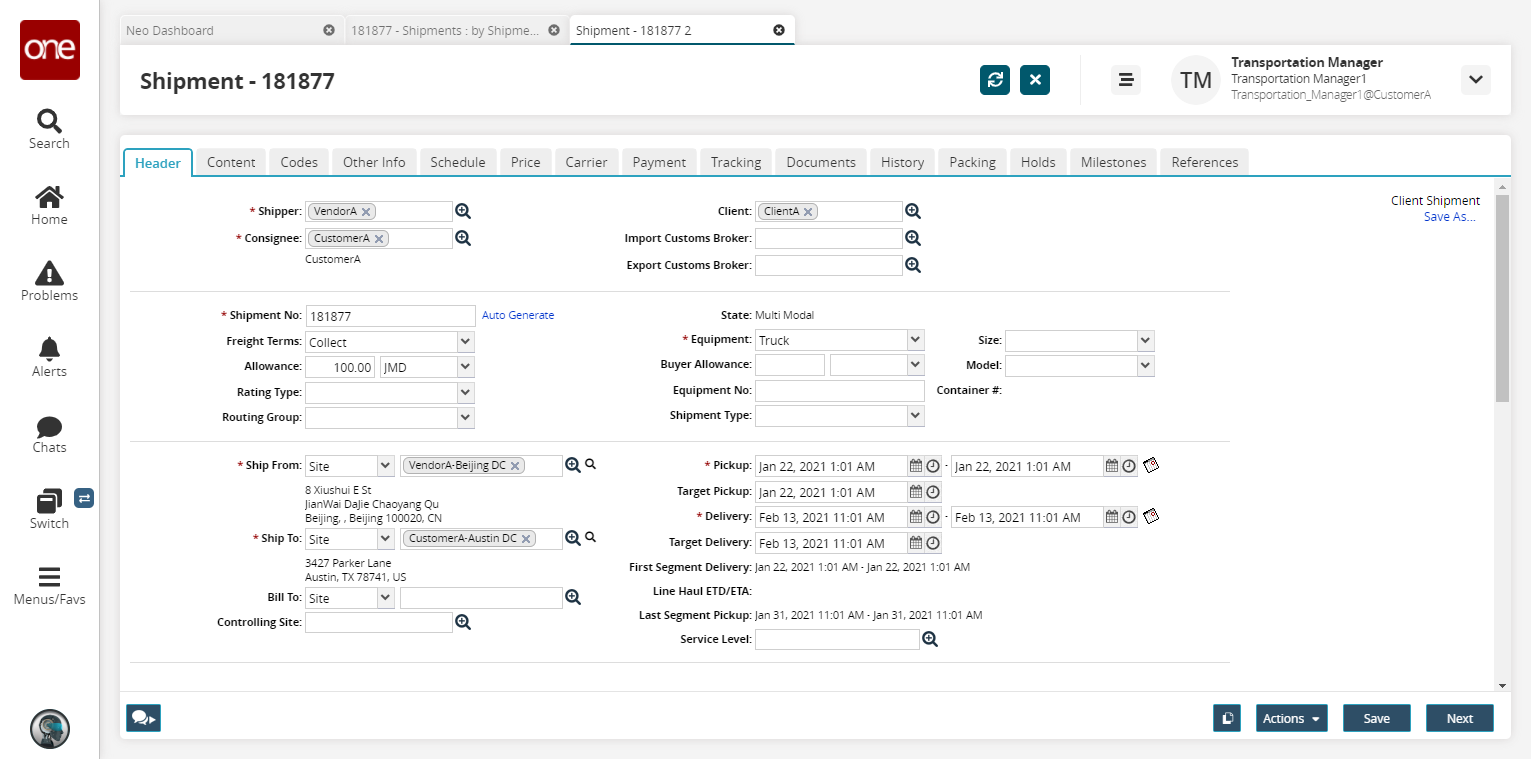
Scroll the page to the right, click the links under the Links, Tracking, Quote, Itinerary, and Container View columns to view the relevant details of the shipment.