Creating a New Integration Subscription
The UI below displays previously generated metadata through the studio. The Category combo box displays a list of Interface Groups to choose from. The user can pick an Interface and version from within that group.
Once the version is selected, the Event and Schedule Sections appear depending on the metadata configuration in Studio for that interface. All available actions are displayed in the event section for users to pick the ones needed.
"Execute As" is the user/role combination to execute outbound interface delivery. This User Association should have permission on the models with which the Outbound Interface works.
"Ignore Changes Made By" can be used when a particular user's actions should not trigger IntegrationSubscription to execute. For example, if "Ignore Changes Made By" is BookStoreAdmin, none of the Actions ( ZBKS.Create, ZBKS.Update, etc.) on the ZBKS.Book model trigger IntegrationSubscription execution.
The schedule section can schedule IntegrationSubscriptions to execute at a scheduled time. "Every Day" stands for daily execution at a given time. All times are interpreted in the server's time zone.
Complete the following steps to create a new integration subscription:
Log in to the ONE system.
Click Menus/Favs > Integration Subscription Group > Create Integration Subscription.
The Create Integration Subscription screen displays.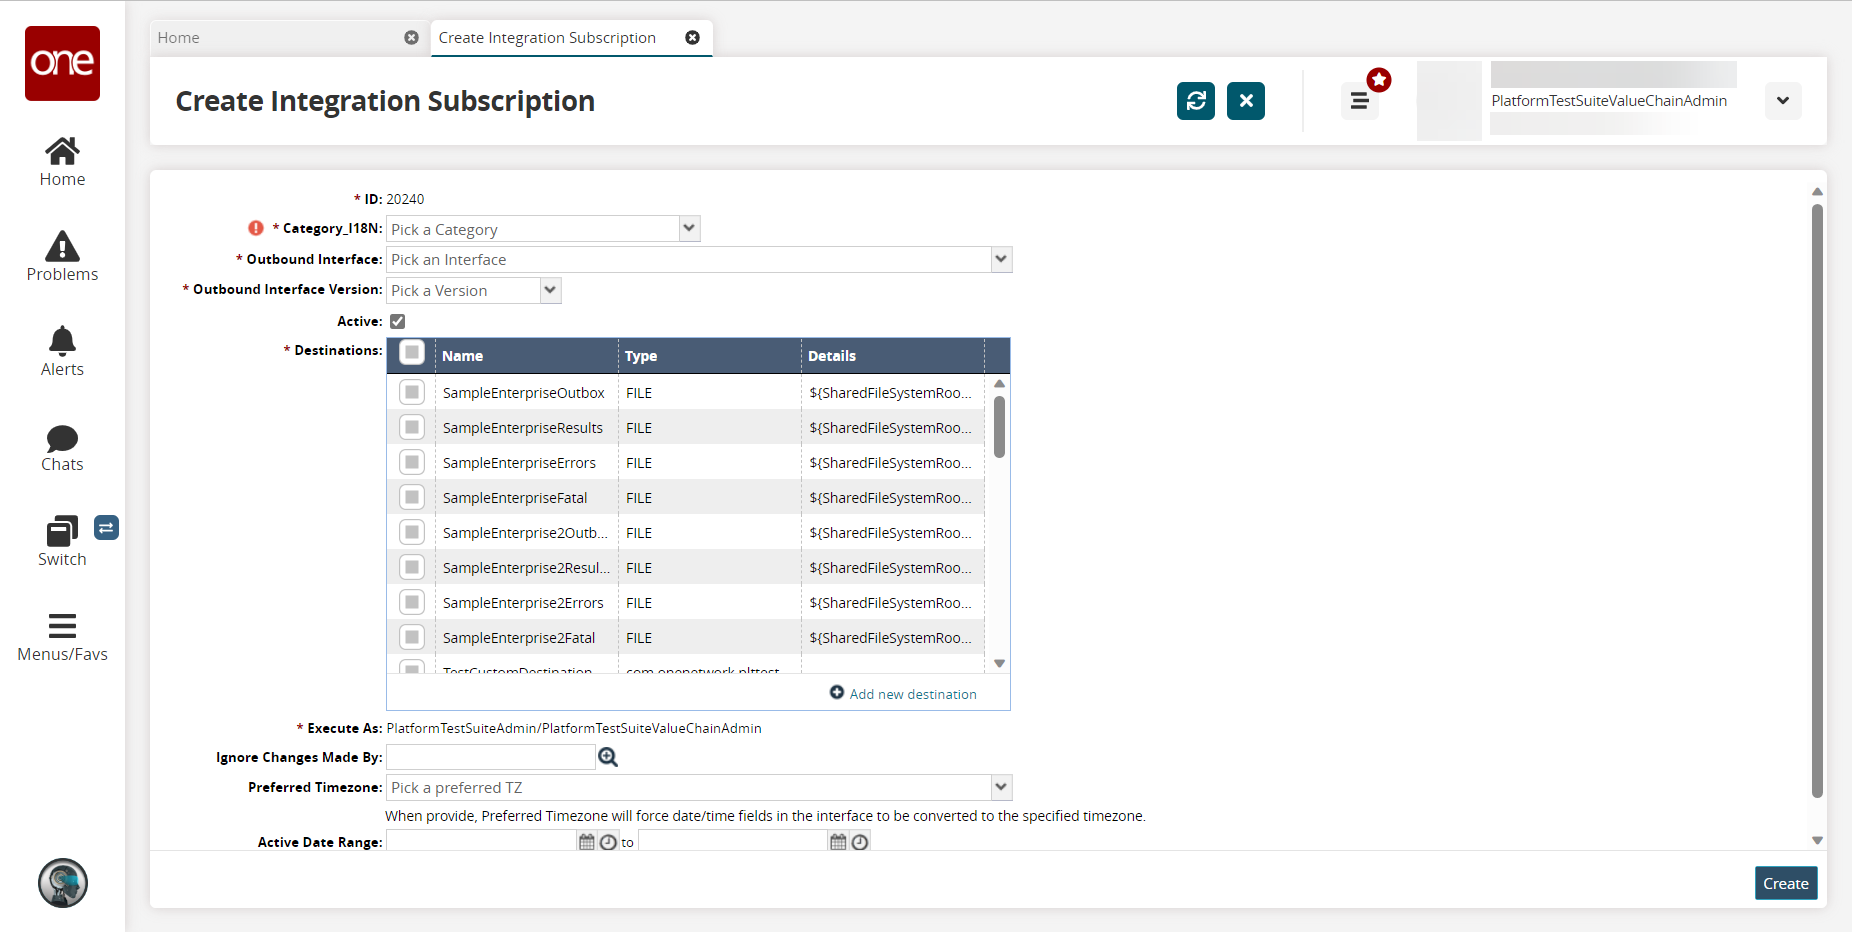
Enter values for the fields as described in the table below. Fields with an asterisk ( * ) are required.
Field
Description
* ID
The ID is automatically generated
* Category_I18N
Select a category from the dropdown menu to create a subscription.
* Outbound Interface
Select an outbound interface from the dropdown menu. The options vary based on the category selected.
* Outbound Interface Version
Select an outbound interface version from the dropdown menu. The options vary based on the category selected.
Active
Check the box to activate or deactivate the subscription.
* DestinationsSelect the checkbox from the list to select a destination, or click the Add new destination link to create a new message destination.
See the "Creating a New Message Destination" procedure in the Developer Network Documentation.
* Execute As
This field depends on the user's role.
Ignore Changes Made By
This field depends on the user's role.
Preferred TimeZone
Select a preferred time zone from the dropdown menu.
Active Date Range
Click the calendar and time icons to select the active date range.
Click Create.
A success message displays.