Implementing a Model Form
We've already seen how you can create forms using User-Defined Pages, but that framework is limited because it's almost primarily done through the UI. If you want to create model form screens relatively fast but also add in some custom logic, you may want to try the Model Form framework.
When opening a model detail screen via a model link or hyperlink from a report, the User-Defined Pages framework will take precedence over the Model Form framework and custom screens. In other words, if I click a link to a ZBKS.Book detail screen and there's a User-Defined Page for ZBKS.Book that matches my User Context, it will open that screen rather than any screen that's been registered for ZBKS.Book with One.PageMgr.regDetail(). (The One.PageMgr.regDetail() function is discussed below.)
Model Forms are implemented through a combination of two artifacts:
You configure Actions and Views in the MPT to govern what fields are sent from the server to the UI, what fields are editable, etc.
You write JavaScript classes to register the model form and do additional customization, for example laying out the fields in a single or two-column layout, adding separate sections, etc.
To begin our example, we'll start with the JavaScript configuration.
Create a new file called "BookDetail.js" in the web/public/jsmodules/ directory of Bookstore. This will be our "JavaScript module" for the Book detail page.
Place the following code in this file:
define(function(){Ext.ns("ZBKS");ZBKS.BookDetail = Ext.extend(One.model.ModelFormContainer, {modelInfo: {customModelName:'Standard ZBKS.Book'},createActionName:'ZBKS.Create',detailViewName:'ZBKS.BookFormDetail',detailConfig: {auditTrailButton:true}});});This script effectively states that:
We are creating a javascript module ZBKS/BookDetail containing class ZBKS.BookDetail which extends a base "ModelFormContainer" from the Platform
This will be used for the custom model "Standard ZBKS.Book". (We will discuss custom models more later, but for now you should be aware that there is a "Standard" custom model for every model you design in your module. Thus for ZBKS.Book, we have "Standard ZBKS.Book".)
There should be an action in the MPT called
"ZBKS.Create" which we will use when creating Books. (In fact, we already created that action in the MPT earlier in the tutorial.)
There should be a View in the MPT called ZBKS.BookFormDetail which will be used to display the Book in read-only mode. (We will create this momentarily.)
Detail pages (pages in read-only mode) should display an Audit Trail button, which we'll elaborate on later.
Now that we've created the js module containing our detail page, we need to register it.
JavaScript modules are not loaded on every page - they are only loaded when they are specifically needed, using the require.js framework. That means we need to tell others what module to load when they want to show the detail for a book.
To achieve this, we should add the following line toweb/public/GlobalRegistry.js. This contents of this file (and any others you add inbuild.jsb) are included into a singleinstance.jsthat is loaded on every page in the application.
One.PageMgr.regDetail('ZBKS.Book','ZBKS.BookDetail');Because it is loaded by every page, you should minimize the content of this as much as possible, keeping the lion's share of your JavaScript code in require.js modules like BookDetail.js!
With either js file open, click the submit button. This will deploy all your JavaScript changes (not just the current file) to the server.
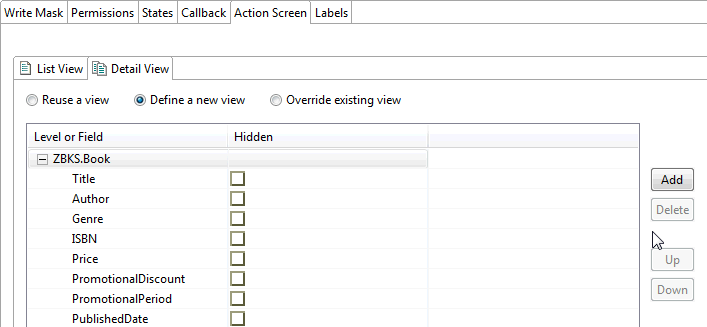
Next let's open the MPT, navigate to Book in the Outline view, go to the Actions tab and select the ZBKS.Create action you added earlier. Navigate to the Action Screen > Detail View within this action. Here you should add some fields to the Book for editing purposes. (Choose any fields you like.)
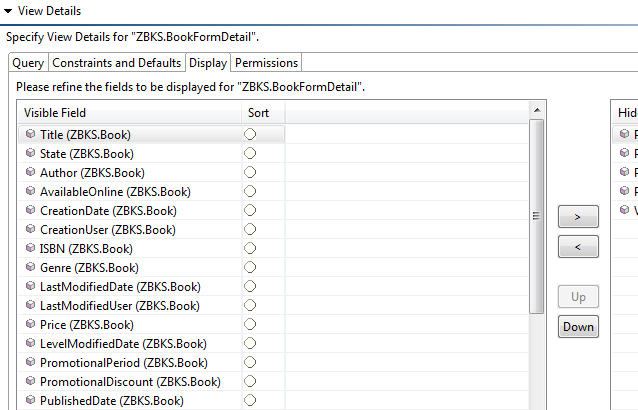
Next, navigate to the Views and add a view called BookFormDetail of type Detail. Add some retrieval fields, and give permission to ZBKS.SampleRoleType. (This might not work if you already created a "User-Defined Page" for Book, as that takes precedence over the model form. To continue with this exercise, either delete the user-defined page for Book or setup different criteria in its Page Rule so it won't be matched.)
When you're done, submit the MPT.
Now that the model form is registered, if you search for Books using the Books by Title view, you will see that the book title is now available as a hyperlink. Pressing that link should show a detail page that corresponds to the fields you chose in you ZBKS.BookFormDetail View.
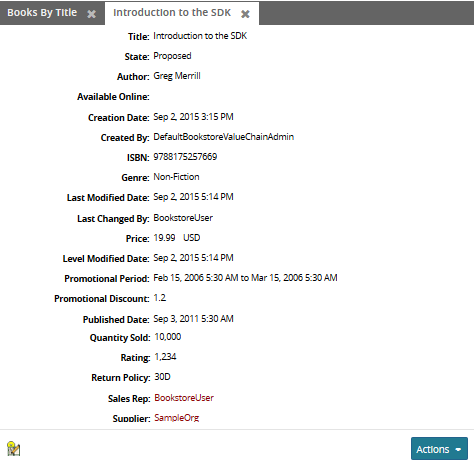
You'll notice on the left side of the toolbar for this page, there is an icon:
This button opens the audit trail for the instance, which allows you to see changes to fields on the model when actions are executed. Before we do that, we need to create an audit trail view. Open the MPT and navigate to Book in the Outline view.Check the Audit Enabled check box for the model:
Then save the MPT and submit it.Navigate to the Views tab and add a view of type Audit Trail View. The name is not important, so you can just call it AuditTrail:
Select a few fields to retrieve for the view, and on the Permissions tab, give access to ZBKS.SampleRoleType. Then save the MPT and submit it.After submitting the MPT, the icon should open the audit trail in a new tab and it should display a grid of changes to the model instance. It should be empty right now, but if you execute actions on any of the Book instances, you should see the change history in the audit trail tab.
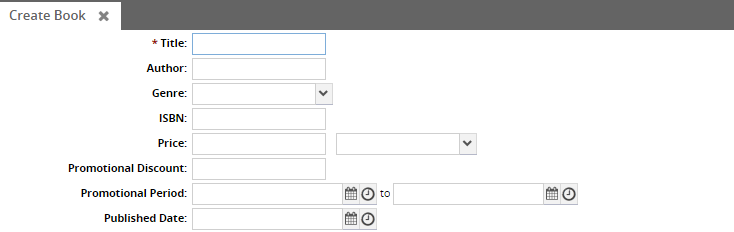
But how do we show the Create form for the book? To do this, we add a UI Meta Model entry for the WebAction:
<WebActionname="CreateBook"><PanelOptions><PanelClass>ZBKS.BookDetail</PanelClass></PanelOptions></WebAction>... as well as for the WebActionRef ...
<WebActionRefname="CreateBook"/>Make these changes, submit the MPT, reload the UI and create a new book to test it out.
Finally, you can make other actions available on your detail page. Try configuring the Action Screen's Detail View for the ZBKS.Publish action. This should make that action available on the detail page for books in the Proposed state.