Procedure 16.5. Processing an Inbound EDI
Create an Inbound Interface
Platform uses Inbound Interfaces to consume data in EDI format.
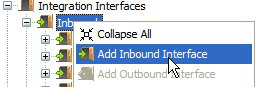
Open your MPT and navigate the Outline view to Inbound Interfaces. Right-click and press "Add Inbound Interface".
For this example, we will create an Inbound Interface to process an inbound X12 EDI 850 (Purchase Order). Choose format type as EDI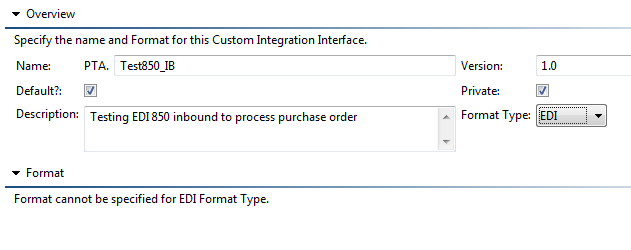
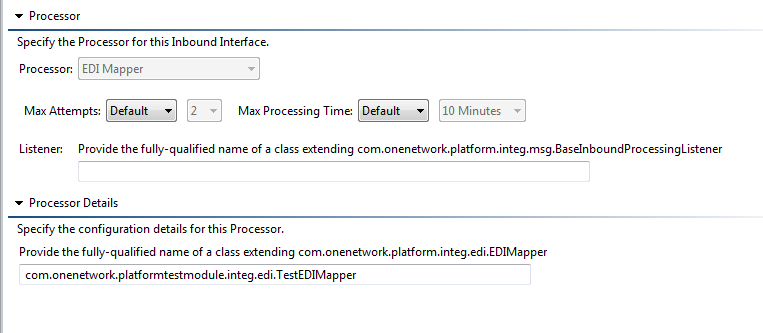
Configure the mapper to process the EDI
The inbound EDI will need a mapper which can traverse through the EDI segments and data elements and convert it to a model. So, the processor tab has an option to specify the fully qualified name of the mapper which will be used to process the EDI.
Setup the MessageSourcePoll
The EDI has to be processed through Platform framework that parses the EDI and validates it before passing it to the actual EDI interface and mapper. For this, the message source poll entry for the message source should have inbound interface as PLT.ConcatenatedEDI_IB V1.0.
Setup the EdiInboundRoute
Platform uses the EdiInboundRoute to determine the inbound interface/mapper to use to process the valid EDI.
The EdiInboundRoute consists of the Sender details and Receiver details along with the transaction type, interface, Edi version and the inbound Message Queue to use. Message Queue details are optional. It will be required in case more than one version of same Interface name is used by same Sender/Receiver, and in that case, the EdInboundRoute matching the inbound queue takes precedence. Similarly, Edi version is also optional. The route matching the Edi version in the file will be taken into precedence if it is present.
The route is determined using the sender/receiver info along with the transaction set number, Edi version, and Message Queue using one of the following :
Transaction set number/EDI message type (ex: 850) + Message Queue + Edi Version + Sender ID + Receiver ID on functional group
Transaction set number/EDI message type (ex: 850) + Message Queue + Edi Version + Sender ID + Receiver ID on Interchange control
Transaction set number/EDI message type (ex: 850) + Message Queue + Edi Version
Transaction set number/EDI message type (ex: 850) + Message Queue
Transaction set number/EDI message type (ex: 850) + Edi Version
Transaction set number/EDI message type (ex: 850)
Load the EdiInboundRoute using PLT.EdiInboundRoute_IB interface. Use interface version 2.0 if queue details are also provided in the EdiInboundRoute.
Example :

Converting an EDI transaction set to ModelList
Platform uses the EdiInboundRoute to find the EDIMapper to be used for processing the EDI transaction set. The mapper implementation must override the public ModelList parse(TransactionSet ts) method to traverse through the EDI and create a ModelList object along with the action to be used.
Sample implementation of the parse method in EDIMapper—
@OverridepublicModelList parse(TransactionSet transactionSet) {/*This has to be com.onenetwork.platform.common.ModelList to retain backward compatibilitywith older modules using PLT's EDI framework.*/ModelList modelList =newModelList();modelList.setActionName("PLT.Create");modelList.setCustomModelName("Standard Order");modelList.setError(null);modelList.setValueChainId(getMessagingContext().getUserContext().getValueChainId());Order order =newOrder();Table headerTable = transactionSet.getHeaderTable();Segment bakSegment = headerTable.getSegment("BAK");order.setOrderNumber(bakSegment.getDataElementValue(3));order.setValueChainId(getMessagingContext().getUserContext().getValueChainId());order.setCreationEnterpriseName("SampleEnterprise");order.setCreationOrganizationName("SampleOrg");modelList.add(order,"http://www.onenetwork.com/Platform");returnmodelList;}Sending Functional Acknowledgment for an inbound EDI
A functional acknowledgment is a response to another EDI transaction. In X12 format, "997" is the transaction identifier used for acknowledgments. In EDIFACT, is it "CONTRL".
The functional acknowledgment is used to indicate the acceptance/rejection of an EDI based on its validity and conformance to the standard format. It uses 3 codes to represent the Ack status -
A for Accepted
R for Rejected
P for Partial Acceptance (indicating that one or more transaction sets had errors but at least one was accepted)
Platform parses an inbound EDI and validates it against the standard format and sends a 997/CONTRL in response to an inbound EDI.
The FA(functional acknowledgment) is at the interchange level and can Ack multiple transaction sets. The parent transactions are marked as Accepted/Rejected accordingly.
Using X12 997 as an example, AK2 has the parent transaction identifier and transaction set number while AK1 has the functional group identifier and number. AK5 indicates the Ack status of the transaction set and AK9 indicates the Ack status of the functional group.
Figure 16.1. Sample 997 for Acceptance
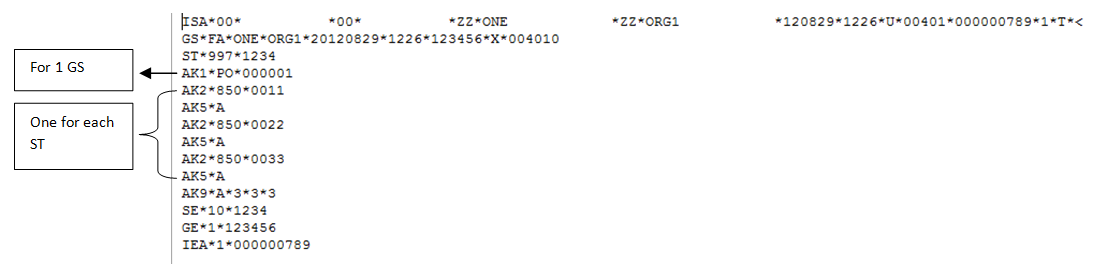
Figure 16.2. Sample 997 for Rejection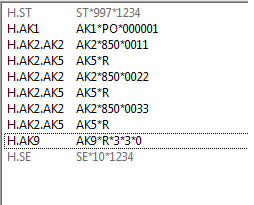
Figure 16.3. Sample 997 for Partially Accepted