Loading Models
Now that the custom definition is in place, you can send a request to the server to create an instance of Book in the system using a process called "loading data."
Right-click on the data/ directory under the Bookstore_dataset in the Package Explorer, point to New, and then click File:
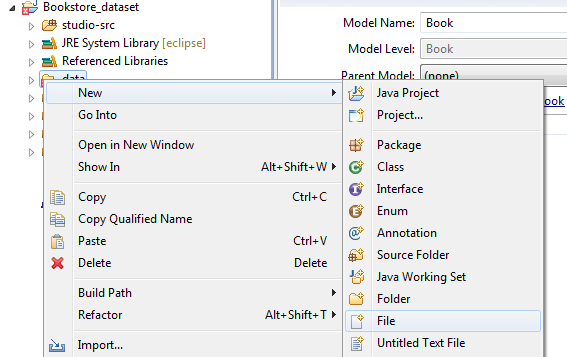
Name the file Books.xml.
In the new file, paste this text and save it: (You can click the "view source" icon in the top-right of the code snippet below to get plain text to more easily copy and paste.)
<ModelList xmlns="http://www.onenetwork.com/Platform" xmlns:vc="http://www.onenetwork.com/Platform"><ValueChainId>9123</ValueChainId><CustomModelName>Standard ZBKS.Book</CustomModelName><ActionName>ZBKS.Create</ActionName><Book xmlns="http://www.mybooks.com/Bookstore"><ValueChainId>9123</ValueChainId><Title>Introduction to the SDK</Title><ISBN>9788175257669</ISBN><Author>Greg Merrill</Author><Publisher>One Network Publishing Inc.</Publisher><PublishedDate>2021-01-25T00:00:00-00:00</PublishedDate><PublisherAddress><vc:Country>US</vc:Country><vc:Component Type="STREET1">4055 Valley View Lane</vc:Component><vc:Component Type="STREET2">Suite 400</vc:Component><vc:Component Type="CITY">Dallas</vc:Component><vc:Component Type="STATE">TX</vc:Component><vc:Component Type="ZIP">75244</vc:Component></PublisherAddress><PublisherWebsite><a href="http://www.onenetwork.com">www.onenetwork.com</a></PublisherWebsite><QuantitySold>10000</QuantitySold><PriceAmount>19.99</PriceAmount><PriceUOM>USD</PriceUOM><PromotionalPeriodStartDate>2006-02-15T00:00:00-00:00</PromotionalPeriodStartDate><PromotionalPeriodEndDate>2006-03-15T00:00:00-00:00</PromotionalPeriodEndDate><Rating>9.7</Rating><ReturnPolicy>P30D</ReturnPolicy><SalesRepName>BookstoreUser</SalesRepName><SalesRepEnterpriseName>SampleEnterprise</SalesRepEnterpriseName><Genre>Non-Fiction</Genre></Book></ModelList>Open Bookstore_dataset/data/LoadData.xml and add this line at the end just inside the LoadData tag: <ModelFile>data/Books.xml</ModelFile> and save it. Essentially what we're doing is adding a new Book instance to our dataset, and referencing it from the LoadData.xml file, which gets processed while executing load-data.
Now execute the load-data target in the Bookstore_dataset:
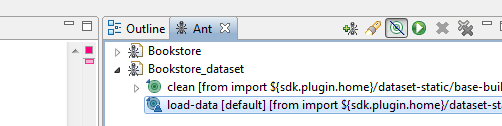
We'll be able to verify that our Book instance has been created in the database in the next section. For now, just verify that you see the BUILD SUCCESSFUL message after executing load-data.