UI Metamodel
The UI Metamodel is an XML-based configuration file used to construct the menus on the screen. Its entries control the visibility and function of menu elements based on permissions and roles defined within your module. Every aspect of the NEO Dashboard's menu is controlled using this file. The UI Metamodel does not contain configuration information for layout, colors, logos, and so on. This is all handled by cascading style sheets (CSS) and is completely separate from the UI Metamodel.
The UI Metamodel can be defined either at the module level or at the dataset level. A dataset UI Metamodel can inherit all or some of the actions, folders, or menus defined in the modules it references. Let's take a look at the UI Metamodel in both the MPT and SPT settings.
Within the Module Process Template, you can find the UI Metamodel within the file tail.mptt. The tail.mptt file is an XML file that contains much more than the UI Metamodel definition. As such, the metamodel information is stored under a node within tail.mptt called <ModuleUiMetaModel>. While it's possible to edit this file directly, this is not recommended. Studio has a validating editor for the UI Metamodel, which will immediately alert you if errors are introduced into the file.
Complete the following steps to view and edit the UI Metamodel entries for your MPT:
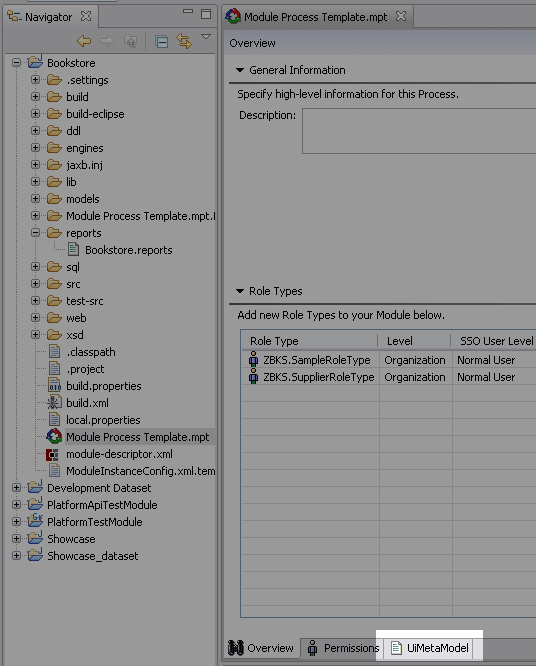
From within Studio, Open the MPT for your application
Locate the UIMetaModel tab
Within the UI Metamodel, make one entry for each widget similar to the following example:
<NeoWidgetTypename="TotalSpentByCategory"componentPath="PLT/Widgets/PivotWidget"><PreviewImagePath>/oms/img/neo/widgets/pivot/pivot2.png</PreviewImagePath><Config>{"reportName": "EXTR.TransactionsByCategory","editableFilters":true,"showFilterSummary": true,"pivotConfig": {"toolbarEnabled": true,"hideChartConfigPanel": false,"options": {"configuratorButton": true}}}</Config></NeoWidgetType>On this line, you should specify the widget's name within the context of the UI meta-model. Normally you just use the regular name of the widget.
The following is an explanation of the parameters:
AllowedLayouts = This defines how the widget can be added to Neo dashboards.
PreviewImagePath = This defines a path to an image that the user sees when choosing the widget to add.
Config contains JSON formatted settings specific to this type of widget. For our analytical (pivot) type widget, these are:
reportName = The name of the report which defines the data
editableFilters = Whether or not to allow the user to change the filters in the user interface
showFilterSummary = Whether or not to show a summary of the filters underneath the widget's name
pivotConfig
toolbarEnabled = Whether or not to display a pivot toolbar at the top of the widget
hideChartConfigPanel = Whether or not to display a filter toolbar above the widget's graph
options
configuratorButton = Whether or not to show an array-shaped button which allows the users to change pivot settings
filters = A set of named default filters that will be applied to the filter panel and report when generating the pivot.
Add a NeoWidgetTypeRef to our NeoWidgetCategory
Underneath the last NeoWidgetType element, find the NeoWidgetCategory element we created earlier. We named it "KPI Widgets".
Add a new NeoWidgetTypeRef for our Analytical (Pivot) widget.
<NeoWidgetCategory name="KPI Widgets"><RoleTypeRef><IntrinsicRoleType>EXTR.SampleRoleType</IntrinsicRoleType></RoleTypeRef><NeoWidgetTypeRef name="MoneySpent"/><NeoWidgetTypeRef name="TotalSpentByCategory"/></NeoWidgetCategory>
The UI Metamodel within the Module allows you to control the module's user interface elements for that module. As with all other aspects of the module's dataset, the UI Metamodel within the dataset allows you to further customize UI features in cases where you need to deploy additional module instances. For example, you have two customers who need different customizations to the module's user interface. Such customizations belong at the dataset level since they do not affect the entire application—only the current applied instance. This allows you to develop a module and then customize it for different customers without creating branches of your module's source tree. Let's next take a look at opening the UI Metamodel within a dataset.
Press Ctrl + Shift + R within Studio to bring up the Open Resource Dialog.
Type UIMetaModel.xml to narrow the list in the Open Resource Dialog. There will be one entry for each dataset you currently have open in your Studio workspace.
Double-click the desired file to open it.
Aside from the obvious difference in the location of the UI Metamodel in the MPT and SPT environments, the format of the UI Metamodel entries is the same for both files except for the root. The UI Metamodel within the dataset has the root element <UiMetaModel> instead of <ModuleUiMetaModel>. The remainder of this section will focus on the various configurable entries with the UI Metamodel in the MPT.
In all cases throughout this chapter, we are assuming the use of NEO Dashboard as custom user interface development is beyond the scope of this user's guide.