Viewing the Pipeline Execution History for an Outbound Integration Pipeline
The basic workflow to create an inbound integration pipeline:
Create an integration pipeline.
Create a pipeline interface.
Set up an integration subscription and execute the pipeline.
View the pipeline execution history.
This page provides the instructions for the fourth step in this workflow. See the other sections for information on each step.
Complete the following steps to view the pipeline execution history:
Log in to the ONE system.
Click Menu/Favs > Tools > Integration > Pipeline Execution History.
The Pipeline Execution History screen appears.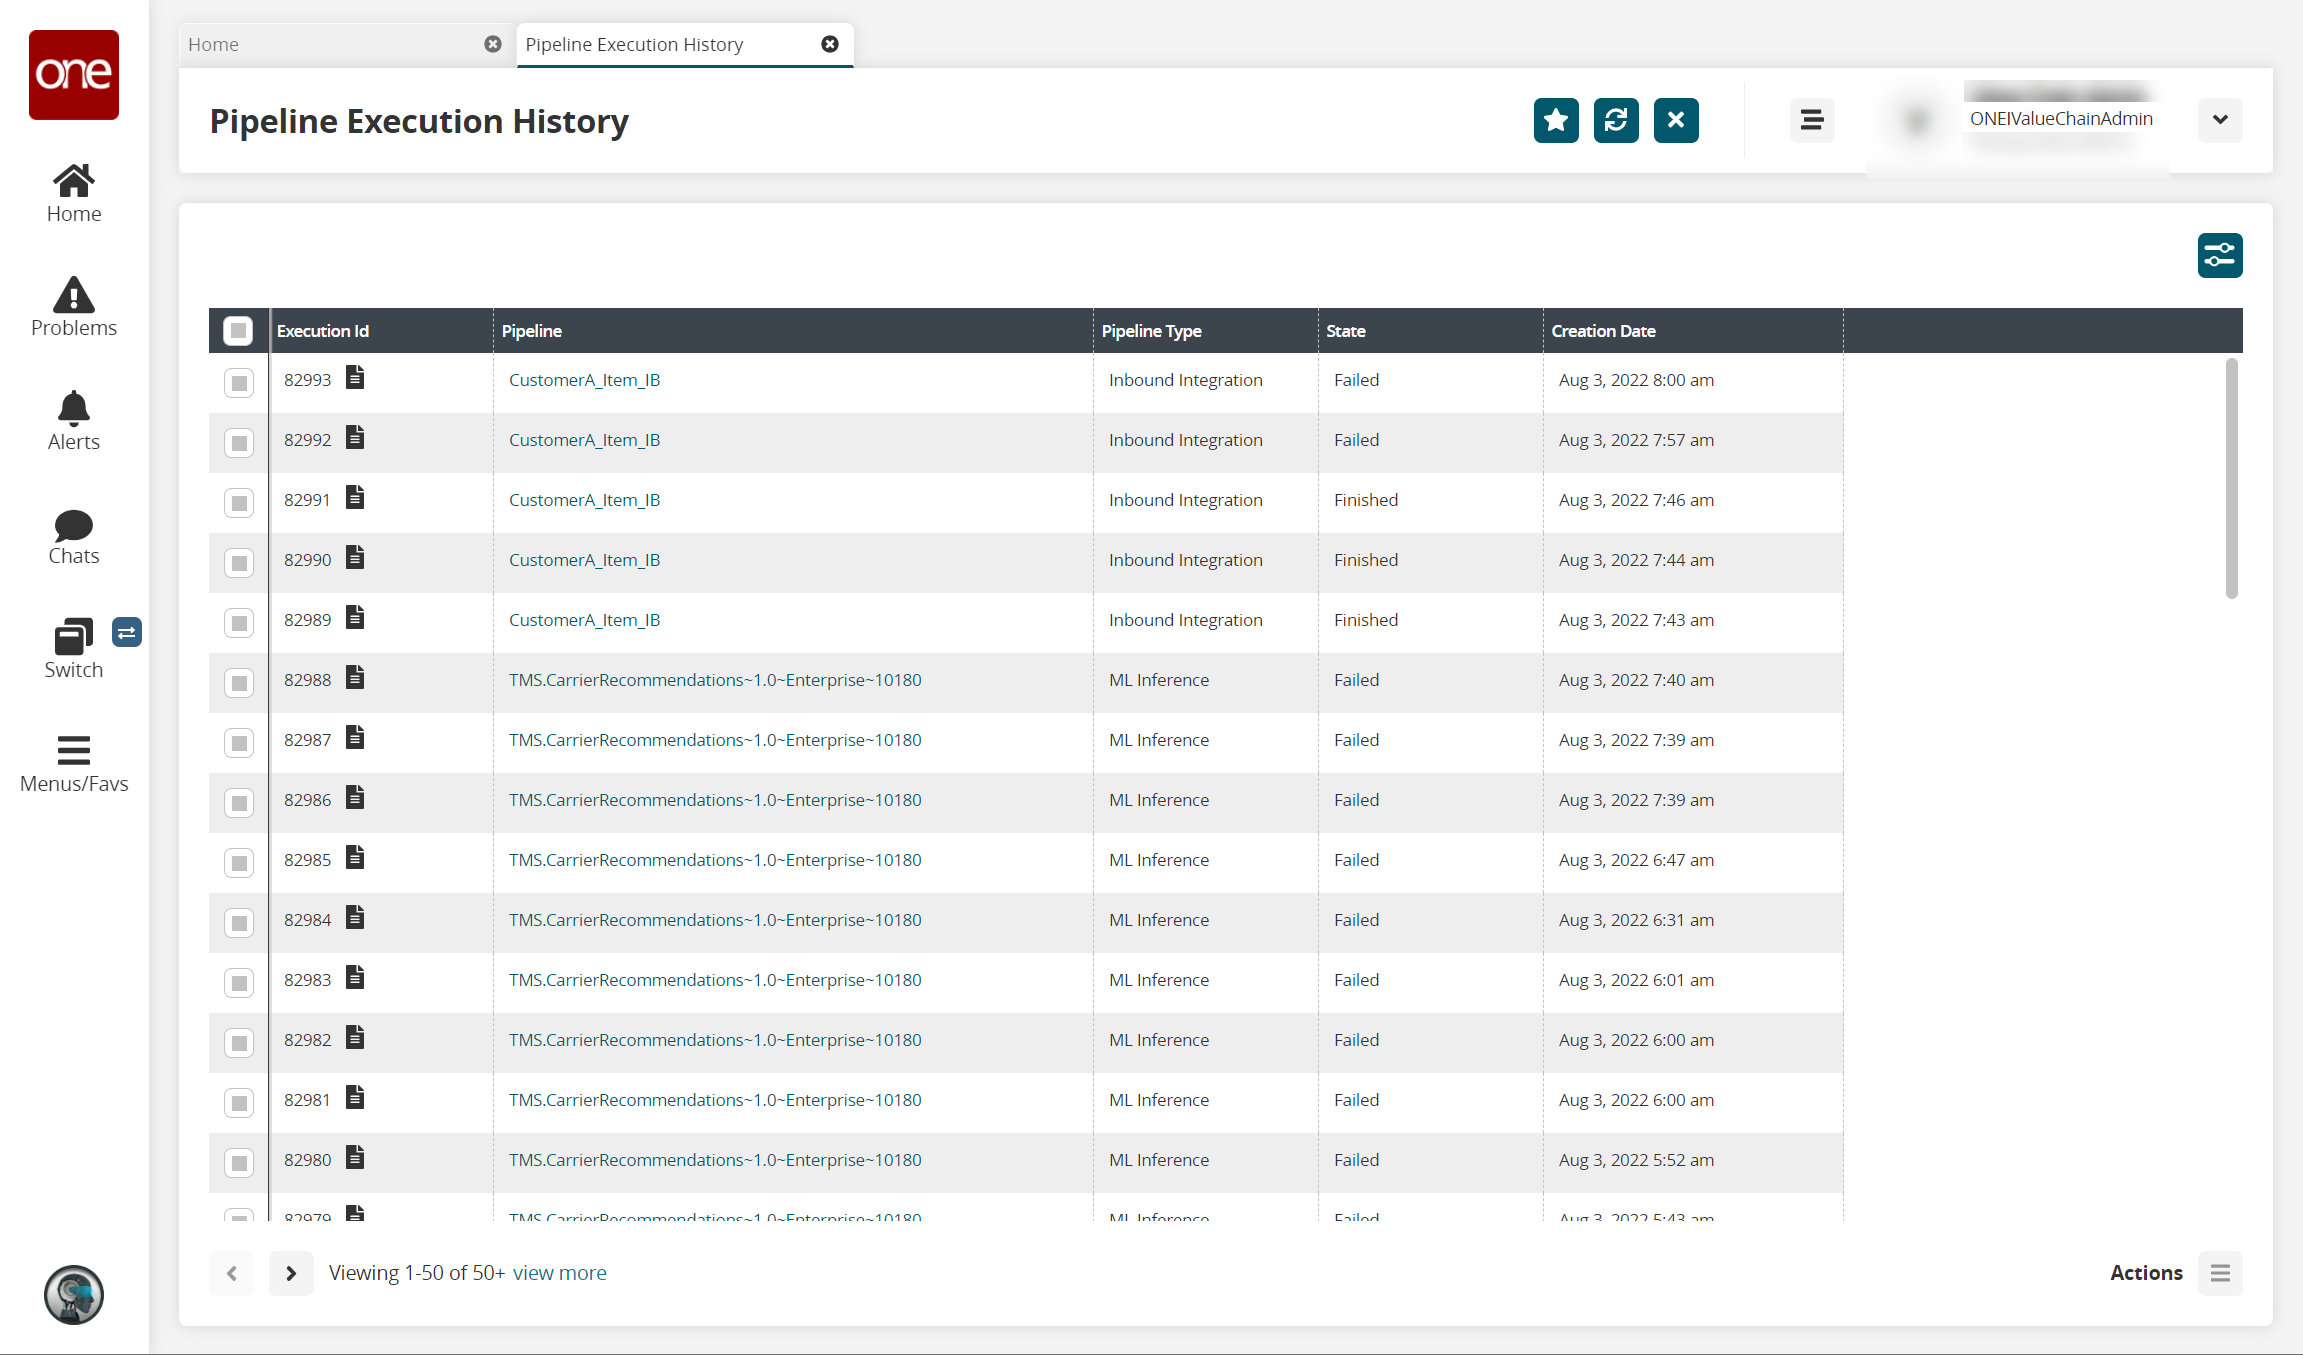
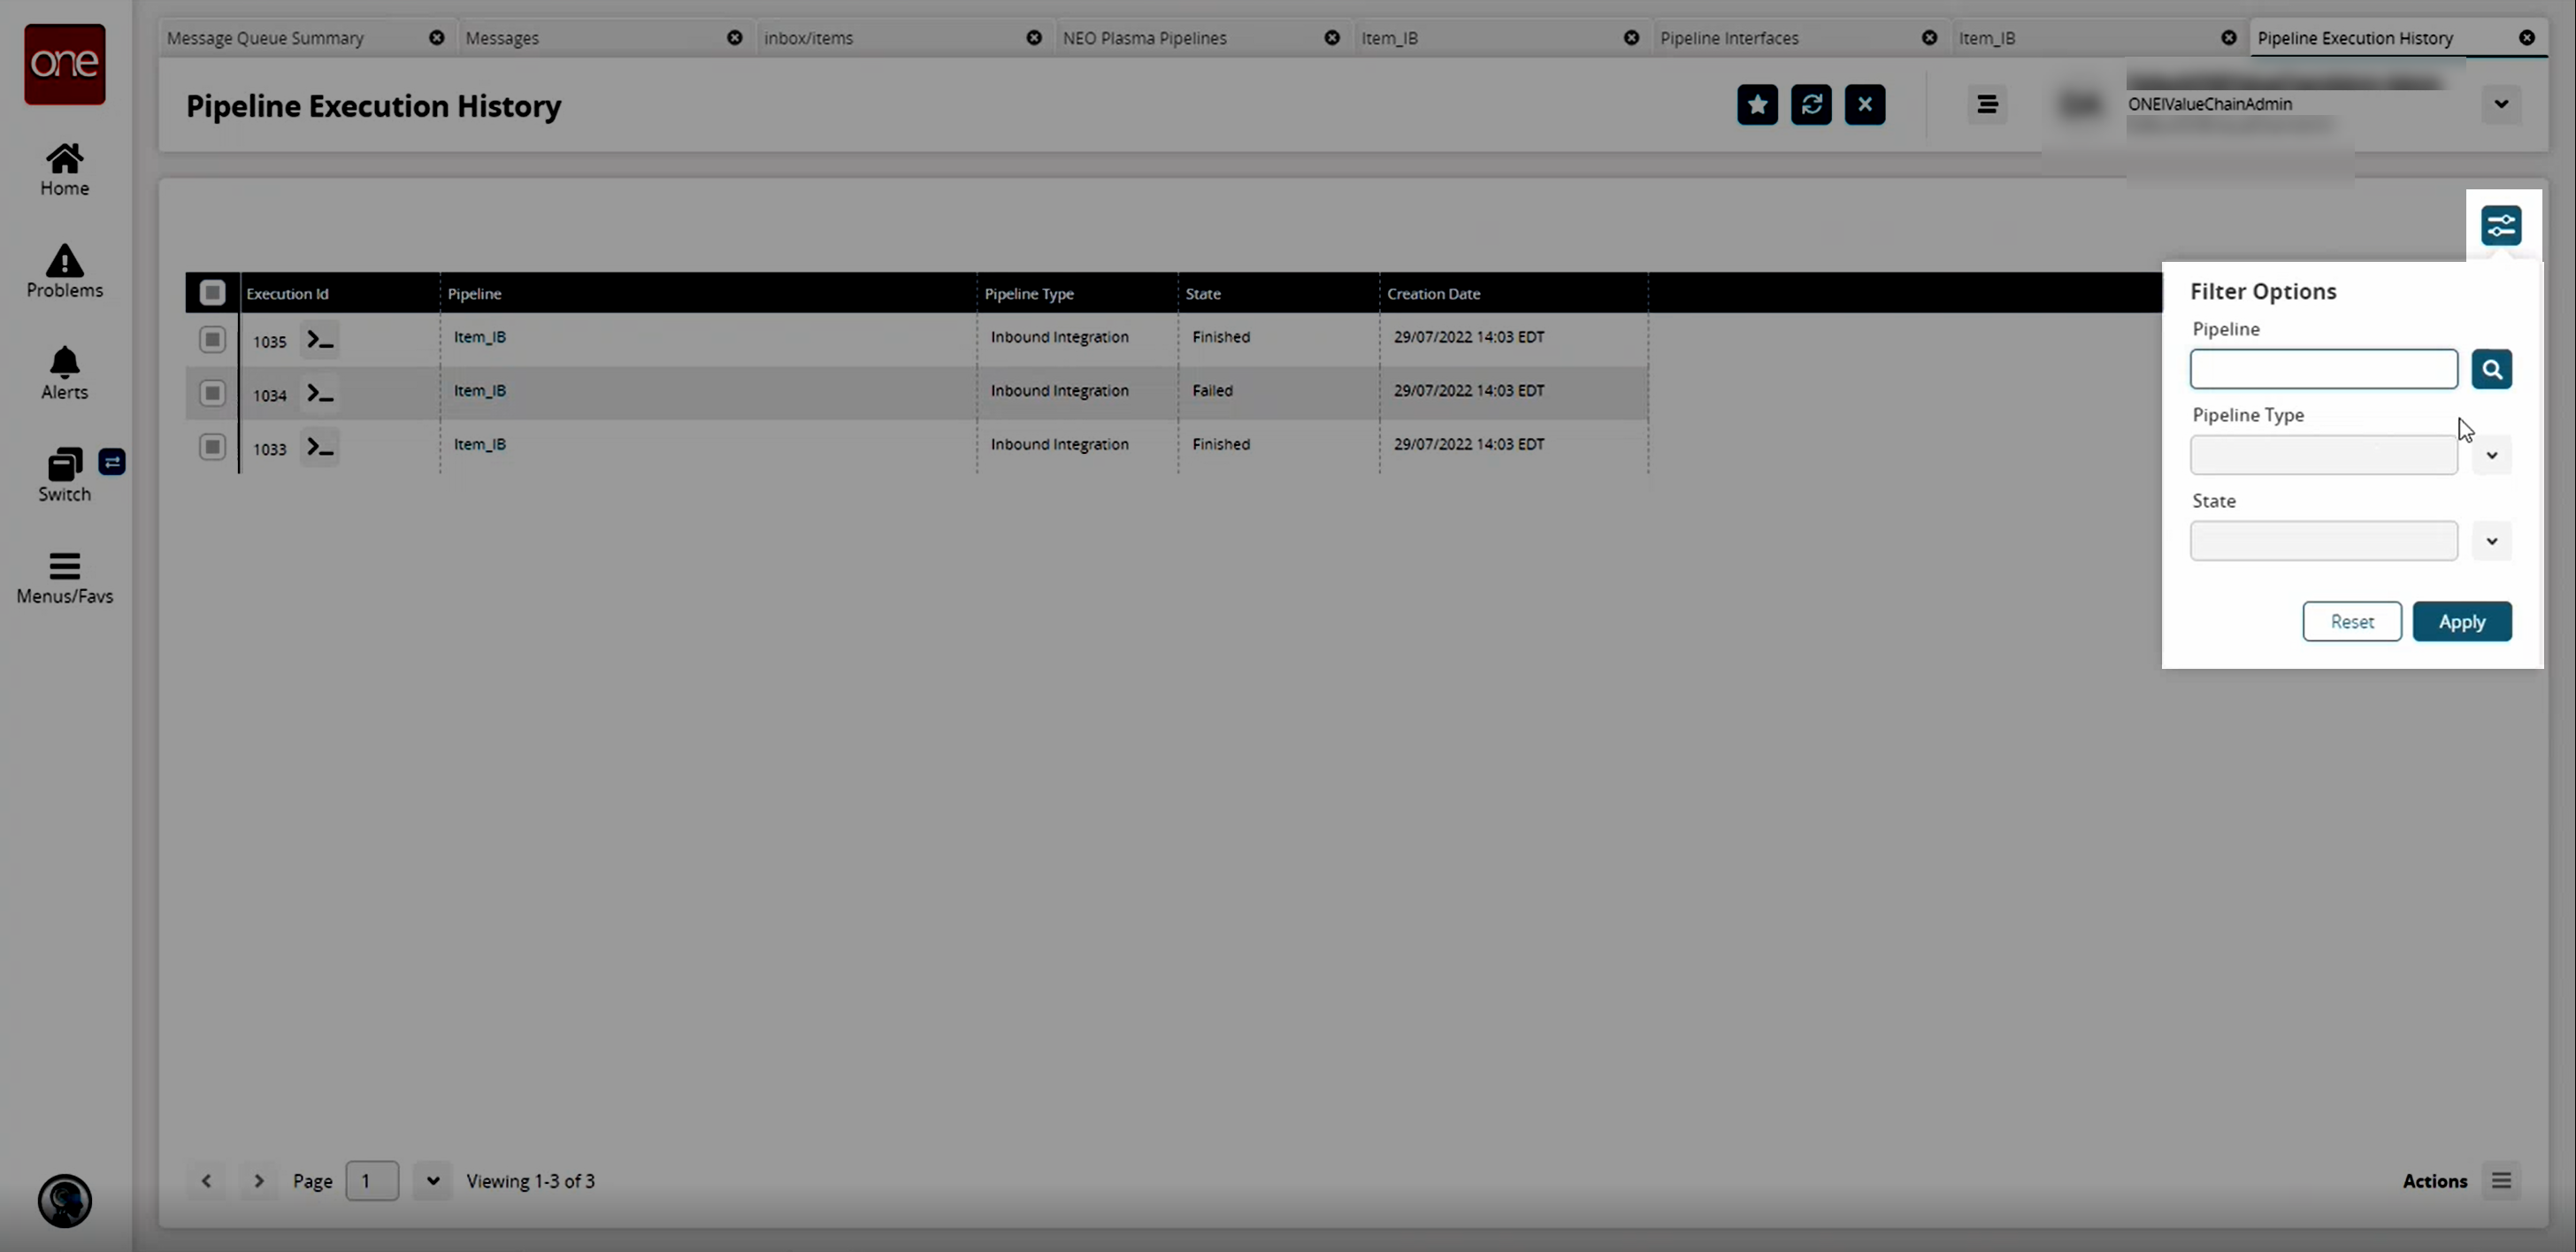
Click the filter icon in the top right to open the filter options and search for a specific pipeline or pipelines. You can search for the pipeline created in this example by name in the Pipeline field or by selecting Outbound Pipeline in the Pipeline Type field.
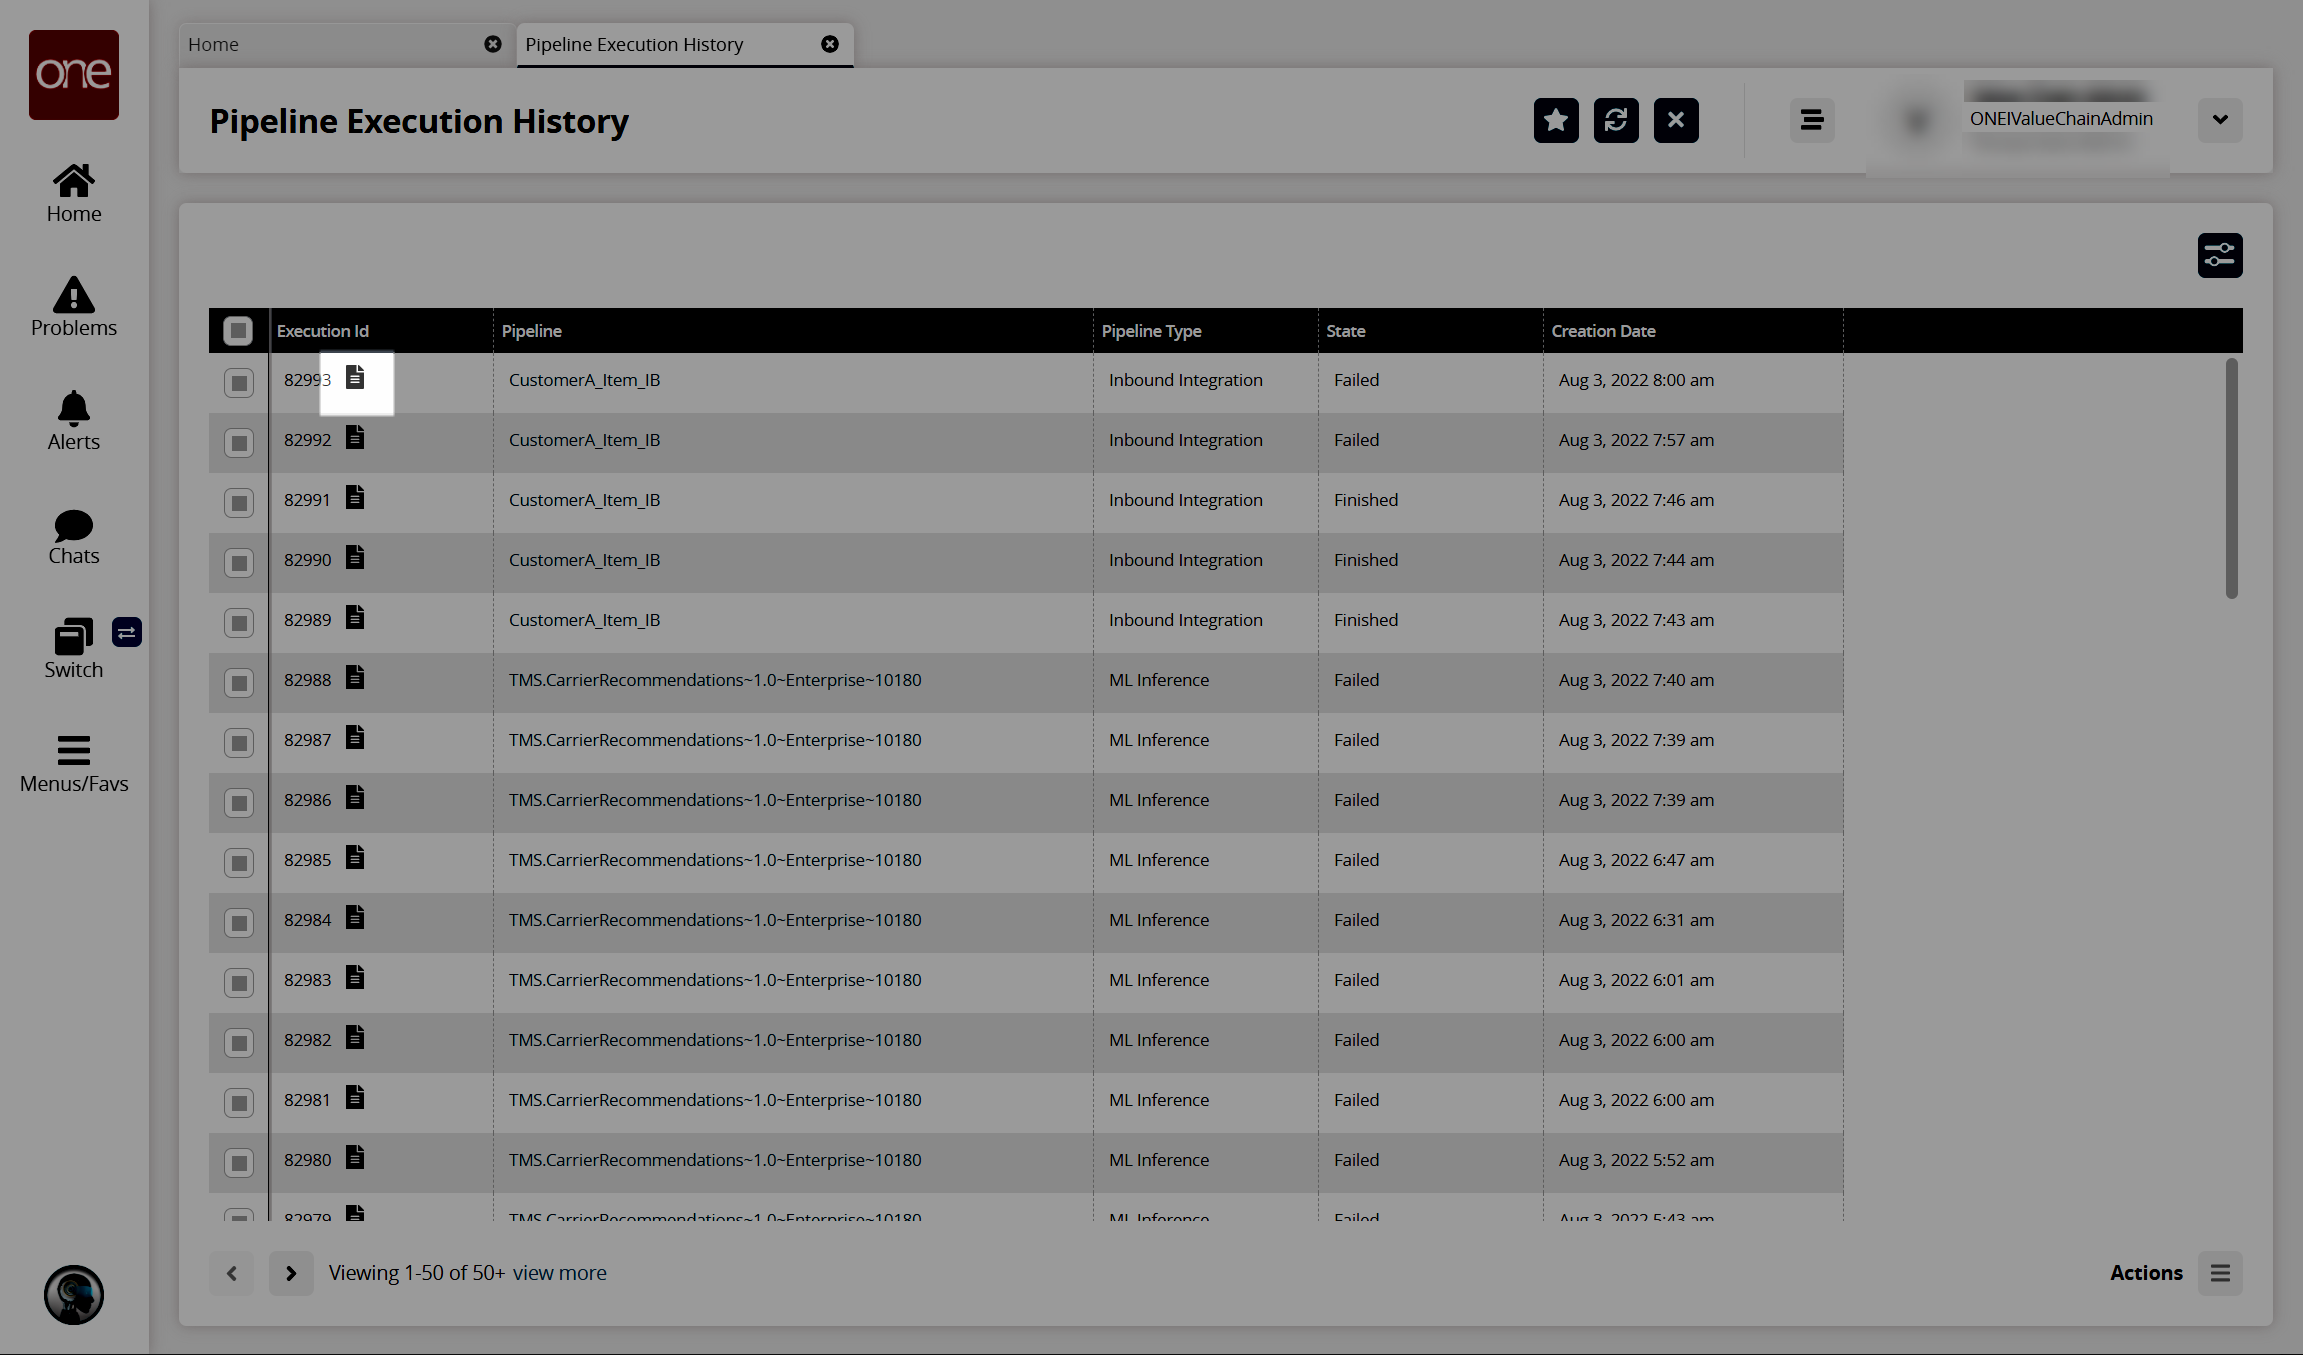
In the Execution ID column, click the icon beside the number to view the log for the desired pipeline.
The Node Logs popup window appears.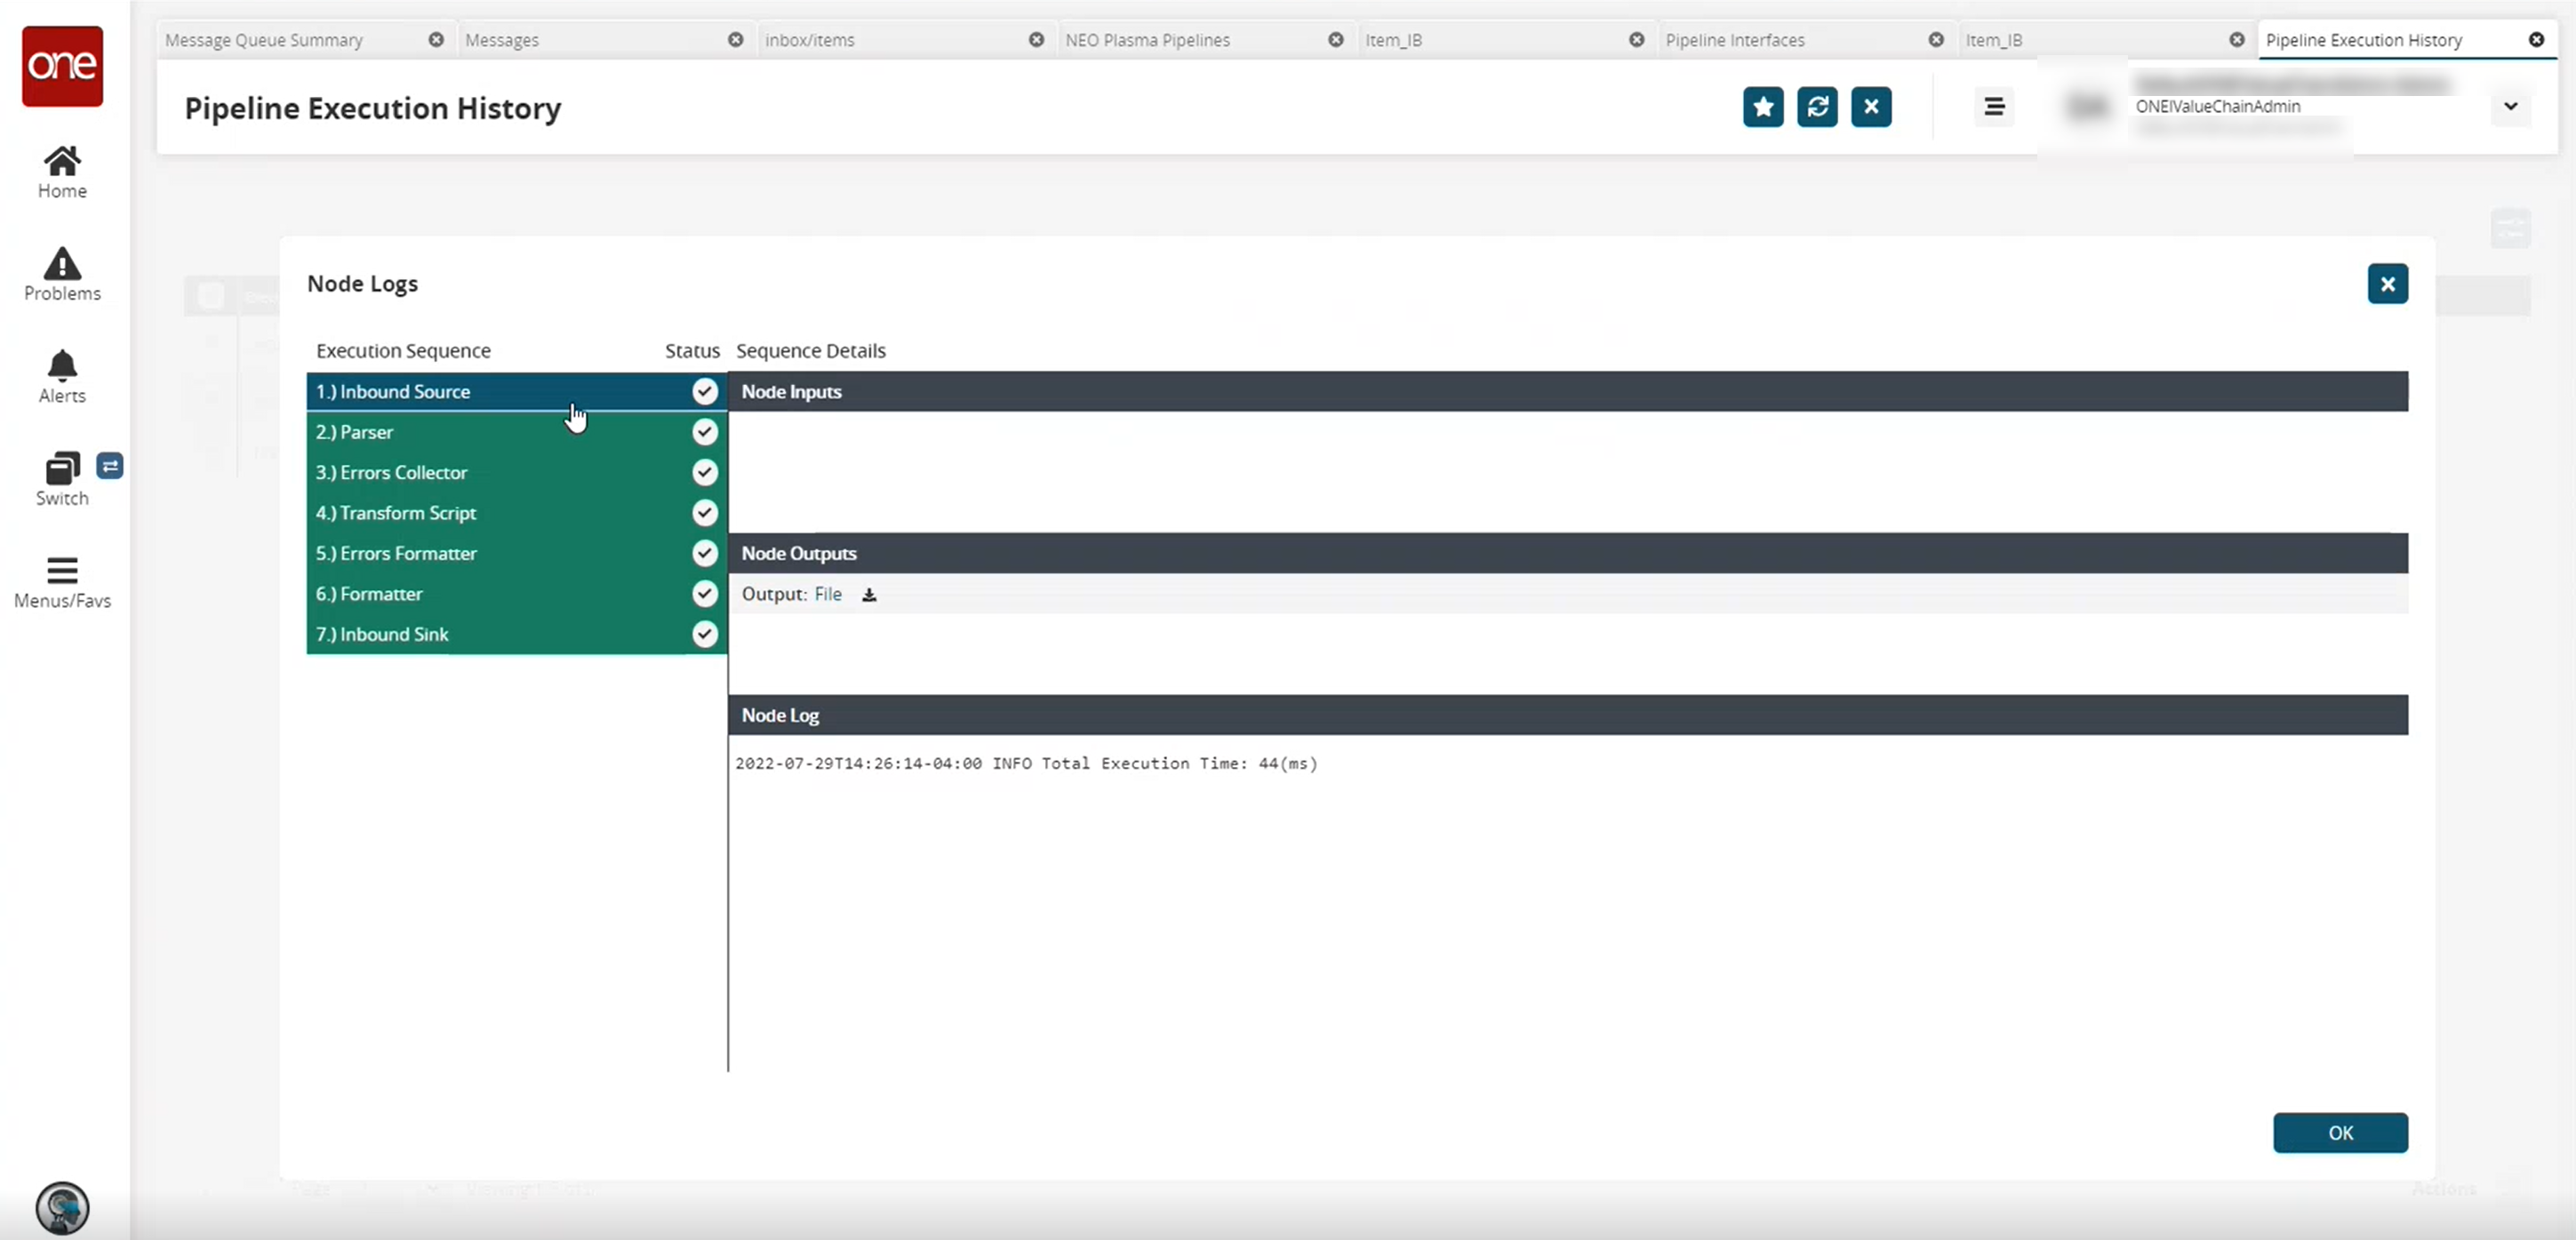
In the Execution Sequence pane on the left, click any node to view the details of its execution in the Sequence Details pane to the right. The nodes highlighted in green were executed successfully. The nodes highlighted in red contain an error.
Click OK to return to the Pipeline Execution History screen.
In the Pipeline column on the Pipeline Execution History screen, click a pipeline link to view and edit the pipeline in a new tab.