Views
A view can be thought of as a basic database query of a model that is configurable through the Studio.
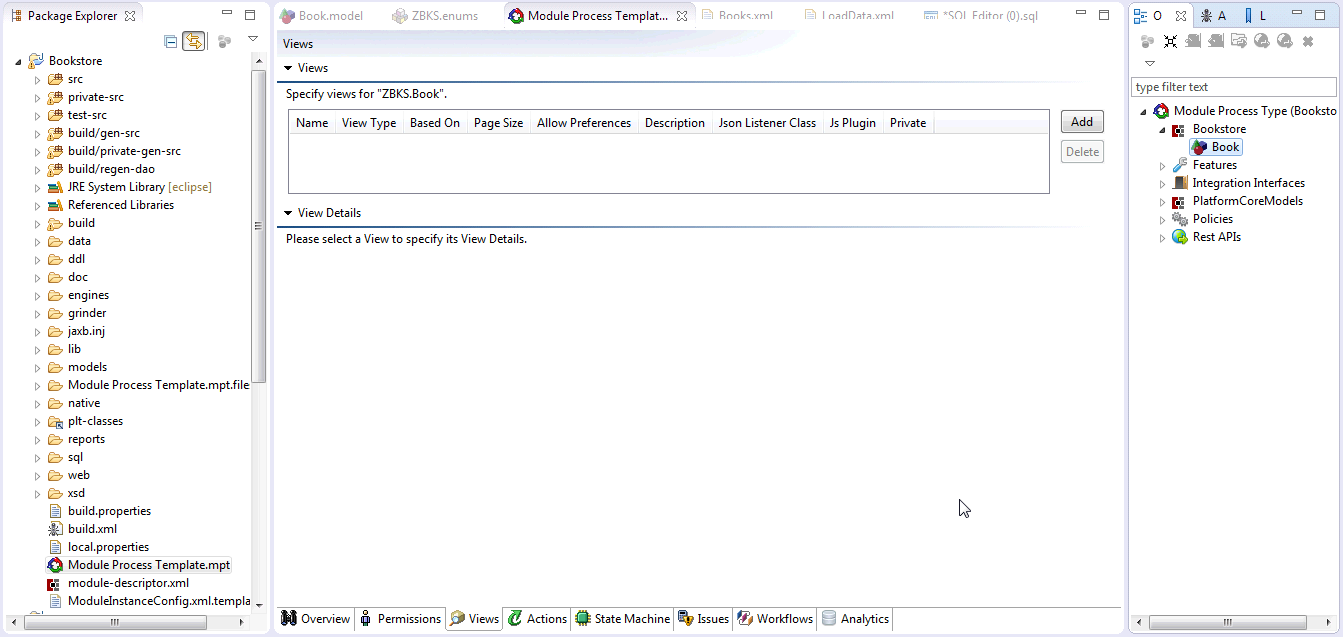
To create a view, we need to go back to the MPT Editor. Go to the Platform SDK perspective, and if it's not already open, double-click the Module Process Template.mpt in the Bookstore project inside the Package Explorer tile. Then select the Book Model in Outline tile (as you did earlier to add the Create Action). Then click on the Views tab, at the very bottom of the editor:
Click the Add button to create a new view. In the View Properties dialog that opens, enter the following information:
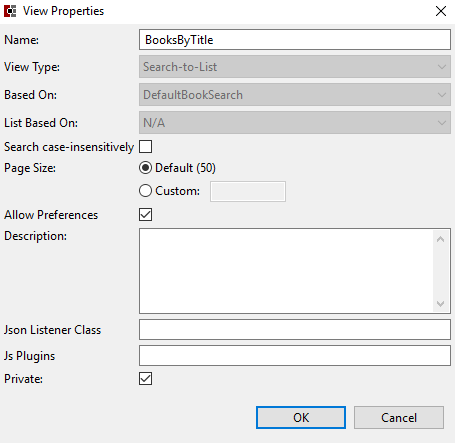
Then click OK.
You should see the new view in the Views section, as well as the details for the Query tab in the View Details section. Select the following fields to be retrieved from the database for this View:

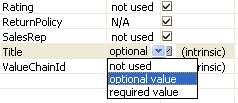
Also, select Title as an optional filter.
On the Display tab, you can choose which fields in the View you want to be visible to the user. We'll just leave that as default (all fields visible except ValueChainId). On the Permissions tab, make sure to select the Can access this view check box for our ZBKS.SampleRoleType.
Click
 Save to save the MPT.
Click
 Submit to submit the MPT to the server.
The next task is to add a menu item for the new BooksByTitle View for our default user, BookstoreUser, so that we can access it. To do this, navigate to the root of the MPT in the Outline tile, and select the UiMetaModel tab on the bottom left.
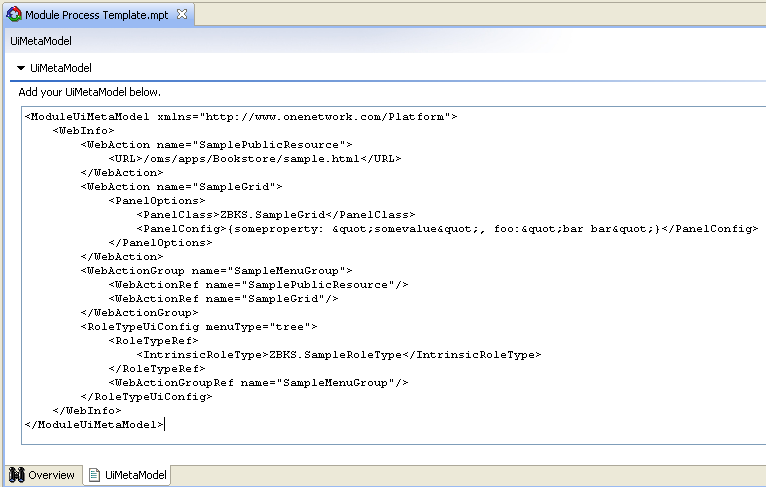
Add the following XML under the other two WebActions that we saw earlier, SamplePublicResource and SampleGrid:
<WebInfo>...<WebActionname="BooksByTitle"><PanelOptions><PanelClass>One.Report</PanelClass><PanelConfig><![CDATA[{viewName: "ZBKS.BooksByTitle", customModelName: "Standard ZBKS.Book", autoExecute: true}]]></PanelConfig></PanelOptions></WebAction>...</WebInfo>Then add a menu reference to this action inside the WebActionGroup tag:
<WebActionGroupname="SampleMenuGroup">...<WebActionRefname="BooksByTitle"/></WebActionGroup>Click
 Save to save your changes to the MPT, and then click Submit to update your local server.
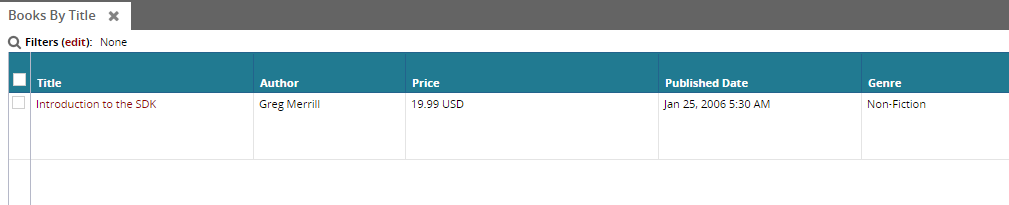
Log in to NEO as you did before, with the user name BookstoreUser and the password of password. You should be able to see the new menu item. Click it to see the View in the main content area: