Working With Dashboards
Users can use dashboards to visualize and monitor data in real-time. Each user can define
and configure multiple dashboards suited to meet the needs of the different aspects of their
daily tasks and workflows.
Customizing NEO Dashboard Layout
Users can customize the layout of dashboards using a Columnar Layout or a Fixed Layout.
Many widgets only display in one layout or the other; only a few widgets display in both
layouts.
Complete the following steps to customize the NEO dashboard layout:
To customize the NEO UI dashboard layout, click the Edit the Dashboard button.

The Add Columnar Layout and Add Fixed Layout buttons appear at the bottom of
the screen.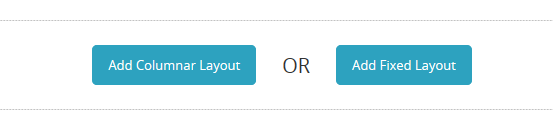
To add a columnar layout, click the Add Columnar Layout button.
A new layout section appears. In the example below, this layout has three
columns. Each column has an Add a widget button.
See "Adding a Widget" for more instructions.
Click the double arrows up or down to move the layout section up or down on the
dashboard. The arrows will be grayed out and inactive if there are no other layout
sections.
Click the Column Layout button to choose a different column layout.

The button will expand to show all possible columnar layouts. Click on the layout
desired.
Enter a title for the layout section in the Layout title field.
Click the Duplicate layout button to duplicate this layout again on the dashboard.

A new layout section displays below with the same layout and widgets.Click the Collapse layout button to collapse the layout section.

The section collapses and widgets in that section no longer display.Click the Delete layout to remove the layout section from the dashboard.

A popup box appears to confirm that you want to delete the section.Click on Yes.
Click on the Add Fixed Layout button to add a fixed layout section to the
dashboard.
A new layout section appears. Once a widget is added, a grid appears and the
widget can be moved into place on the grid.
Click on Save the Dashboard to save the layout changes.

Creating Additional Dashboards
Users can create up to five additional dashboards.
Complete the following steps to create an additional dashboard:
From the NEO UI dashboard, click the My Dashboards button.

The My Dashboards dialog box displays.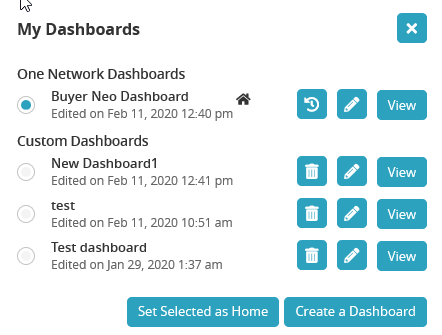
Click on the Create a Dashboard button.
The New Dashboard dialog box displays.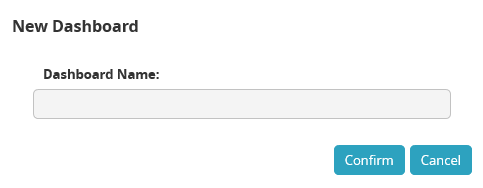
Type in a name for the new dashboard.
Click on the Confirm button.
The new dashboard displays and can be configured with widgets.
See "Customizing NEO Dashboard Layout" and "Adding Widgets" for more
information.
Click on the Save the Dashboard button.

The new dashboard displays.
The new dashboard now also displays in the list of customized dashboards when you click on My Dashboards.
Switching Between NEO Dashboards
Complete the following steps to switch between dashboards from the Home screen:
From the NEO UI dashboard, click on the My Dashboards button.

The My Dashboard dialog box displays.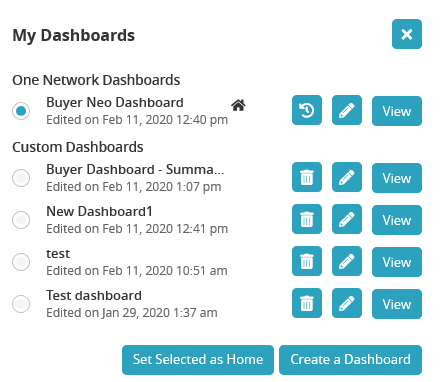
Click on the View button for the dashboard you wish to view.
The dashboard displays.
Complete the following steps to switch between dashboards if you have viewed a
dashboard and then moved to another screen:
Click on Switch in the left sidebar of the NEO UI.
A slide-out menu of Active Screens (perspectives) displays.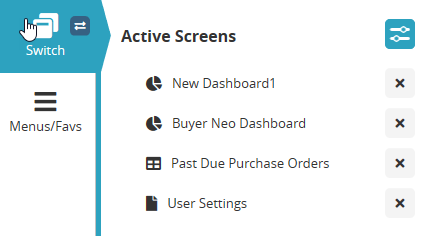
Click on the dashboard name from the list.
The dashboard displays.
Complete the following steps to switch to different dashboards from the Menu/Favs
menu in the left sidebar:
Click on Menu/Favs > Quick Links > My Dashboards in the left sidebar of the NEO UI.
A list of the user's dashboards displays.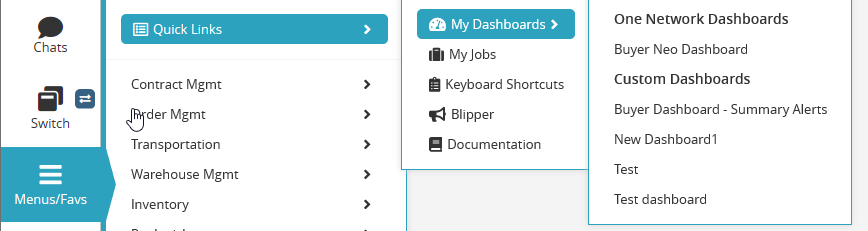
Click on the desired dashboard.
The dashboard displays.
Publishing And Subscribing To Custom Dashboards
Users can now publish and subscribe to dashboards in the NEO UI. This allows organizations
to have a uniform presentation of information across roles and users.
Complete the following steps to publish and subscribe to dashboards:
Log in to the ONE system.
Neo displays a Dashboard based on the selected user role.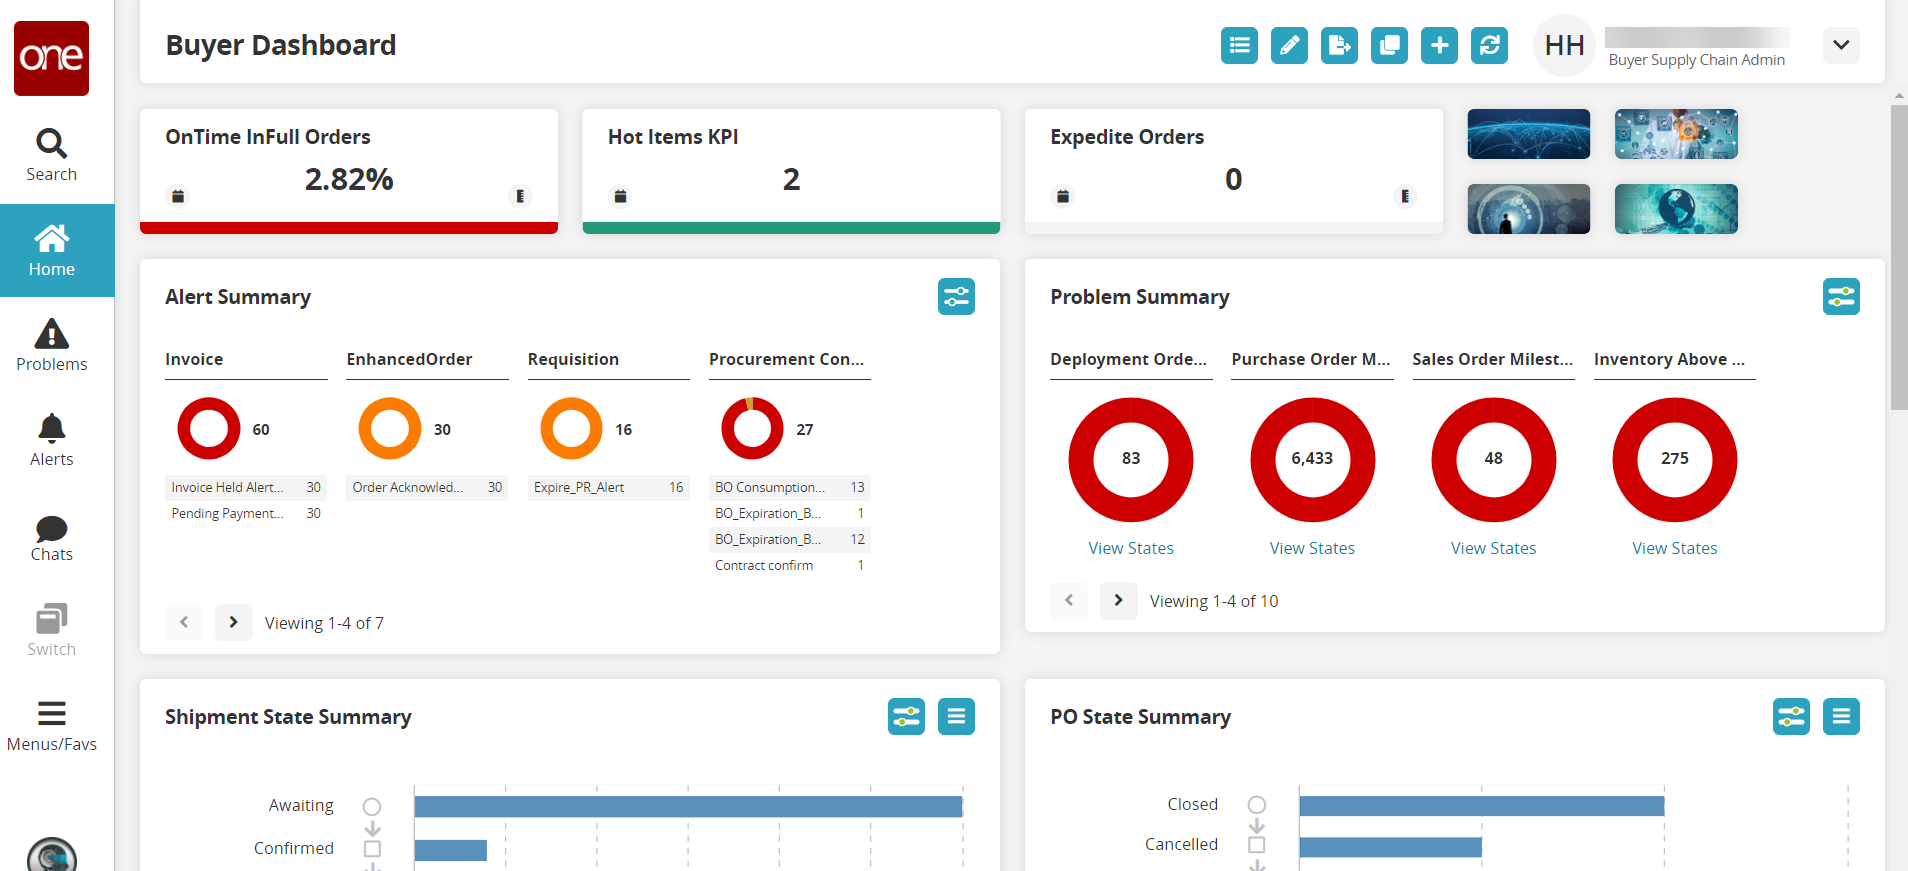
Click on the My Dashboards button at the top of the screen.
The My Dashboards popup window displays.
Publish a Custom Dashboard
Click on the Edit button for one of the Custom Dashboards section of the popup
window.
A menu of actions displays.Click on Publish.
A confirmation Publish Dashboard popup displays.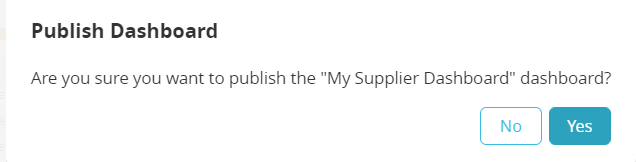
Click the Yes button.
The details for the dashboard are updated in the My Dashboards popup window.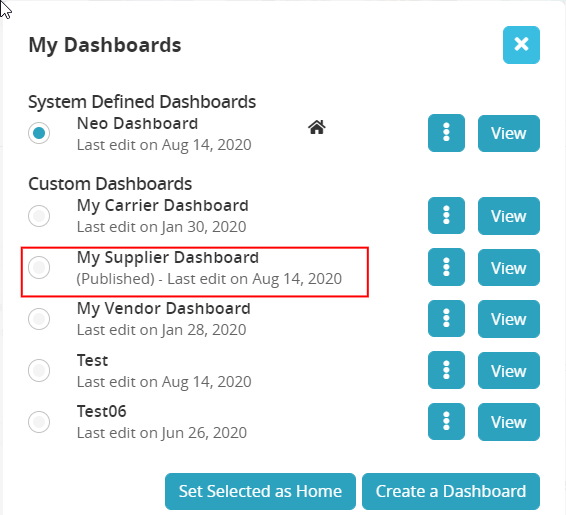
Dashboards can also be published and unpublished from Menus/Favs > Quick Links > My
Dashboards > Manage Custom Dashboards.
Subscribe to a Dashboard
When users publish a dashboard within the organization, other users can subscribe to and
use that dashboard.
Complete the following steps to subscribe to a dashboard.
Log in to the ONE system.
Click on Menu/Favs > Quick Links > My Dashboards > Manage Custom
Dashboards.
The Manage Custom Dashboards screen displays a list of your custom dashboards
with the option to Publish or Unpublish and Delete under the Action column.
Dashboards in the organization that have been published will have the option
to Subscribe or Unsubscribe under the Action column.Click on Subscribe to subscribe to a new dashboard.
A confirmation popup window displays.Click on Yes.
The dashboard display on the screen updates and the dashboard is now in your
list of dashboards.