Recalling Items
Users can initiate a recall process for a lot, lot instance, or item. Users can also identify the location of recalled items and choose to recall items from the selected locations. The user or organization can initiate a recall for a lot, lot instance, or item. The recall process consists of three states:
Initiated: When a user/organization creates a recall request, it starts in the Initiated state.
In-Progress: When a user/organization at the recalled location invokes the Working on Recall action, the corresponding task and the recall request move to the In-Progress state.
Closed: When a user/organization at the recalled location invokes the Completed Recall action, the corresponding recall request moves to the Closed state.
Complete the following steps to initiate a recall request:
L og in to the ONE system.
Select Menu/Favs > Transportation > Recall.
In the NEO UI, users can click on the Menu/Favs icon on the left sidebar and type in the name of the screen in the menu search bar. For more information, see "Using the Menu Search Bar."
The Recall screen appears.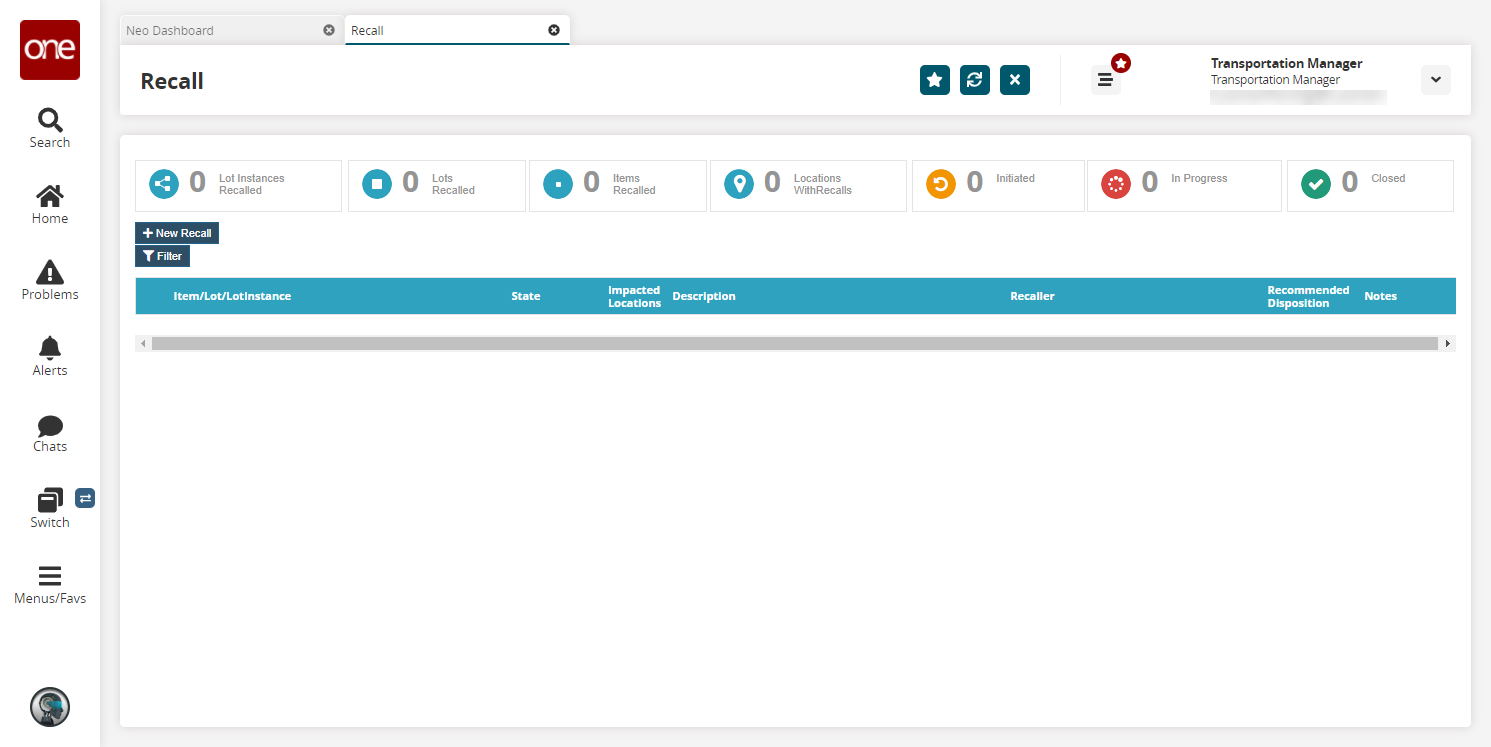
Click New Recall to initiate a new recall.
The New Recall popup appears.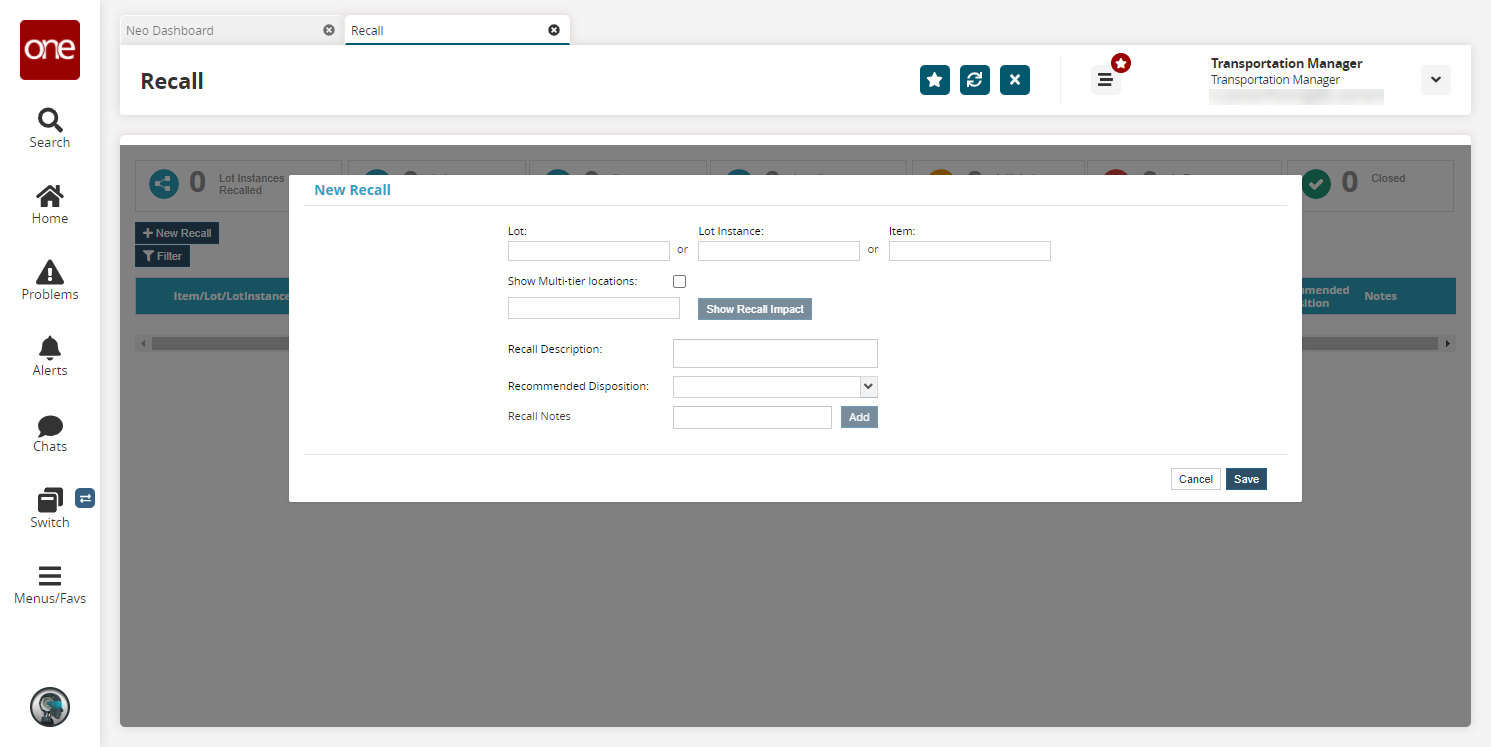
Fill out the following fields. Fields with an asterisk ( * ) are required.
Field
Description
Lot
Select a lot from the drop-down menu.
Lot Instance
Select a lot instance from the drop-down menu.
Item
Select an item from the drop-down menu.
Show Multi-Tier Locations
Select this checkbox to show multi-tier locations.
Recall Description
Enter a description of the recall.
Recommended Disposition
Select either Destroy or Return from the drop-down menu.
Recall Notes
Enter any recall notes and click Add to save them.
Click the Show Recall Impact button to show locations impacted by the recall.
The list of all the impacted locations is displayed.
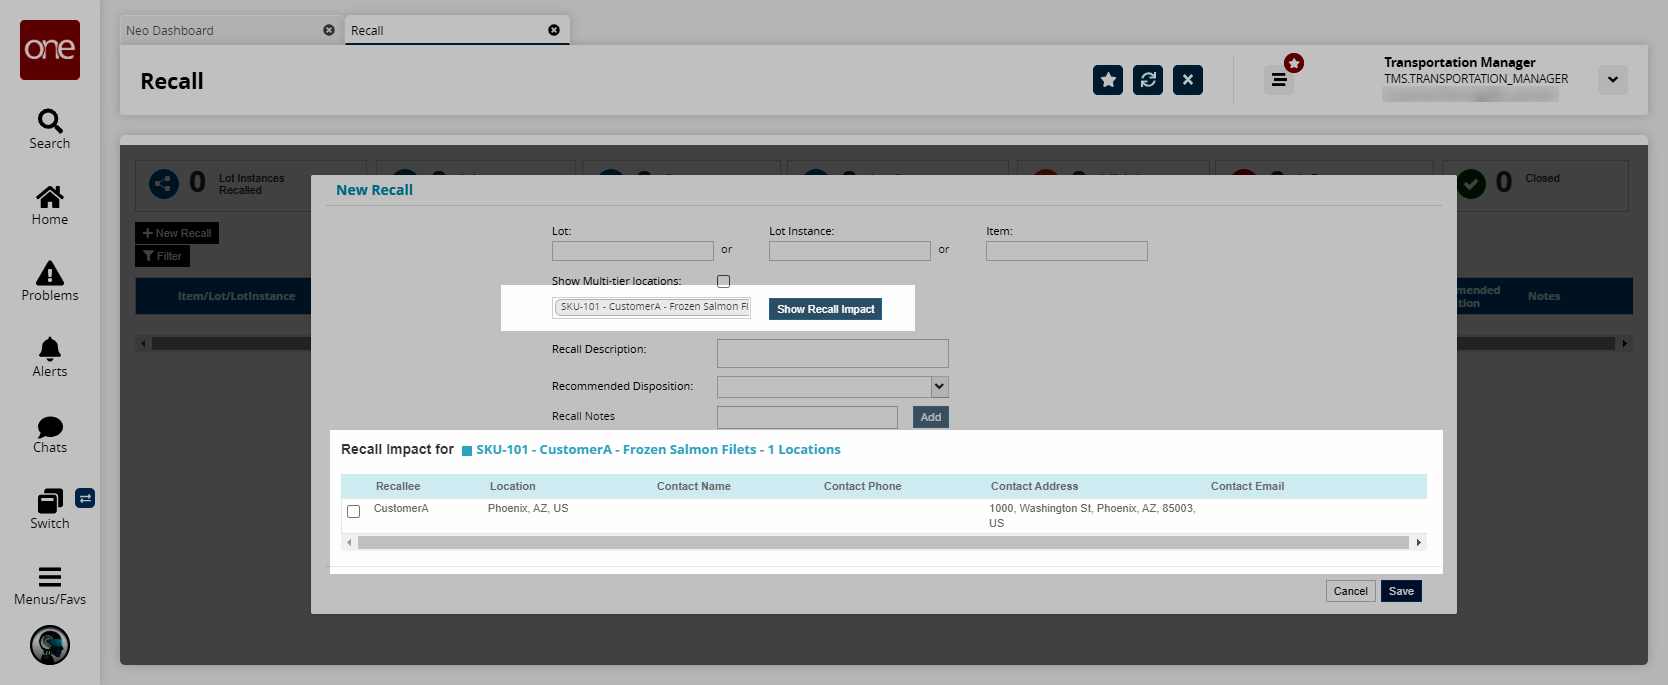
Select the checkbox to choose the locations for recall.
Click Save to initiate the recall.
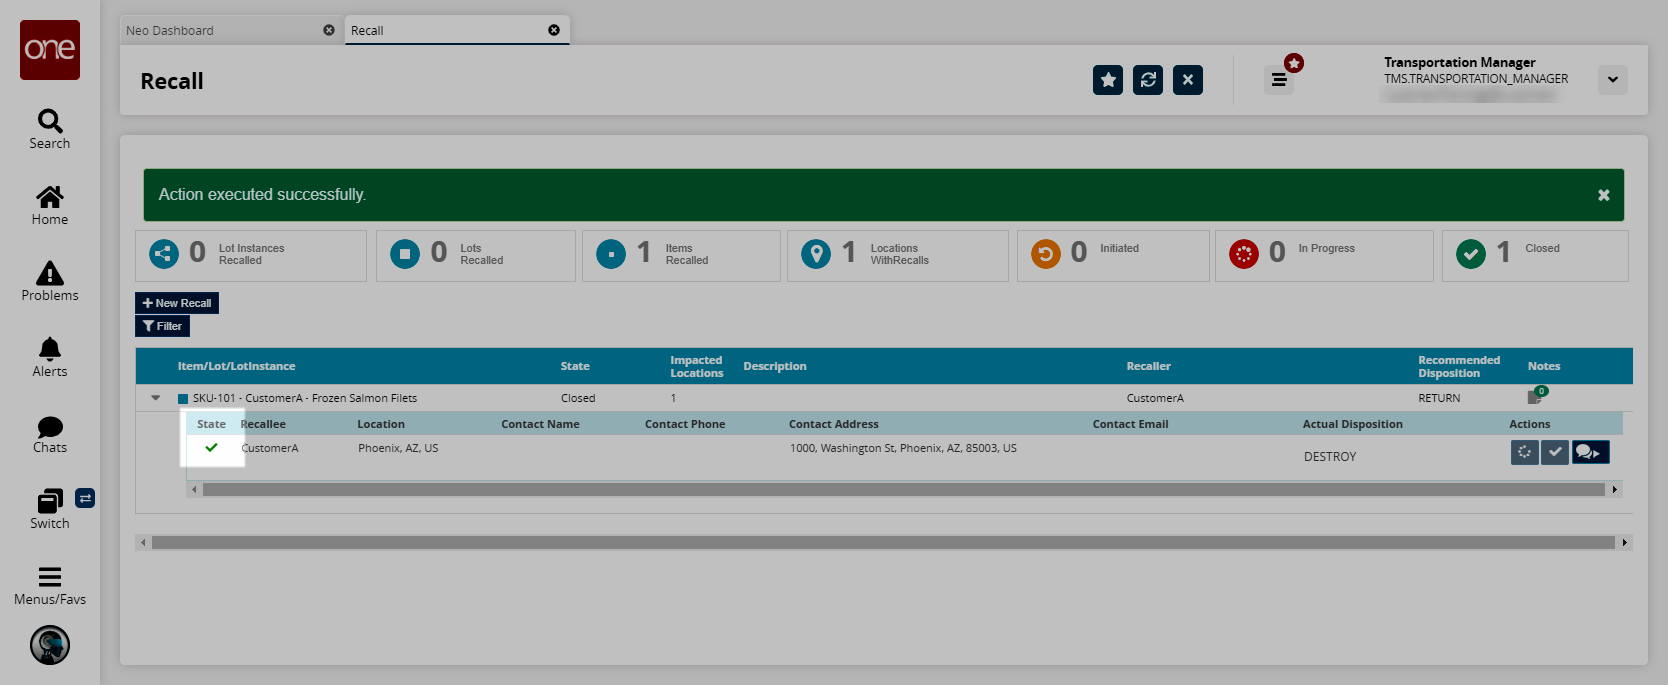
A success message appears.
Complete the following steps to close the recall process:
Expand the required item, lot, or lot instance, and click the Actions
 icon.
icon.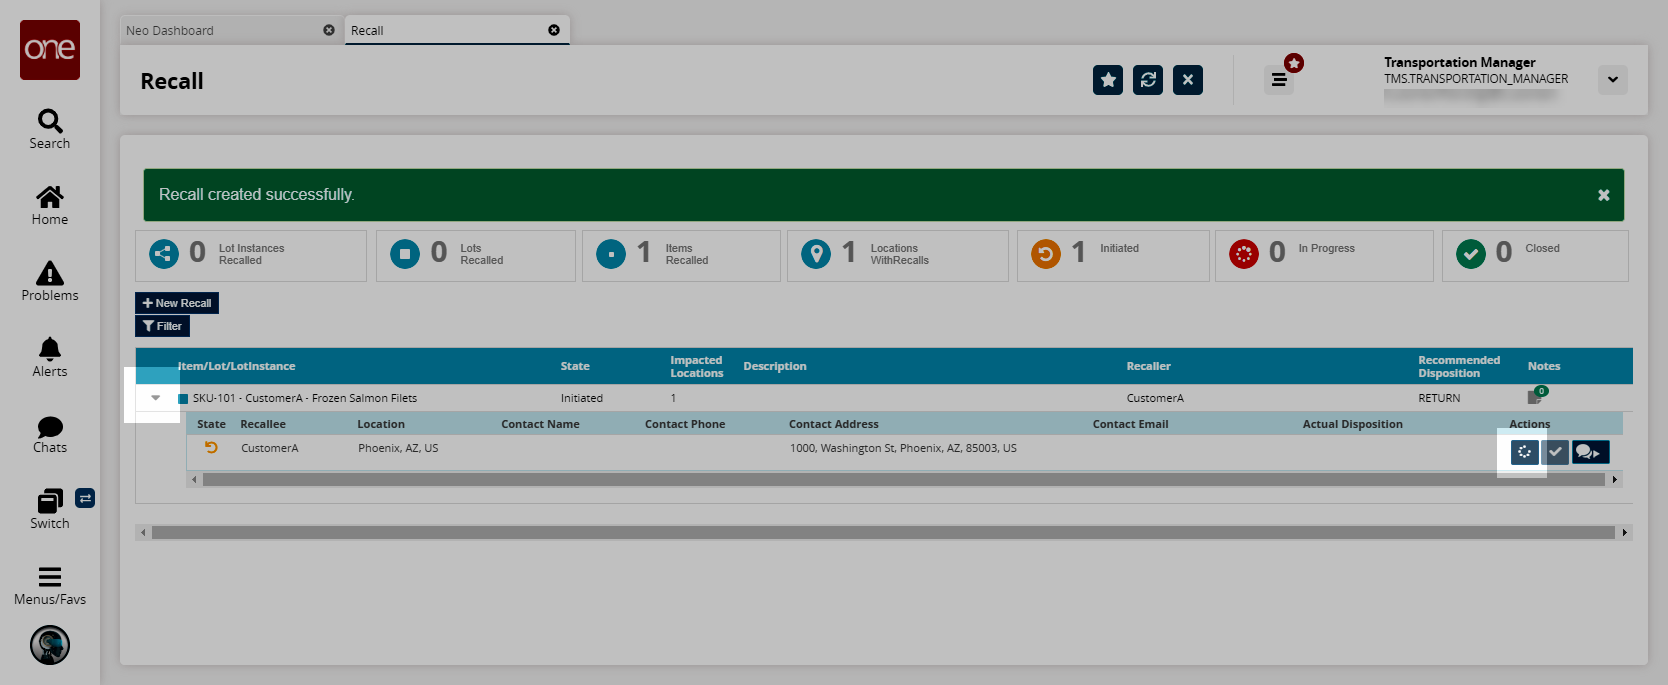
The Actual Disposition field appears.From the Actual Disposition dropdown menu, select the required value.
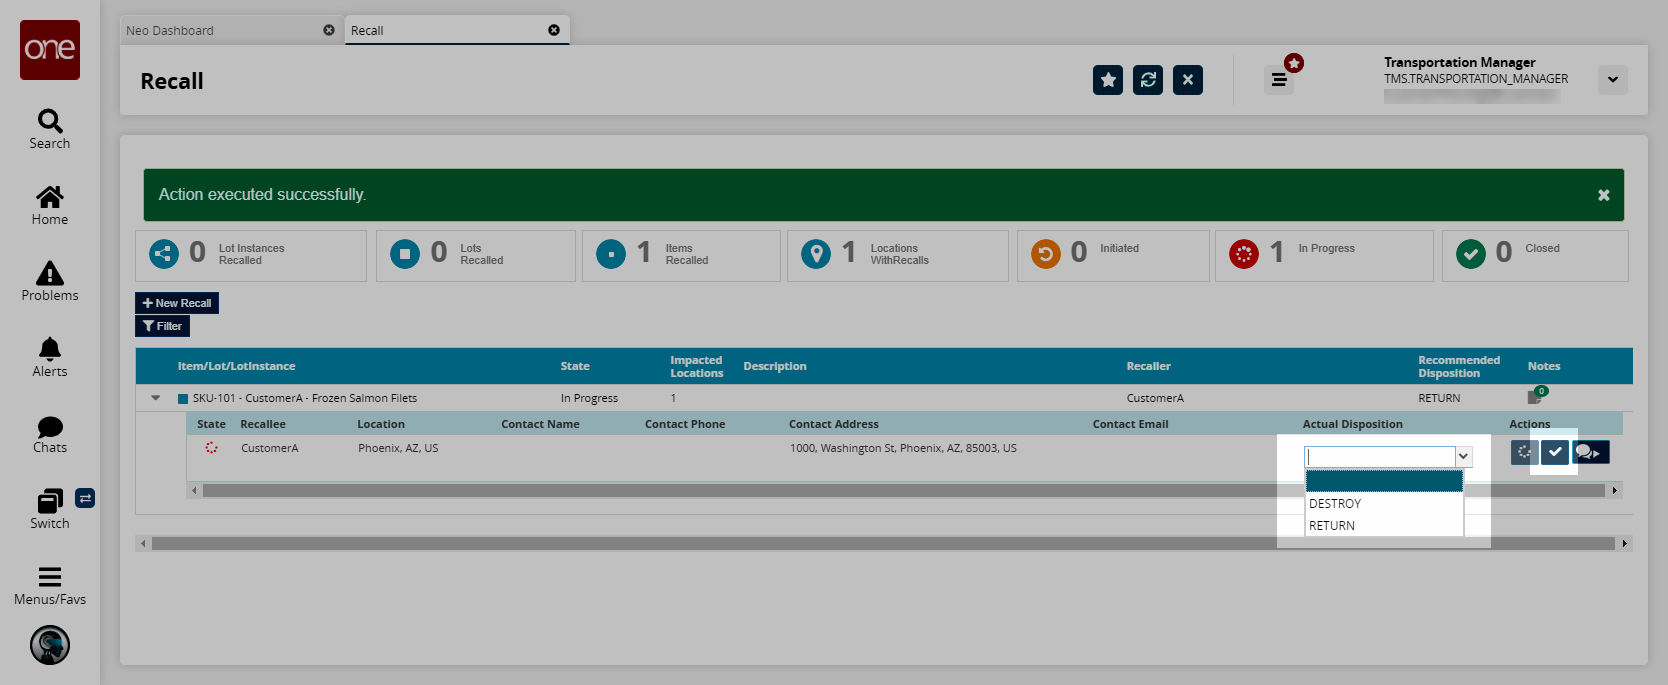
A success message appears and the request moves to the Closed state.