Adding Enterprise Role Types
Administrative users can add new enterprise role types. These role types specify access to menus, which actions can be performed, and which screens can be viewed by users with each role type. Users of this role type are limited to the actions, menus, and screens configured when creating the new role type.
Complete the following steps to add new enterprise role types:
L og in to the ONE system.
Click Menus/Favs > Administration > Role > Search Ent Role Types.
In the NEO UI, users can click on the Menus/Favs icon on the left sidebar and type in the name of the screen in the menu search bar. For more information, see "Using the Menu Search Bar."
The Search Ent Role Types screen opens. The Explorer pane shows existing enterprise role types.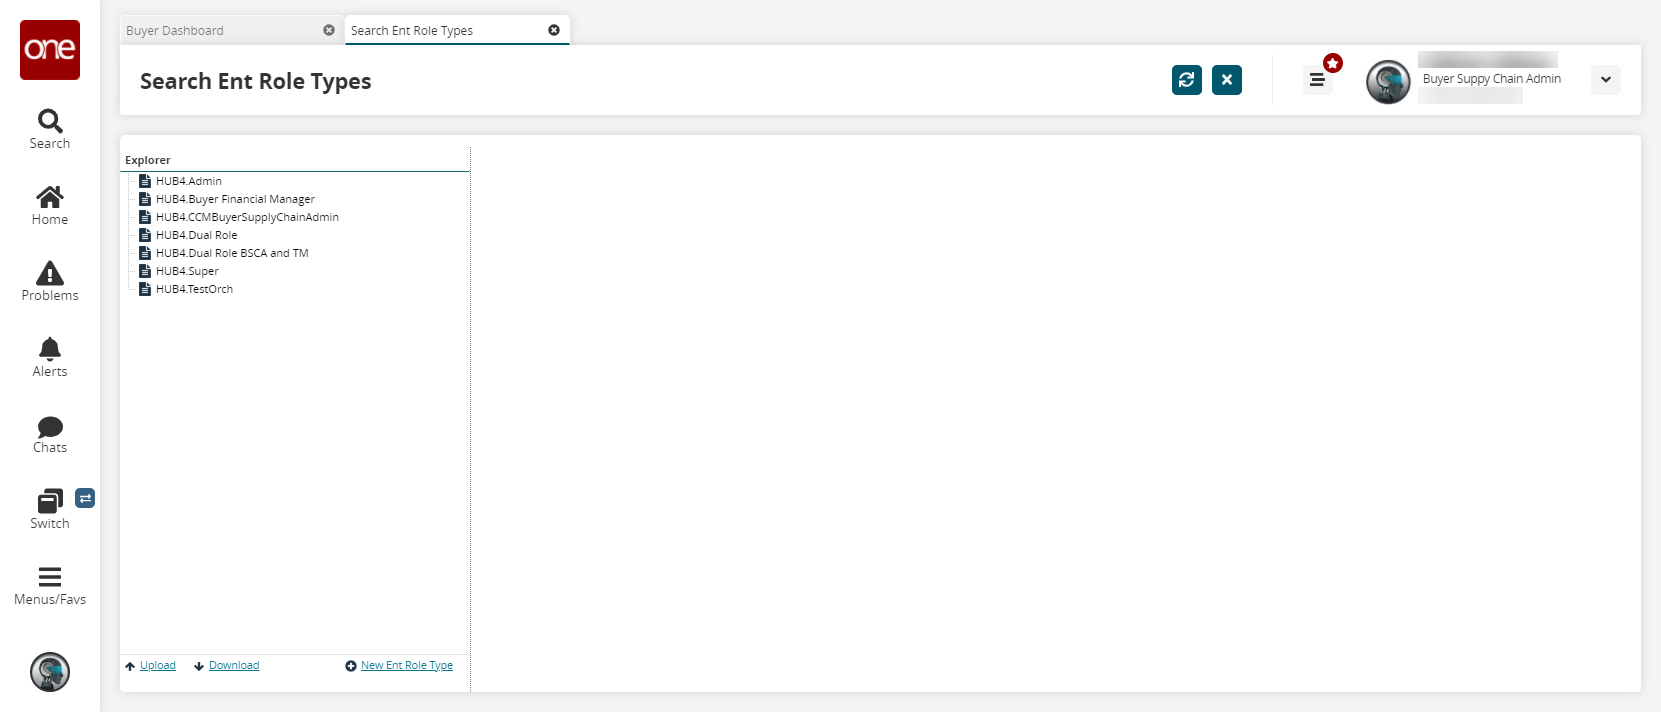
At the bottom of the Explorer pane, click the New Ent Role Type link to add a new enterprise role type,
The Info, Menu, Action, Screen, Portlet,Neo Widget, and Global Search tabs for the new role type opens.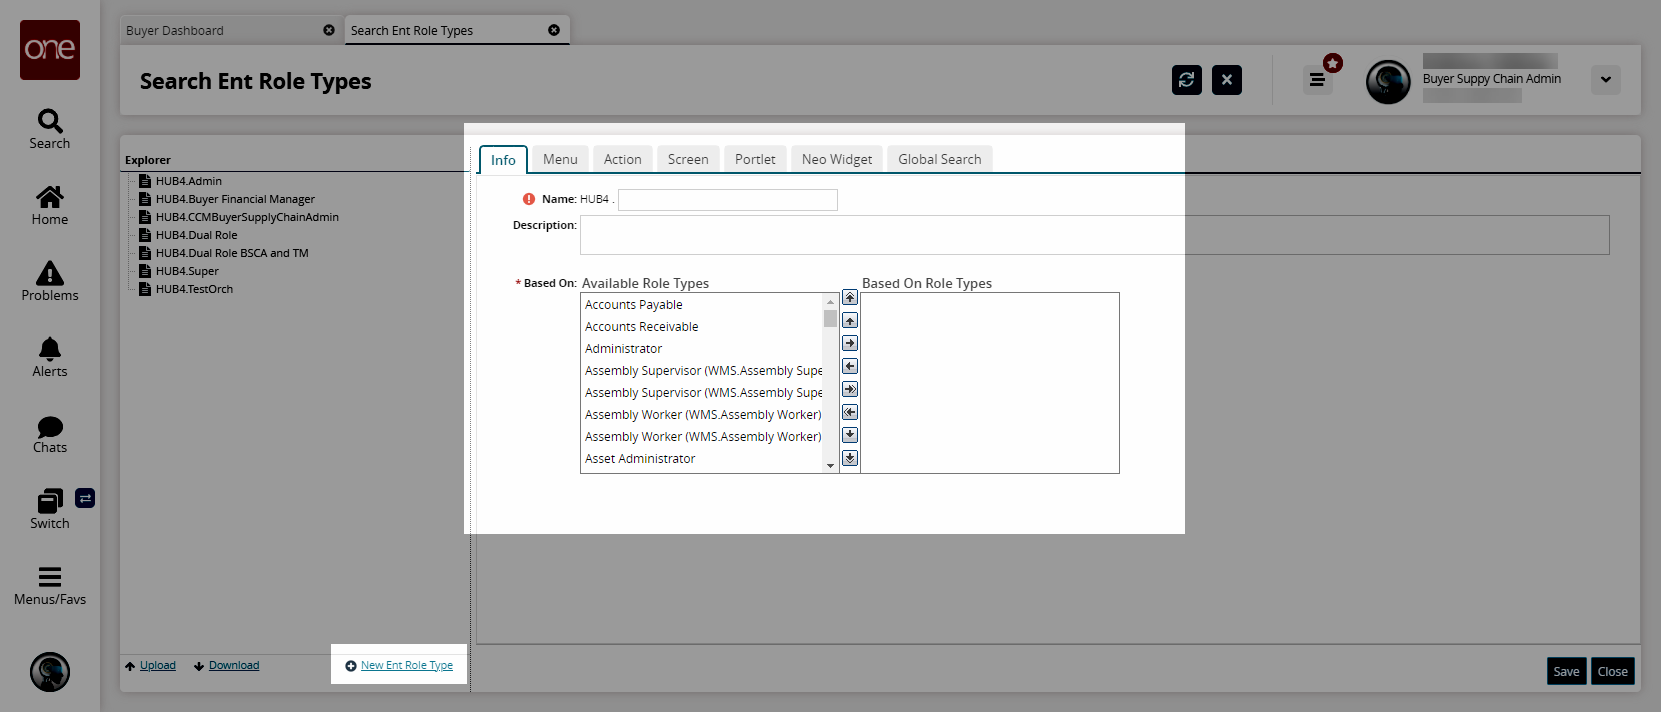
W hen defining a new role type, be aware that the Menu, Action, and Screen settings often have an effect on each other. For example, you can create a role type that has the actions to create a new shipment, but if they have no access to that screen or menu, they cannot perform the action.
Info Tab
The Info tab allows you to define basic information about the role type including the name, description, and the roles it is based on (if any).
Enter a Name and Description for the new enterprise role.
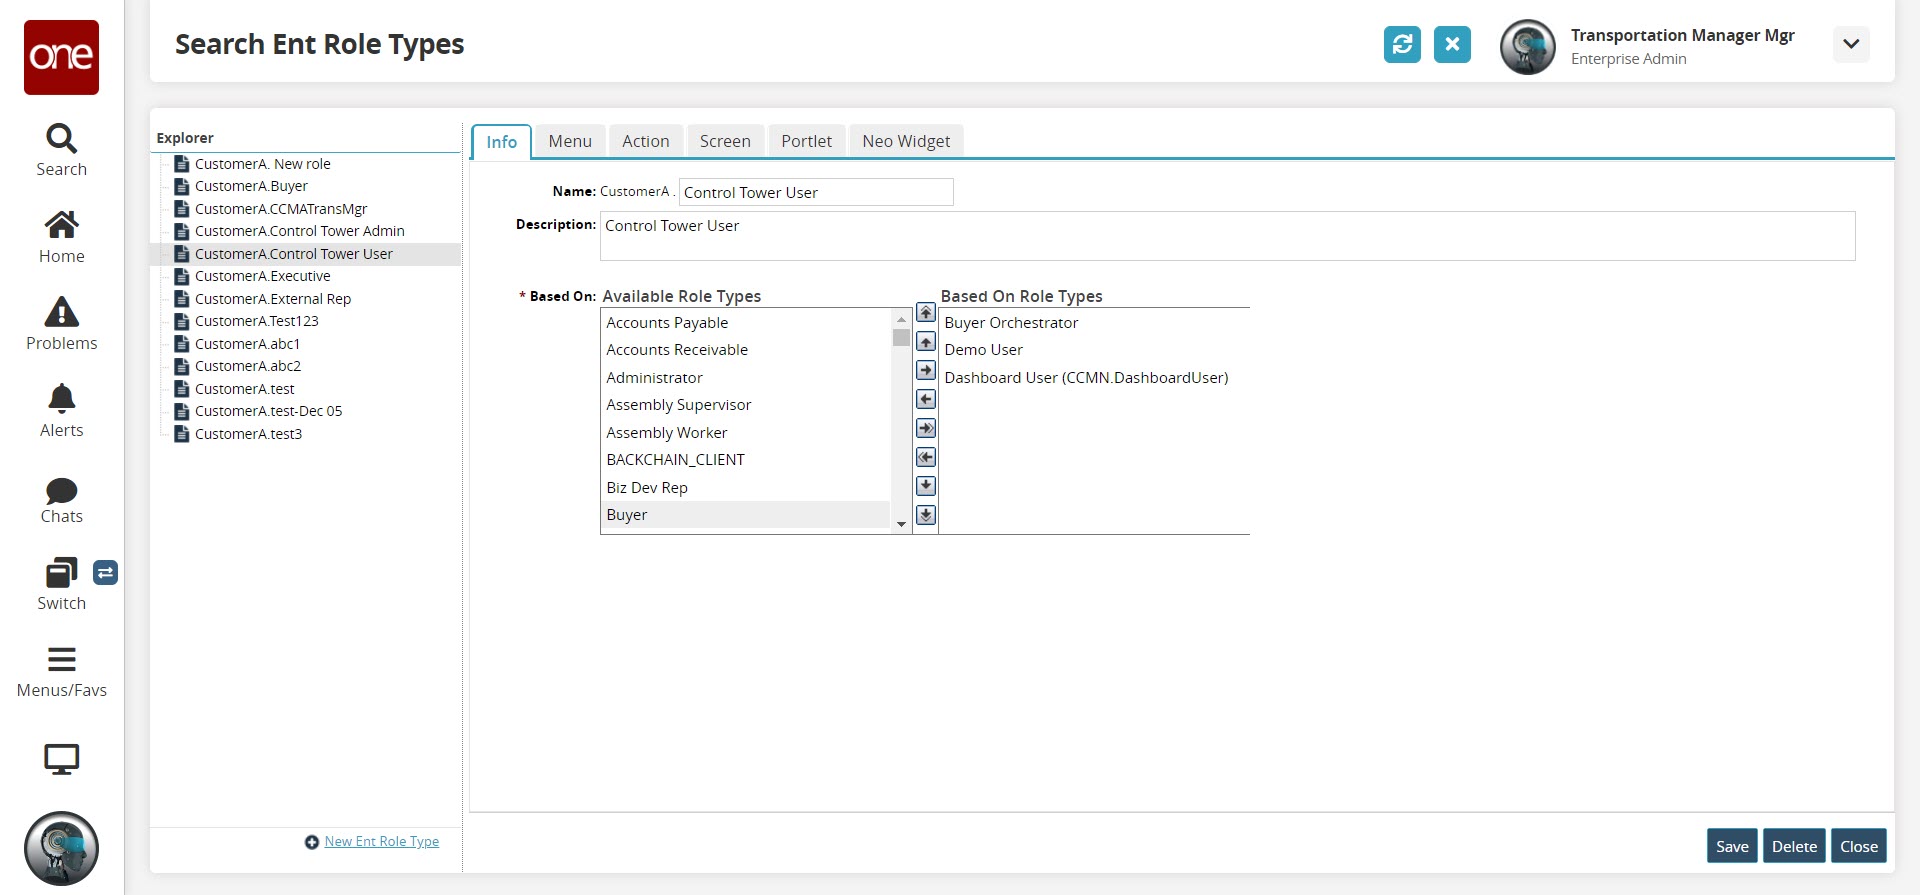
The entries in the Based On field show the roles your custom enterprise type is based on. If you select a role from the list on the left, and add it to the list on the right, your enterprise role will have the same permissions that the Based On role has.
To base the new enterprise role on one or more existing enterprise roles, move them to the right side of the Based On window by selecting them, and clicking the Right arrow.
The selected roles move to the Based On box.
Click Save.
A success message displays to confirm the creation of the new enterprise role type.
Menu Tab
The Menu tab allows you to control what menus a role has access to by selecting and deselecting the menu items in the list. Making a selection at a high level, such as Planning, selects all of the menus under the planning menu as well.
Click the Menu tab.
The Menu pane shows the Menu Item list for the selected role type. By default, all folders are collapsed. Menu items that are allowed for the Based On role are selected by default for the role you are working with.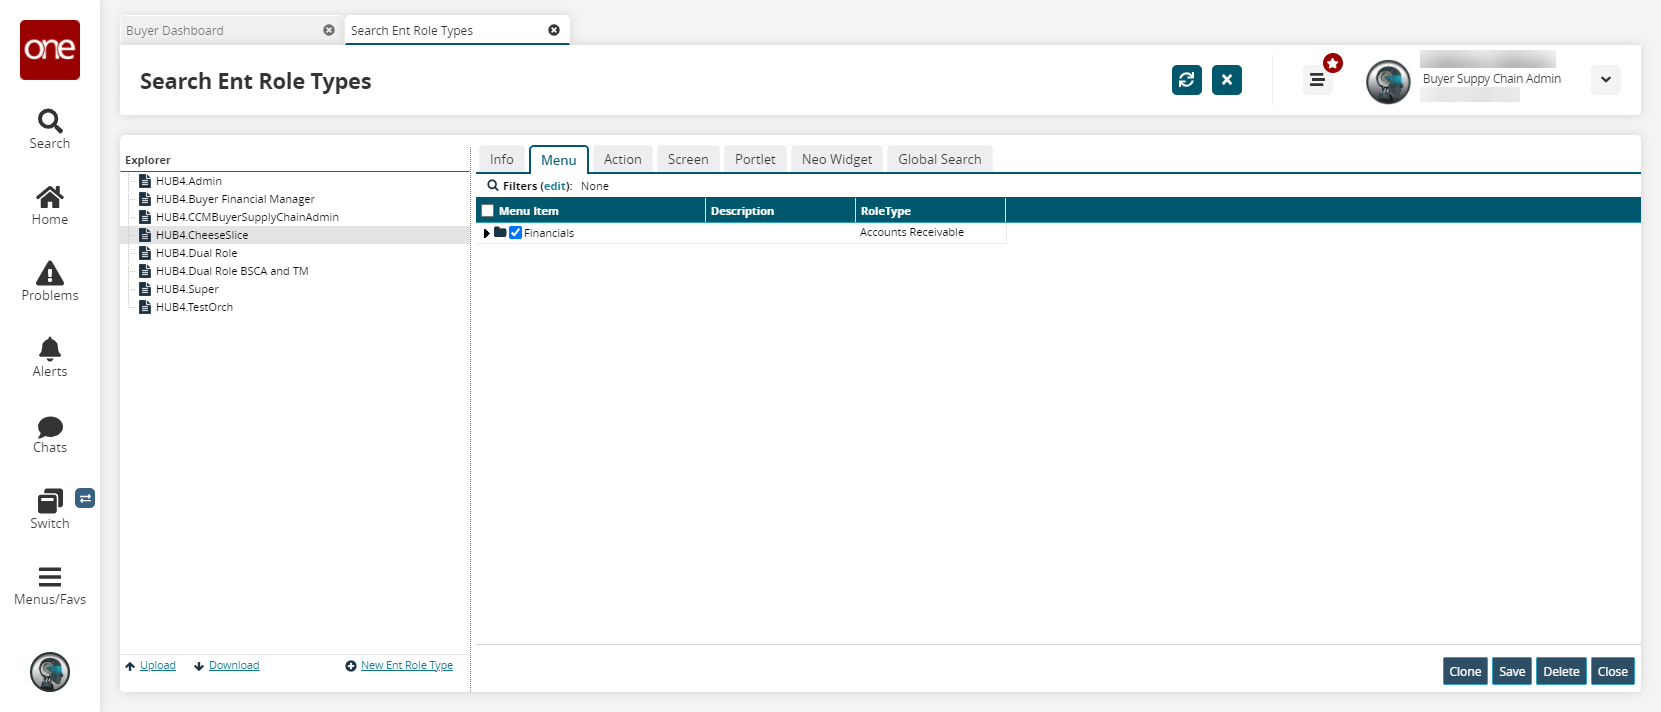
To expand a menu item folder, click the expand button. Similarly, to collapse an expanded folder, click the collapse button.
As appropriate for the selected enterprise role type, expand folders for menus and menu options, then select or clear checkboxes to allow or deny access to menus, options, or sub-options.
The expanded folders show menu options and sub-options.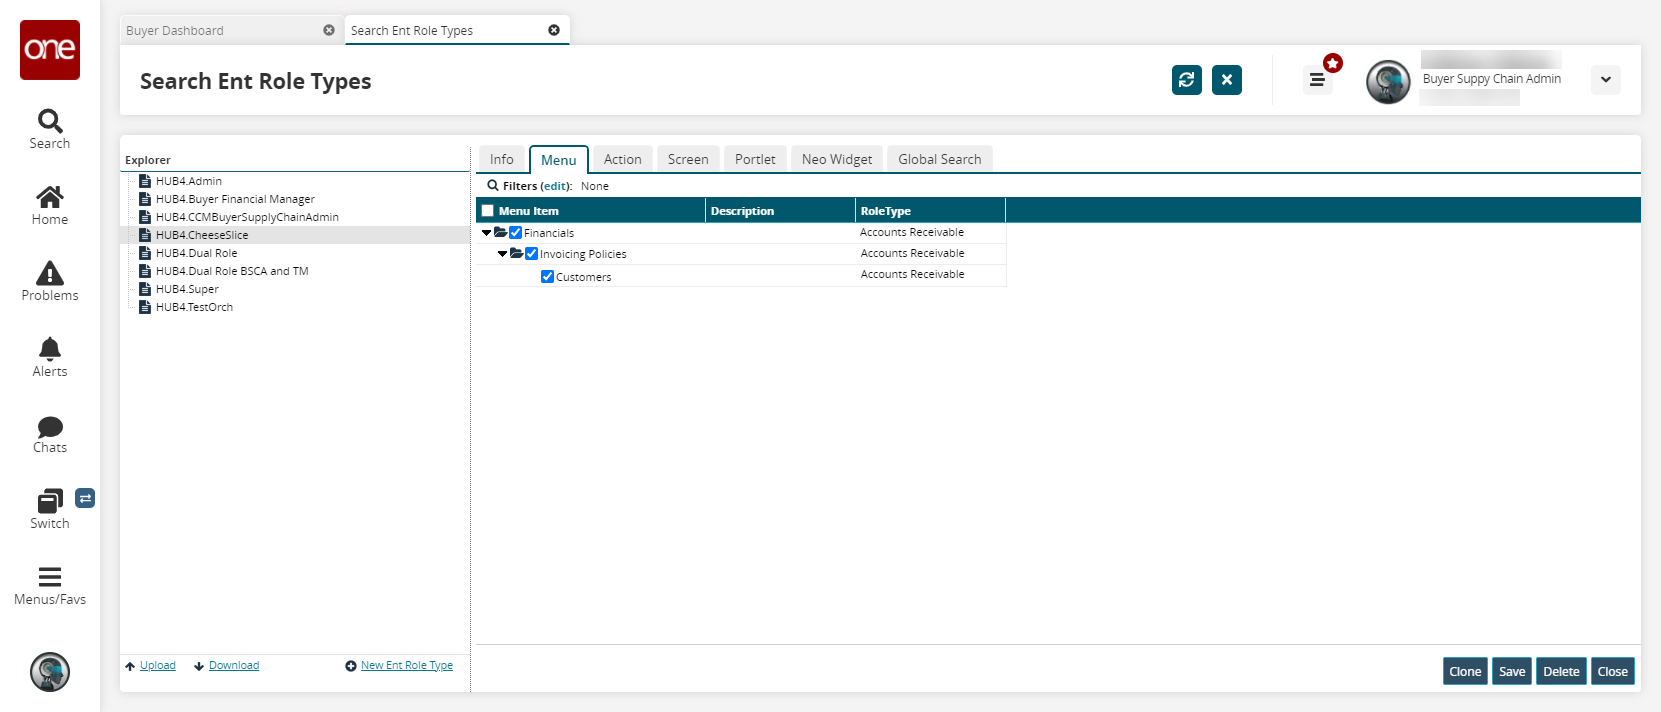
Click Save.
A success message is displayed.
Action Tab
By selecting and deselecting items on the Actions tab, you can allow or restrict certain actions for a role type, controlling what actions users with that selected role type can perform.
Click the Action tab.
The Action tab shows the Action Item list for the selected role type. By default, all folders are collapsed.
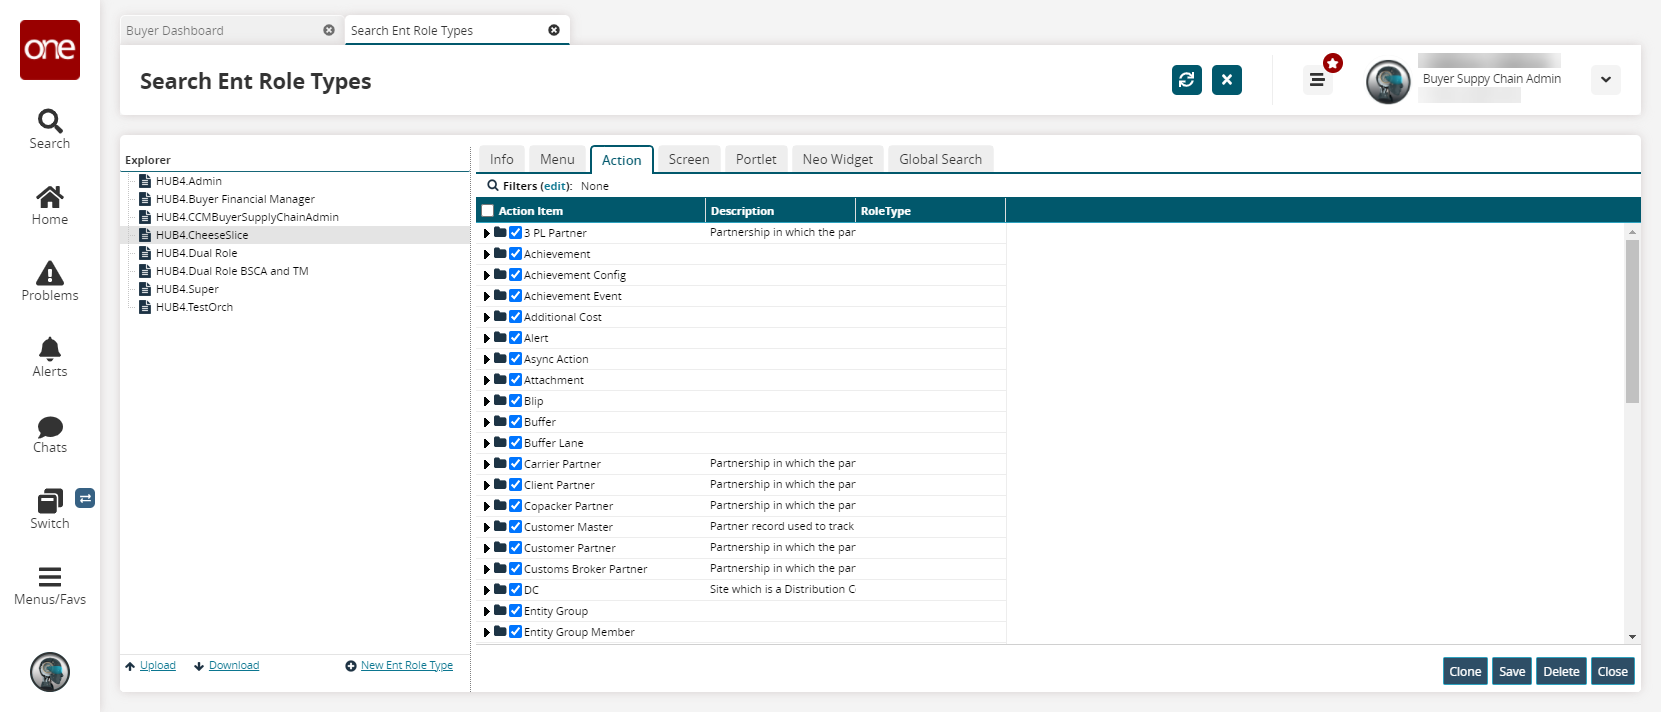
To view the options for each action, expand action folders.
Each action option has a brief description.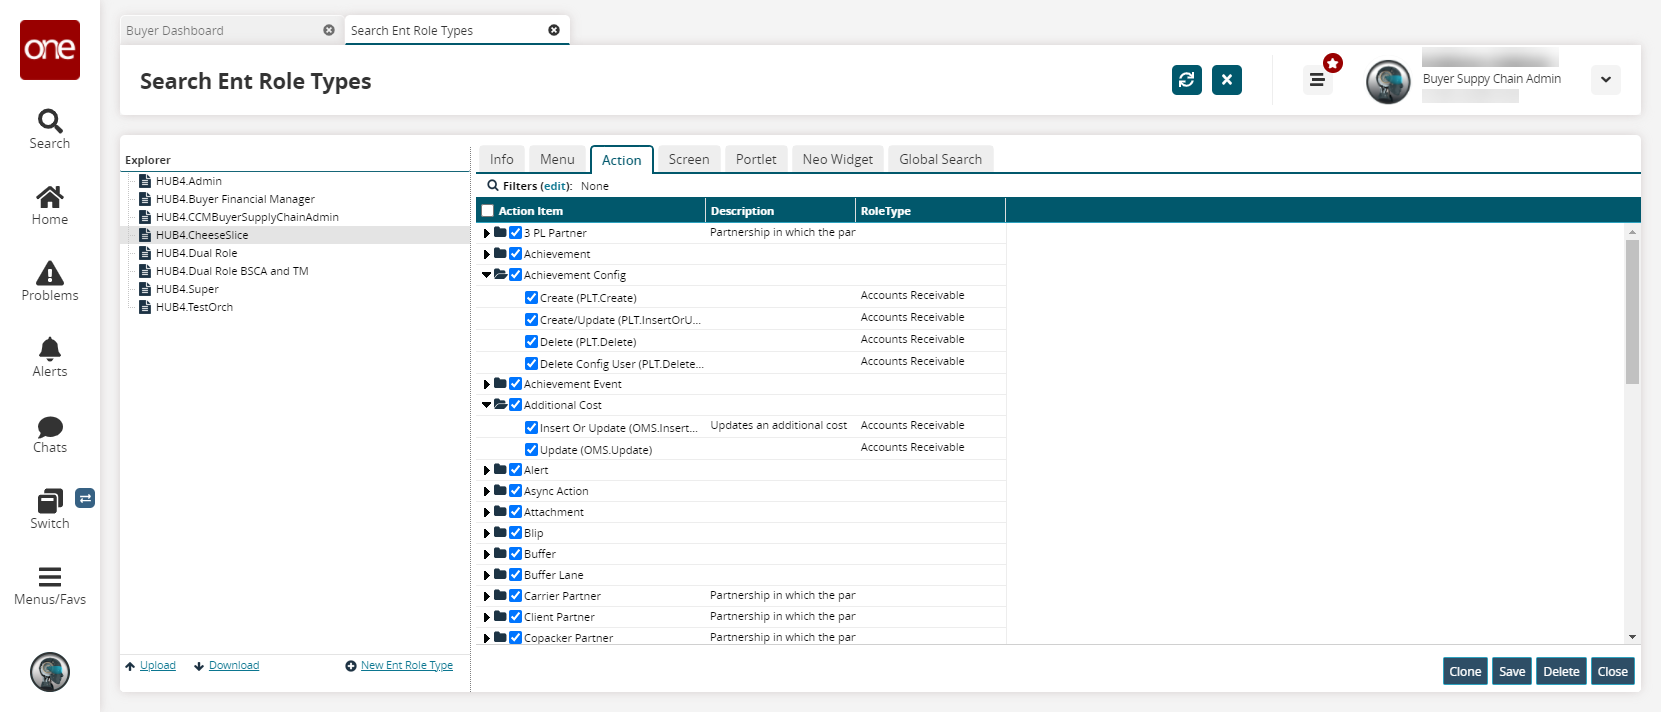
Select actions based on the requirements for the enterprise role type you are creating.
Click Save.
A success message is displayed.
Screen Tab
By selecting and deselecting items on the Screen tab, you can allow or restrict certain screens for a role type, controlling what screens users with that selected role type can see.
Click the Screen tab.
The Screen pane shows the Global Screen Element list for the selected role type.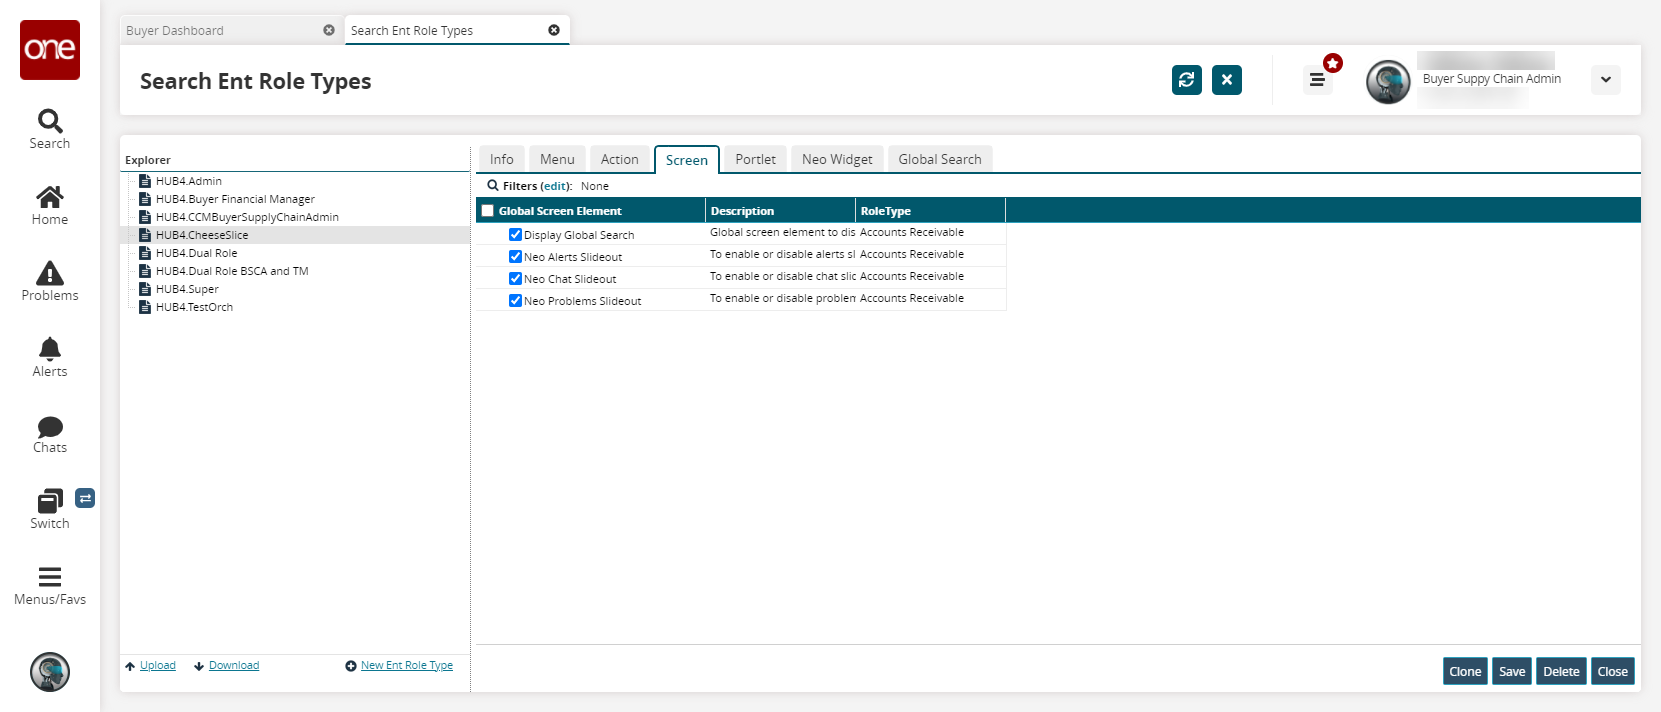
As appropriate for the selected enterprise role type, select or clear checkboxes to allow or deny access to global screen element options.
Click Save.
A success message is displayed.
Neo Widget Tab
By selecting and deselecting items on the Neo Widget tab, you can allow or restrict certain widgets for a role type, controlling what widgets users with that selected role type can use.
Click the Neo Widget tab.
The Neo Widget pane shows the NeoWidget Item list for the selected role type.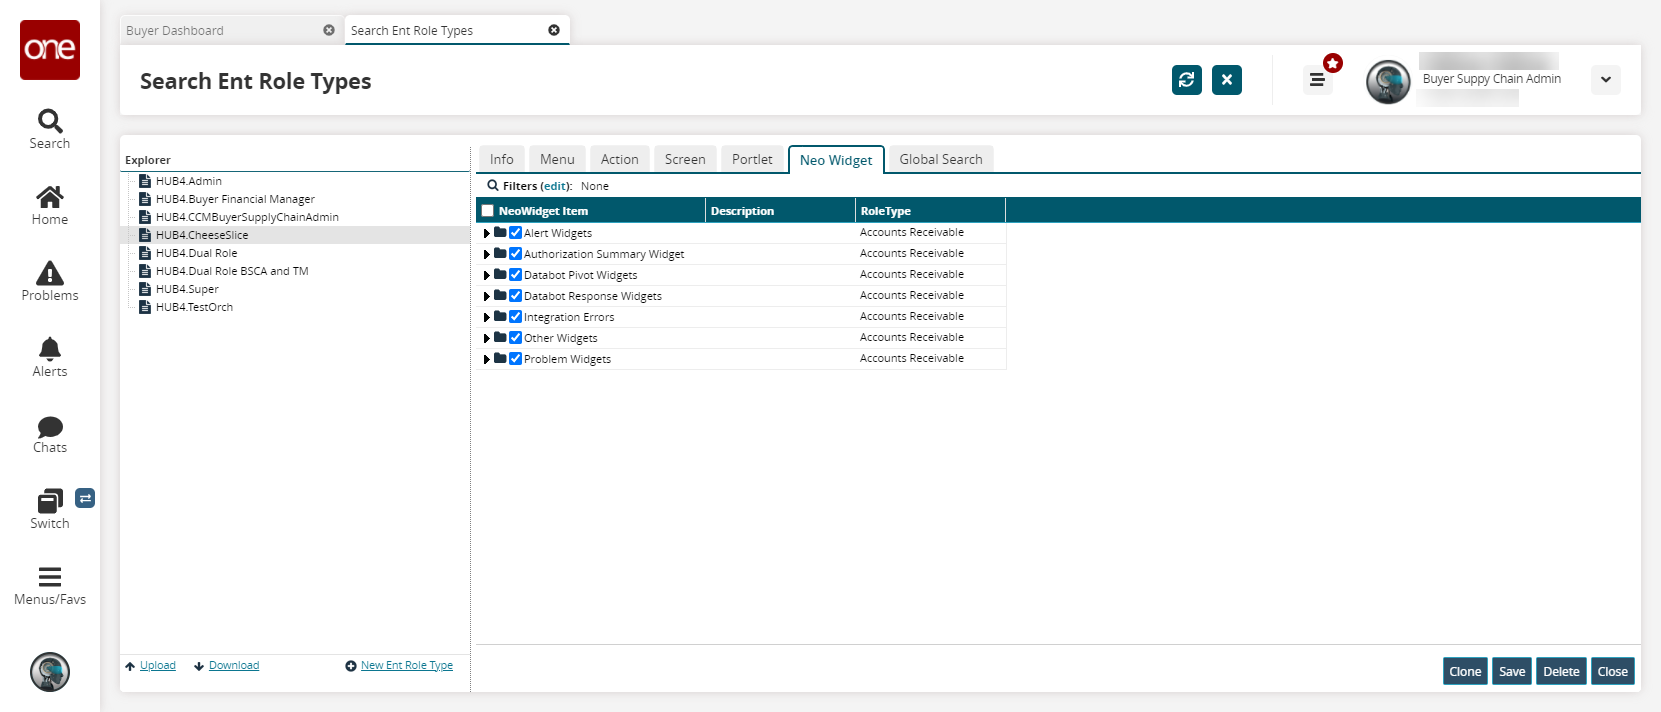
As appropriate for the selected enterprise role type, select or clear checkboxes to allow or deny access to specific widgets.Click Save.
A success message is displayed.
Global Search Tab
By selecting and deselecting items on the Global Search tab, you can allow or restrict certain global searches for a role type, controlling what searches users with that selected role type can use.
Click the Global Search tab.
The Global Search pane shows the GlobalSearch Item list for the selected role type.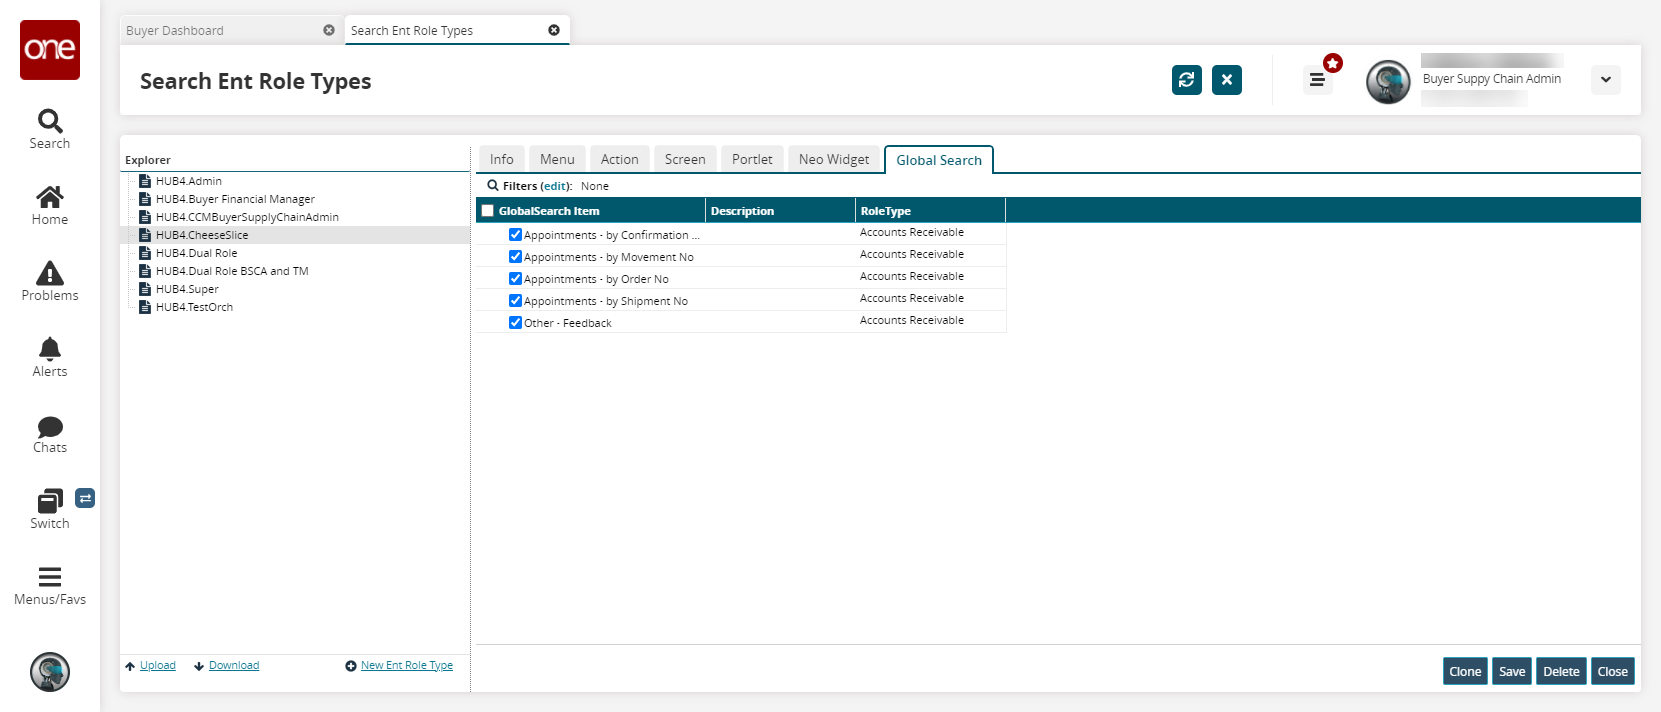
As appropriate for the selected enterprise role type, select or clear checkboxes to allow or deny access to specific searches.Click Save.
A success message appears.
Role Setting
Associate the new role with a test user you create. See the "Adding Users" section for more information on adding a user to the system.
Log in to the test role you created using the user name and password you defined.
Verify that the user can perform the actions you intended. If any required actions were overlooked, and the user with the new role type cannot perform the desired actions, the system generates an error message allowing you to determine which unselected actions are causing the issue.
With the information from the error message, update the actions settings for the role type.
See the following tables for sample action configurations. This table describes how to set up actions for a role type that can only create new shipments.
|
Primary Category |
Secondary Category |
|
Movement |
|
|
Tender Plan |
|
|
Cost Component |
|
|
Movement Tracking Event |
|
|
Shipment Tracking |
|
|
Reservation |
|
|
Invoice |
|
|
Invoice Hold |
|
|
Shipment Milestone |
|
|
Tracking Event Cnfg |
|
|
Tracking Event Config |
|
This table describes how to set up actions for a role type that can only modify dates on existing shipments.
|
Primary Category |
Secondary Category |
|
Shipment |
|
|
Movement |
|
|
Shipment Tracking Event |
|