Adding Locations to Warehouses or Other Locations
Users can add a location to a warehouse or to another location within a warehouse. For example, if you have a warehouse Warehouse A, and in Warehouse A is a location Facility B, you can add a location, such as a shelf or a zone, to Facility B.
Complete the following steps to add a location to a warehouse or another location using Warehouse Explorer:
Log in to the ONE system.
Click Menus/Favs > Warehouse Mgmt >Warehouse Explorer .
The Warehouse Explorer screen displays .
Select the warehouse or another location in the Explorer pane.
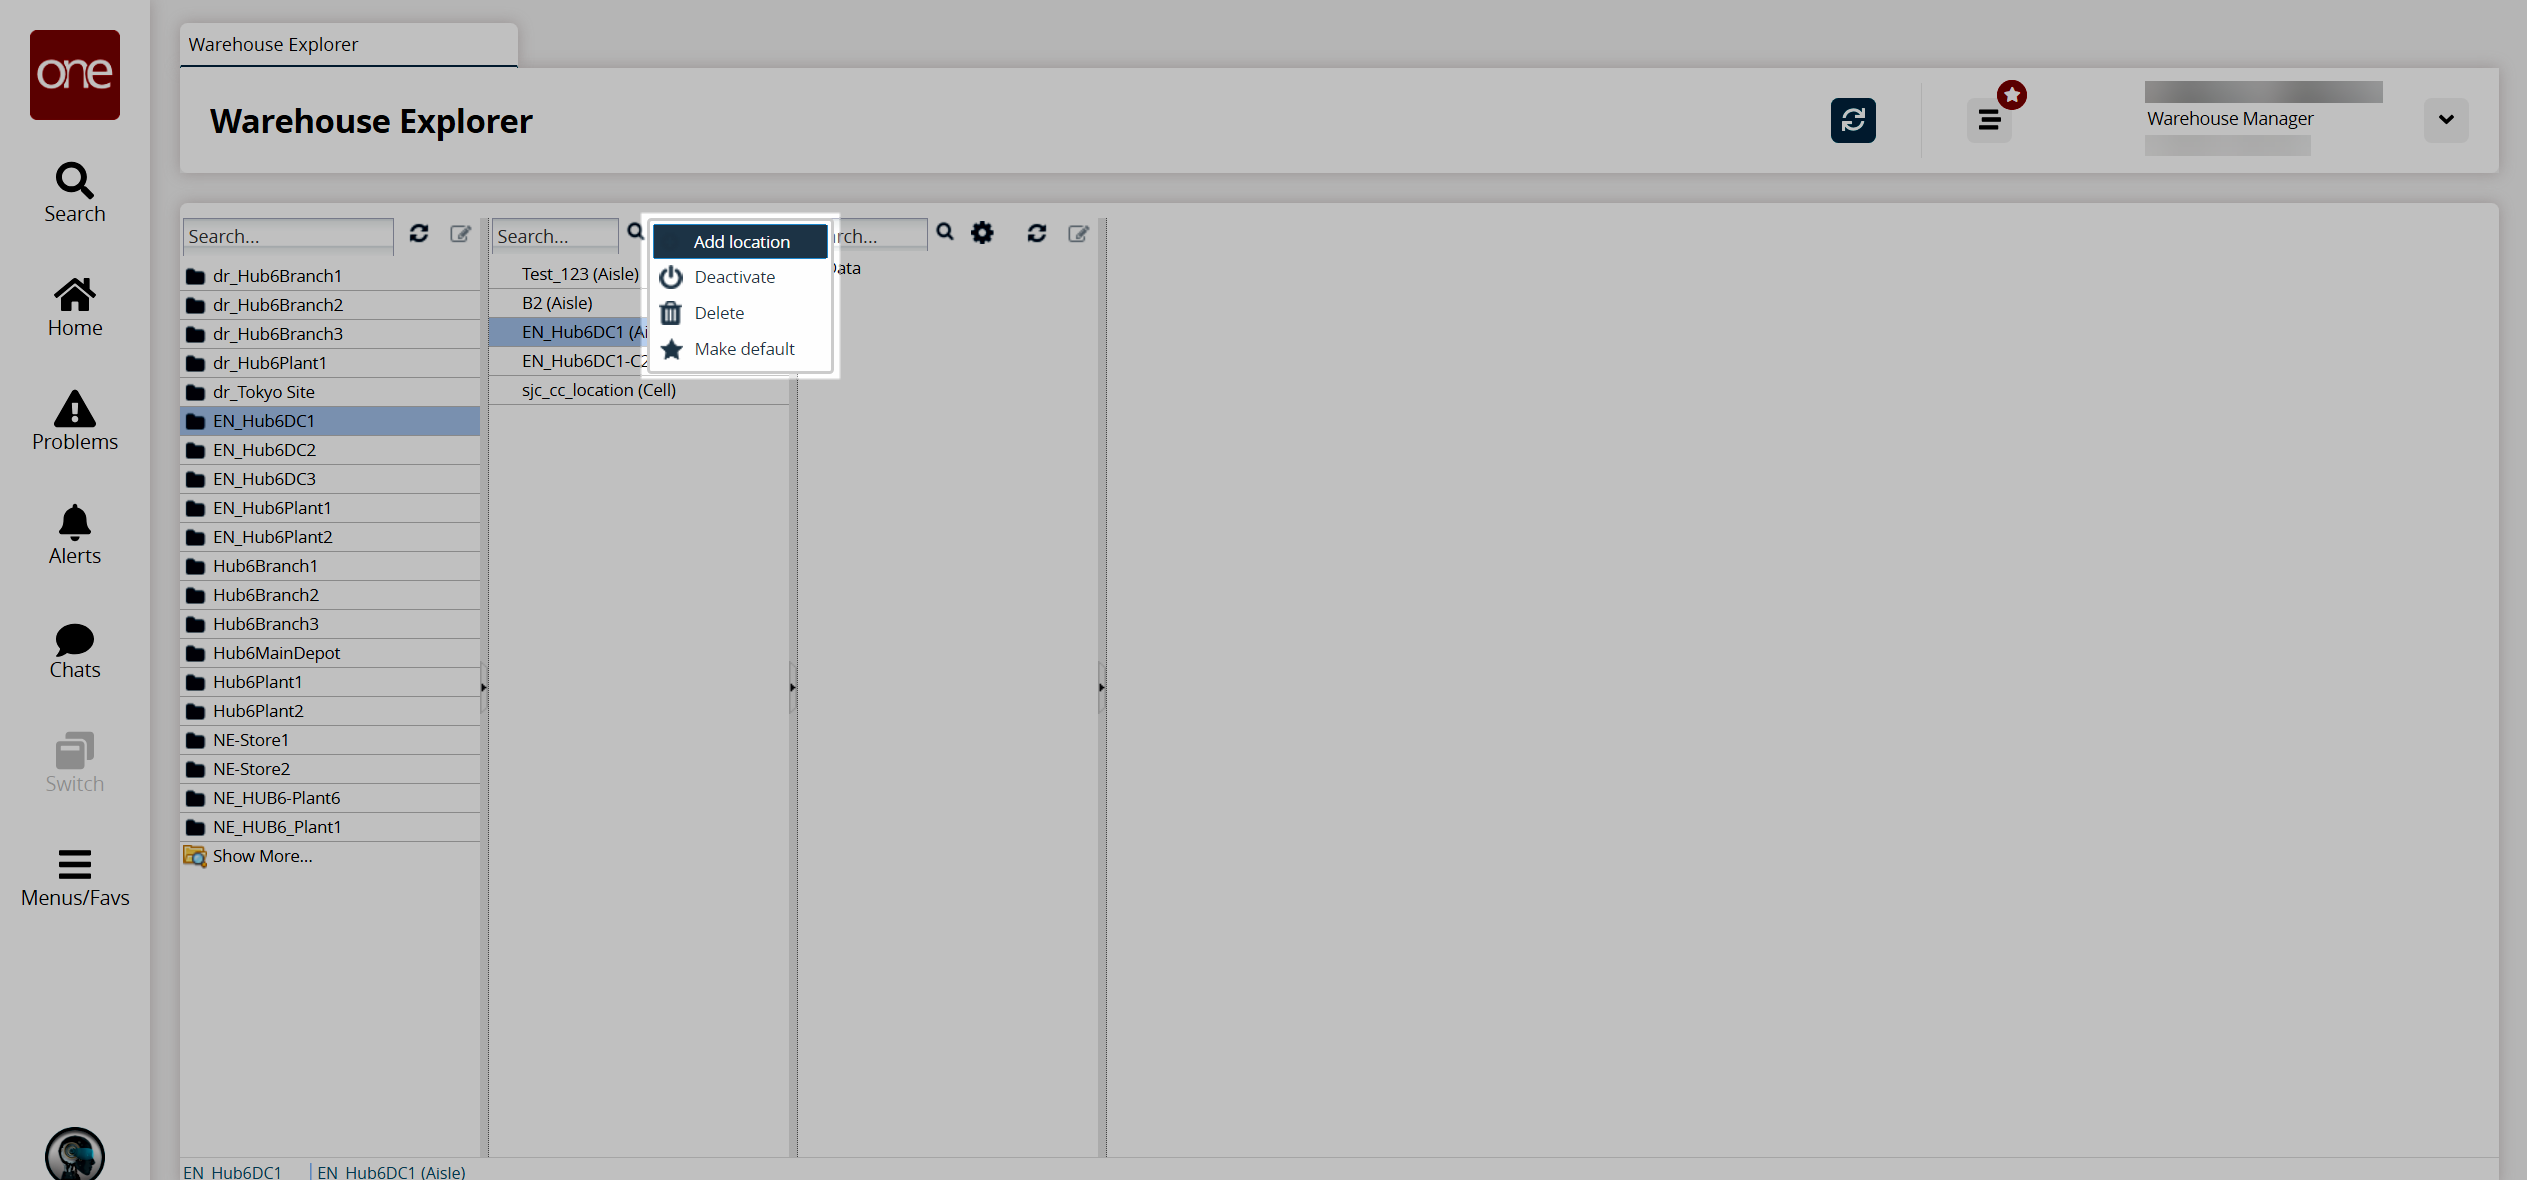
A second pane displays.Click the cog icon and then click Add Location.
The Add Location popup displays.
Fill out the following fields. Fields with an asterisk ( * ) are required.
Field
Description
* Location Type
Select a value from the drop-down menu. The available options are Aisle, Cell, Facility, Floor, Level, Row, Shelf, or Zone.
* Name
Enter a name for the location.
* Display Name
Enter a display name for the location.
Active?
Select this checkbox if the new location is active.
Is Default
Select this checkbox if the new location is a default location.
Capacity, Spaces
Define the capacity or number of spaces for the location.
Auto-Putaway
Select this checkbox to enable the auto-putaway feature.
Locked
Select this checkbox if the location is locked.
Site Resource
Use the picker tool to select a Site Resource.
Click Create.
The new location displays in the Locations pane for the selected warehouse or in the warehouse explorer.