Working with Warehouse Explorer
The Warehouse Explorer makes it easy to add a location, deactivate a location, delete a location, or set a default for your enterprise.
Complete the following steps to access the Warehouse Explorer and assign areas for specific operations:
L og in to the ONE system.
Click Menus/Favs > Warehouse Mgmt > Warehouse Explorer.
The Warehouse Explorer screen appears.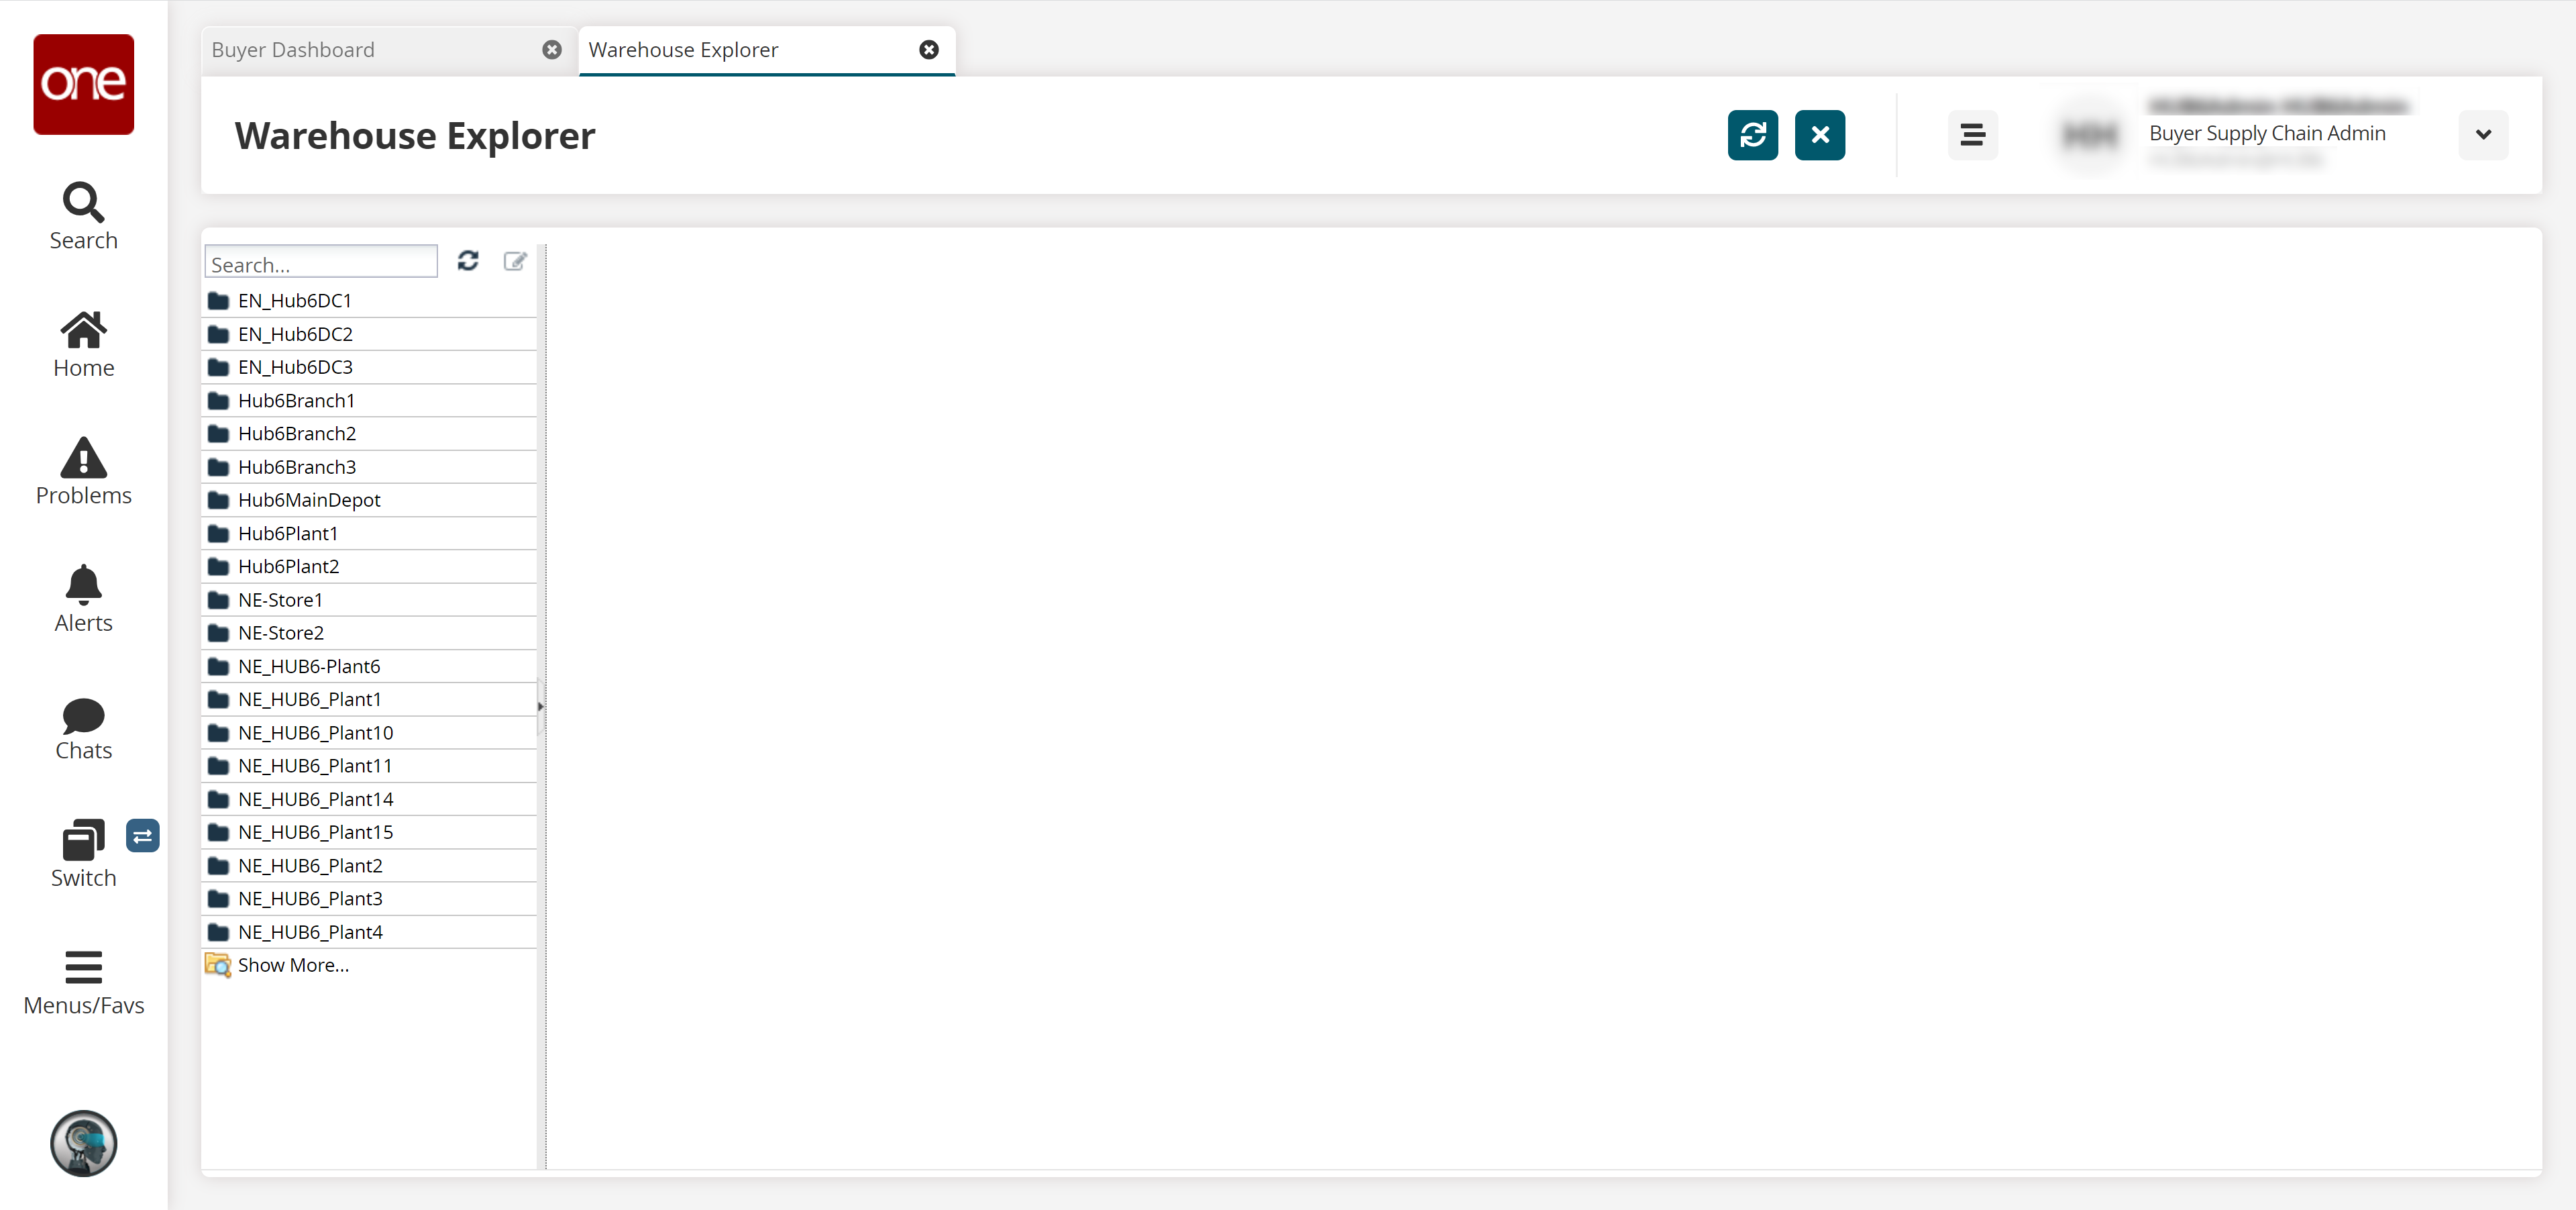
Search for and select the desired warehouse in the left Explorer pane.
Click the Edit
 icon.
icon.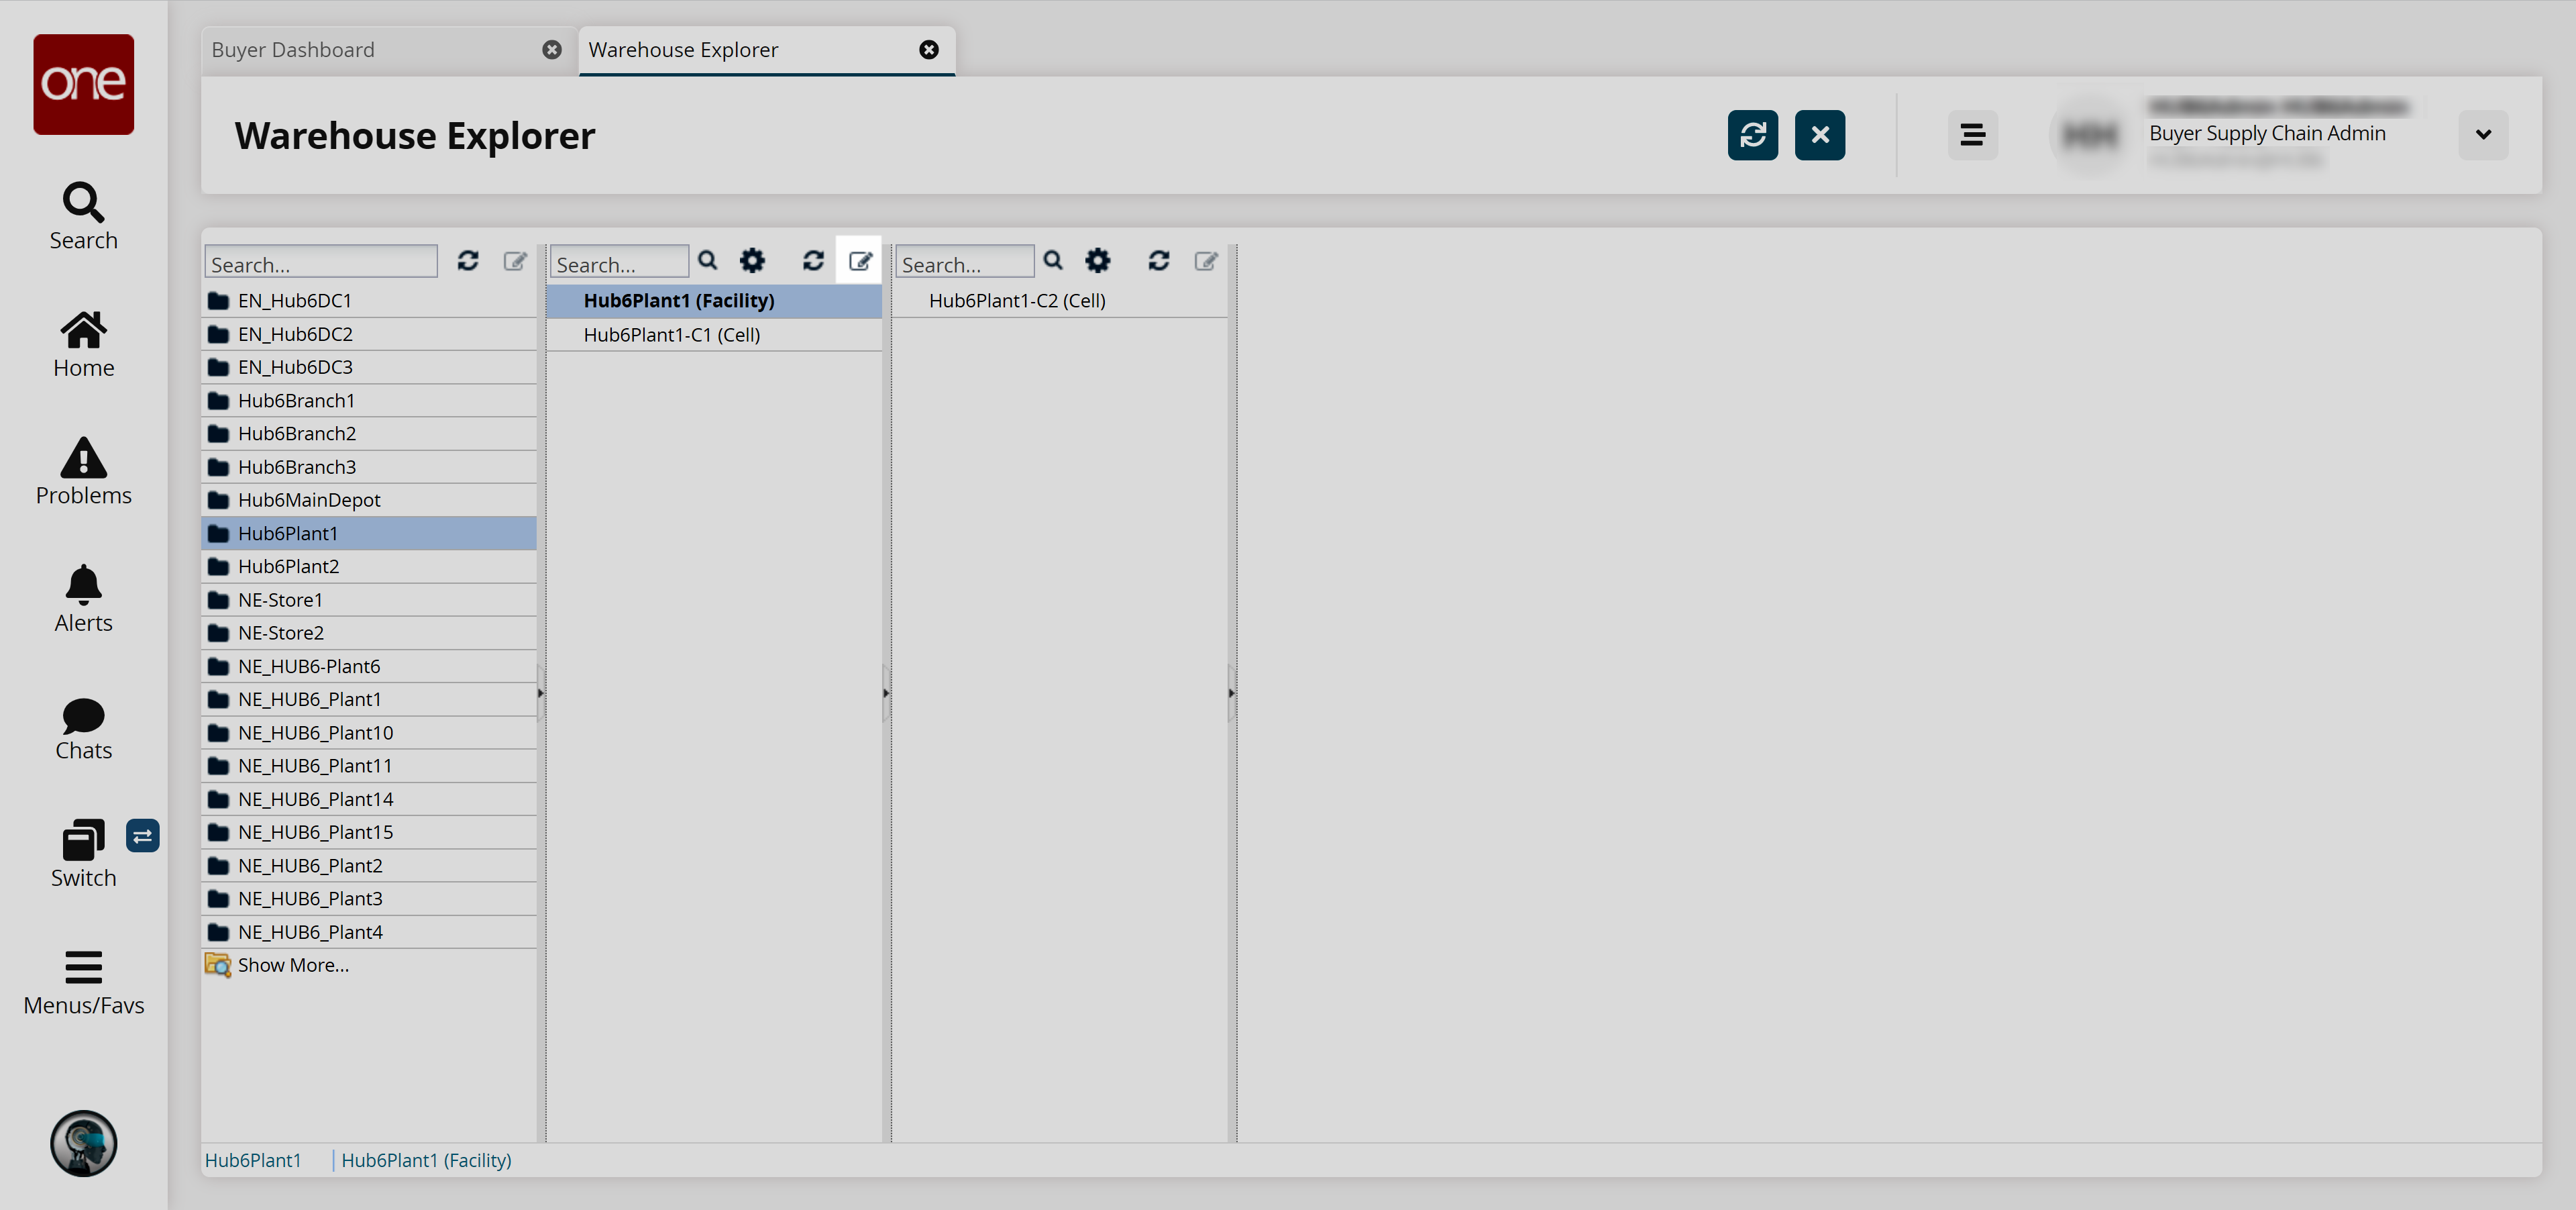
The location details appear in a separate pane.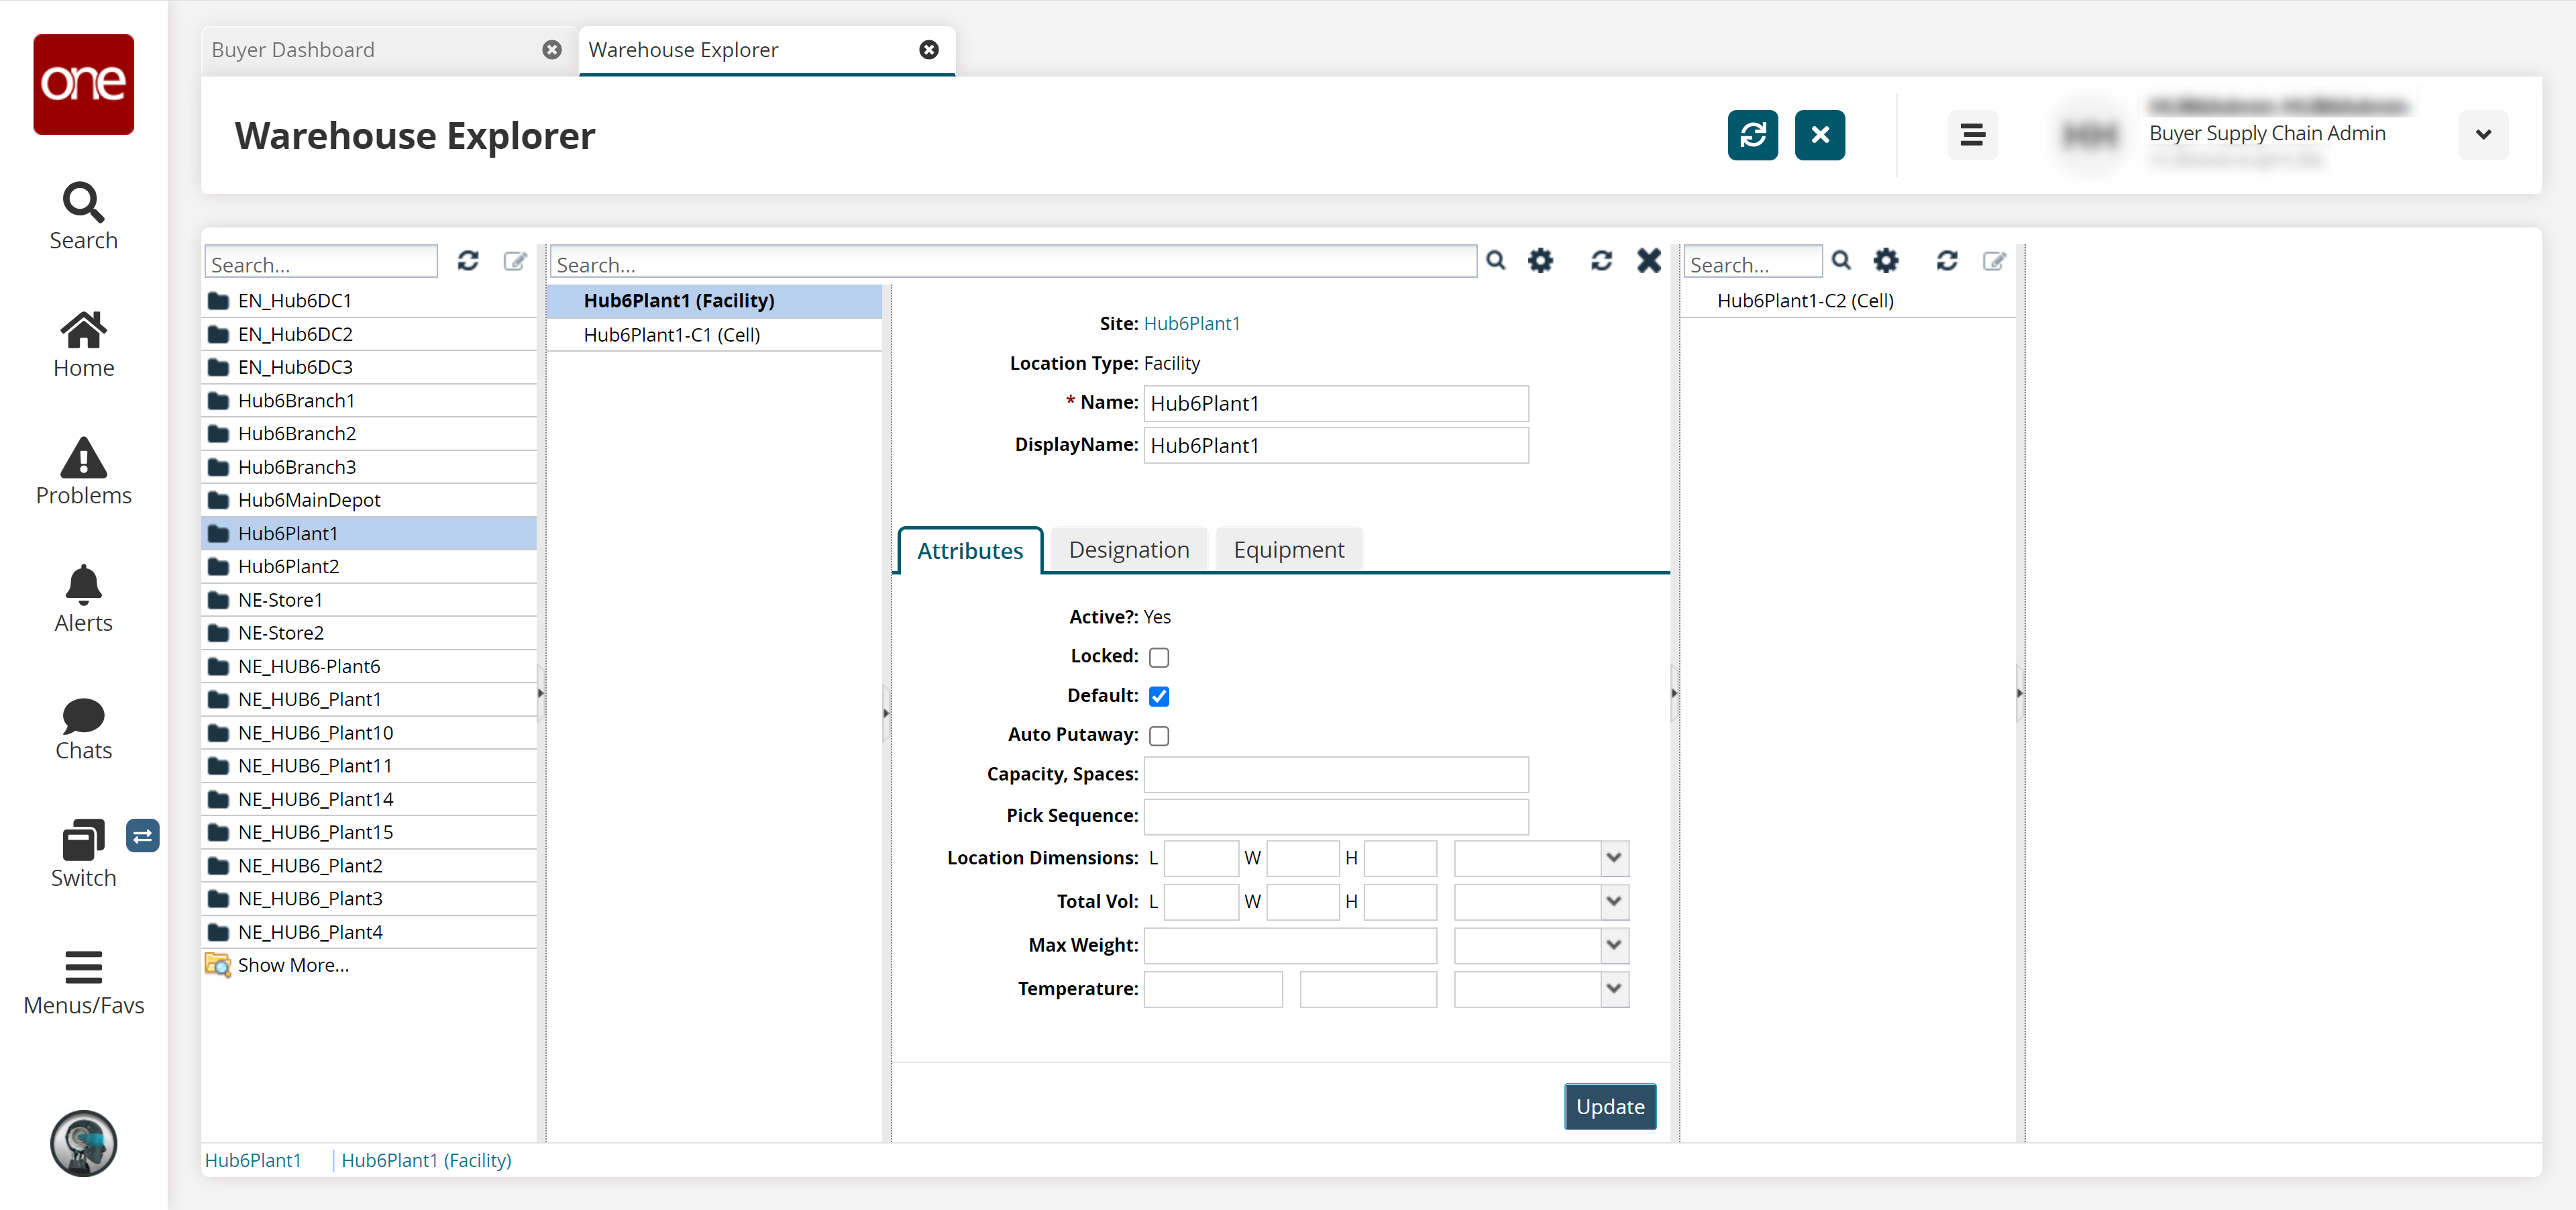
Fill out the * Name field and the Display Name field. Fields marked with an asterisk ( * ) are required.
Fill out the following fields in the Attributes tab.
Field
Description
Locked
Select this checkbox to lock the selected location.
Is Default
Select this checkbox to mark the selected location as the default location.
Auto-Putaway
Select this checkbox to enable the Auto-Putaway option for the selected location.
Capacity, Spaces
Enter the allocated capacity or the number of spaces for the selected location.
Pick Sequence
Enter a pick sequence.
Warehouse layouts are represented by multiple aisles, bays, and zones. For zones, the Pick Sequence field is intended to guide a warehouse worker with an optimal picking order. The Pick Sequence field is an integer value that describes a unique sequence within a zone; if a warehouse location structure does not have zones defined, then the pick sequence is defined globally (for all locations of the site). A higher number represents a longer distance from the zone entrance, while conversely, a lower number represents a shorter distance from the zone entrance.
If a specific pick sequence already exists for a location and a user attempts to apply that same pick sequence to another location, then a confirmation popup appears to inform the user and ask if they want to shift the pick sequence for all locations starting from the entered pick sequence.
If the user selects NO, then no action is taken.
If the user selects YES, then the pick sequence is increased by one for all locations within the same zone starting from the entered pick sequence. Once completed, the entered pick sequence is saved to the current location.
Lastly, if a pick sequence is not defined for a location, the system will order the sequence in ascending order by aisle, bay, row by zone.
Location Dimensions
Enter the dimensions of a location and then select the unit of measurement from the drop-down list.
Users must enter dimensions in the length (L), width (W), and height (H) format.Total Vol
Enter the total volume of the location and then select the unit of measurement from the drop-down list.
Users must enter dimensions in the length (L), width (W), and height (H) format.Max Weight
Enter the maximum weight and then select the unit of measurement from the drop-down list.
Temperature
Enter the temperature range for the location and then select the unit of measurement from the drop-down list.
Select the Designation tab.
The tab opens.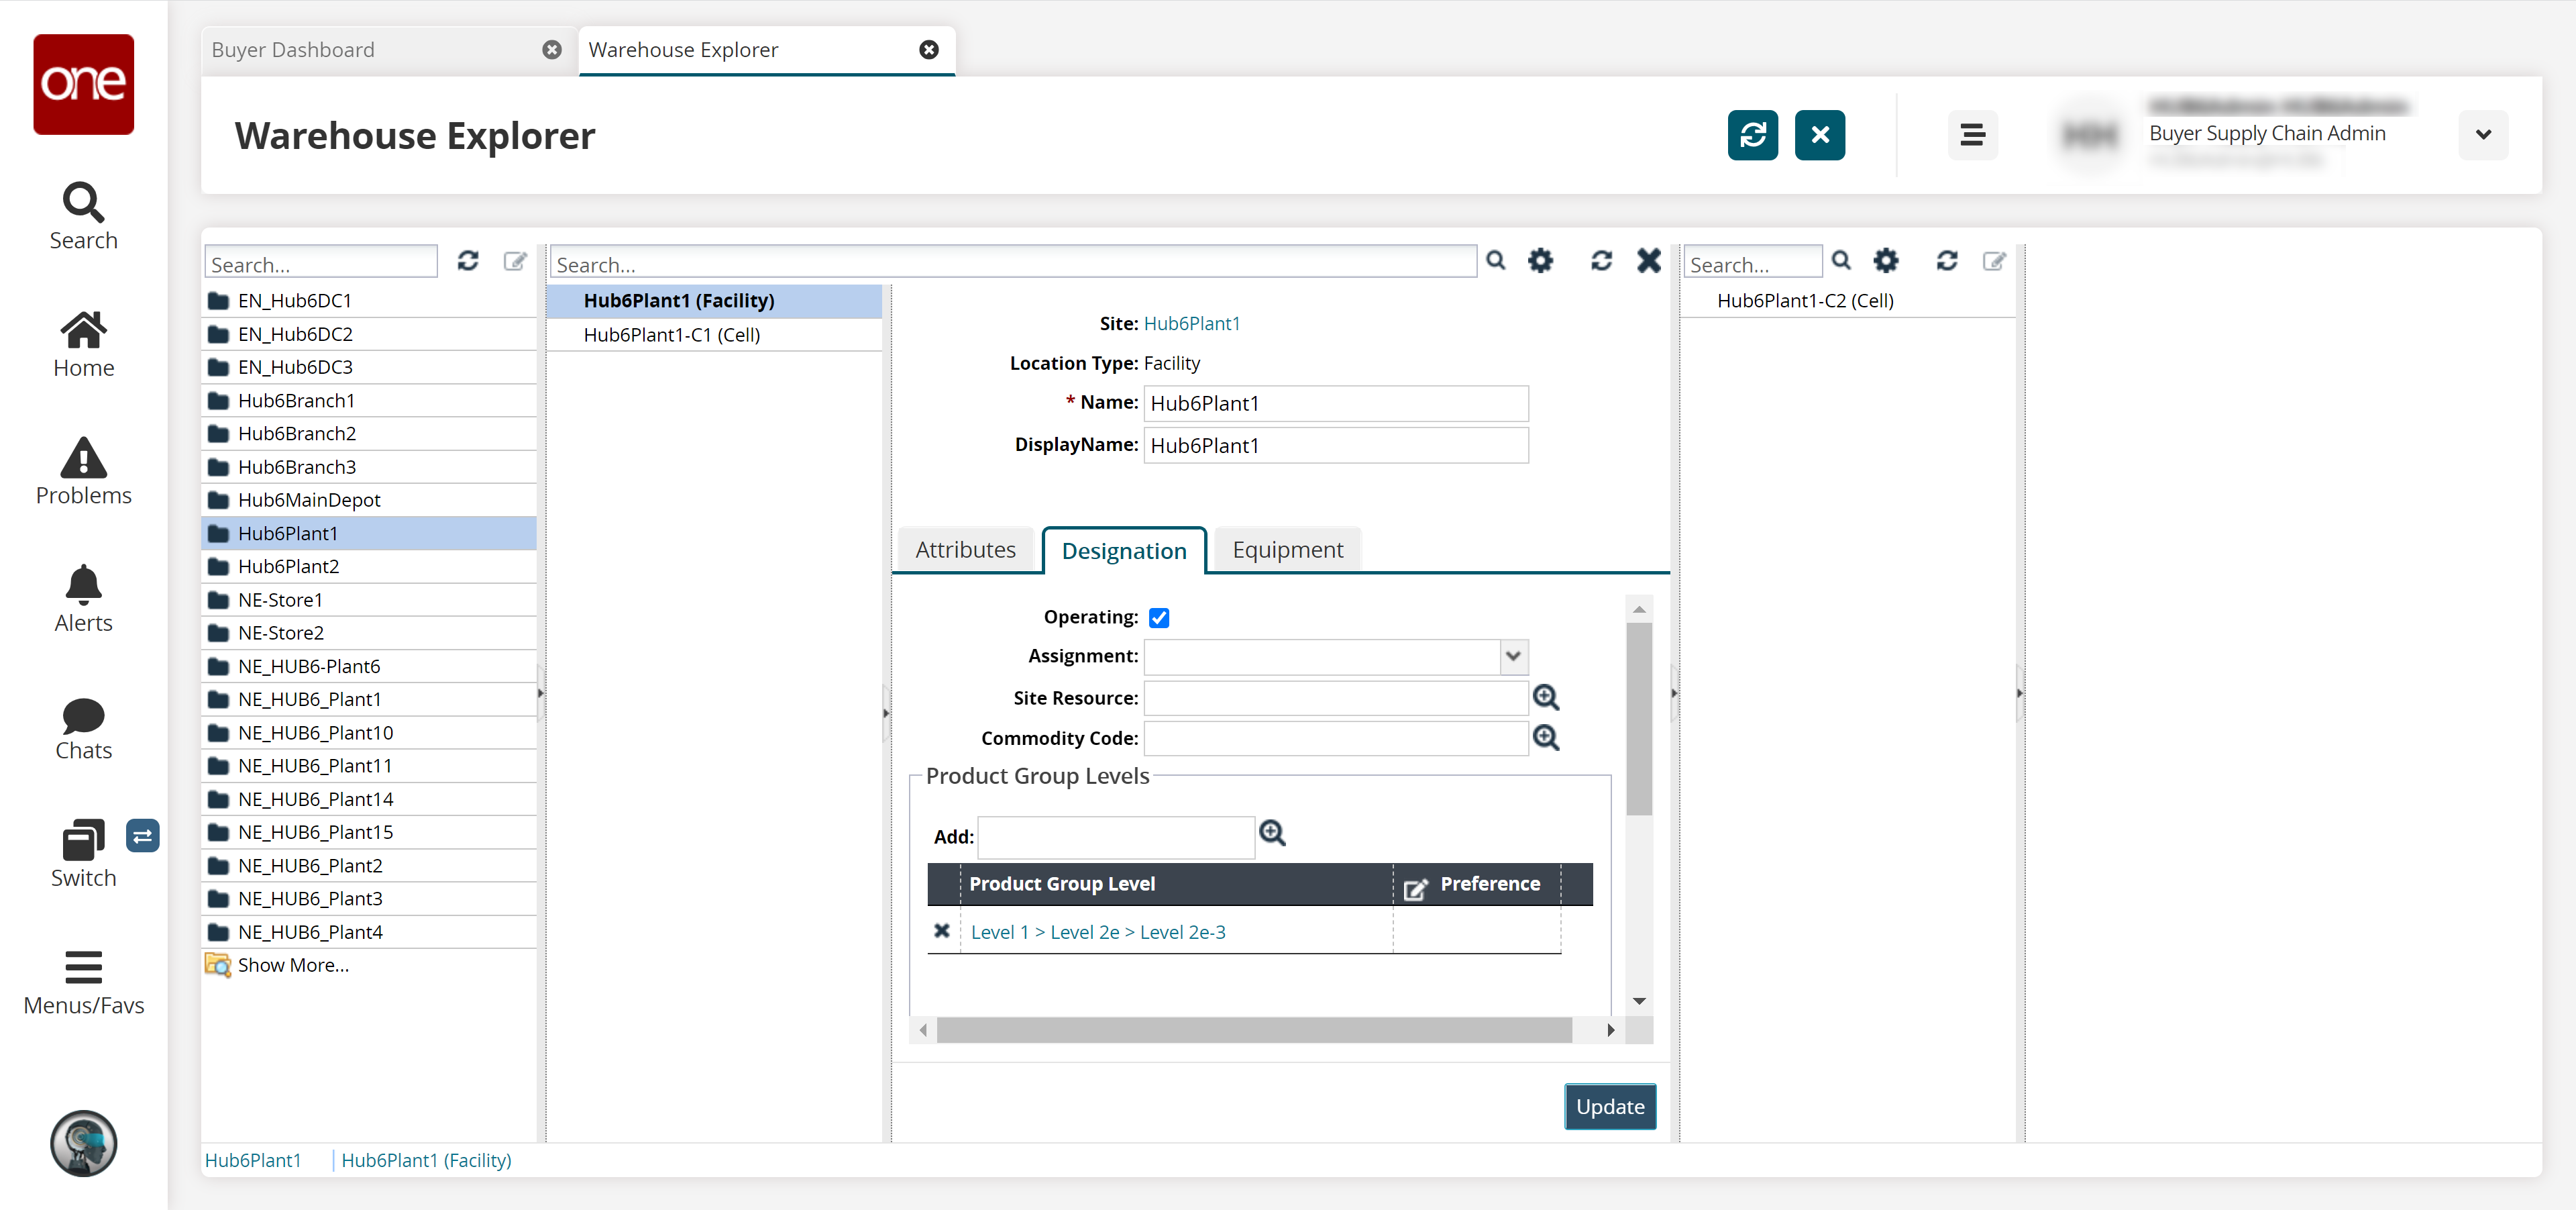
Fill out the following fields in the Designation tab.
Field
Description
Operating
Select this checkbox to indicate the location is in operation.
Operating locations are locations actively used in warehouse operations without any limitation, such as the day-to-day activities of picking, putaway, and transferring of inventory. During warehouse maintenance, warehouse managers can use the new Operating field to set or unset a warehouse location as an operating location.
When the Operating flag is set to True, the location can hold inventory, and all inventory operations are allowed.
When the Operating flag is set to False, the location can still hold inventory, but the only allowed inventory operations are those that reduce inventory, not increase it.
The Auto Enable Operating Location policy in the WMS Maintenance policy group identifies the location types that will automatically have their Operating flag set to True by default. If this policy is undefined, then the following location types will have the Operating flag set to True: AISLE, BULK, SLOT, BIN.
Assignment
Select one of the following options to designate the selected location for a specific warehouse operation:
Inbound Dock: A location used for initial check-in and unloading. Usually corresponds to dock doors with the same name.
Inbound Staging: A location where inventory is staged for receiving after unloading is done. A single dock-door group may have multiple staging locations identified as receiving lanes for a particular warehouse configuration.
Outbound Dock: A location used for check-out and loading. Usually corresponds to dock doors with the same names.
Outbound Staging: A location where packed/palletized inventory is staged for loading and shipping.
Pallet Building: Pallet building area where goods are transferred after picking/parcel packing is done for palletizing.
Parcel Packout: Parcel packing area where goods are secured with additional material and packed into cartons.
Picking: A picking location where goods are picked. Usually corresponds to manual pick or designated picking area where goods are delivered/replenished from storage (lower two levels of the rack).
Storage: A location where goods are put away after receiving or kitting. Usually, the top three levels of the rack.
Site Resource
Use the picker tool to select a dock door or a dock door group.
Commodity Code
Use the picker tool to select a commodity code.
Product Group Level
Use the picker tool to select a product group level. Input an integer value in the Preferences field.
Items
Use the picker tool to select an item: the item description will populate with information from the item details screen. Input an integer value in the Preferences field.
Select the Equipment tab.
The tab opens.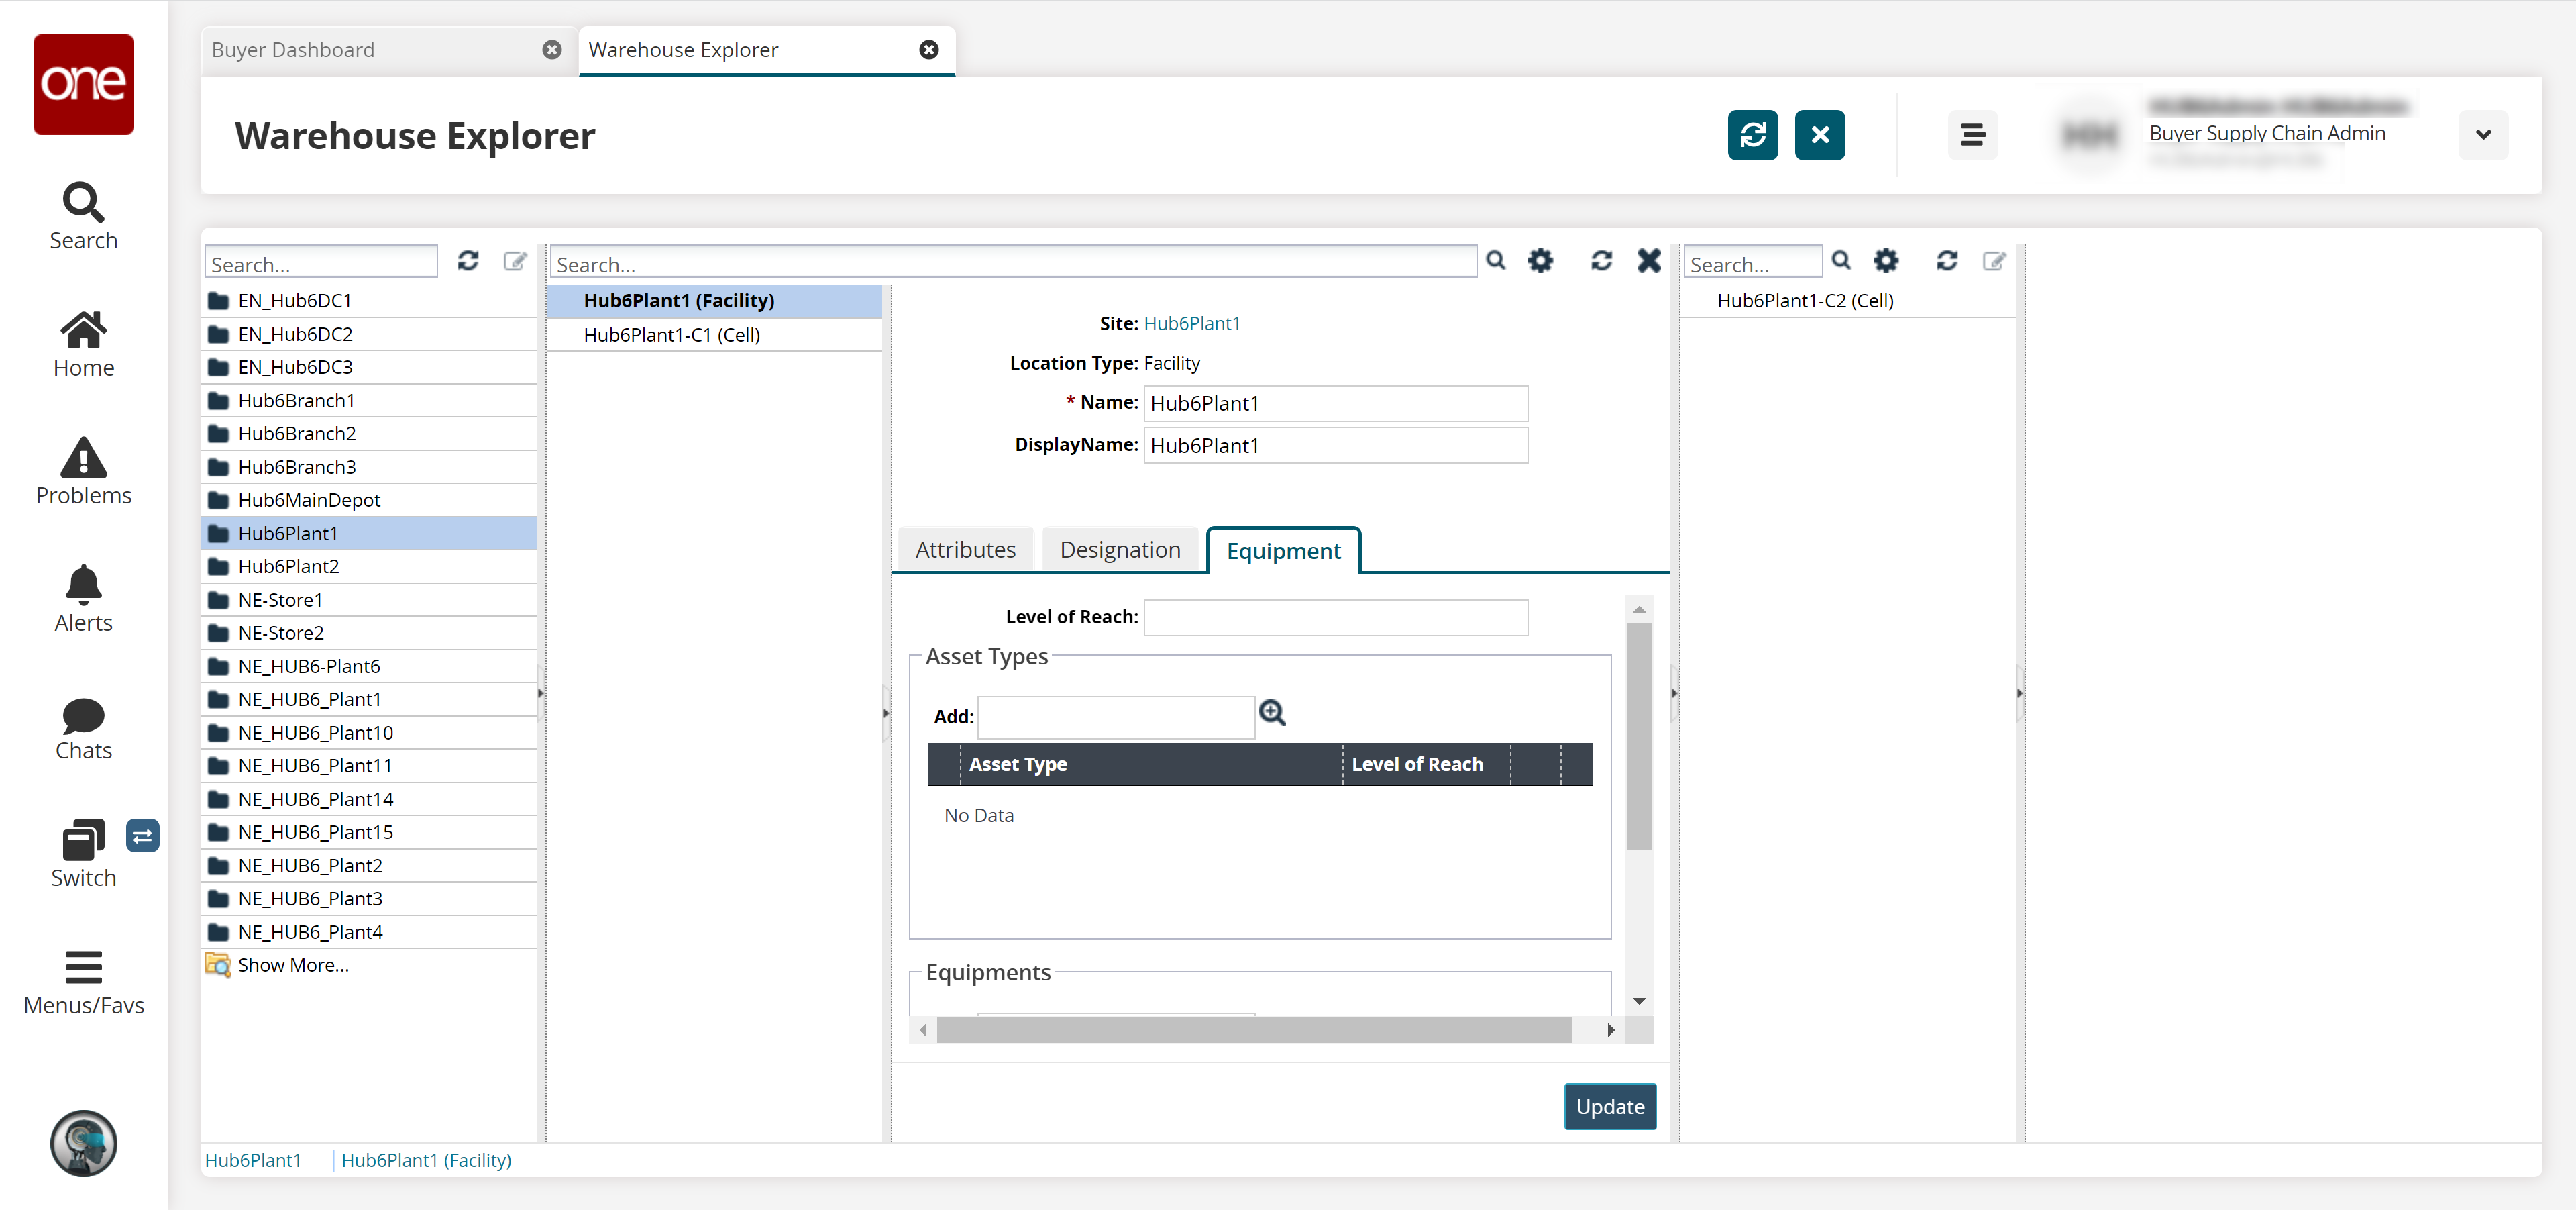
Enter a Level of Reach.
Location racks can have multiple levels, where lower levels can be accessed by warehouse workers without any additional equipment, and higher levels generally require a forklift. The Level of Reach field indicates a level or row. The field accepts integers from 1 to 999, and the parent's level of reach is copied automatically to all its children's locations. The level of reach of a child's location cannot be modified and is read-only.
In the Asset Types and Equipments boxes, use the picker tool to select an option. Enter a value in the Level of Reach column.
The Asset Types field represents the types of assets used in the warehouse for general uses, such as a standard forklift, an extended forklift, or a fork jack.
Click Update.