Adding New Customs Policies
Customer transportation manager users can create policies for customs compliance. The system generates the required documents like Custom Entry and Security Filing for a shipment matching the particular custom policy.
Complete the following steps to add a new customs policy:
L og in to the ONE system.
Click Menus/Favs > Customs > Customs Policies. In the NEO UI, users can click on the Menus/Favs icon on the left sidebar and type in the name of the screen in the menu search bar. For more information, see "Using the Menu Search Bar."
The Customs Policies screen appears.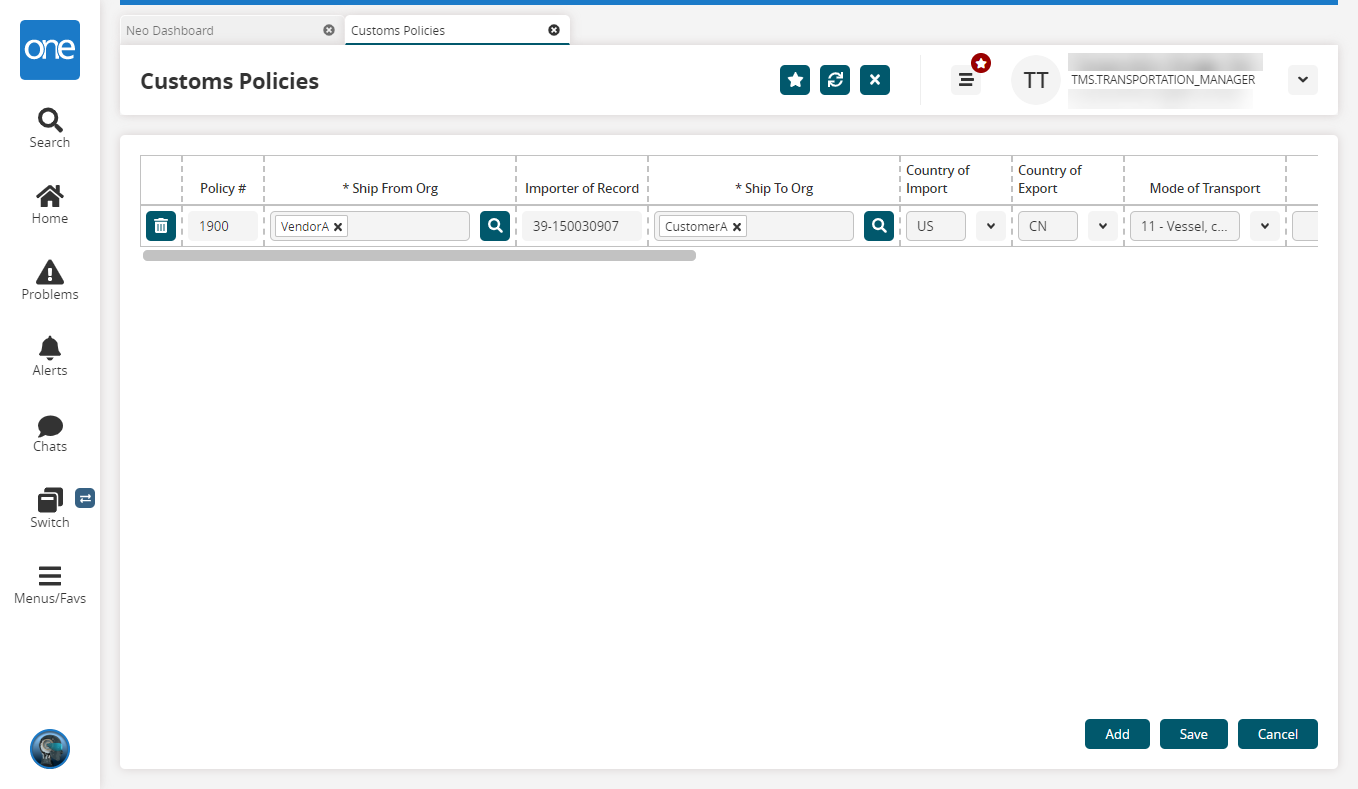
Click Add to add a new policy.
A new row displays.Fill out the following fields. Fields with an asterisk ( * ) are required.
Field
Description
Policy Number
The policy number is auto-generated once the policy is saved.
*Ship From Org
Select a ship-from organization using the picker tool.
Importer of Record
This information is auto-populated.
*Ship To Org
Select a ship-to organization using the picker tool.
Country of Import
Enter or select the two-letter country code for the shipment destination or the country that will be importing the shipments.
Country of Export
Enter or select the two-letter country code for the shipment origin or the country that will be exporting the shipments.
Mode of Transport
Select the mode of transport from the dropdown menu.
Carrier Org
Select a carrier organization using the picker tool.
Auto Duty Determination
Check the box to automatically calculate the applicable customs duty.
Entry Type
Select the appropriate entry type for the shipment.
ISF Transaction Type
Select the applicable Importer Security Filing (ISF) transaction code. The default is Completed Transaction (CT).
Partner Mapping
Click the icon in this column and a popup menu appears. For each field, select a partner to map to. For example, selecting Seller in the Sender field maps the seller partner to the sender partner.
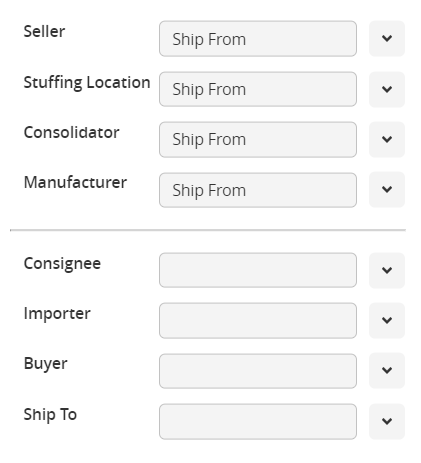
Select the Seller type from the dropdown list.
Select the Stuffing Location type from the dropdown list.
Select the Consolidator type from the dropdown list.
Select the Manufacturer type from the dropdown list.
Select the recipient for the Consignee from the dropdown list.
Select the recipient for the Importer from the dropdown list.
Select the recipient for the Buyer from the dropdown list.
Select the recipient for the Ship To destination from the dropdown list.
Broker Filer Code
The broker filter code autopopulates based on values selected in other fields.
*Customs Broker Partner
Select a customs broker partner using the picker tool.
*Process
Check and/or uncheck the document types to select the type of document or documents to generate.
Click Save to save the new customs policy.