Adding Order Tracking Events
Complete the following steps to add order tracking events:
L og in to the ONE system.
Click Menus/Favs > Order Mgmt > Policies > Order Tracking.
In the NEO UI, users can click on the Menus/Favs icon on the left sidebar and type in the name of the screen in the menu search bar. For more information, see "Using the Menu Search Bar."
The Order Tracking screen displays.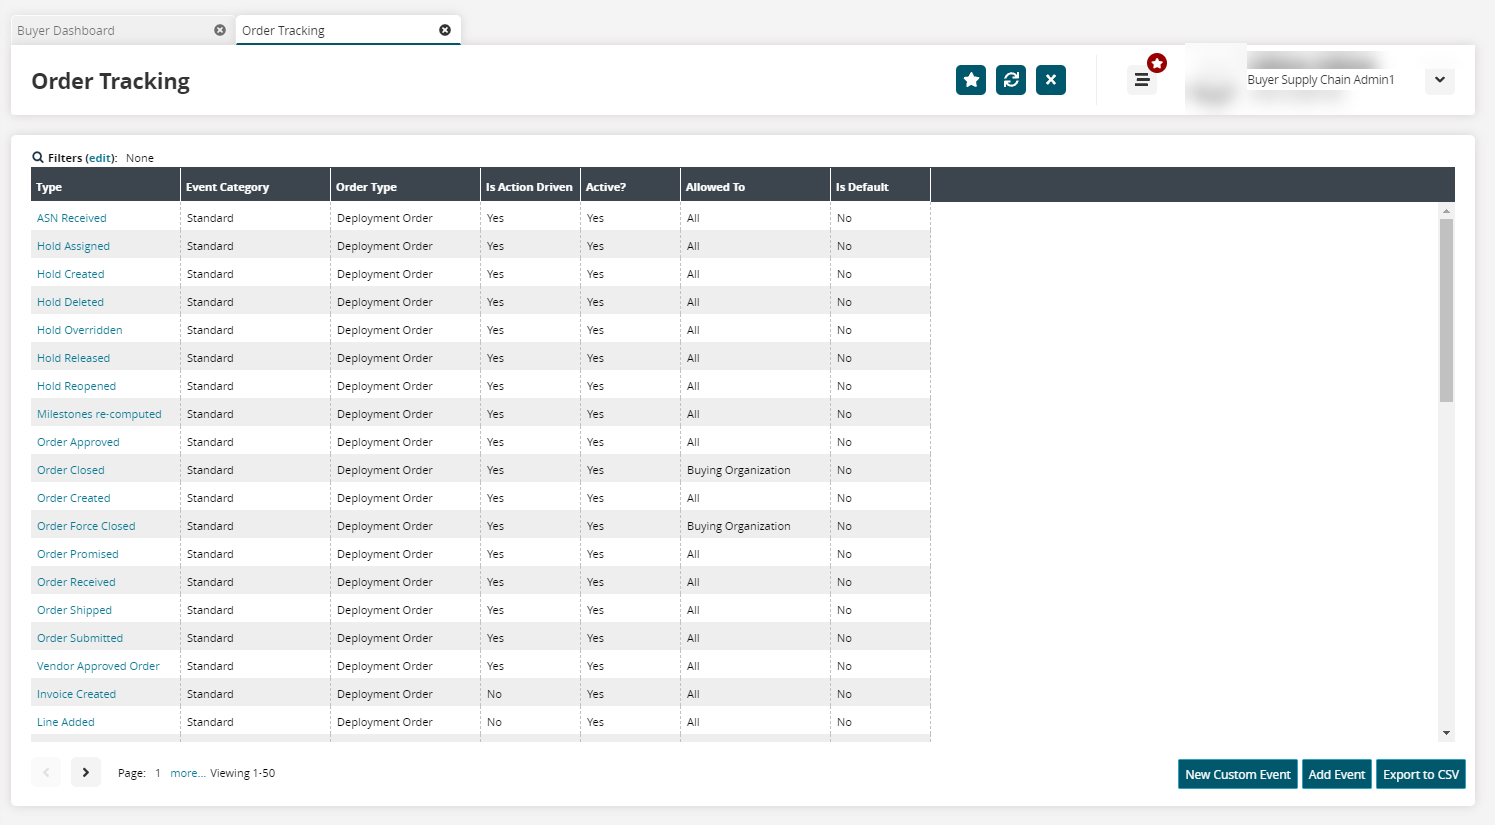
Click the New Custom Event button to generate a new custom event.
The Add Tracking Event popup appears.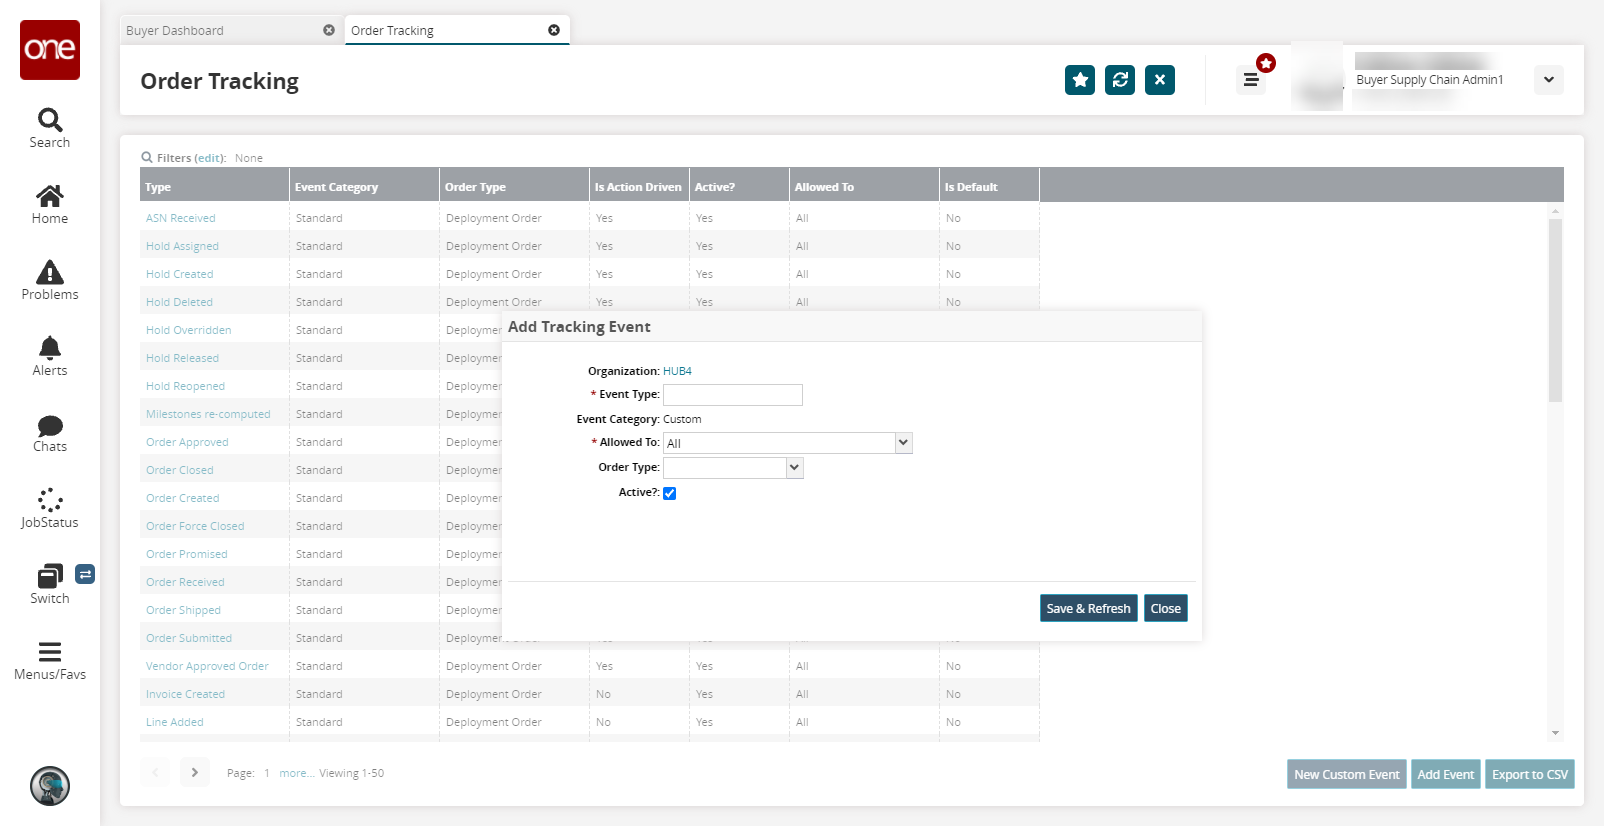
Fill out the following fields. Fields with an asterisk ( * ) are required.
Field
Description
* Event Type
Enter an event type.
* Allowed To
Select who is allowed to view this tracking event from the drop-down menu.
Order Type
Select an order type from the drop-down menu.
Active?
Select this checkbox if the tracking event is active.
Click Save and Refresh.
Click the Add Event button.
The Add Tracking Events popup appears.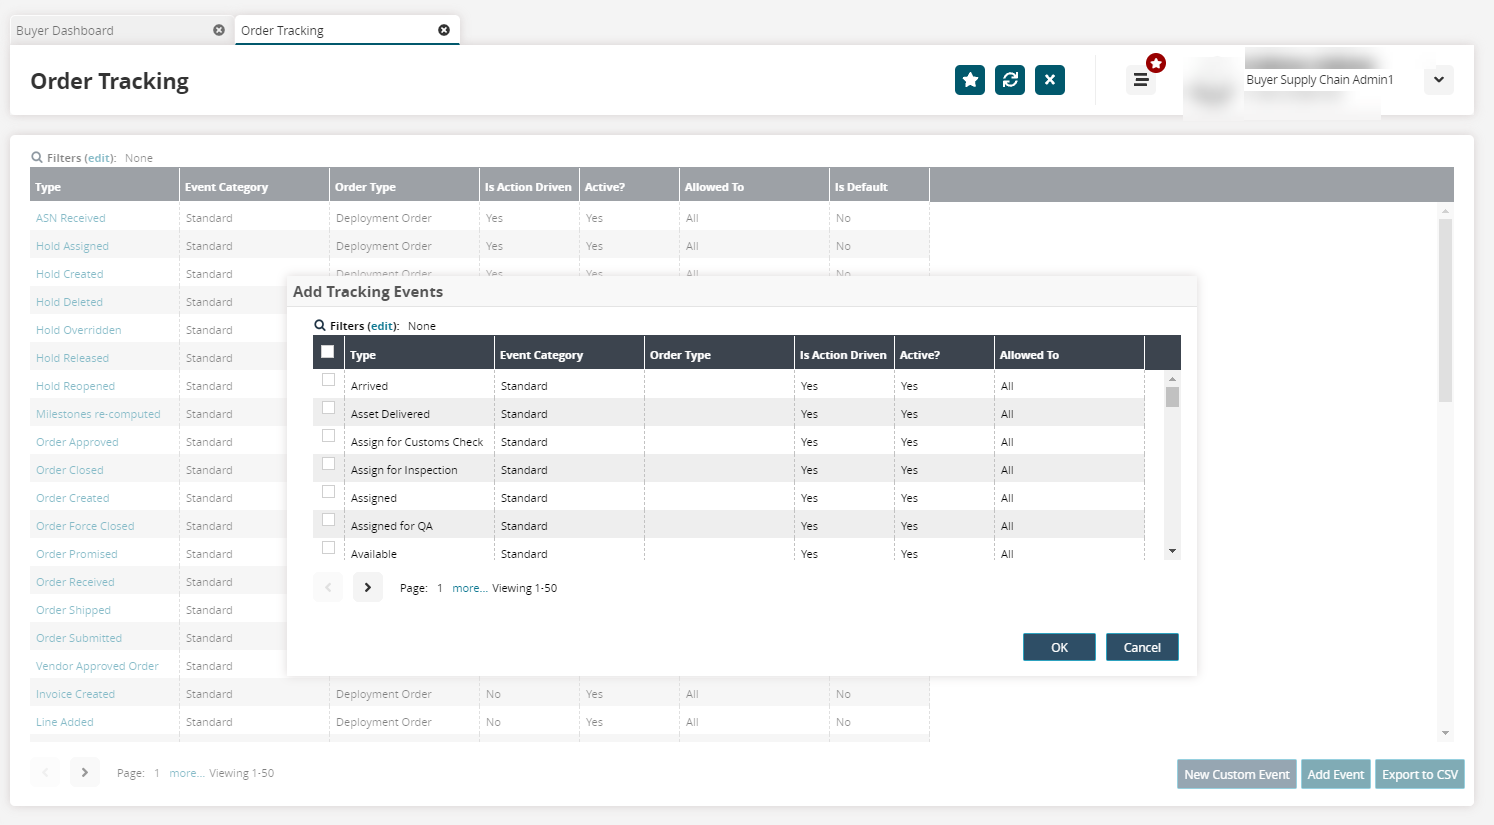
Select one or more order tracking events to add. Then, click OK.
A success message appears.Click the Export to CSV button to export the report to a CSV file.