Adding Tracking Events via the Search Shipments Page
Users can add tracking events for movements, shipments, and shipment lines from the Search Shipments and Search Movements pages in the UI. The Search Shipments page offers tracking event creation via the Tracking link or contextual menus. The Search Movements page only offers tracking event creation through the contextual menu. The contextual menu workflow is the same for both movements and shipments on both search pages.
Complete the following steps to create tracking events using the tracking link:
L og in to the ONE system.
Click Menus/Favs > Transportation > Search Shipments.
The Search Shipments page displays.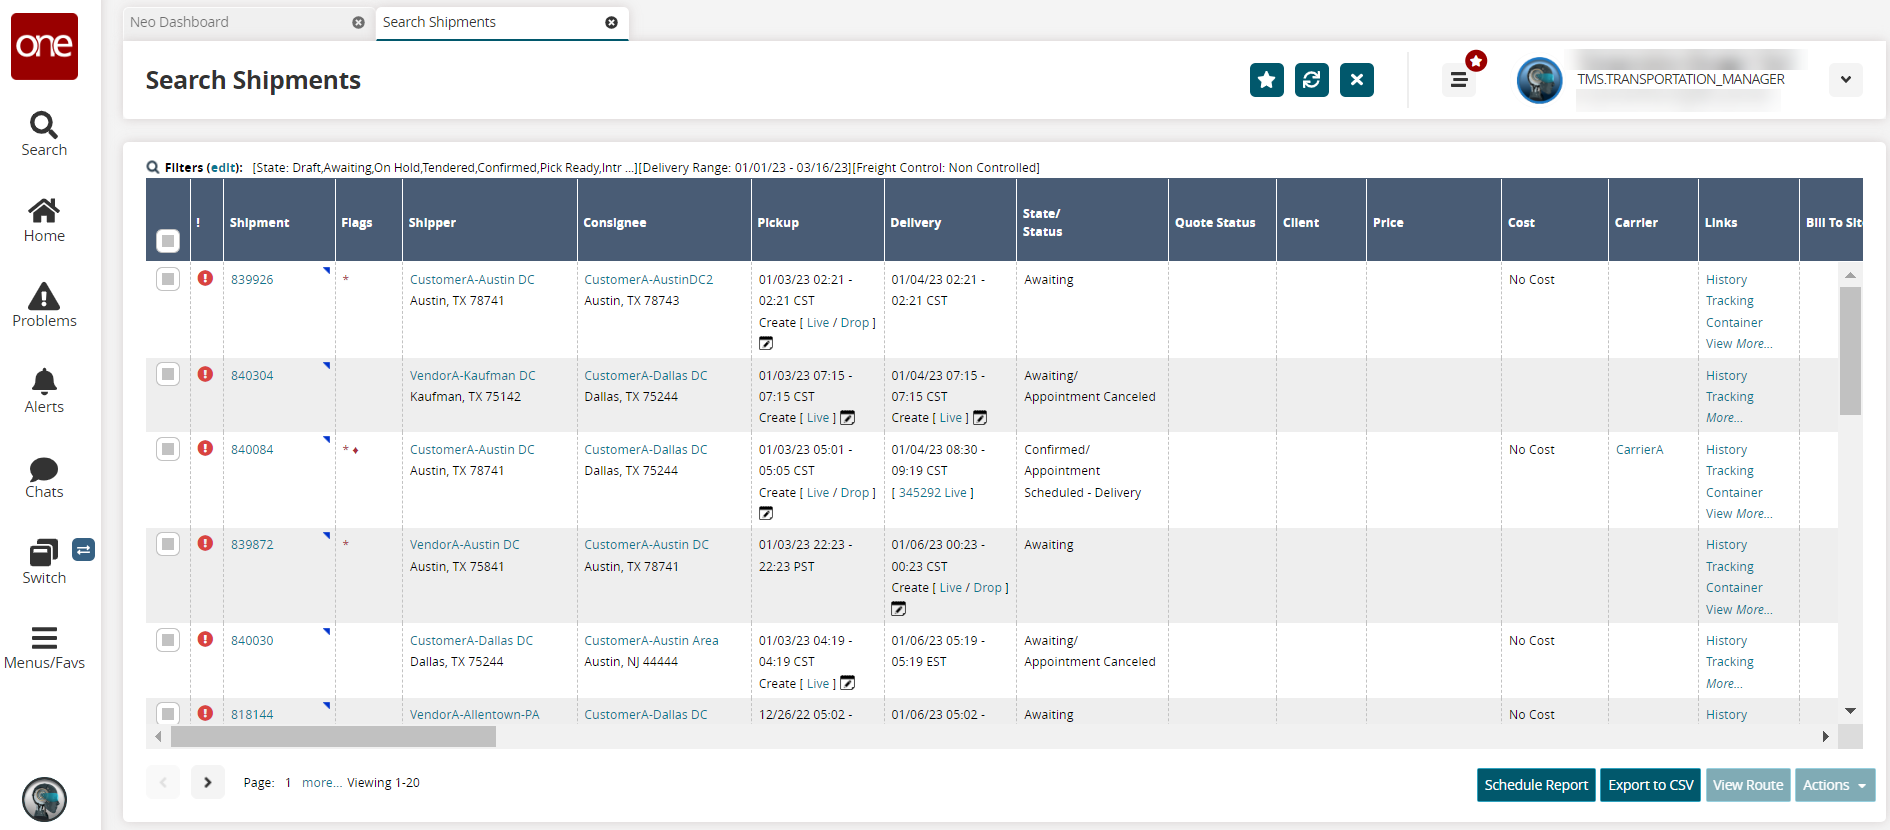
Enter values for the fields in the Filters header. For more information, see the "Search Shipments" section in the Online Help.
Click Tracking under the Links column.
The tracking events report page displays.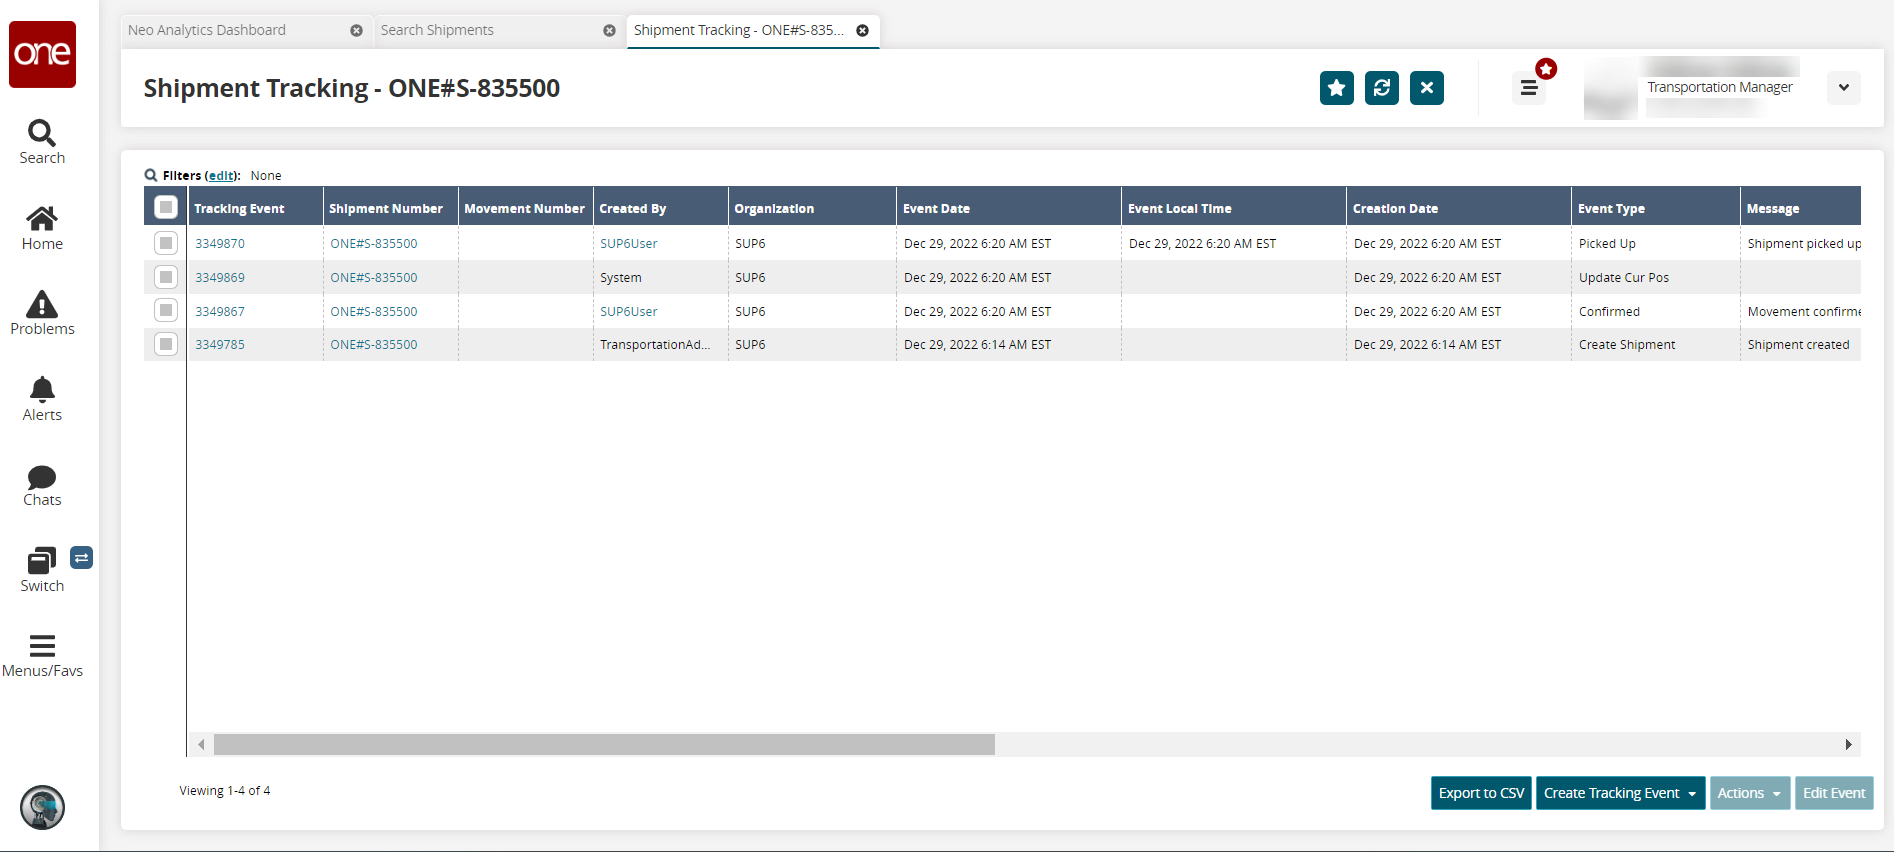
Click the Create Tracking Event button.
A menu displays tracking event types.Click a tracking event type.
The Create Tracking Event popup displays.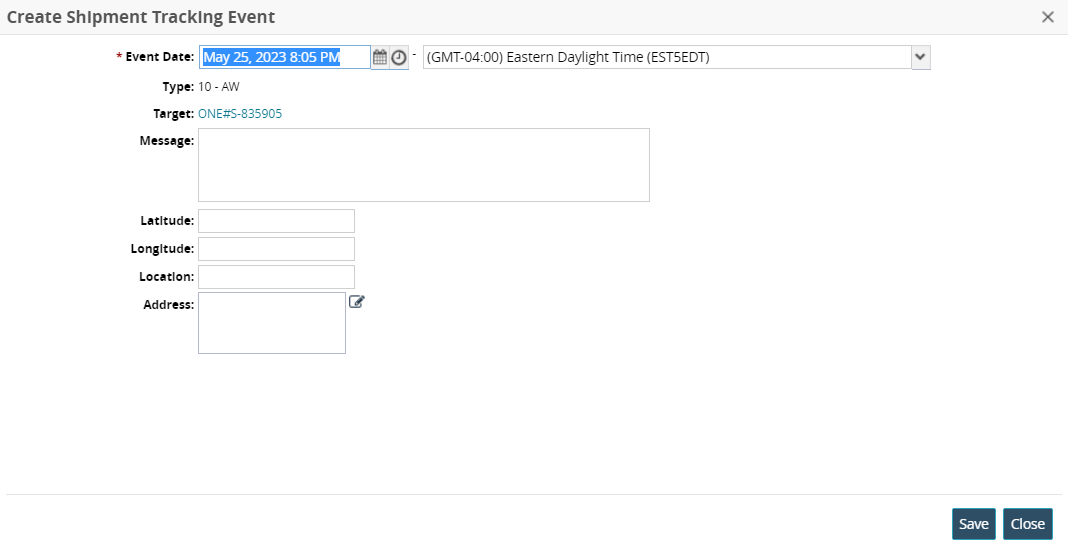
Enter values for fields described in the table below. Fields with an asterisk ( * ) are required.
Field
Description
* Event Date
Use the calendar and clock tools to select the date and time in the first field. Select the time zone from the dropdown list in in the second field.
Type
This field is auto-populated based on the shipment details
Target
This field is auto-populated.
Message
Enter the message that displays when the event is triggered.
Latitude
Enter the latitude coordinates.
Longitude
Enter the longitude coordinates.
Location
Enter the location.
Address
Click the Address field or the edit icon (pencil) and complete the following steps:
Select a country from the dropdown list.
Enter the primary address in the * Line field.
Enter additional address information in the Line 2 and Line 3 fields.
Enter the address information for * City, * State, and * Zip (code) fields.
Click outside the popup to close it.
Click the Save button.
A green success message displays.Click the Close and Refresh button.
The new tracking event is added to the table.
Both the Search Shipments and Search Movements pages offer contextual menus (accessed via a blue triangle in the top right corner of the cell) with options to create tracking events. The instructions are the same for both pages; the Search Shipments page is used in the instructions below.
Complete the following steps to create tracking events using the contextual menu:
L og in to the ONE system.
Click Menus/Favs > Transportation > Search Shipments. In the NEO UI, users can click on the Menus/Favs icon on the left sidebar and type in the name of the screen in the menu search bar. For more information, see "Using the Menu Search Bar."
Enter values for the fields in the Filters header. For more information, see the "Search Shipments" or "Search Movements" sections in the Online Help.
Click the Search link.
The results display in the Search Shipments screen.
Click the contextual menu (blue triangle) for a shipment.
A menu displays.Click Shipment Tracking. (Click Movement Tracking on the Search Movements screen.)
The shipment's tracking event report displays.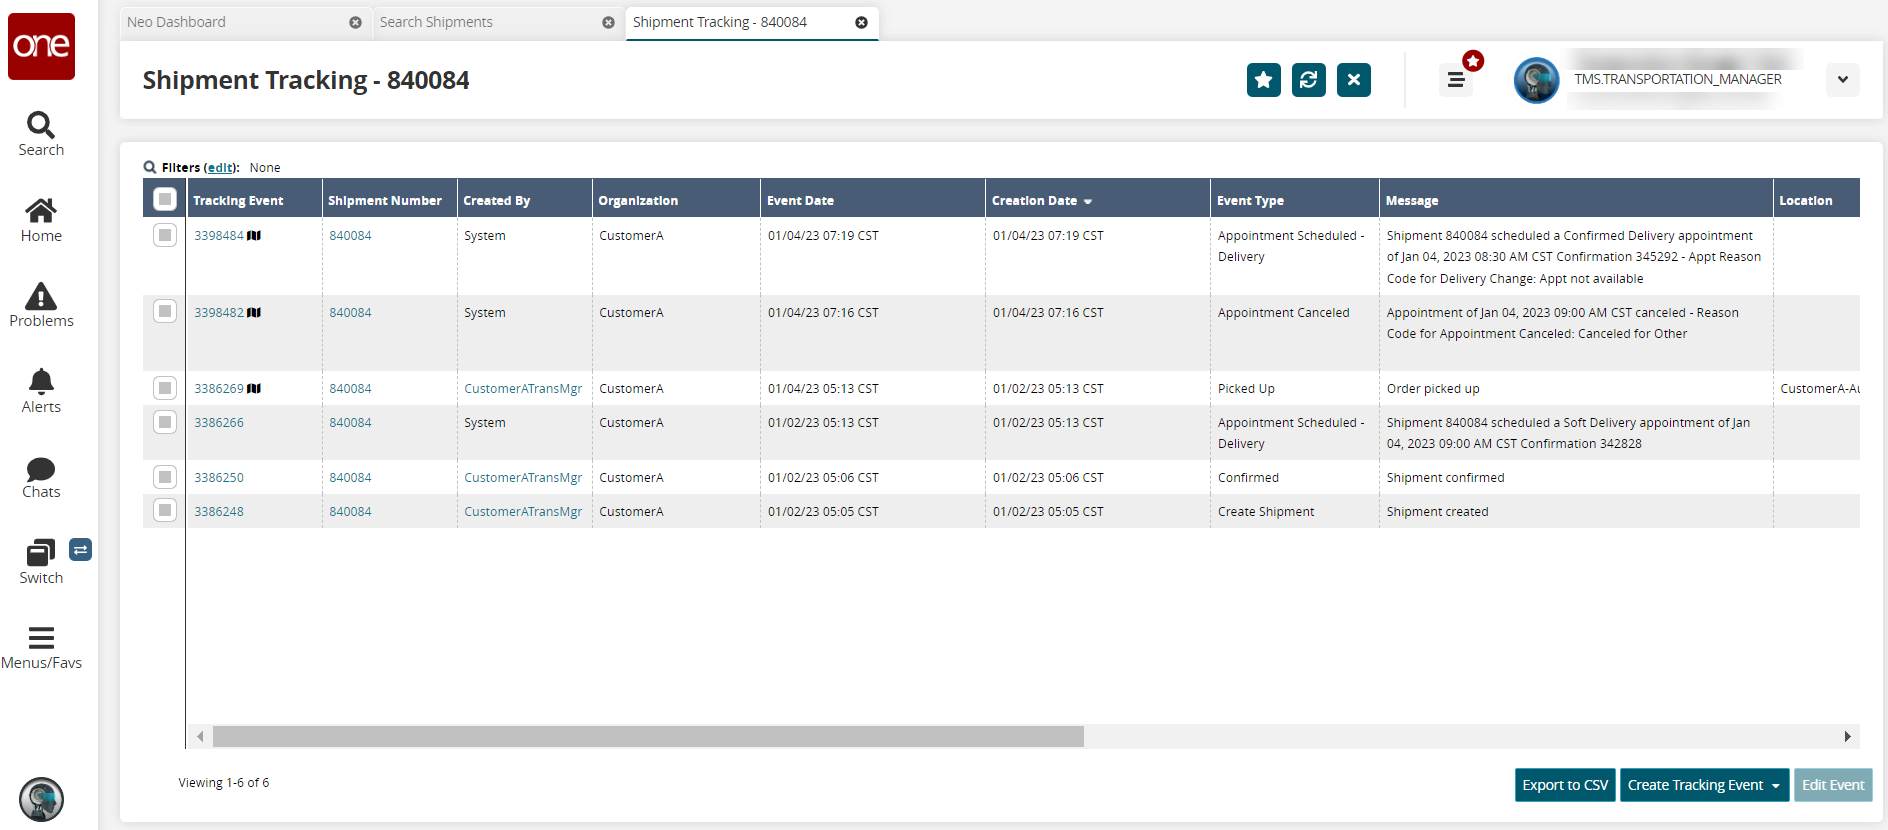
Click the Create Tracking Event button and follow the instructions from above.
Click Shipment Line Tracking to create a shipment line tracking event from the contextual menu. This is found on the Search Movements screen as well.
The Shipment Line Tracking popup displays.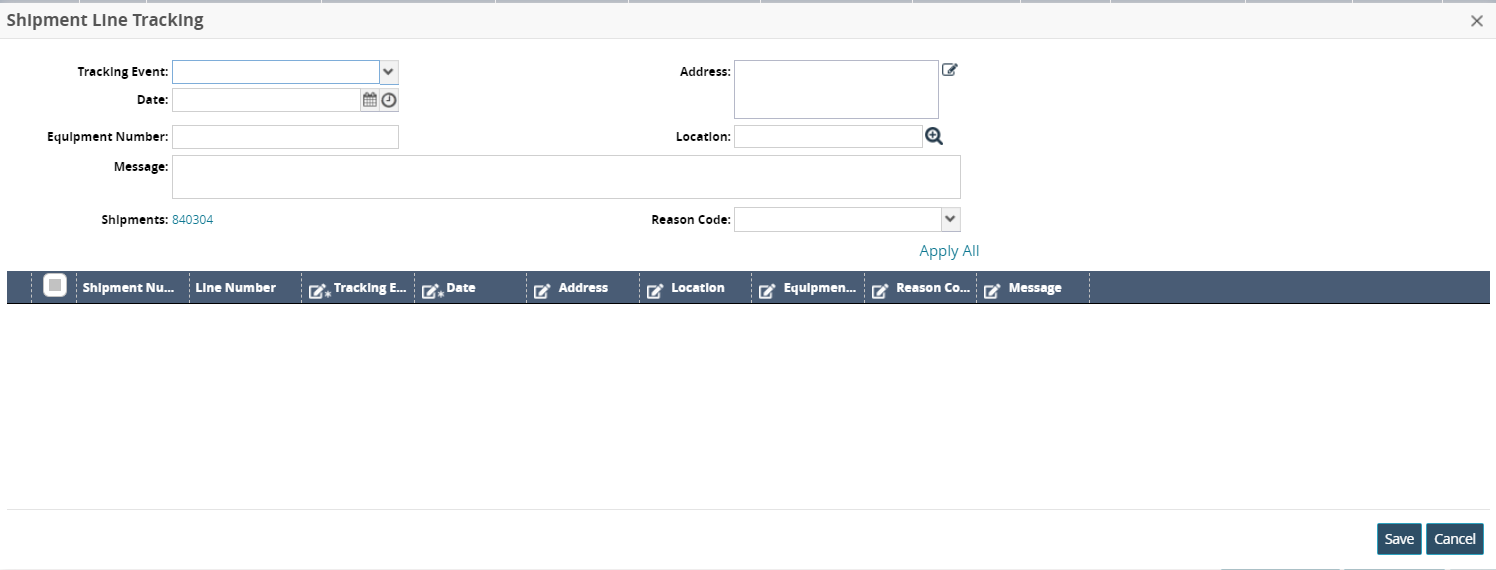
Enter values for fields described in the table below. Fields with an asterisk ( * ) are required.
Field
Description
Tracking Event
Select the tracking event from the dropdown list.
Date
Use the calendar and clock tools to enter the date.
Equipment Number
Enter the equipment number.
Message
Enter a message that displays when the event is triggered.
Shipments
This field is autopopulated.
Address
Click the Address field or the edit icon (pencil) and complete the following steps:
Select a country from the dropdown list.
Enter the primary address in the * Line field.
Enter additional address information in the Line 2 and Line 3 fields.
Enter the address information for * City, * State, and * Zip (code) fields.
Click outside the popup to close it.
Location
Use the picker tool to select a location.
Reason Code
Select a reason code from the dropdown list.
Click the Save button.