Adding and Updating Invoice Lines to Receivable Invoices
You can add or update invoice lines to an invoice.
Complete the following steps to add invoice lines:
L og in to the ONE system.
Click Menu/Favs > Financials > Receivables > Invoices.
In the NEO UI, users can click on the Menus/Favs icon on the left sidebar and type in the name of the screen in the menu search bar. For more information, see "Using the Menu Search Bar."
The Receivable Invoices screen displays.
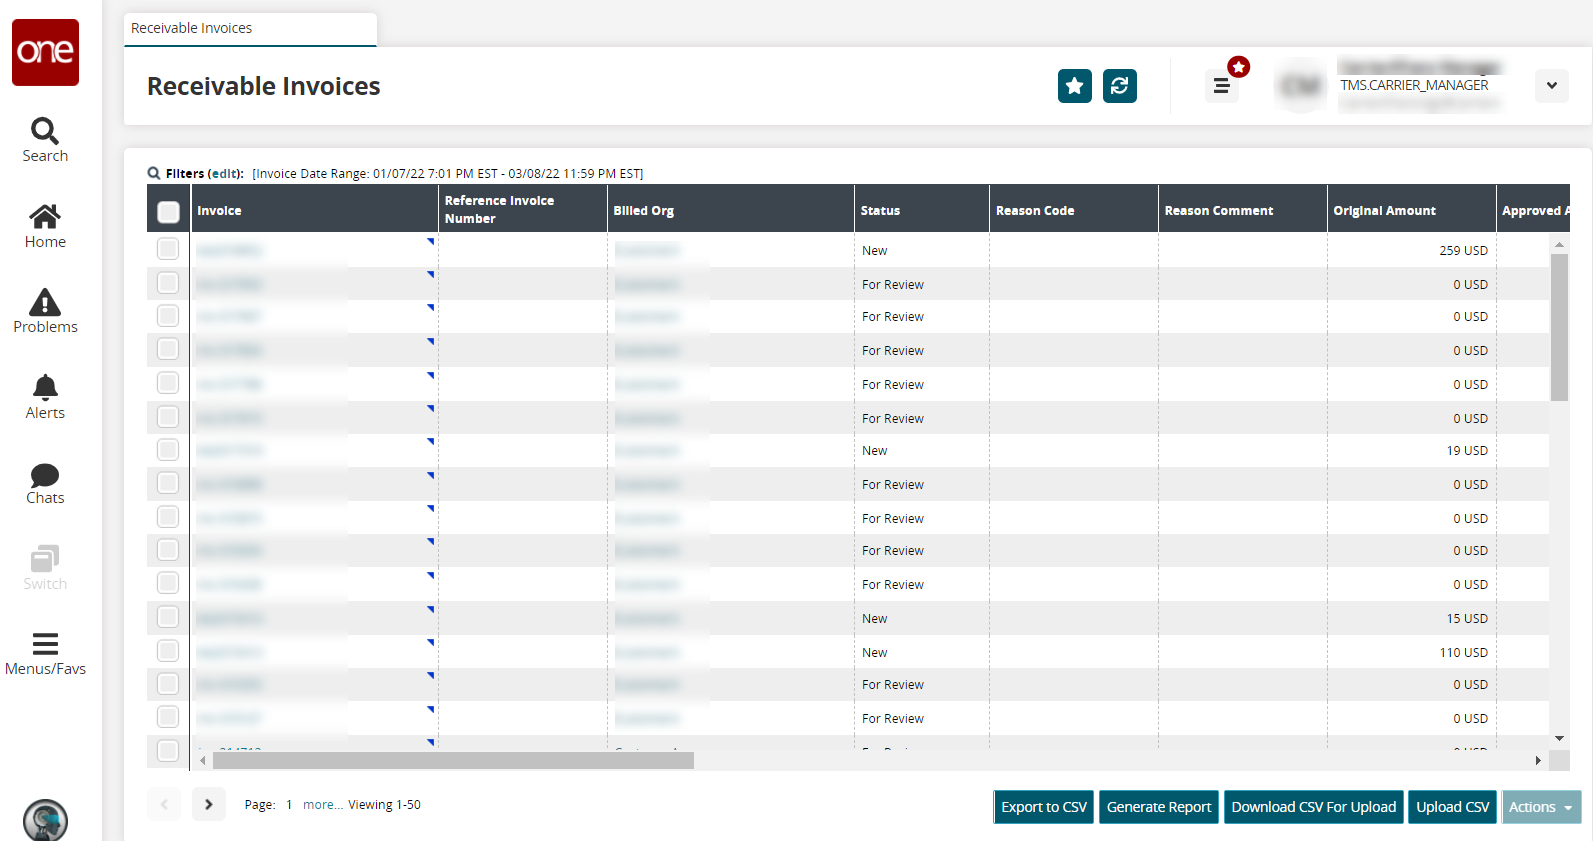
Click on the link under the Invoice column.
The invoice details screen displays.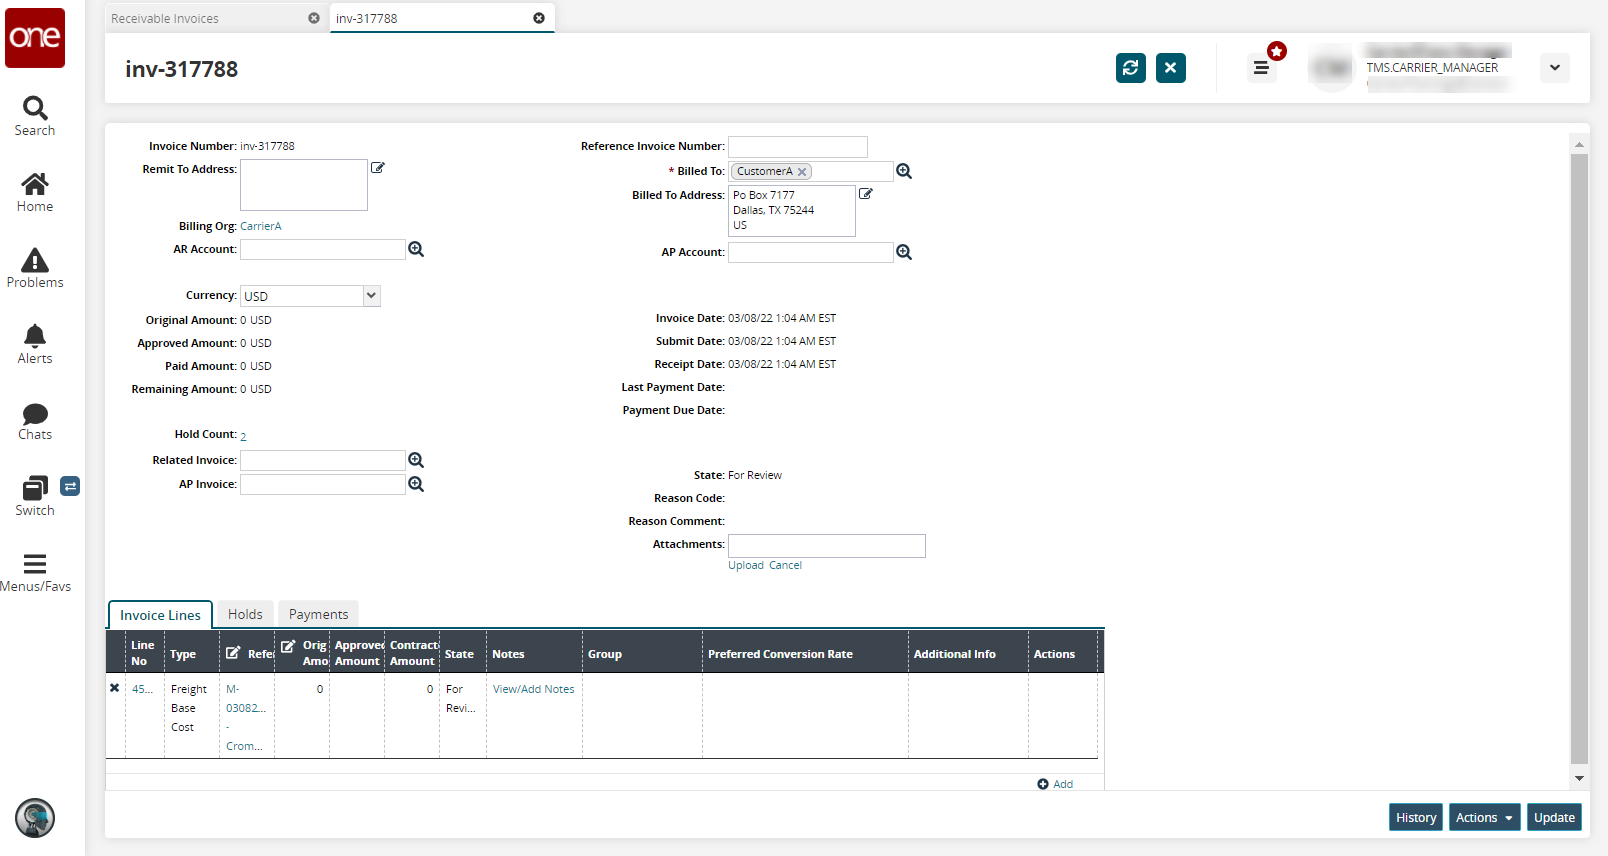
On the Invoice Lines tab, click the column icon located on any column, such as Line No, Type, Reference, and so on.
A popup window with options appears.
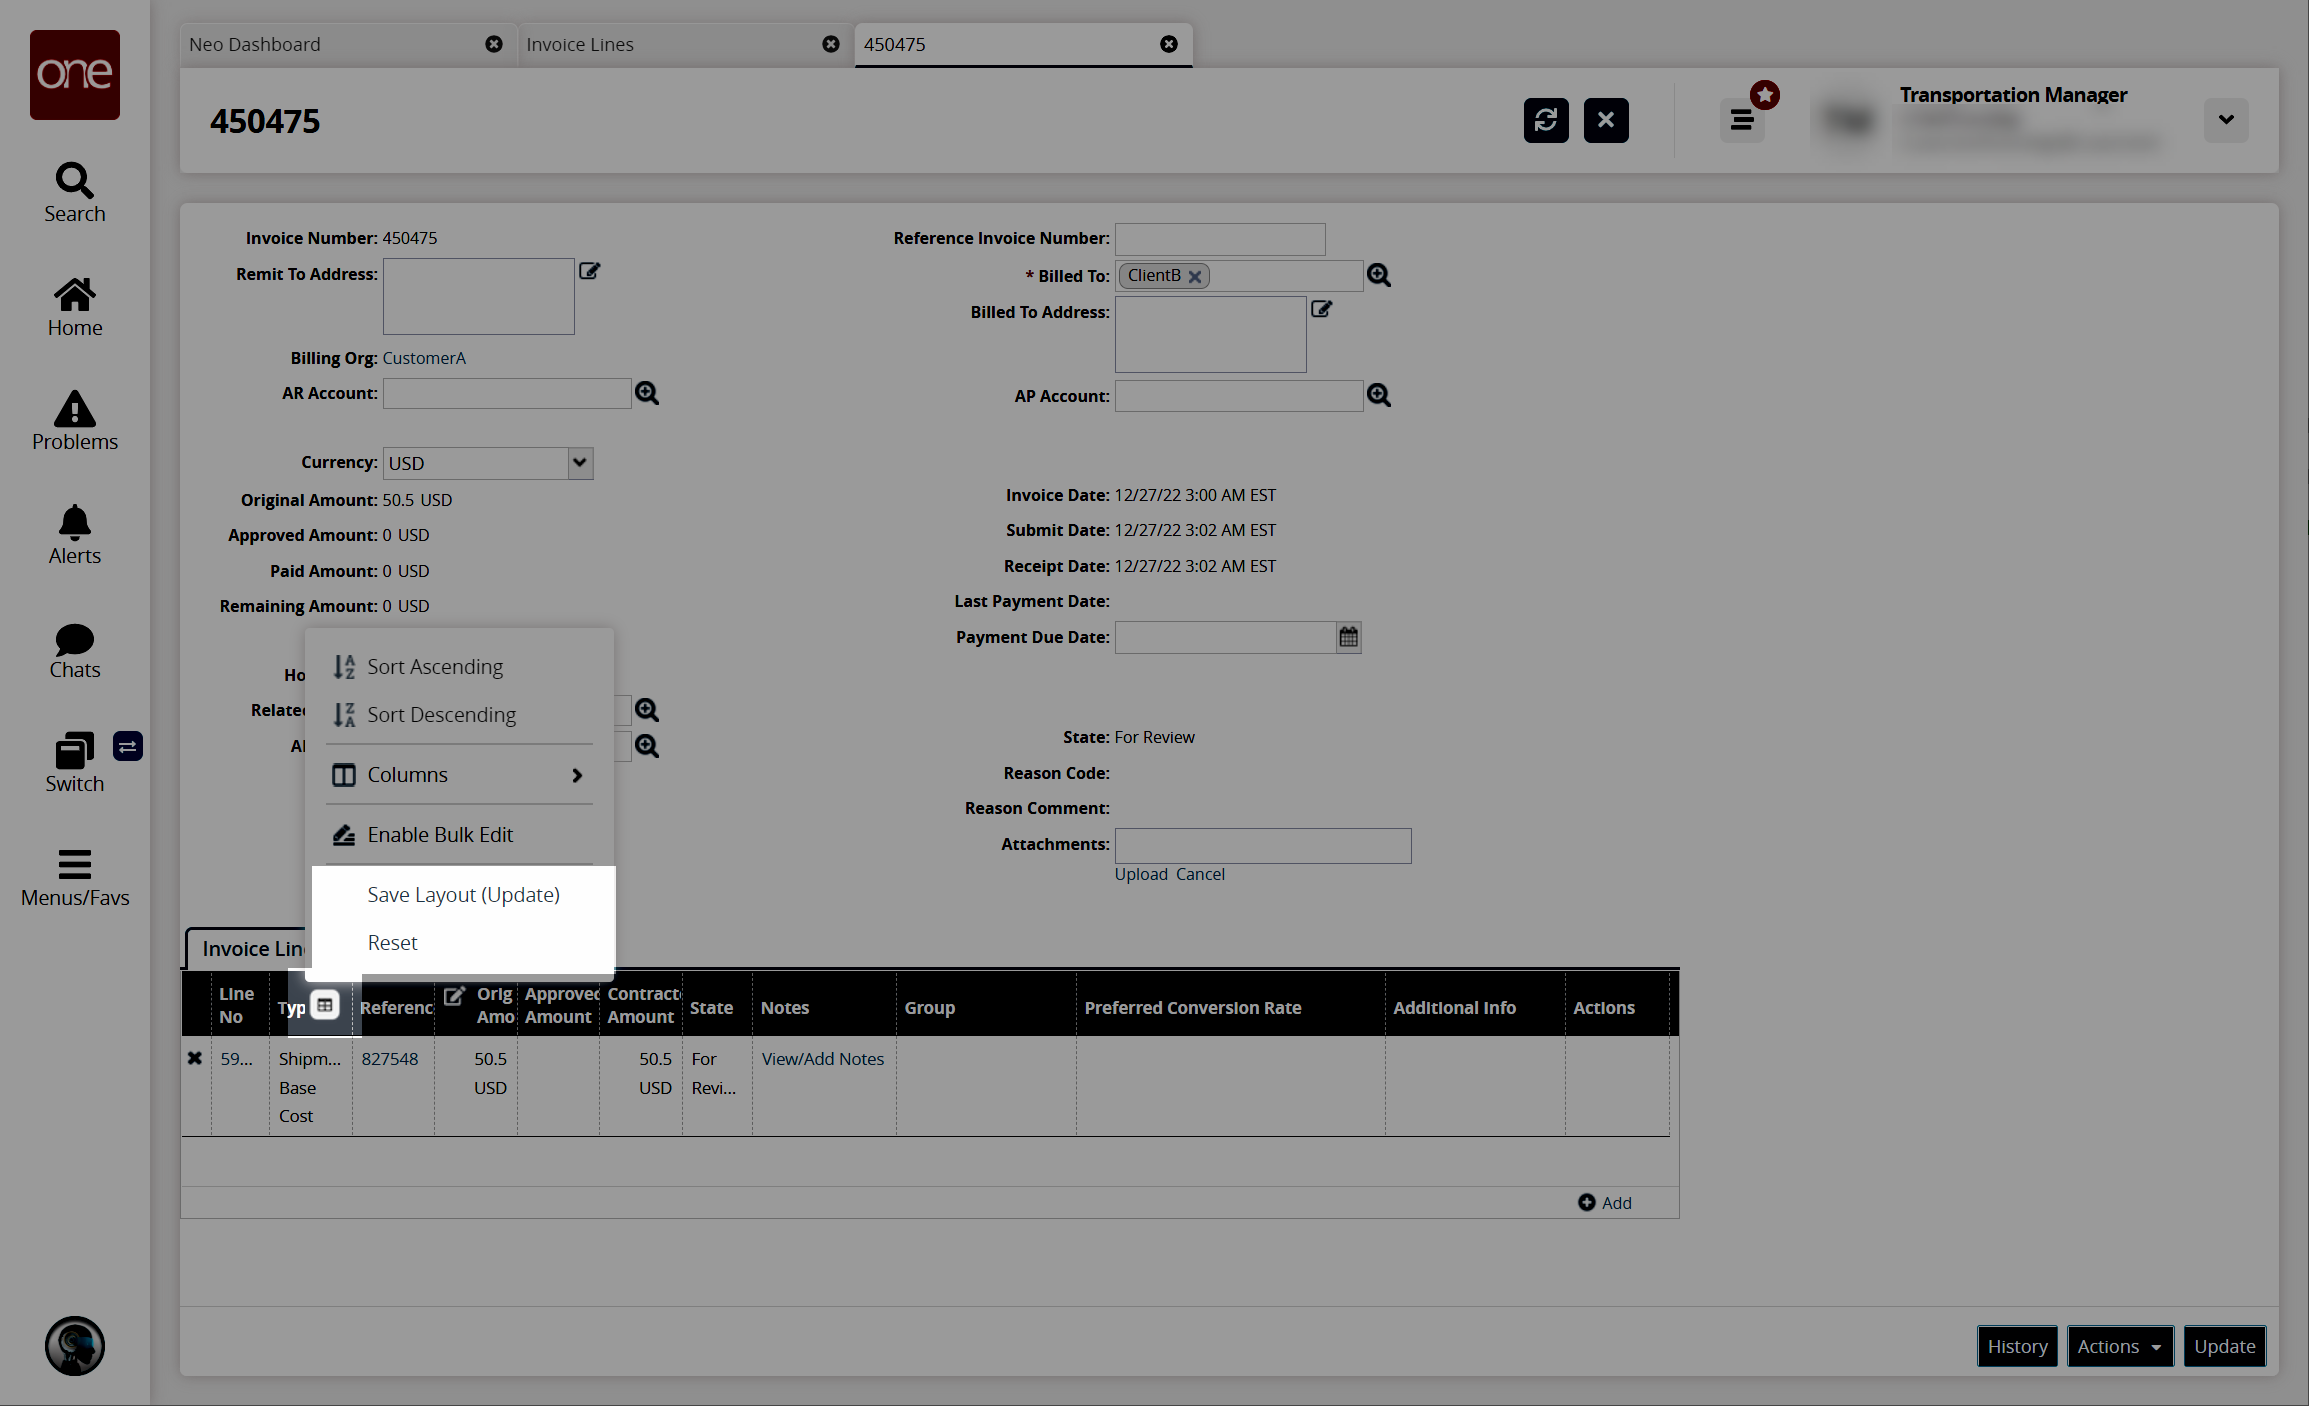
Click Save Layout (Update) to save the layout or Reset reset the layout to its original format.
The layout is saved or resets to the original based on the selection.To add an invoice line on the invoice details screen, click the Add link.
The New Invoice Line popup window appears.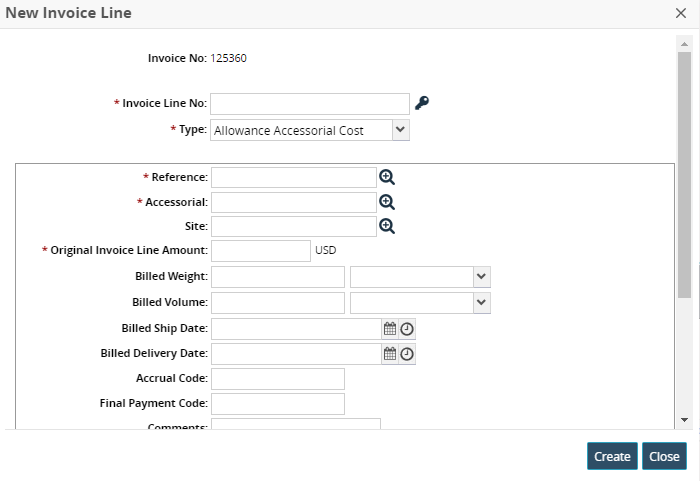
Enter a value for the Invoice Line No field or click on the key icon to auto-generate an invoice line number.
Select a value for the Type field using the dropdown menu.
The fields in the section below the Type field will display.Enter values as required. Fields with an asterisk ( * ) are required.
Click the Create button.
The new invoice line appears in the Invoice Line tab.To update an existing line, click on the link under the Line No column.
The Update Invoice Line popup displays. Any fields that were populated previously will display that information.Make any changes as required.
Click the Update button on the popup.
Click the Update button for the invoice.
A green success message displays.