Assigning and Reassigning User Codes
Complete the following steps to assign a user code to a user from the User Code Explorer screen:
L og in to the ONE system.
Click Menus/Favs > Administration > User > User Code Explorer.
In the NEO UI, users can click on the Menus/Favs icon on the left sidebar and type in the name of the screen in the menu search bar. For more information, see "Using the Menu Search Bar."
The User Code Explorer screen displays.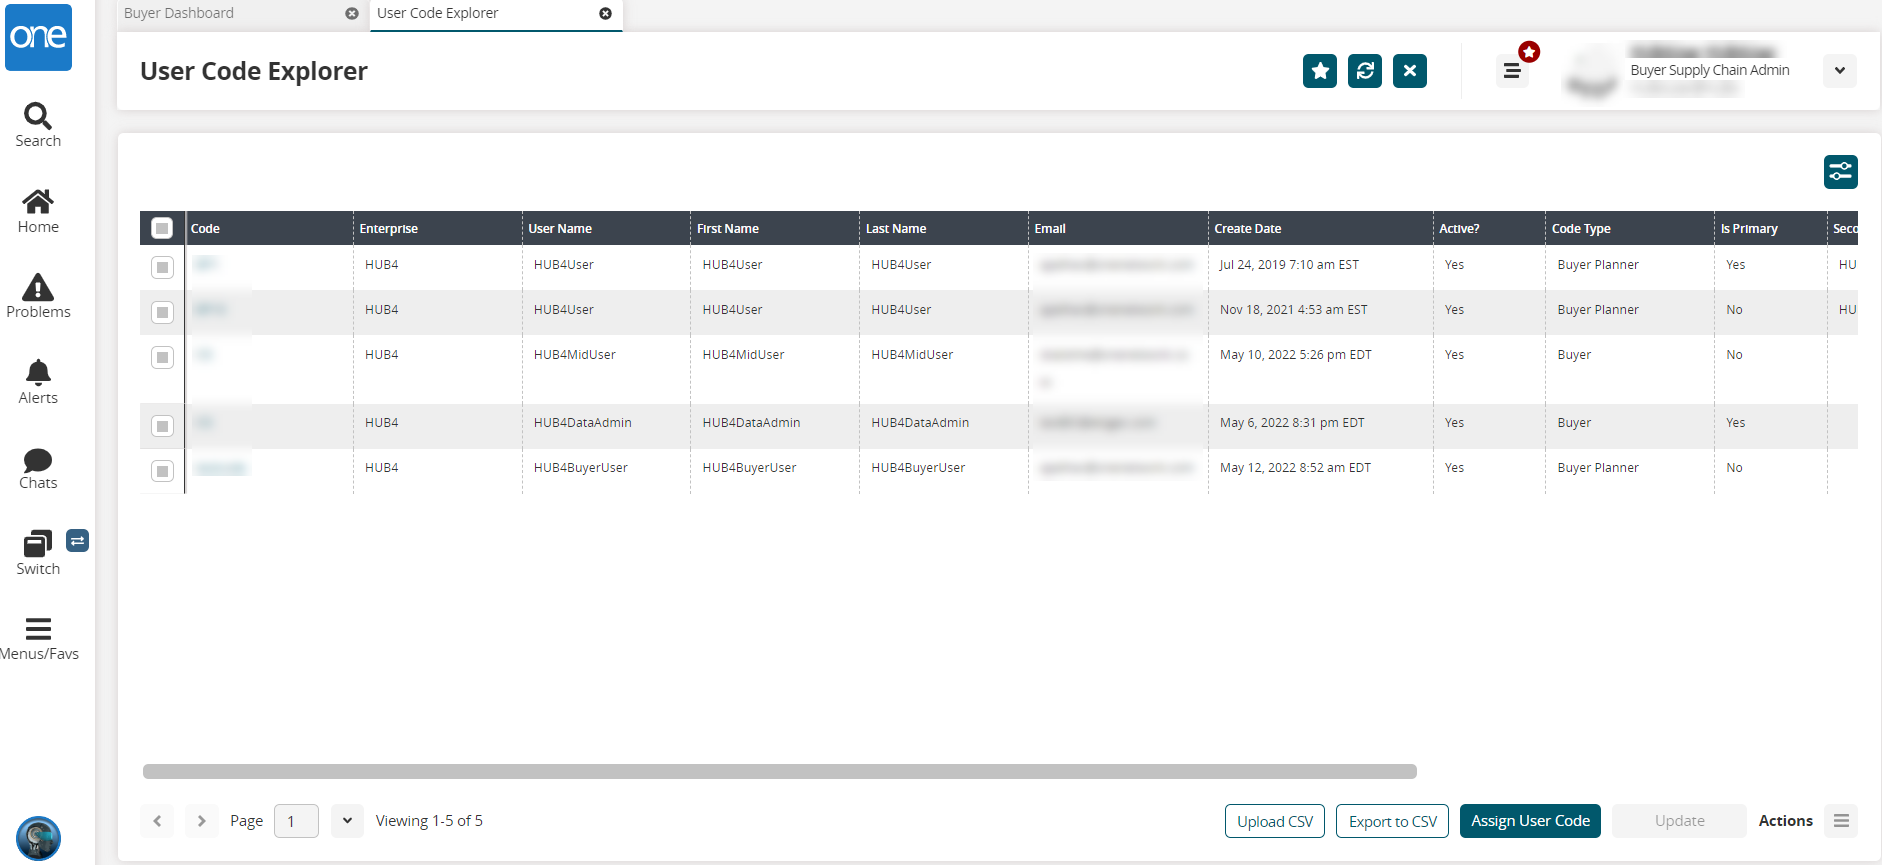
Click the Assign User Code button.
The Assign User Code popup displays.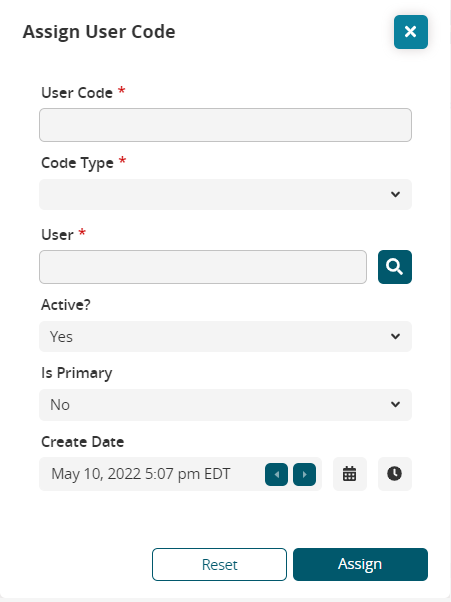
Enter values for fields described in the table below. Fields with an asterisk ( * ) are required.
Field
Description
User Code *
Enter the user code name.
Code Type *
Select a code type from the dropdown list.
User *
Use the picker tool to select a user.
Active
Select Yes or No from the dropdown list.
Is Primary
Select Yes or No from the dropdown list. If this field is set to Yes, then a secondary user cannot be added to the code.
Create Date
Use the < and > buttons to select the day prior to or after the current day, or use the calendar and clock icons to select a date and time.
Click the Reset button to clear the values in the popup window.
Click the Assign button to assign the code to the user.
A green success message displays, and the new code displays in the report.To update the code(s), click the checkbox.
The Update button is now active.Click the Update button.
The report filters all other codes to only show the selected records with editable fields noted with a pencil icon.Update the fields as required.
Click the Submit button.
The screen refreshes with the updates and a green success message.
Complete the following steps to reassign a user code to a primary and/or secondary user starting from the User Code Explorer screen:
In the User Code Explorer screen, click the checkbox next to a user code.
The Actions menu is active.Click the Actions button, then select Reassign Code.
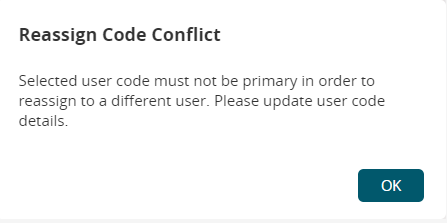
The Reassign Code popup window displays the Primary User tab as the default. In this case, we selected the OS code.Please note that if the code is set to Is Primary, then the following warning popup displays. Click the OK button to close the popup. To assign a secondary user, update the code and remove the check for the Is Primary field.
Click the Secondary User tab.
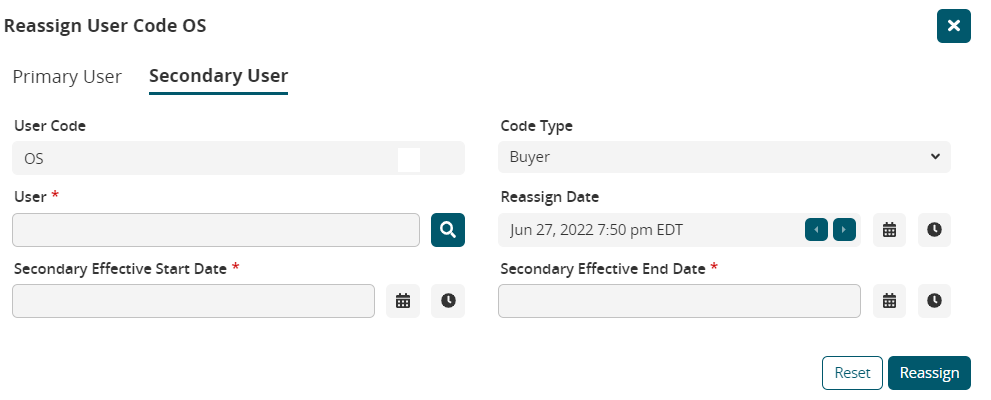
Use the picker tool to select a user for the User * field.
Use the calendar and clock tools to select the beginning date and time for the Secondary Effective Start Date * field.
Use the calendar and clock tools to select the end date and time for the Secondary Effective End Date * field.
Click the Reassign button.
The code records update with the secondary user name and effective dates, and a green success message displays.