Configuring Business Rules as Approvers for Singletons
This topic describes how to create and apply business rules as approvers for singletons.
Complete the following steps to use business rules as approvers for singletons:
L og in to the ONE system.
Click Menus/Favs > Administration > Approval Routing.
The Approval Routing screen appears.
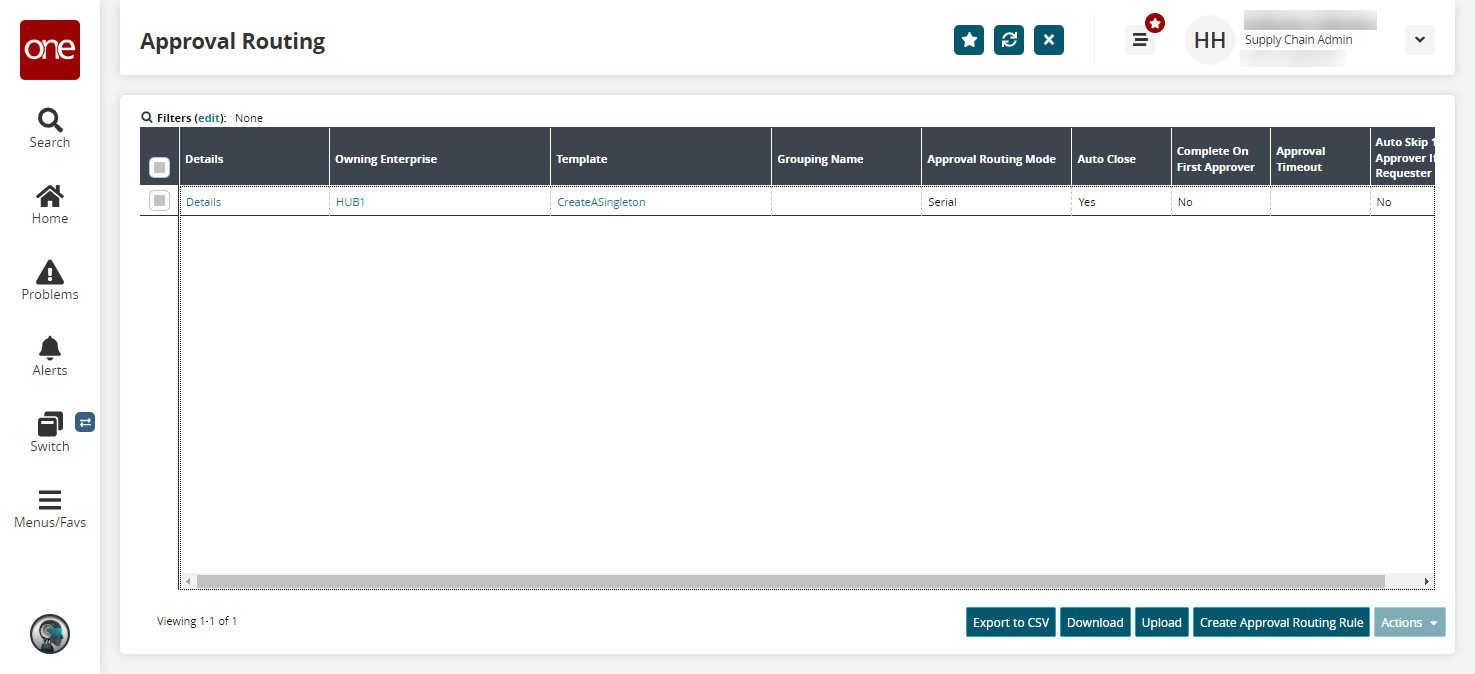
Click Create Approval Routing Rule.
The Create Approval Routing Rule screen appears.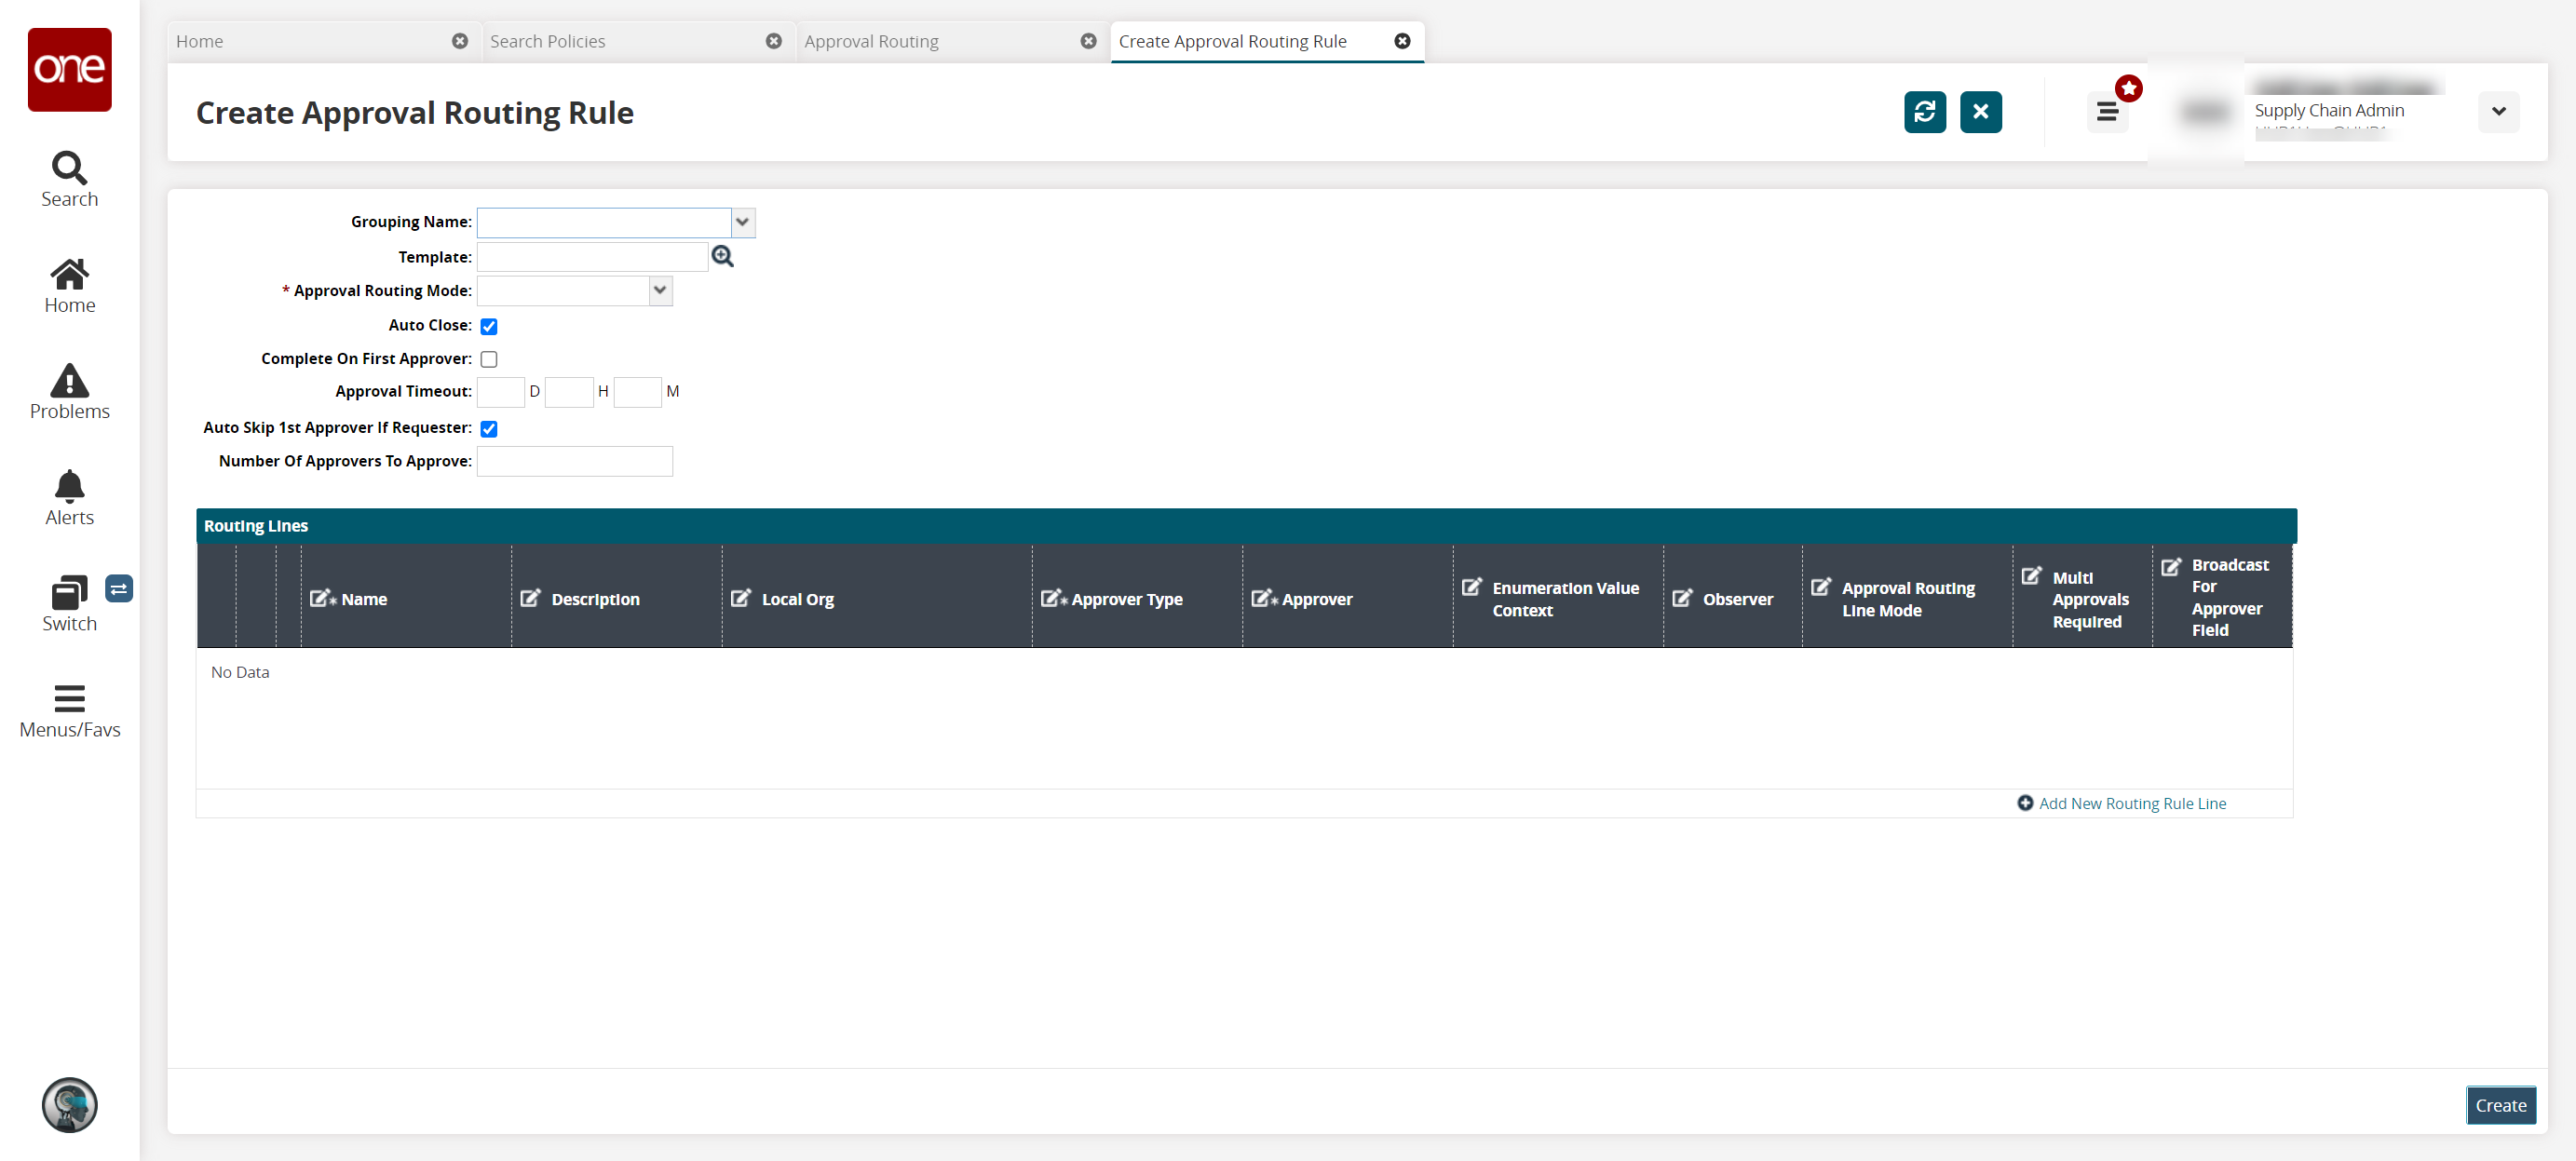
Fill out the following fields. Fields with an asterisk ( * ) are required.
Field
Description
Grouping Name
Select a grouping name from the dropdown menu.
Template
Click the picker tool to select the template for creating or updating a singleton.
Though not shown as mandatory, this field must be completed before adding a routing line or the business rule option is not shown.
* Approval Routing Mode
Select an approval routing mode from the dropdown menu.
Auto-Close
Select this checkbox to auto-close the approval routing rule.
Complete On First Approver
Select this checkbox to complete the approval routing rule after the first approver.
Approval Timeout
Enter a timeframe in days, hours, and minutes that the approval is valid.
Auto-Skip 1st Approver If Requester
If this checkbox is selected and the first approver is also the requester, the first approval line is skipped and automatically approved. If this checkbox is not selected, then even if the requester is the first approver, the requester must explicitly provide their approval. This field is enabled by default.
Number of Approvers to Approve
Enter the number of approvers.
Adding a Routing Line with a Business Rule as an Approver
Complete the following steps to add business rules as approvers:
Under the Routing Lines section, click the +Add New Routing Rule Line link.
Enter the details of a new routing line. Fields with an asterisk (*) are required.
Field
Description
*Name
Enter a name for the new routing line.
Description
Enter a brief description of the new routing line.
Local Org
Enter the local org using the picker tool.
*Approver Type
Select Business Rule from the dropdown list.
This option is not displayed unless a template for a singleton is selected in the Template field.
*Approver
Click to display the Select Approver popup screen. Follow steps 3 to 10 below to configure the business rules and expressions to validate them as approvers.
When Line Applies
Select conditions for using the routing line.
Observer
Select Yes from the dropdown to set the routing line as an observer.
Approval Routing Line Mode
Select a line mode from the dropdown list.
Click in the Approver field. The Select Approver pop-up screen appears.
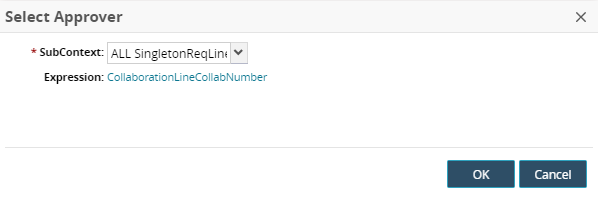
In the * SubContext field, select a subcontext for the selected approver from the dropdown menu.
Click the text in the Expression field to set parameters for validating the business rule:
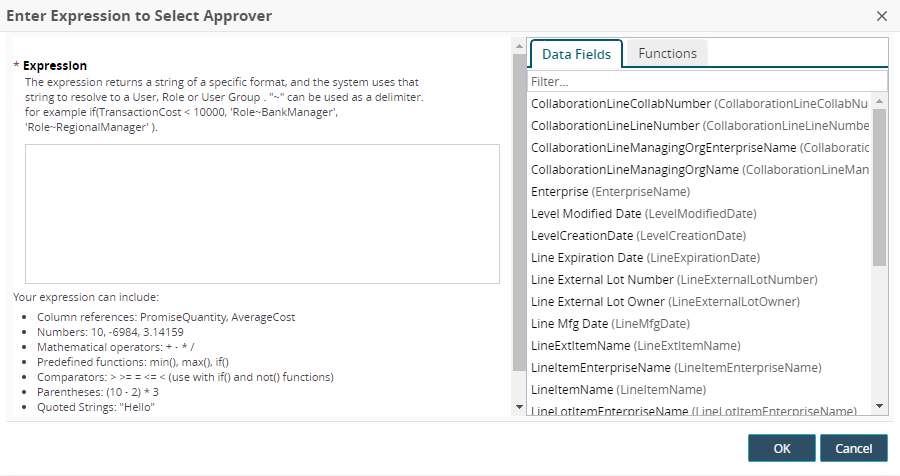
Under * Expression, create custom expressions as needed.
Refer to the on-screen information to view what you can include in an expression.
Alternatively, select entries from the Data Fields tab in the right pane to use existing expressions.
Click the Functions tab to add conditions such as current date, date format, specific values, and if-else conditions to the validation expression.
Click OK.
The Create Approval Routing screen updates and appears.Click the Create button.