Configuring Tracking Event Policies
This policy defines settings for tracking event options that appear on the UI. The user selects only tracking events that are preferred for display, reducing clutter and increasing usability. The user can also create new tracking events and configure the required and optional fields by partners. Note that these tracking events are meant to be information only and will not execute any business logic on the invocation of the event. Users can require certain fields for a system-defined tracking event and configure these rules by partners, which is only possible for originally optional fields. If the system has already configured a field to be required, the user will not be able to change it.
Complete the following steps to view tracking event policies:
L og in to the ONE system.
Select Menus/Favs > Transportation > Policies > Tracking Event Policies. In the NEO UI, users can click on the Menus/Favs icon on the left sidebar and type in the name of the screen in the menu search bar. For more information, see "Using the Menu Search Bar."
The Tracking Event Policies screen appears with tabs for different categories of events.
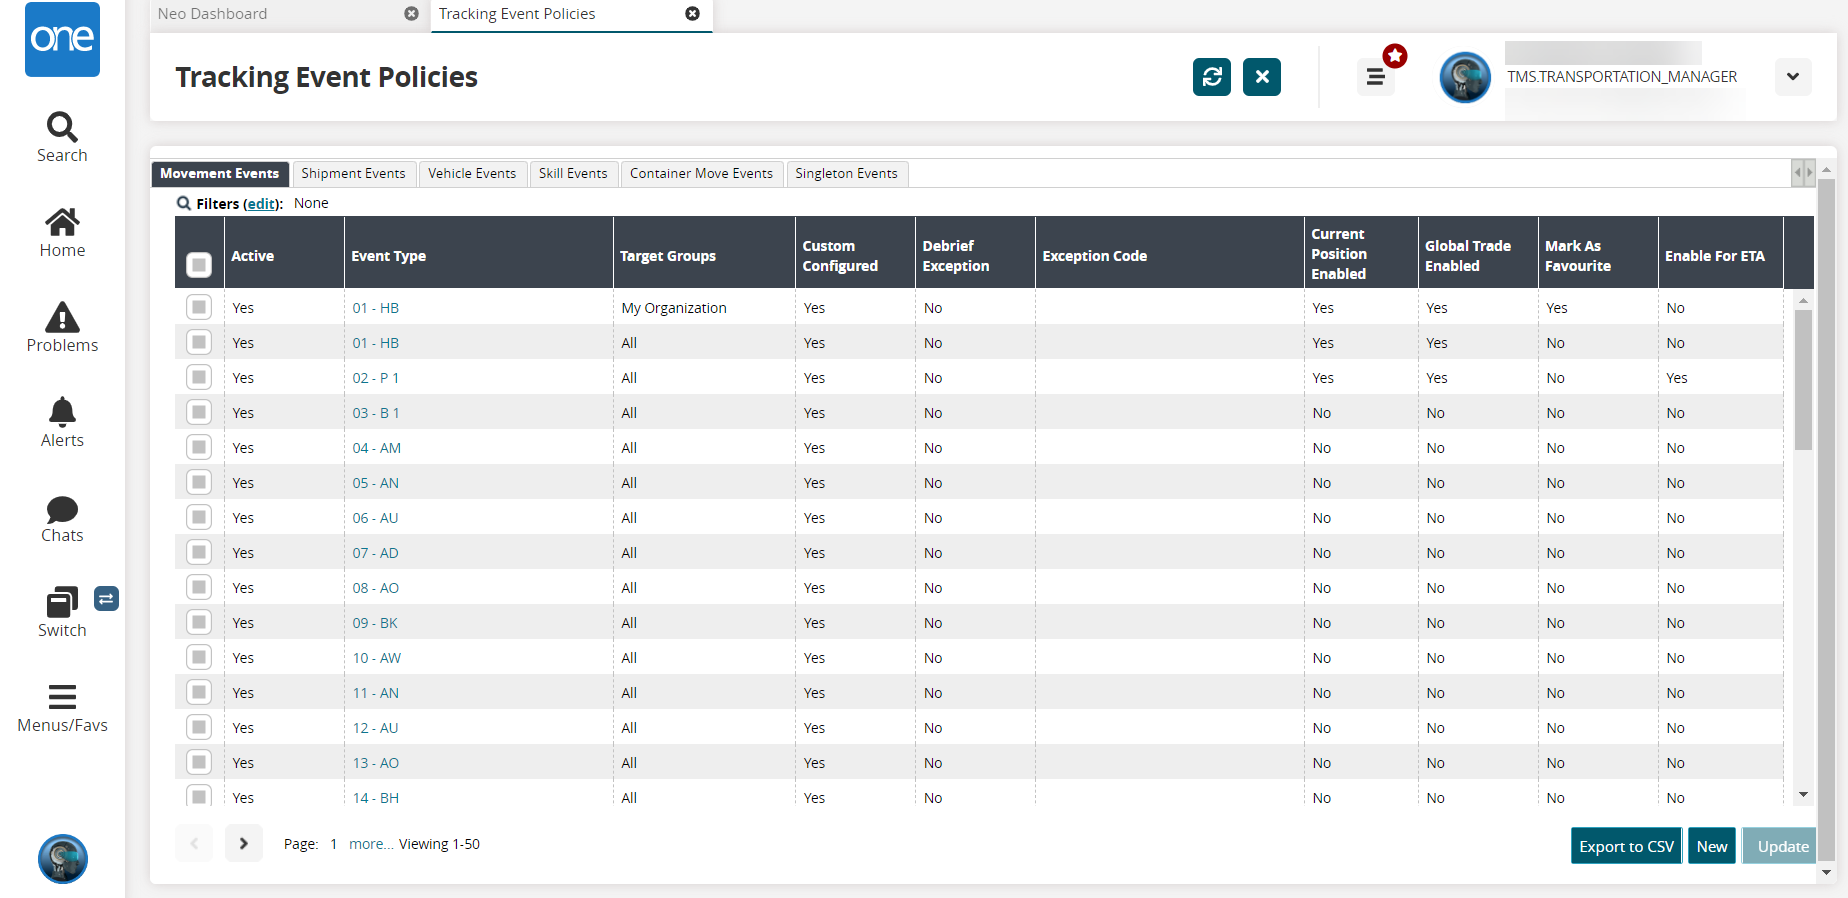
Click the Export to CSV button to export the report to a CSV file.
Complete the following steps to create a new tracking event policy for movement and shipment events:
On the Tracking Event Policies screen, click the New button.
The Create Movement Evt Config screen appears.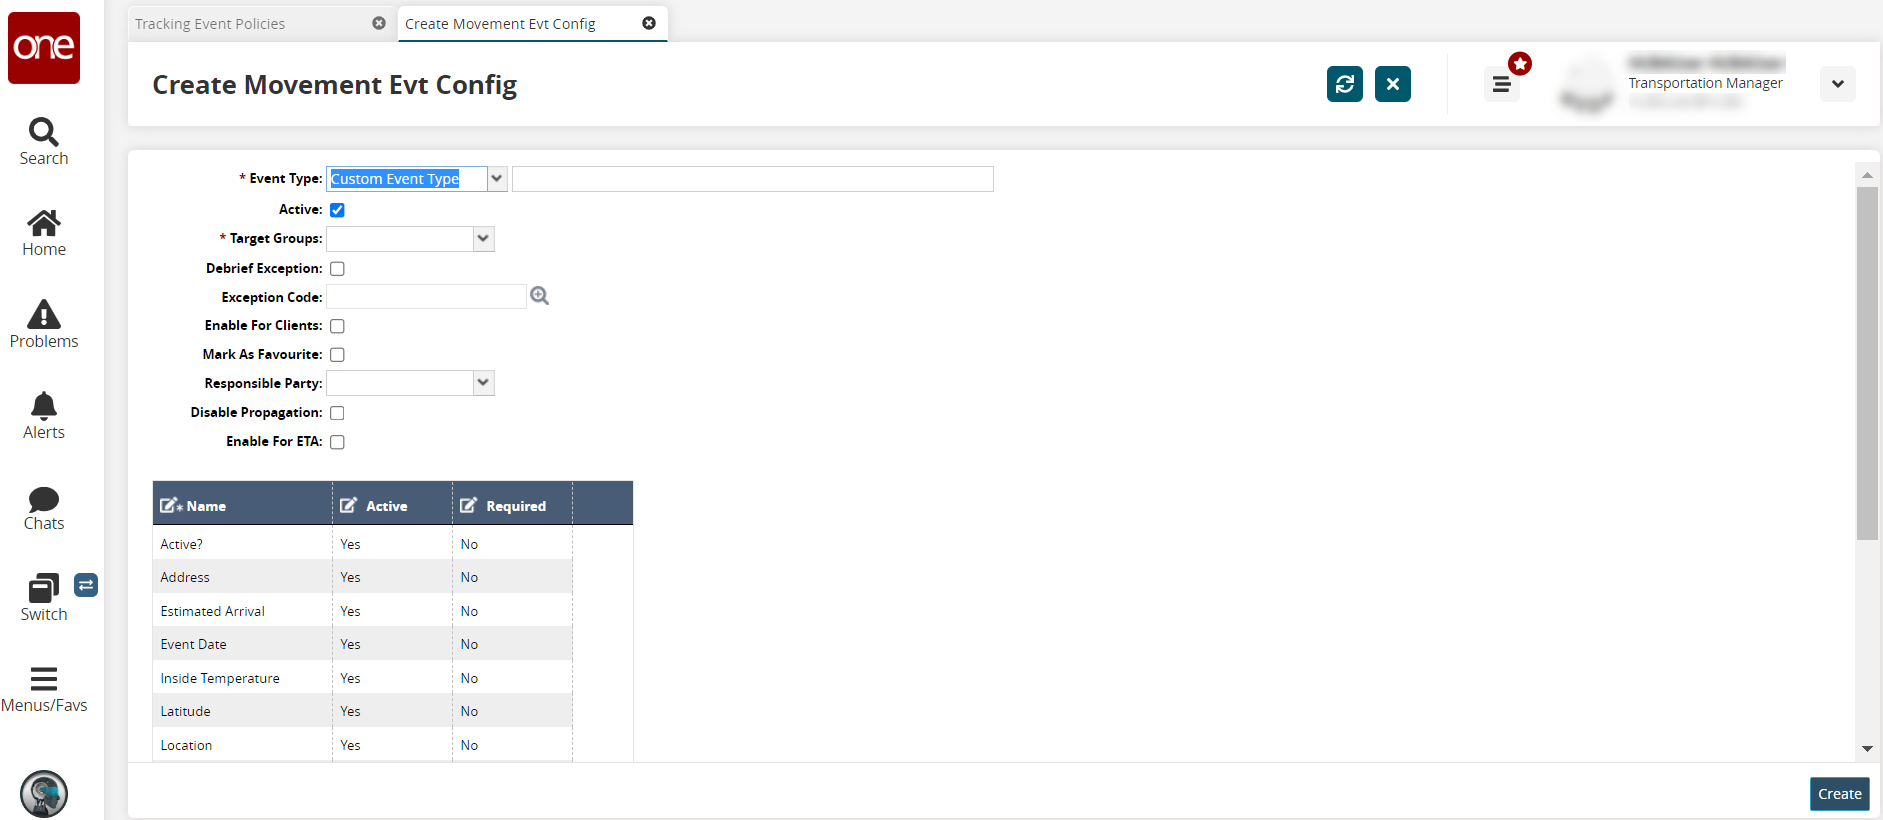
Enter values for fields described in the table below. Fields with an asterisk ( * ) are required.
Field
Description
* Event Type
Select an event type from the dropdown list.
For Standard Event Type, select an event type from the dropdown list in the second field.
For a Custom Event Type, type in a custom event type in the box in the second field.
Active
Click the checkbox to activate the event type. By default, the checkbox is enabled.
* Target Groups
Select a target group from the dropdown list.
Debrief Exception
Click the debrief exception checkbox to enable debrief exception for the event type.
Exception Code
Enter or use the picker tool to select an exception code.
Enable For Clients
Click the checkbox to enable the event for clients.
Mark As Favourite
Click the checkbox to mark the event type as a favorite.
Responsible Party
Select a responsible party from the dropdown list.
Disable Propagation
Click the checkbox to disable propagation for the event.
Enable For ETA
Click the checkbox to enable the estimated time of arrival for the event.
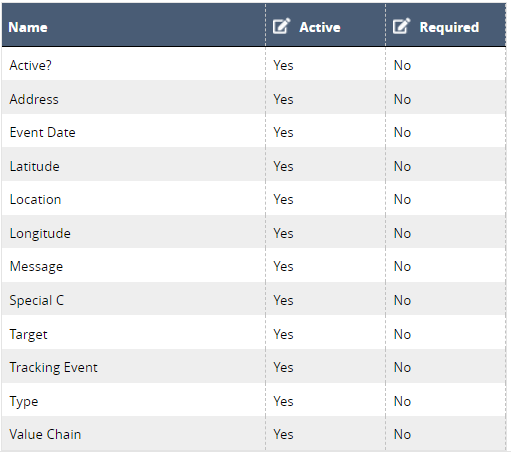
* Name, Active, and Required table
Click inside each box under the Name column to edit the Name.
Click inside each box under the Active column and select a Yes or No option from the dropdown list
Click inside each box under the Required column and select a Yes or No option from the dropdown list
Click the Create button to create the tracking event.
A success message appears.
New vehicle, skill, container move, and singleton events have two required fields: * Event Type and * Allowed To (events that are allowed to certain groups, similar to target groups).
Complete the following steps to update one or more existing policies from the Tracking Event Policy screen:
On the Tracking Event Policy screen, click the checkbox for the movement or shipment events tracking policy row, and click the Update button.
The screen refreshes with only the selected policies in edit mode; fields with an edit icon (pencil) are editable. The instructions below describe movement and shipment tracking events.
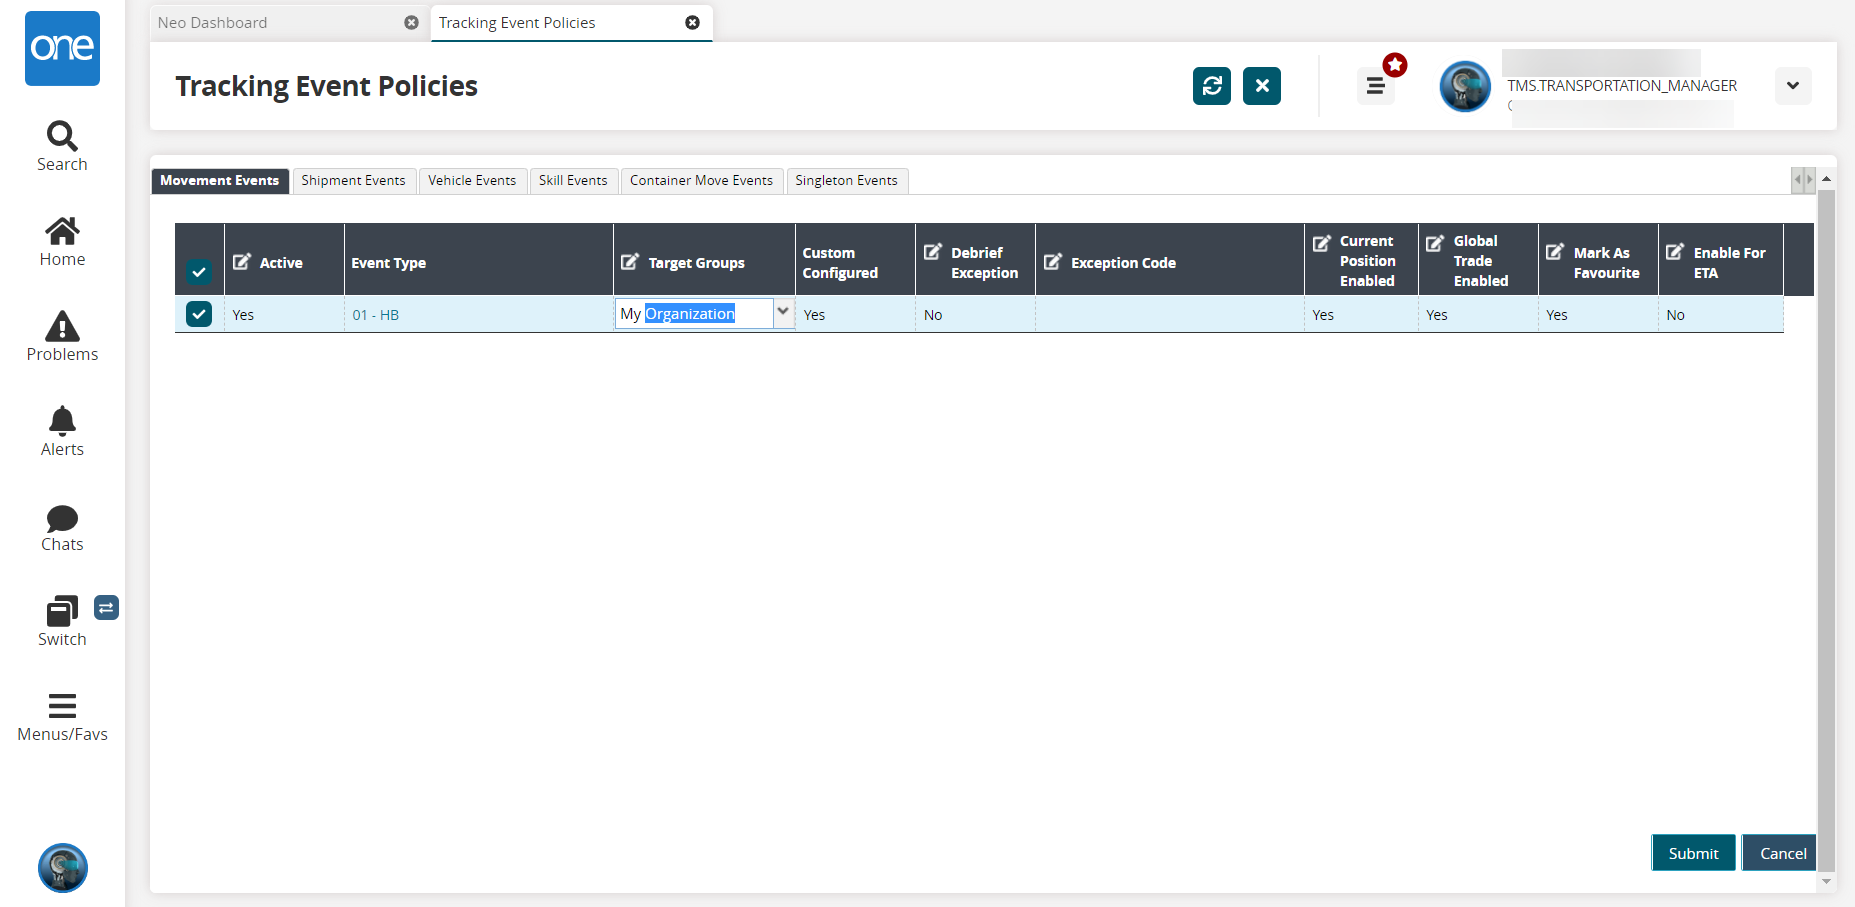
Enter values for fields described in the table below. Fields with an asterisk ( * ) are required.
Field
Description
Active
Select an option from the dropdown list to ensure this policy is active. Options are Yes and No.
Target Groups
Select an option from the dropdown list to select target groups.
Custom Configured
Select an option from the dropdown list to indicate this is a custom-configured policy. Options are Yes and No.
Debrief Exception
Select an option from the dropdown list to allow exceptions for debriefs. Options are Yes and No.
Exception Code
Enter or use the picker tool to select an exception code.
Current Position Enabled
Select an option from the dropdown list to enable current position tracking. Options are Yes and No.
Global Trade Enabled
Select an option from the dropdown list to enable global trade. Options are Yes and No.
Mark As Favourite
Select an option from the dropdown list to mark this policy as a favorite. Options are Yes and No.
Enable For ETA
Select an option from the dropdown list to enable estimated time of arrival (ETA) tracking. Options are Yes and No.
Click the Vehicle Events tab to update vehicle events.
Select events for updates, and click the Update button.
The screen refreshes with only the selected policies in edit mode; fields with an edit icon (pencil) are editable.Edit values for fields described in the table below. Fields with an asterisk (*) are required.
Field
Description
*Active?
Select an option from the dropdown list to ensure this policy is active. Options are Yes and No.
Allowed To
Select an option from the dropdown list to select groups allowed to track the event.
Custom Configured
Select an option from the dropdown list to indicate this is a custom-configured policy. Options are Yes and No.
*Debrief Exception
Select an option from the dropdown list to allow exceptions for debriefs. Options are Yes and No.
Exception Code
Enter or use the picker tool to select an exception code.
Click the Submit button to update the existing movement or shipment tracking policy.
A success message appears.
Skill, container move, and singleton events do now allow multiple updates. Please follow the instructions below to update these events from the event details screen.
Update existing policies from the tracking event details screen:
On the Tracking Event Policies screen, click the link under the Event Type header for a movement. Alternatively, click the Shipment Events tab and click the link for a shipment event type.
The event details screen displays. Movement and shipment event detail fields are the same.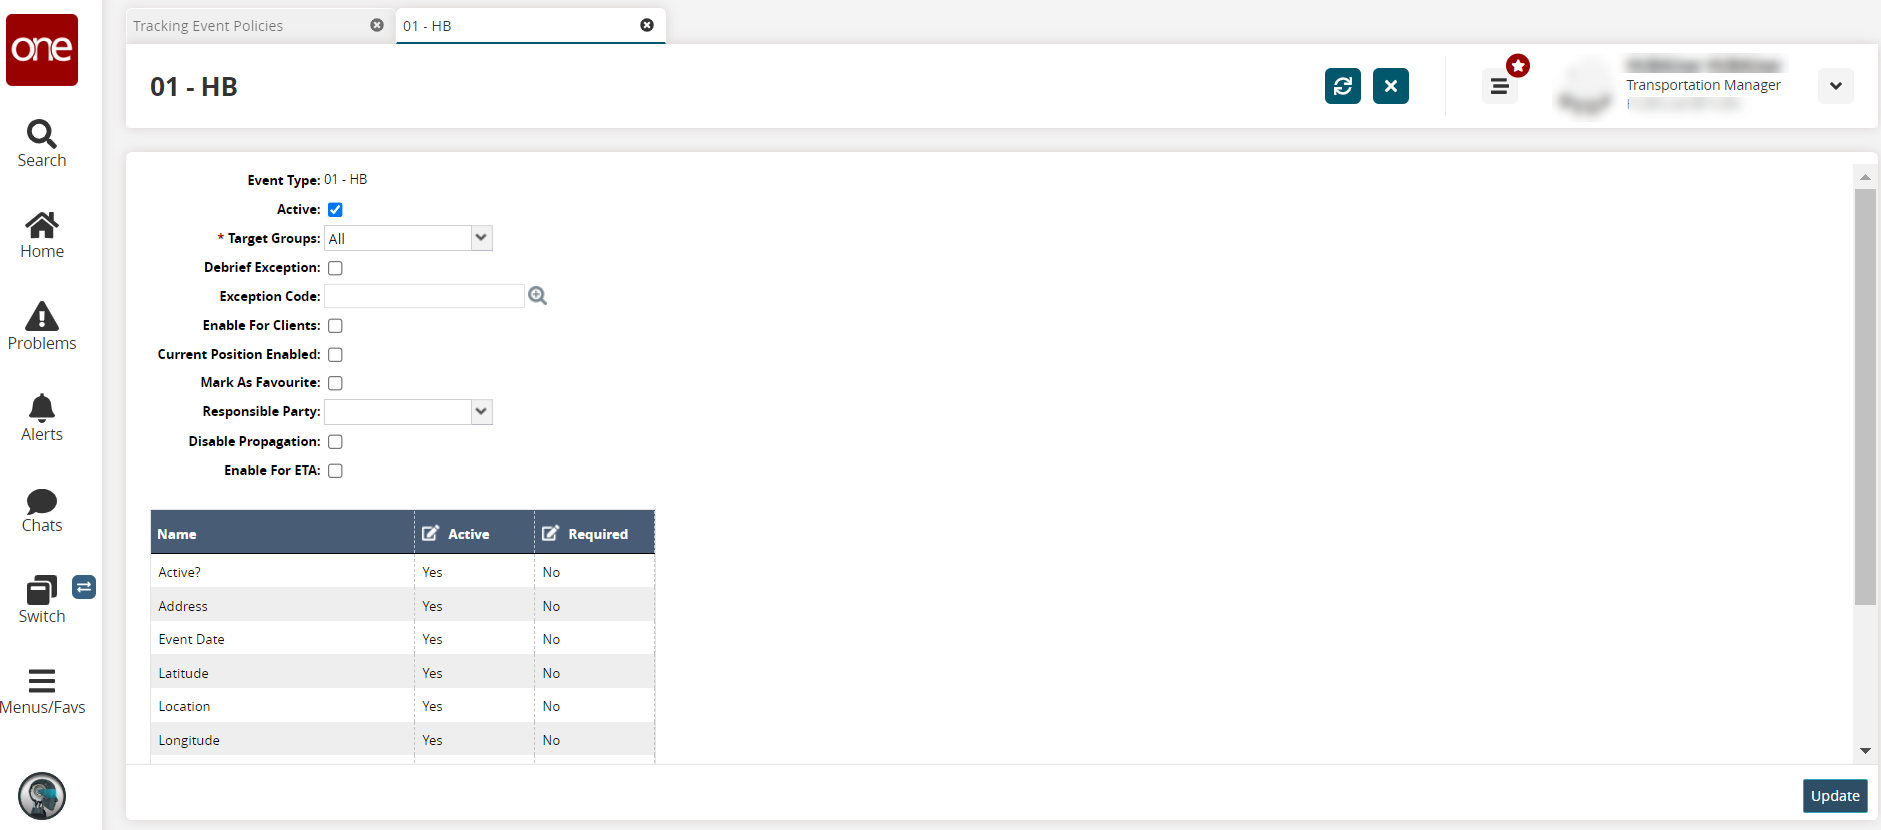
Enter values for fields described in the table below. Fields with an asterisk ( * ) are required.
Field
Description
Active
Check the box to set this policy as active.
* Target Groups
Select a target group from the dropdown list.
Debrief Exception
Check the box to set this policy as a debrief exception.
Exception Code
Enter or use the picker tool to select an exception code.
Current Position Enabled
Check the box to enable current position tracking for this policy.
Global Trade Enabled
Check the box to enable global trade for this policy.
Mark As Favourite
Check the box to mark this policy as a favorite.
Responsible Party
Select the responsible party from the dropdown list.
Disable Propagation
Check the box to disable propagation for this policy.
Enable For ETA
Select an option from the dropdown list.
For the attributes and fields in the following table, click the box and select Yes or No under Active and Required for each.
Click the Vehicle Events, Skill Events, Container Move Events, or Singleton Events tabs to update a policy from one of these categories. All updateable fields are the same.
In the Event Type column, click the link.
The event details page displays. Fields with an asterisk ( * ) are required.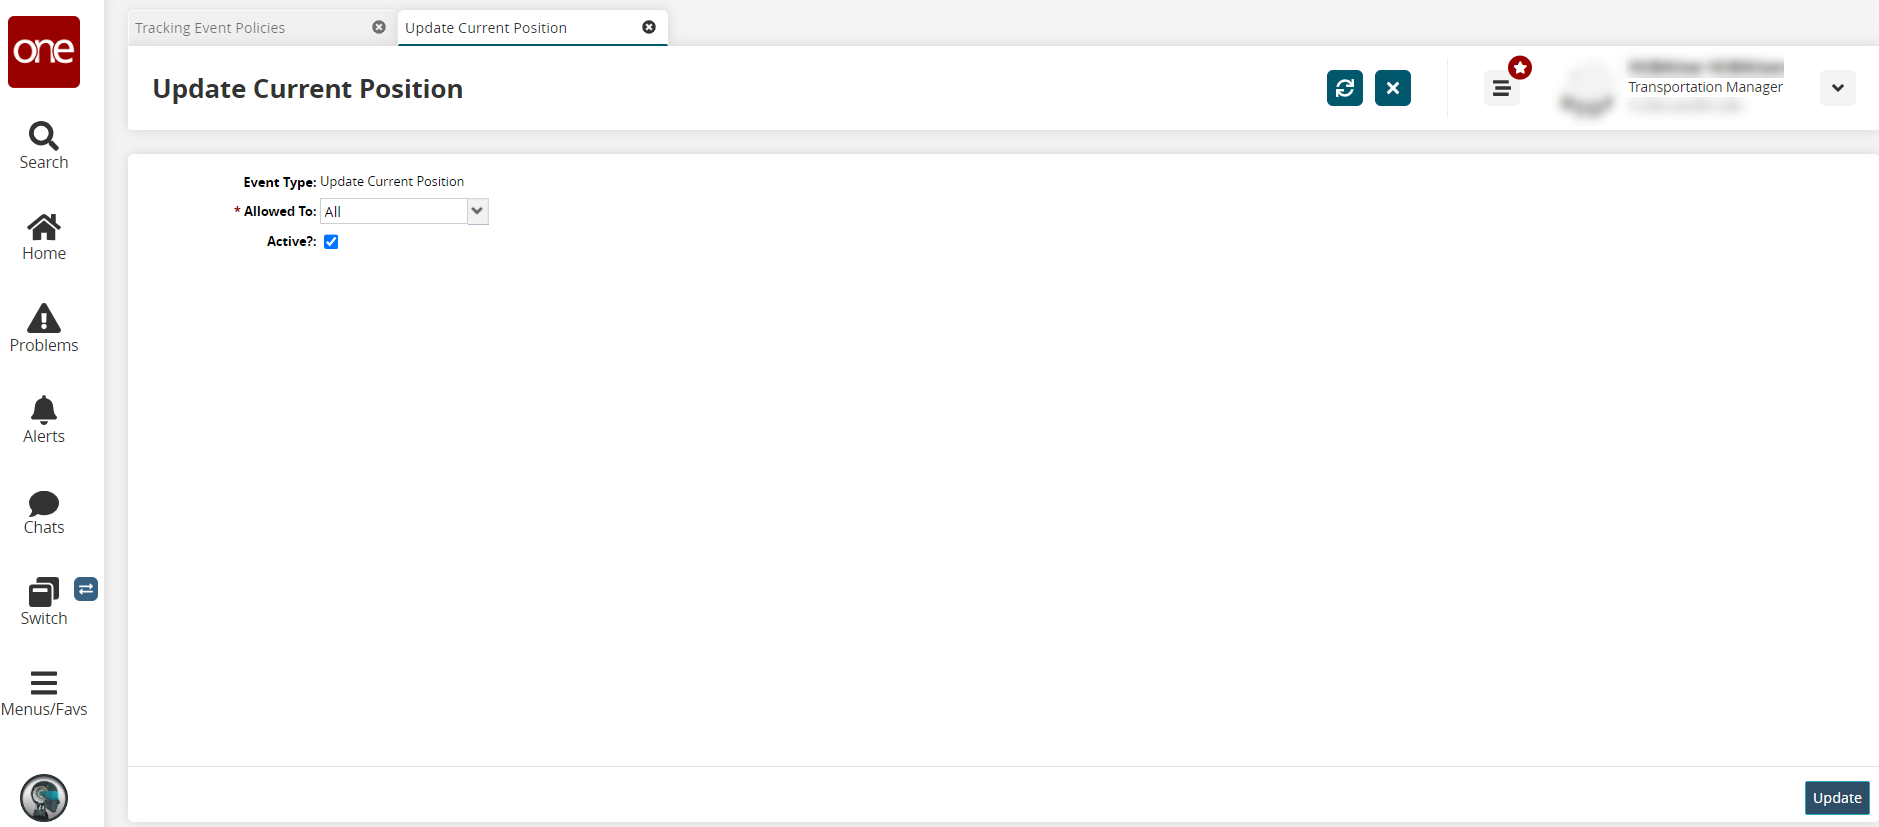
Select an option for * Allowed To from the dropdown list.
Check the box for the Active? field.
Click the Update button.
A green success message displays.