Configuring Transit Time Speed at the Regional Level
Complete the following steps t o configure Transit Time Speed at the Region level:
L og in to the ONE system.
Select Menu/Favs > Planning > Policies > Planning Regions.
In the NEO UI, users can click on the Menus/Favs icon on the left sidebar and type in the name of the screen in the menu search bar. For more information, see "Using the Menu Search Bar."
The Planning Regions screen appears.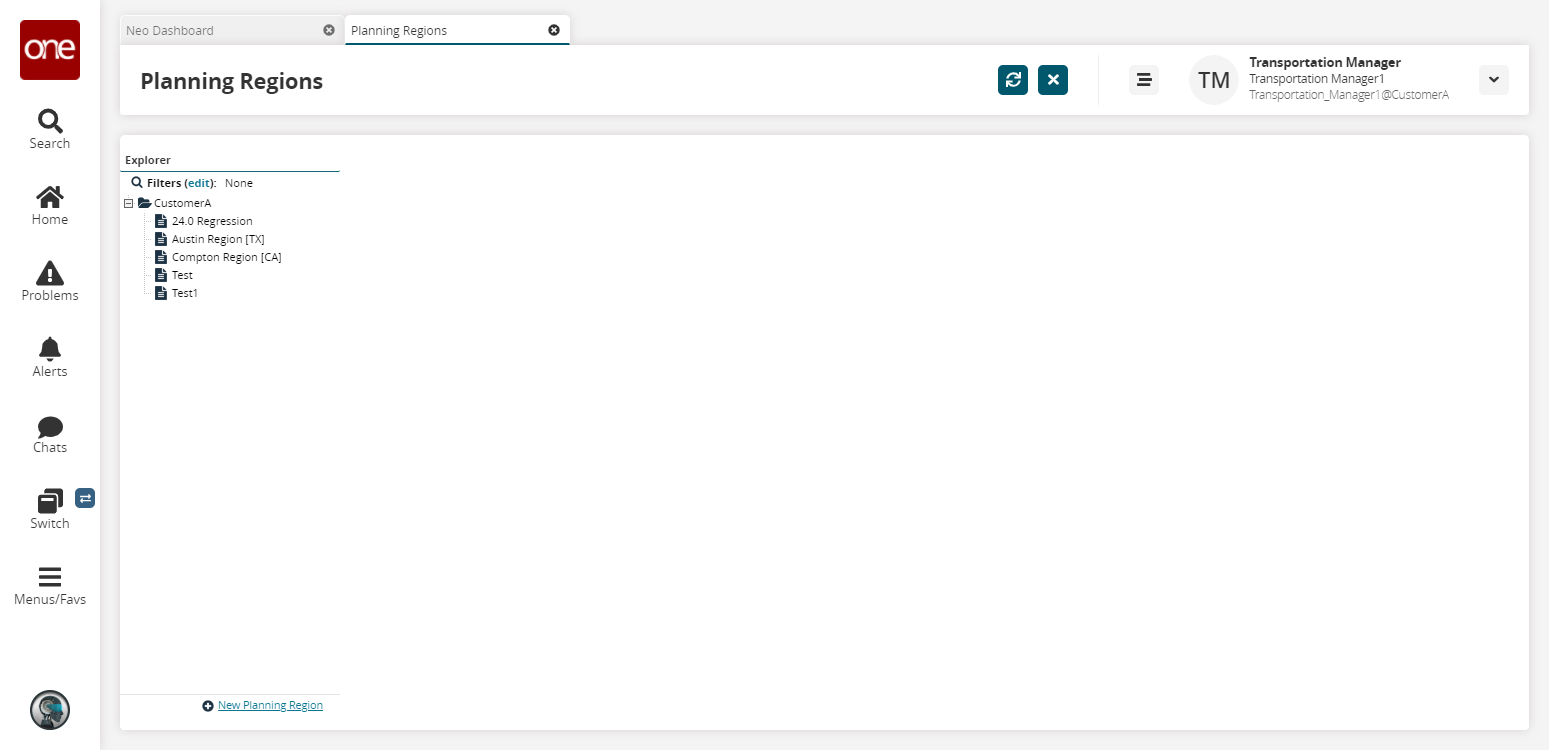
To view the details for a particular region, click on the name of a region in the Explorer pane.
The Planning Region Details pane appears.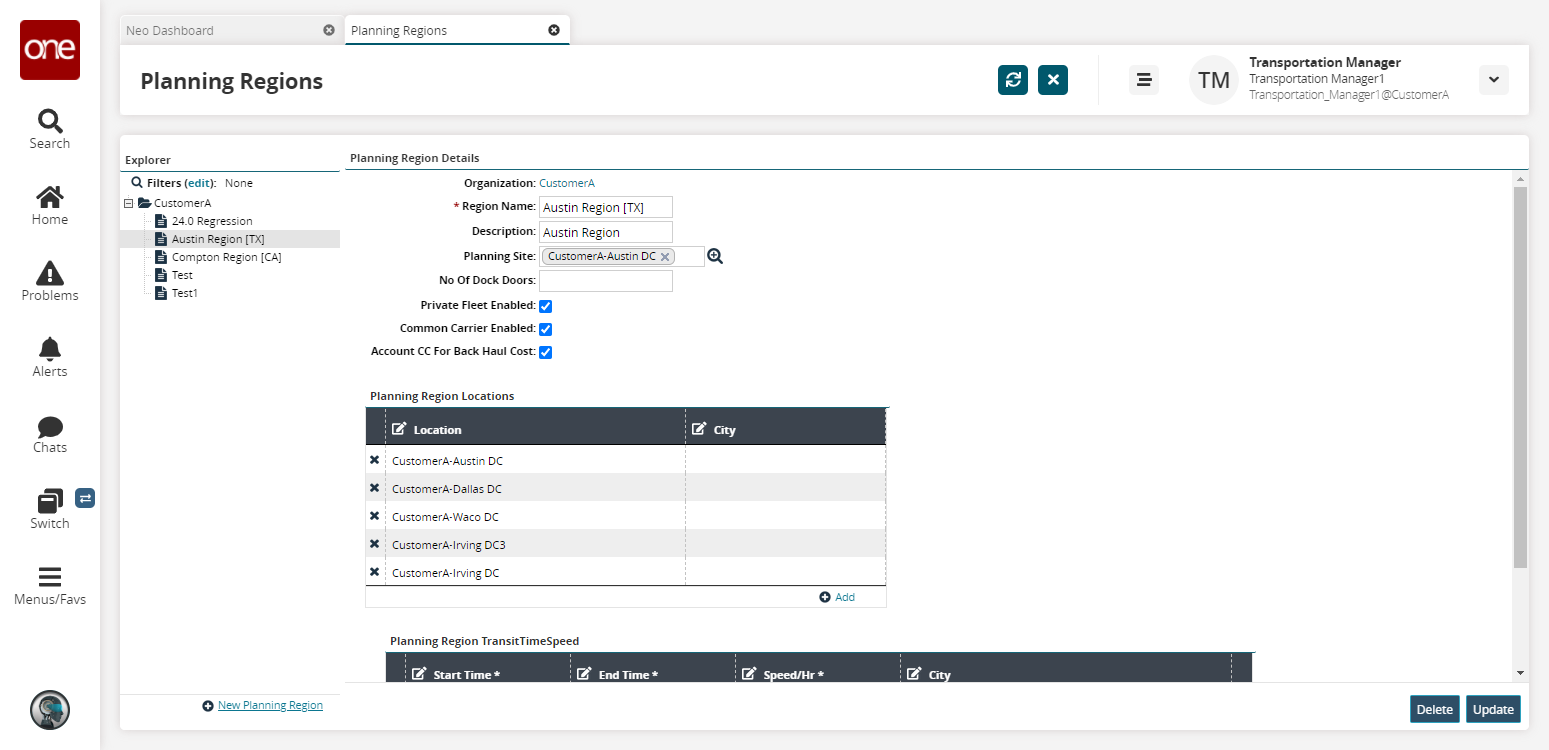
To add a transit time variance, click the Add button in the Planning Region Transit Time Speed table.
A transit time row appears.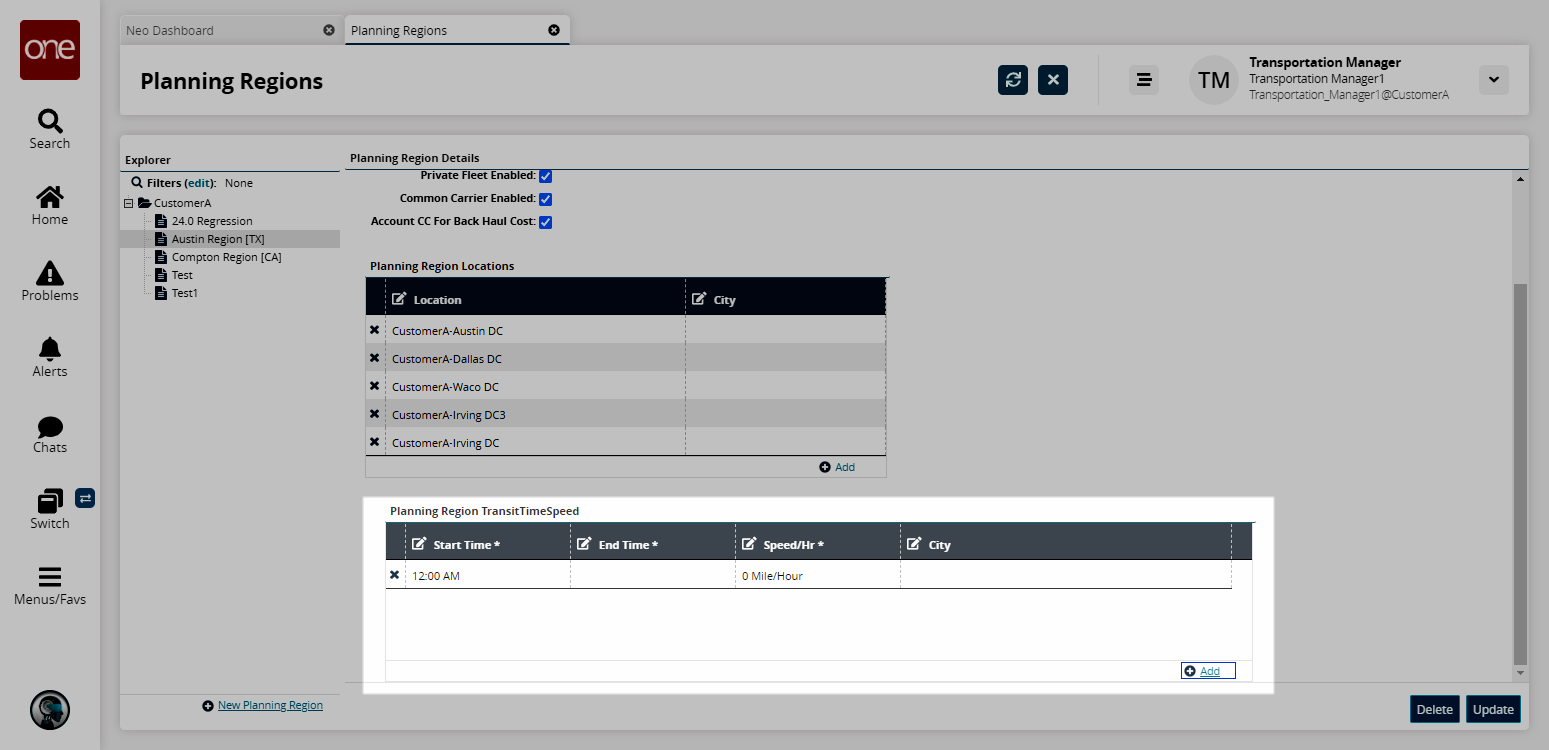
This policy defines settings for transit time. You can configure different transit speeds for your private fleet vehicles throughout the day so that they are used in transportation planning.
To select a time range, click on the Start Time cell to display the Time button and then select the time. Repeat this step for the End Time.
To select a speed, click inside the Speed/Hr cell to display the Speed box and the Distance UOM list, and type a speed value and select either the Mile or Kilometer option.
To save all changes, click the Update button.
A success message appears.