Creating Approved Customer Lists (ACLs)
Complete the following steps to create an approved customer list (ACL):
L og in to the ONE system.
Click Menus/Favs > Administration > ACLs.
In the NEO UI, users can click on the Menus/Favs icon on the left sidebar and type in the name of the screen in the menu search bar. For more information, see "Using the Menu Search Bar."
The ACLs screen displays.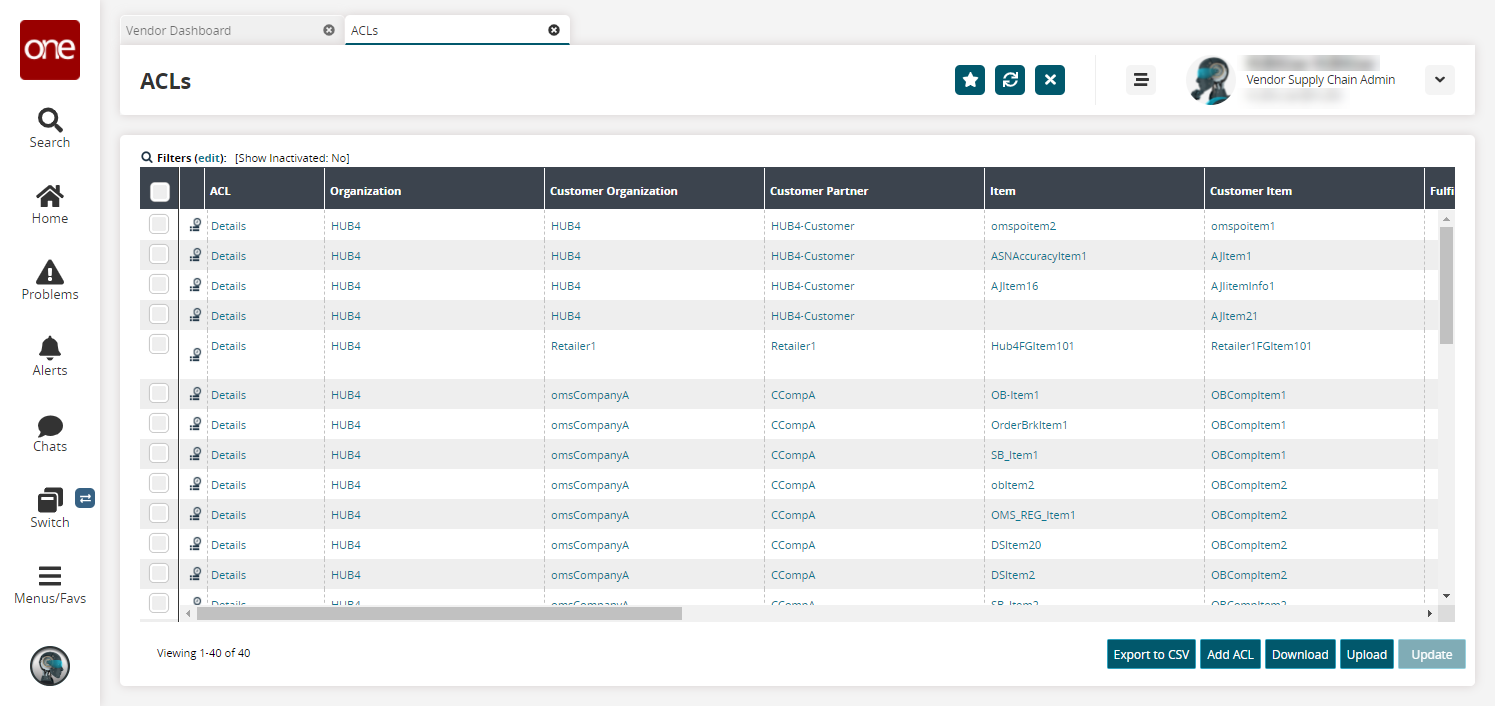
Click the Add ACL button.
The Add ACL screen displays.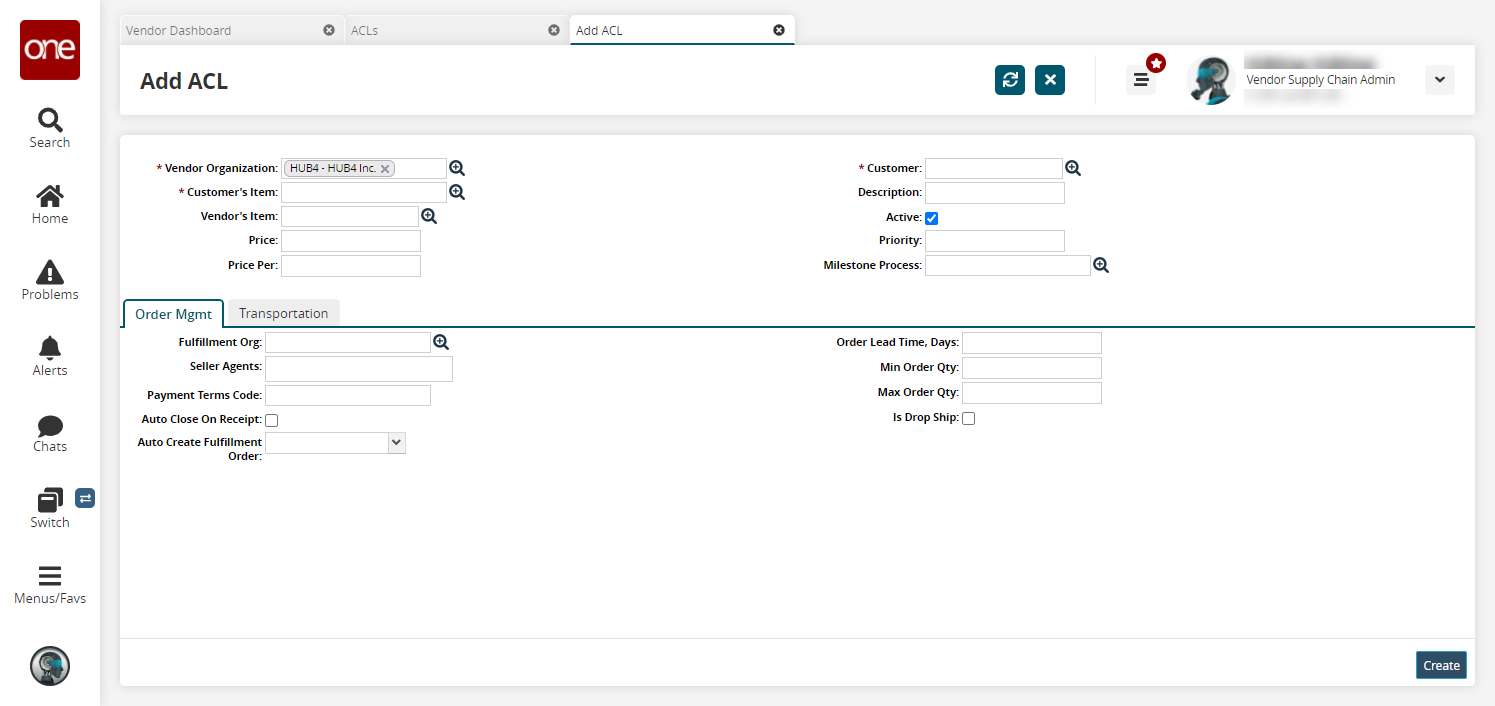
Enter values for fields described in the table below. Fields with an asterisk ( * ) are required.
Page Section
Field
Description
General Header
* Vendor Organization
Enter or use the picker tool to select the vendor organization.
* Customer's Item
Enter or use the picker tool to select the customer's item.
Vendor's Item
Enter or use the picker tool to select the vendor's Item.
Price
Enter the total price for the item.
Price Per
Enter the price per item.
* Customer
Use the picker tool to select the customer for this ACL.
Description
Enter a description for the ACL.
Active
Select the checkbox to activate or deactivate the ACL.
Priority
Enter the priority of the ACL.
Milestone Process
Enter or use the picker tool to select the milestone process.
Order Mgmt Tab
Fulfillment Org
Enter or use the picker tool to select the fulfillment organization.
Seller Agents
Enter a name for the seller agent.
Payment Terms Code
Enter a code for payment terms.
Auto-Close On Receipt
Select the checkbox to enforce the policy to auto-close an invoice for this ACL upon receipt.
Auto-Create Fulfillment Order
Select an option from the dropdown menu. When Deployment Order or Purchase Order is selected, fulfillment orders are created automatically from the selected order type for the ACL.
Order Lead Time, Days
Enter the number of days for the order lead time.
Min Order Qty
Enter the minimum quantity for orders for this ACL.
Max Order Qty
Enter the maximum quantity for orders for this ACL.
Is Drop Ship
Select this field to enable dropshipping. When this field is enabled, the ACL is marked for dropshipping, meaning the item is delivered directly to a customer instead of going to a warehouse first. When this field is disabled, the ACL is marked for traditional shipping (to a warehouse first). The field is disabled by default.
Click the Transportation tab.
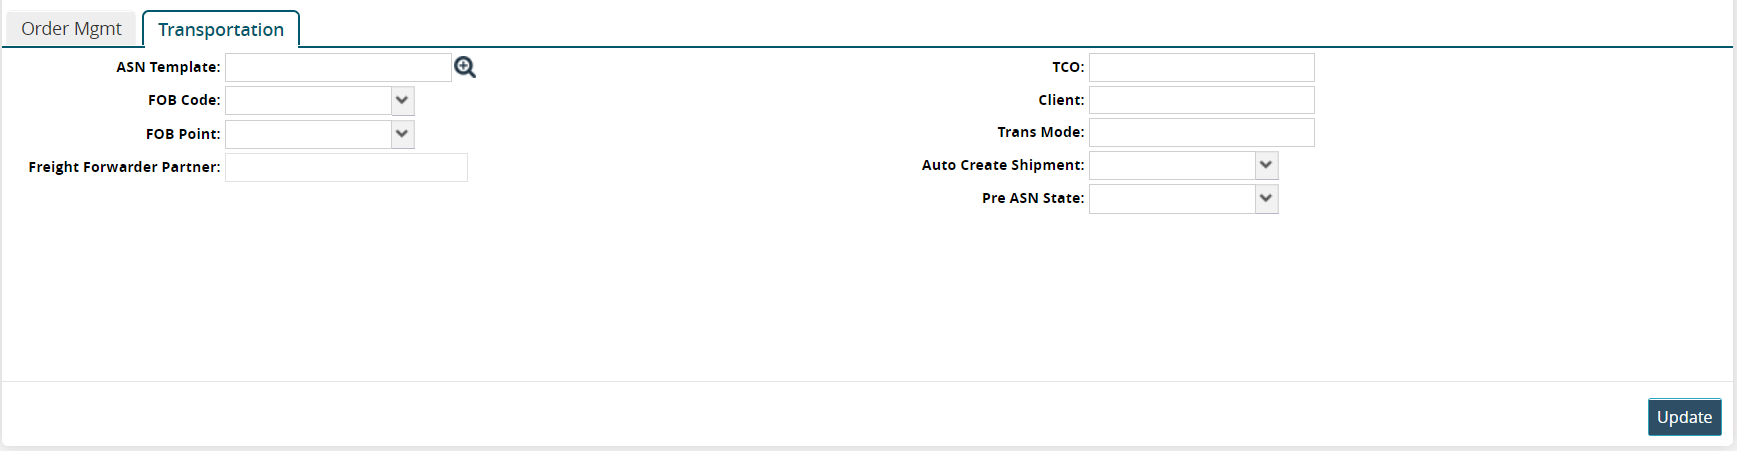
Enter values for fields described in the table below. Fields with an asterisk ( * ) are required.
Field
Description
ASN Template
Click the picker tool to select an ASN template.
FOB Code
Select a Freight On Board (FOB) code from the dropdown list.
FOB Point
Enter a Freight On Board point from the dropdown list.
Freight Forwarder Partner
Enter a freight forwarder partner.
TCO
Enter the name of the transportation coordinator.
Client
Enter the client's name.
Trans Mode
Enter a transportation mode.
Auto Create Shipment
Select an option from the dropdown list to auto-create a shipment.
Pre-ASN State
Select a pre-ASN state from the dropdown list.
Click the Create button.
The new ACL appears in the ACL list.