Creating Approved Vendor Lists (AVLs)
Complete the following steps to create an AVL:
Log in to the ONE system as Buyer Supply Chain Admin.
Click Menus/Favs > Administration > AVLs.
In the NEO UI, users can click on the Menus/Favs icon on the left sidebar and type in the name of the screen in the menu search bar. For more information, see "Using the Menu Search Bar."
The AVLs screen displays.
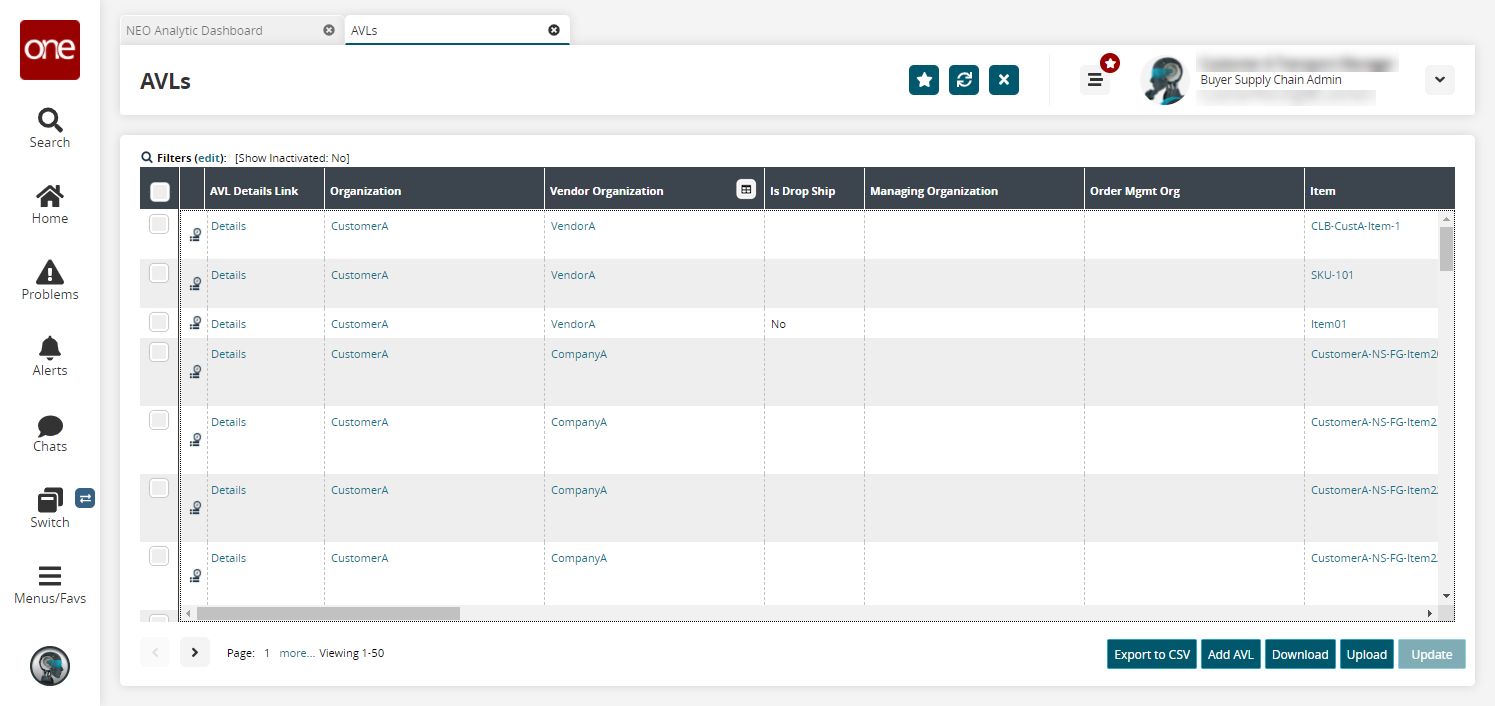
Click the Add AVL button.
The Add AVL screen displays. By default, the Details tab is selected.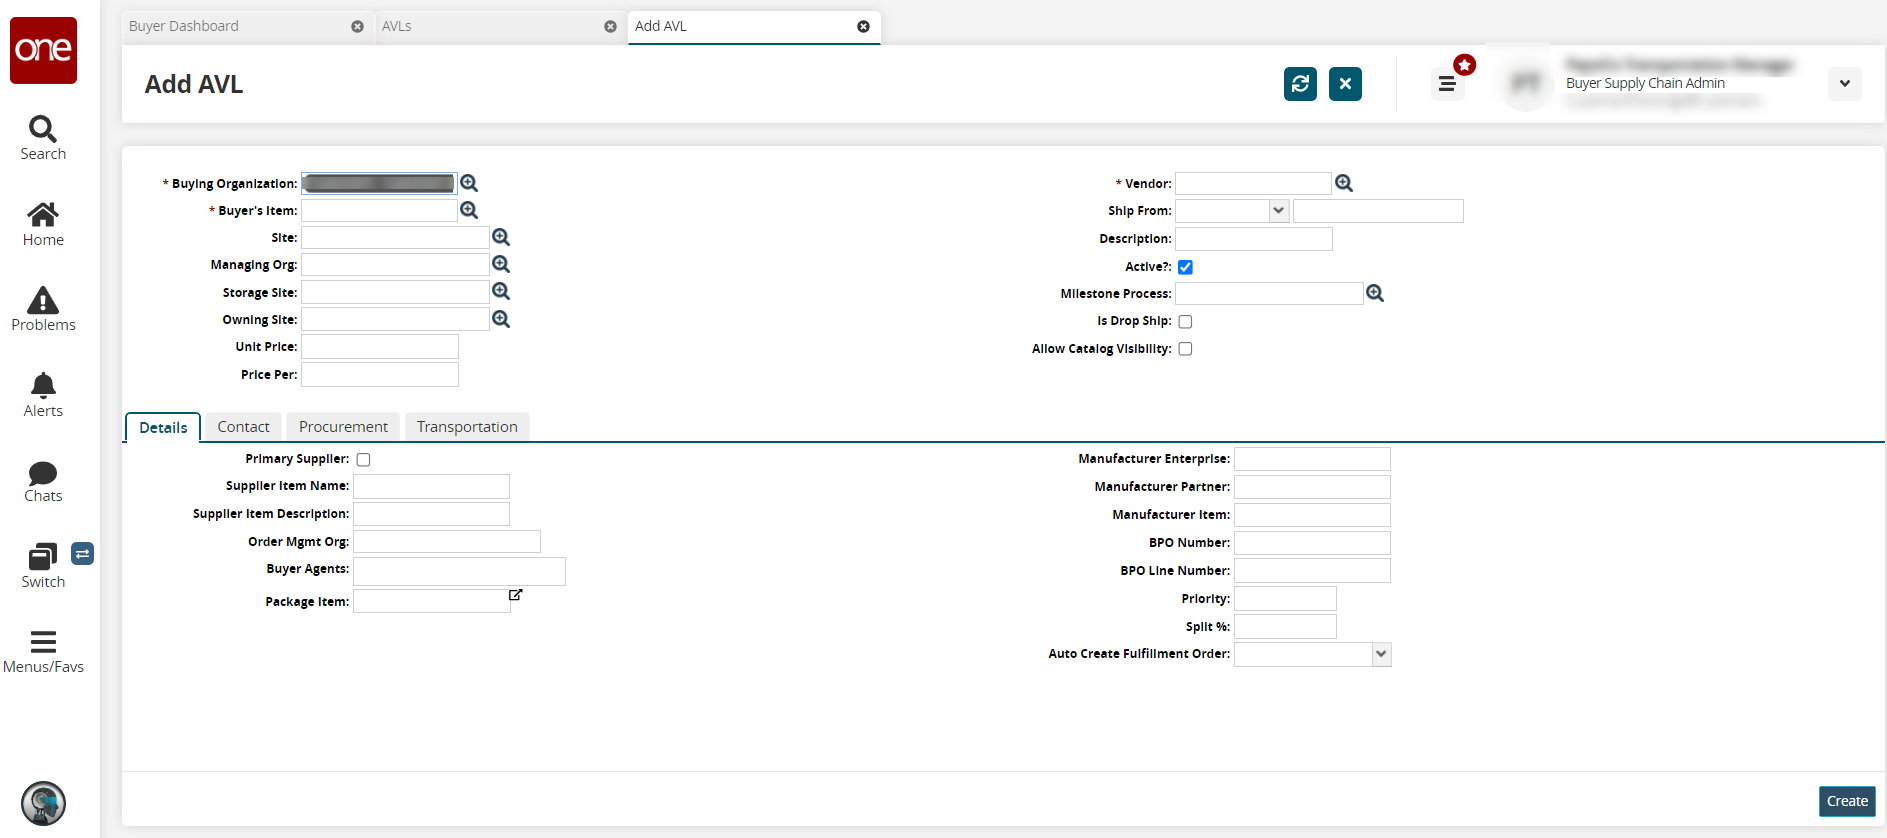
Enter values for fields described in the table below. Fields with an asterisk ( * ) are required.
Section
Field
Description
Header
* Buying Organization
This field populates when creating the AVL. This field can be updated from the AVLs screen by clicking on the Update button.
* Buyer's Item
This field populates when creating the AVL.
Site
This field populates when creating the AVL.
Managing Org
Enter or use the picker tool to select the managing organization.
Storage Site
Enter or use the picker tool to select the storage site.
Owning Site
Enter or use the picker tool to select the owning site.
Unit Price
Enter a unit price.
Price Per
Enter a price per item.
Vendor Organization
This field populates based on the vendor selected when creating the AVL.
Vendor
This field populates when creating the AVL.
Ship From
Select the site from where the items will be shipped. In the first field, select either the Vendor's Site or the Vendor's Partner Site. Type the site name in the second field.
Active?
Check the box if this AVL is active.
Milestone Process
Enter or use the picker tool to select the milestone process.
Is Drop Ship
Check this box to enable dropshipping. When this field is enabled, the AVL is marked for dropshipping, meaning the item is delivered directly to a customer instead of going to a warehouse first. When this field is disabled, AVL is marked for traditional shipping (to a warehouse first). The field is disabled by default.
Allow Catalog Visibility
Check this box to allow the AVL to have visibility to the catalog.
Details tab
Primary Supplier
Check the box if this AVL will be a primary supplier.
Supplier Item Name
Type in the name of the item name as it is called by the supplier.
Supplier Item Description
Type in a description of the item.
Order Mgmt Org
Type in the name of the order management organization.
Buyer Agents
Type in the name of the buyer agents.
Package Item
Type in the name of the package item. Click the popout icon to view the packing resource.
Manufacturer Enterprise
Type in the name of the manufacturer's enterprise name.
Manufacturer Partner
Type in the name of the manufacturer's partners.
Manufacturer Item
Type in the name of the manufacturer's item.
BPO Number
Type in the blanket purchase order number.
BPO Line Number
Type in the blanket purchase order line number.
Priority
Type in the priority.
Split %
Type in the percentage value for a split.
Auto-Create Fulfillment Order
Select an option from the dropdown menu. When Deployment Order or Purchase Order is selected, fulfillment orders are automatically created from the selected order type for the AVL.
Click the Contact tab.

Enter values for fields described in the table below. Fields with an asterisk ( * ) are required.
Section
Field
Description
Supplier CSR (Customer Service Representative)
Supplier CSR
Select the supplier's customer service representative (CSR) using the picker tool.
Code
Type in the appropriate code for the CSR.
Email
Type in the email address for the CSR.
Phone
Type in the phone number for the CSR.
Supplier Ship MGR (Manager)
Code
Type in the code for the supplier's shipping manager.
Email
Type in the email address for the manager.
Phone
Type in the phone number for the manager.
Supplier Sales Rep
Code
Type in the code for the supplier's sales representative.
Email
Type in the email address for the sales rep.
Phone
Type in the phone number for the sales rep.
Click the Procurement tab.
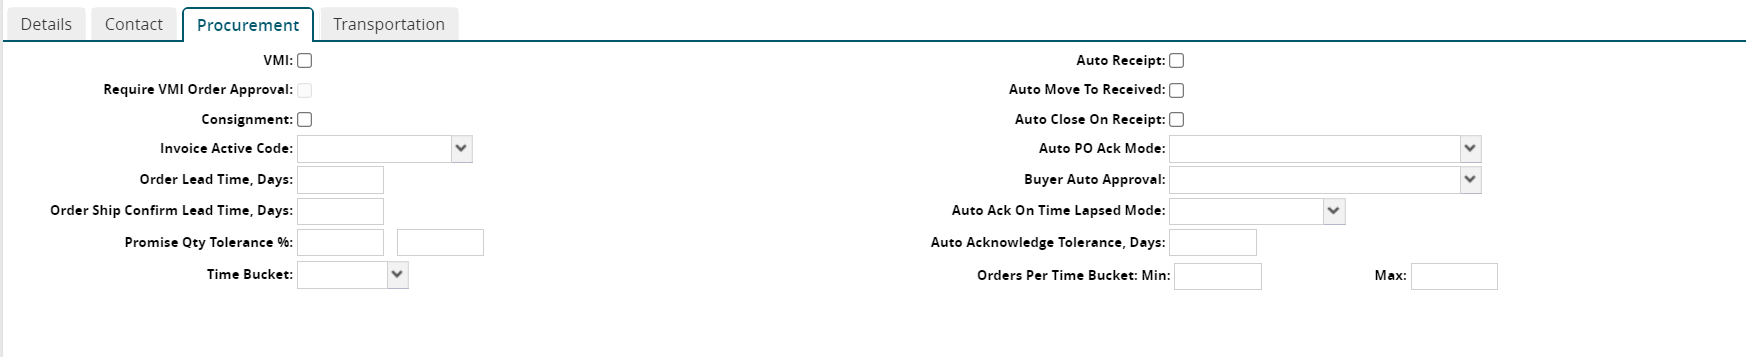
Enter values for fields described in the table below. Fields with an asterisk ( * ) are required.
Field
Description
VMI
Select the checkbox if this AVL will have vendor-managed inventory (VMI). When this box is checked, the following box will activate.
Require VMI Order Approval
Select the checkbox if approval is required for VMI orders.
Consignment
Select the checkbox if this is on consignment.
Invoice Active Code
Select the invoice inactive code from the dropdown list.
Order Lead Time, Days
Enter the number of days for the order lead time.
Order Ship Confirm Lead Time, Days
Enter the number of days lead time for an order's shipping confirmation.
Promise Qty Tolerance %
Enter the percentage value for the promised quantity tolerance level.
Time Bucket
Select the time frame (bucket) from the dropdown list.
Auto Receipt
Check the box if this AVL will have auto-receipt.
Auto Move To Received
Check the box if orders will automatically move to received status.
Auto Close On Receipt
Check the box if orders will automatically close upon receipt.
Auto PO Ack Mode
Select the type of auto-acknowledgment mode for purchase orders from the dropdown list.
Buyer Auto Approve
Select the auto-approval process for the buyer from the dropdown list.
Auto Ack On-Time Lapsed Mode
Select the action (mode) for orders that are auto-acknowledged but their on-time status has lapsed from the dropdown list.
Auto Acknowledge Tolerance, Days
Enter the number of days for auto-acknowledgment tolerance.
Orders Per Time Bucket (Min and Max)
Enter a minimum and a maximum number of orders allowed per time frame.
Click the Transporation tab.

Enter values for fields described in the table below. Fields with an asterisk ( * ) are required.
Field
Description
ASN Template
Use the picker tool to select the template to use for an advanced shipping notice (ASN).
Inco Terms
Select the code for the inco terms used for this AVL from the dropdown list.
Inco Terms Location
Type in the location for the inco terms.
Overshipping Tolerance, %
Type in the percentage value for the tolerance level for over-shipping.
Overreceiving Tolerance, %
Type in the percentage value for the tolerance level for over-receiving.
Underreceiving Tolerance, %
Type in the percentage value for the tolerance level for under-receiving.
TCO
Type in the value for the Transportation Controlling Organization (TCO).
Client
Enter the client organization. The Client field is populated based on how the Transportation Controlling Organization (TCO) is picked on the order. If the TCO is picked from a buffer, then the system will pick the corresponding client identified in the buffer, but if the TCO is not picked from any master data and a default value is picked, then the Client field will be null. In all cases, the Client displays an organization with a Client Partner partnership with the TCO and where the TCO has a Freight Forwarder Partner partnership with the Client.
Auto Create Shipment
Select the auto-create shipment status from the dropdown list.
Pre ASN State
Select a value for the pre-ASN state from the dropdown list.
Enable Pre ASN For Static Route
Select the checkbox to enable pre-ASNs for static routes.
Click Create to create the new AVL.
A success message displays.