Creating Custom UOMs
Users can create custom units of measure (UOMs) to display forecast or historical quantity information on various demand planning screens. From the Create Custom UOM screen, users can define the UOM name (for example, Truck), the conversion factor, and the granularity of the conversion factor. Users can specify for which items, site groups, and/or partner sites the custom UOM is applicable. If all three are specified, then the conversion is at the lowest level and, therefore, the most specific. This means the conversion factor can differ for the same item if the site group or partner site differs.
Once enabled, the following UI screens support customer-defined UOMs when viewing demand forecasts and demand histories:
Partner Site Forecast Book
Search Demand Forecast
Search Aggregated Orders
Search Aggregated Shipments
Forecast Review
Demand History Review
Forecast And Demand History Review
Complete the following steps to create custom UOMs:
L og in to the ONE system.
Click Menus/Favs > Demand Planning > Custom UOM > Create Custom UOM.
The Create Custom UOM screen appears.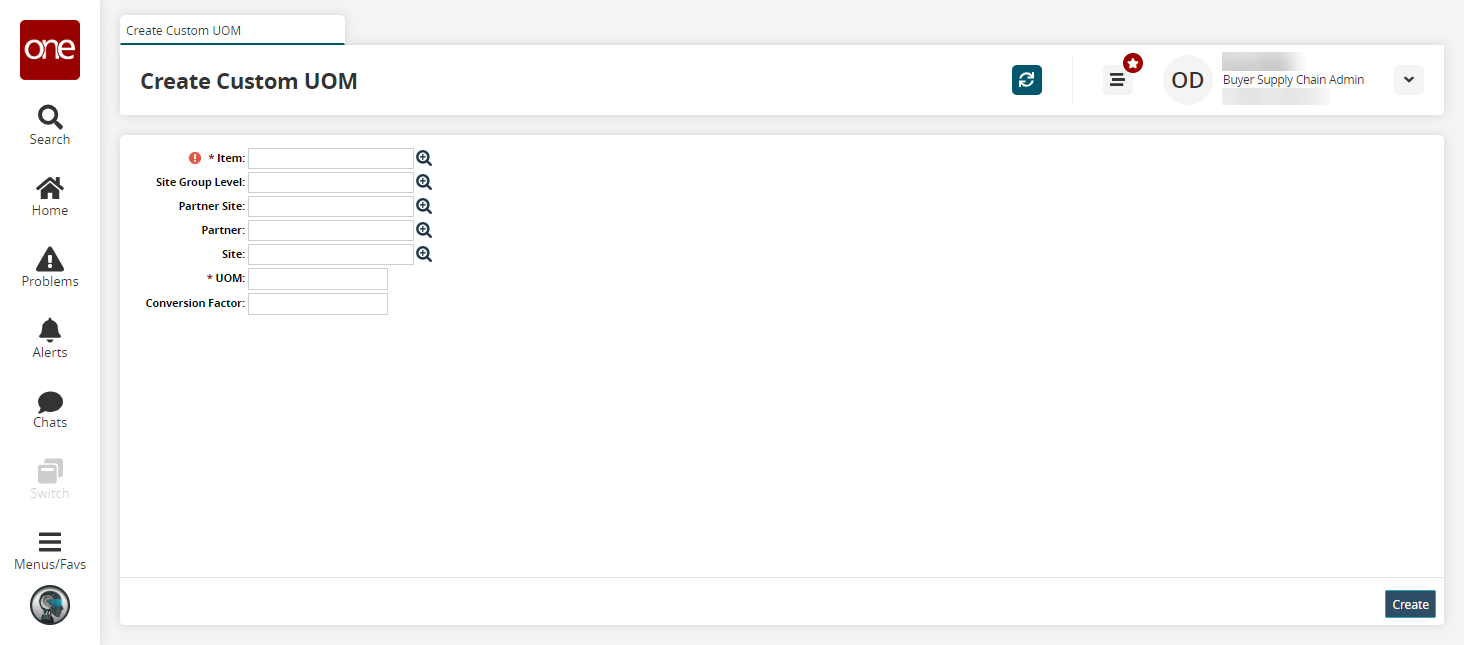
Fill out the following fields. Fields with an asterisk ( * ) are required.
Field
Description
* Item
Select an item using the picker tool.
Site Group Level
Select a site group level using the picker tool.
Partner Site
Select a partner site using the picker tool.
Partner
Select a partner using the picker tool.
Site
Select a site using the picker tool.
* UOM
Enter a custom UOM name.
Conversion Factor
Enter a conversion factor. The Conversion Factor field tells the system how to convert from forecast units to custom UOMs. For example, say the Conversion Factor field is set to 0.5, and your custom UOM is "Truck." If the forecast is 20 units, then the Truck forecast is 10 Trucks.
Click Create.
A success message appears