Creating Customers
Vendor Supply Chain Admin users can add, search, and update customers in the system.
Complete the following steps to add a new customer:
L og in to the ONE system.
Click Menu/Favs > Administration > Customers.
In the NEO UI, users can click on the Menus/Favs icon on the left sidebar and type in the name of the screen in the menu search bar. For more information, see "Using the Menu Search Bar."
The Customers screen appears.
Click the Add Customer button.
The Add Customer screen appears with the Contact tab showing as the default.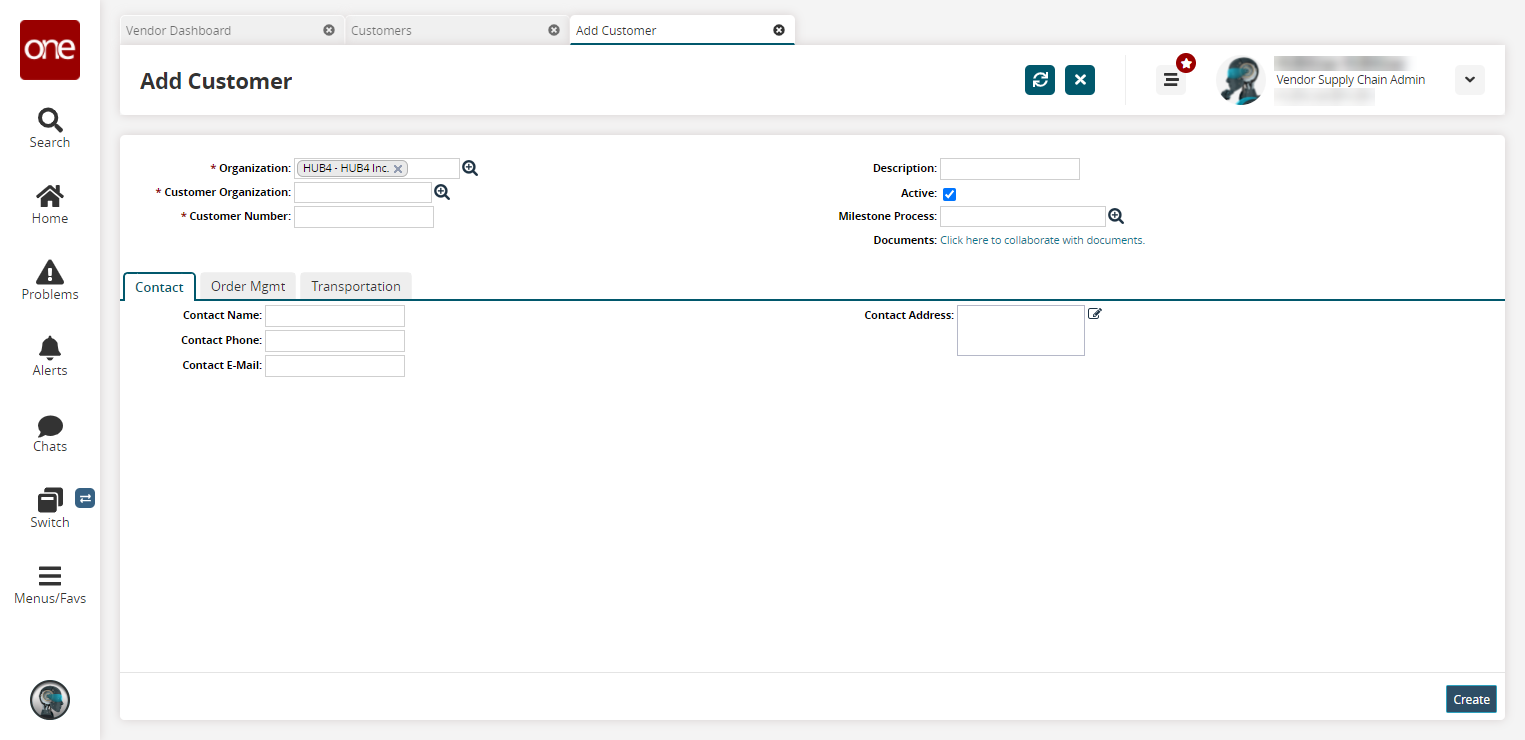
Enter values for fields described in the table below. Fields with an asterisk ( * ) are required.
Field
Description
* Organization
Use the picker tool for the organization that the customer is under.
* Customer Organization
Use the picker tool to select an organization the customer will fall under for hierarchical purposes.
* Customer Number
Enter an identifying number for the customer.
Description
Type in a description of the customer.
Active
Check the box to make this customer active.
Milestone Process
Use the picker tool to select a milestone process.
Documents
Click the link to add documents to this customer profile. Please note that you will have to save the customer profile first by clicking on the Create button.
Contact Tab
Enter the customer's contact details for the Contact Name, Contact Phone, and Contact Email fields.
Click the edit icon for the Contact Address field.
A popup displays.Enter values for fields described in the table below. Fields with an asterisk ( * ) are required.
Please note that the fields are context-sensitive and may change based on the country selected.Field
Description
Country
Select a country from the dropdown list.
*Line 1
Enter the company contact's address.
Line 2
Enter additional address information.
Line 3
Enter additional address information.
*City
Enter the city for the company contact.
*State
Select the state from the dropdown list.
*Zip
Enter the ZIP code.
Order Management Tab
Click the Order Mgmt tab.

Enter values for fields described in the table below. Fields with an asterisk ( * ) are required.
Field
Description
Auto-Close On Receipt
Check the box to enable automatically closing orders upon receipt.
Size
Select a size from the dropdown list.
Auto Create Fulfillment Order
Select an option from the dropdown menu. When Deployment Order or Purchase Order is selected, fulfillment orders are automatically created from the selected order type for the customer.
Packing Method
Select a method for packing from the dropdown list.
Invoice Tab
Click the Invoice tab.

Enter values for fields described in the table below. Fields with an asterisk ( * ) are required.
Field
Description
Purchasing Address
Enter the purchasing address for invoices. Use the instructions from above to complete the popup.
Currency
Select the currency for the invoice from the dropdown list.
Settlement Currency
Select the settlement currency for the invoice from the dropdown list.
Usance
Enter a numerical value for usance.
Invoicer Mgmt Org
Type or use the picker tool to select the invoicer's management organization.
Discount Bill To Address
Enter the discount bill-to address. Use the instructions from above to complete the popup.
Payment Terms
Type or use the picker tool to select the payment terms.
Payment Method
Select the payment method from the dropdown list.
Freight
Select the freight type from the dropdown list.
Freight Forwarder
Type or use the picker tool to select the freight forwarder.
On Credit Hold
Check the box if this customer's invoices incur a hold for credit.
Transportation Tab
Click the Transportation tab.

Enter values for fields described in the table below. Fields with an asterisk ( * ) are required.
Field
Description
ASN Template
Use the picker tool to select a template to use for auto-ship notices (ASNs).
Inco Terms
Select the incoterms for this customer from the dropdown list.
Fulfillment Org
Enter the fulfillment organization name.
Intransit Shipment Cancel Tolerance
Enter values for (D) days, (H) hours, and (M) minutes for the tolerance before an in-transit shipment is canceled.
Auto Pre ASN Lead Time
Enter values for (D) days, (H) hours, and (M) minutes for the lead timer for automatically generating a pre-ASN. Select if the lead time is for calendar days or only business days from the dropdown list.
TCO
Enter the name of the transportation coordinator.
Client
Enter the client associated with this customer.
Trans Mode
Use the picker tool to select the equipment type for the transportation mode.
Auto Create Shipment
Select an option for automatically creating a shipment from the dropdown list.
Pre ASN State
Select an option for the pre-ASN state from the dropdown list.
Click the Create button.
A success message appears.