Creating Databots with the Databot Builder
You can create a databot using the Databot Builder wizard to add databot details, participants, and questionnaires, as well as invite people to participate and respond. You can also create a databot by clicking the Create Databot button on the Databot Explorer screen.
Complete the following steps to create a new databot:
L og in to the ONE system.
Click Menus/Favs > Tools > Databot > Databot Builder.
In the NEO UI, users can click on the Menus/Favs icon on the left sidebar and type in the name of the screen in the menu search bar. For more information, see "Using the Menu Search Bar."
The Databot Builder screen appears displaying the Details tab. The same screen appears with the title Create Databot when a databot is created from the Databot Explorer screen.
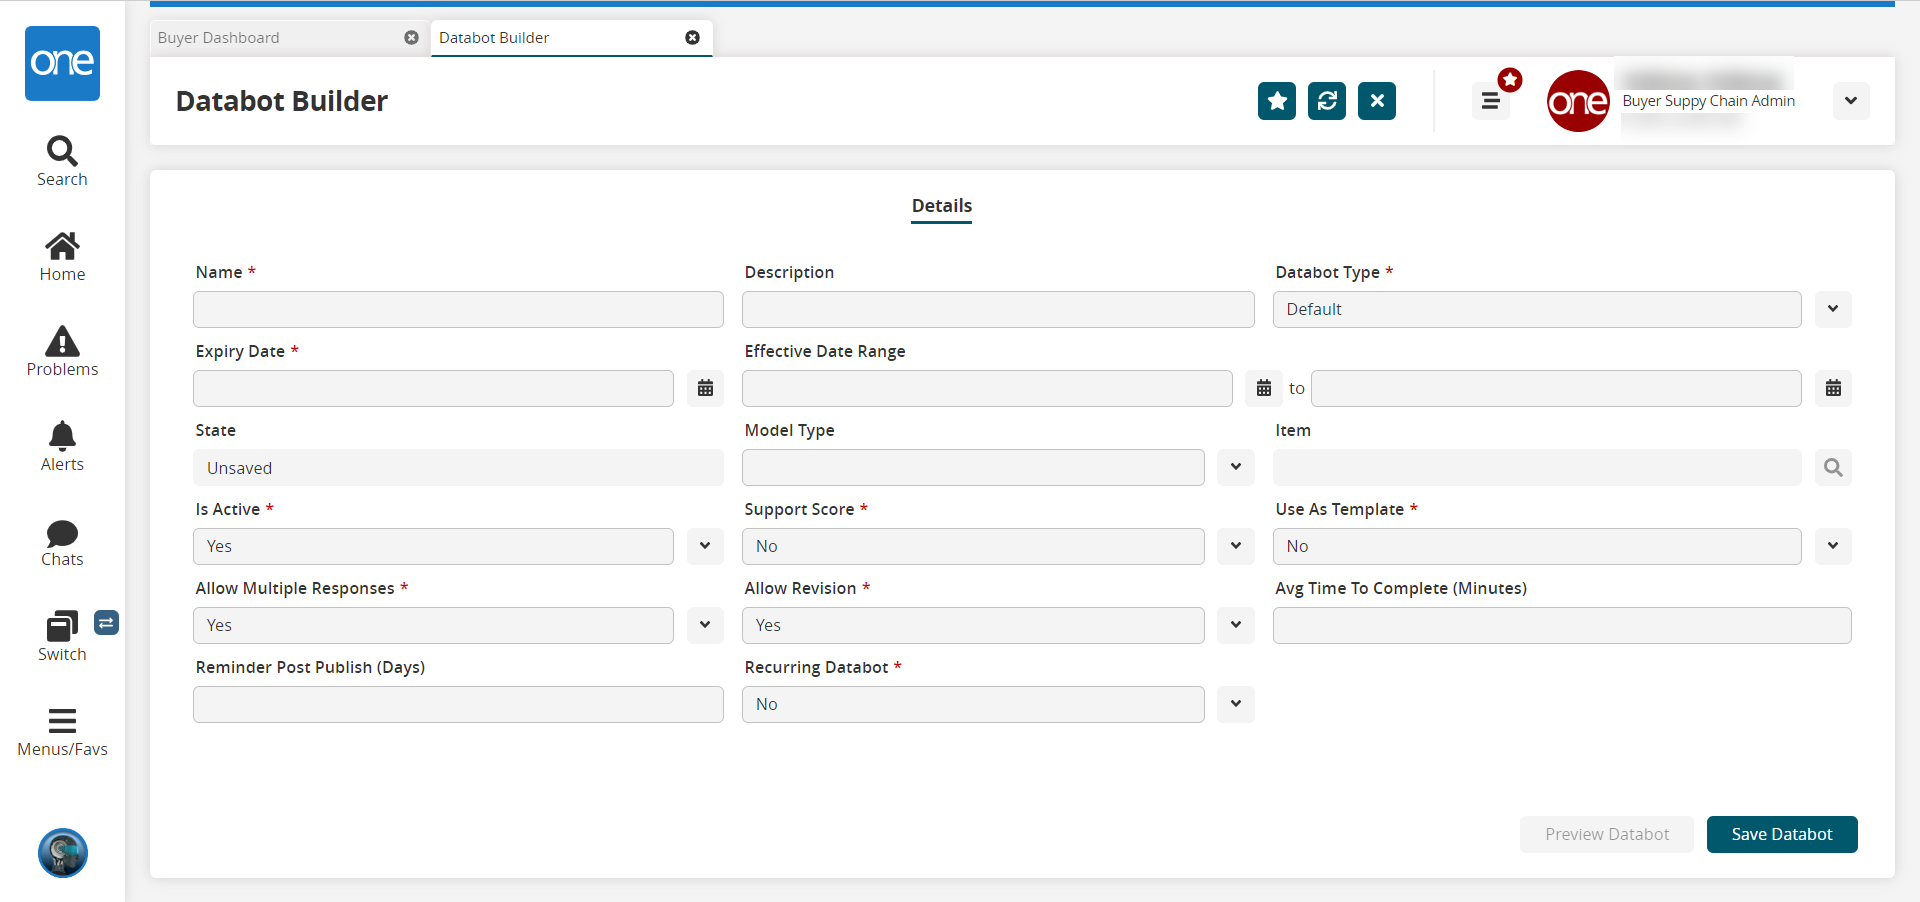
Enter values for fields described in the table below. Fields with an asterisk ( * ) are required.
Field
Description
Name *
Enter the name of the new databot.
Description
Enter a description of the databot.
Databot Type *
Select the databot type from the dropdown list: Default, With Audit, or With Reviewer.
Expiry Date *
Click the calendar icon to select the expiration date of the databot.
Effective Date Range
Click the calendar icons to select the date range for which the databot is effective.
State
Read-only field. Displays whether the databot is saved or unsaved.
Model Type
Select the type of model from the dropdown list: Item, RFxheader, or Partner.
Item
This is a dynamic field that changes according to the selected linked model (Item, RFx, or Partner). Click the picker tool to select one or more items, RFx, or partners.
Is Active *
Select the checkbox to mark the databot as active.
Support Score *
Select the checkbox to enable scoring responses to the databot questionnaire.
Use As Template *
Select the checkbox to save this databot and its questions as a template that can be reused.
Allow Multiple Responses *
Select the checkbox to allow multiple responses to the questionnaire.
Allow Revision *
Select the checkbox to allow revisions to the responses.
Avg Time To Complete (Minutes)
Enter the average time (in minutes) to complete the databot questionnaire.
Reminder Post Publish (Days)
Enter the number of days to wait before sending a reminder to participants.
Recurring Databot *
Select Yes to automatically run the databot on the specified date or at a specified frequency.
Configuring Databot Recurrence
Setting the Recurring Databot field to Yes displays a new grid where users can add a repeat schedule or update an existing one.
Complete the following steps to create a recurring databot:
Click the Add button to add a date and time for the databot to recur.
A popup window displays.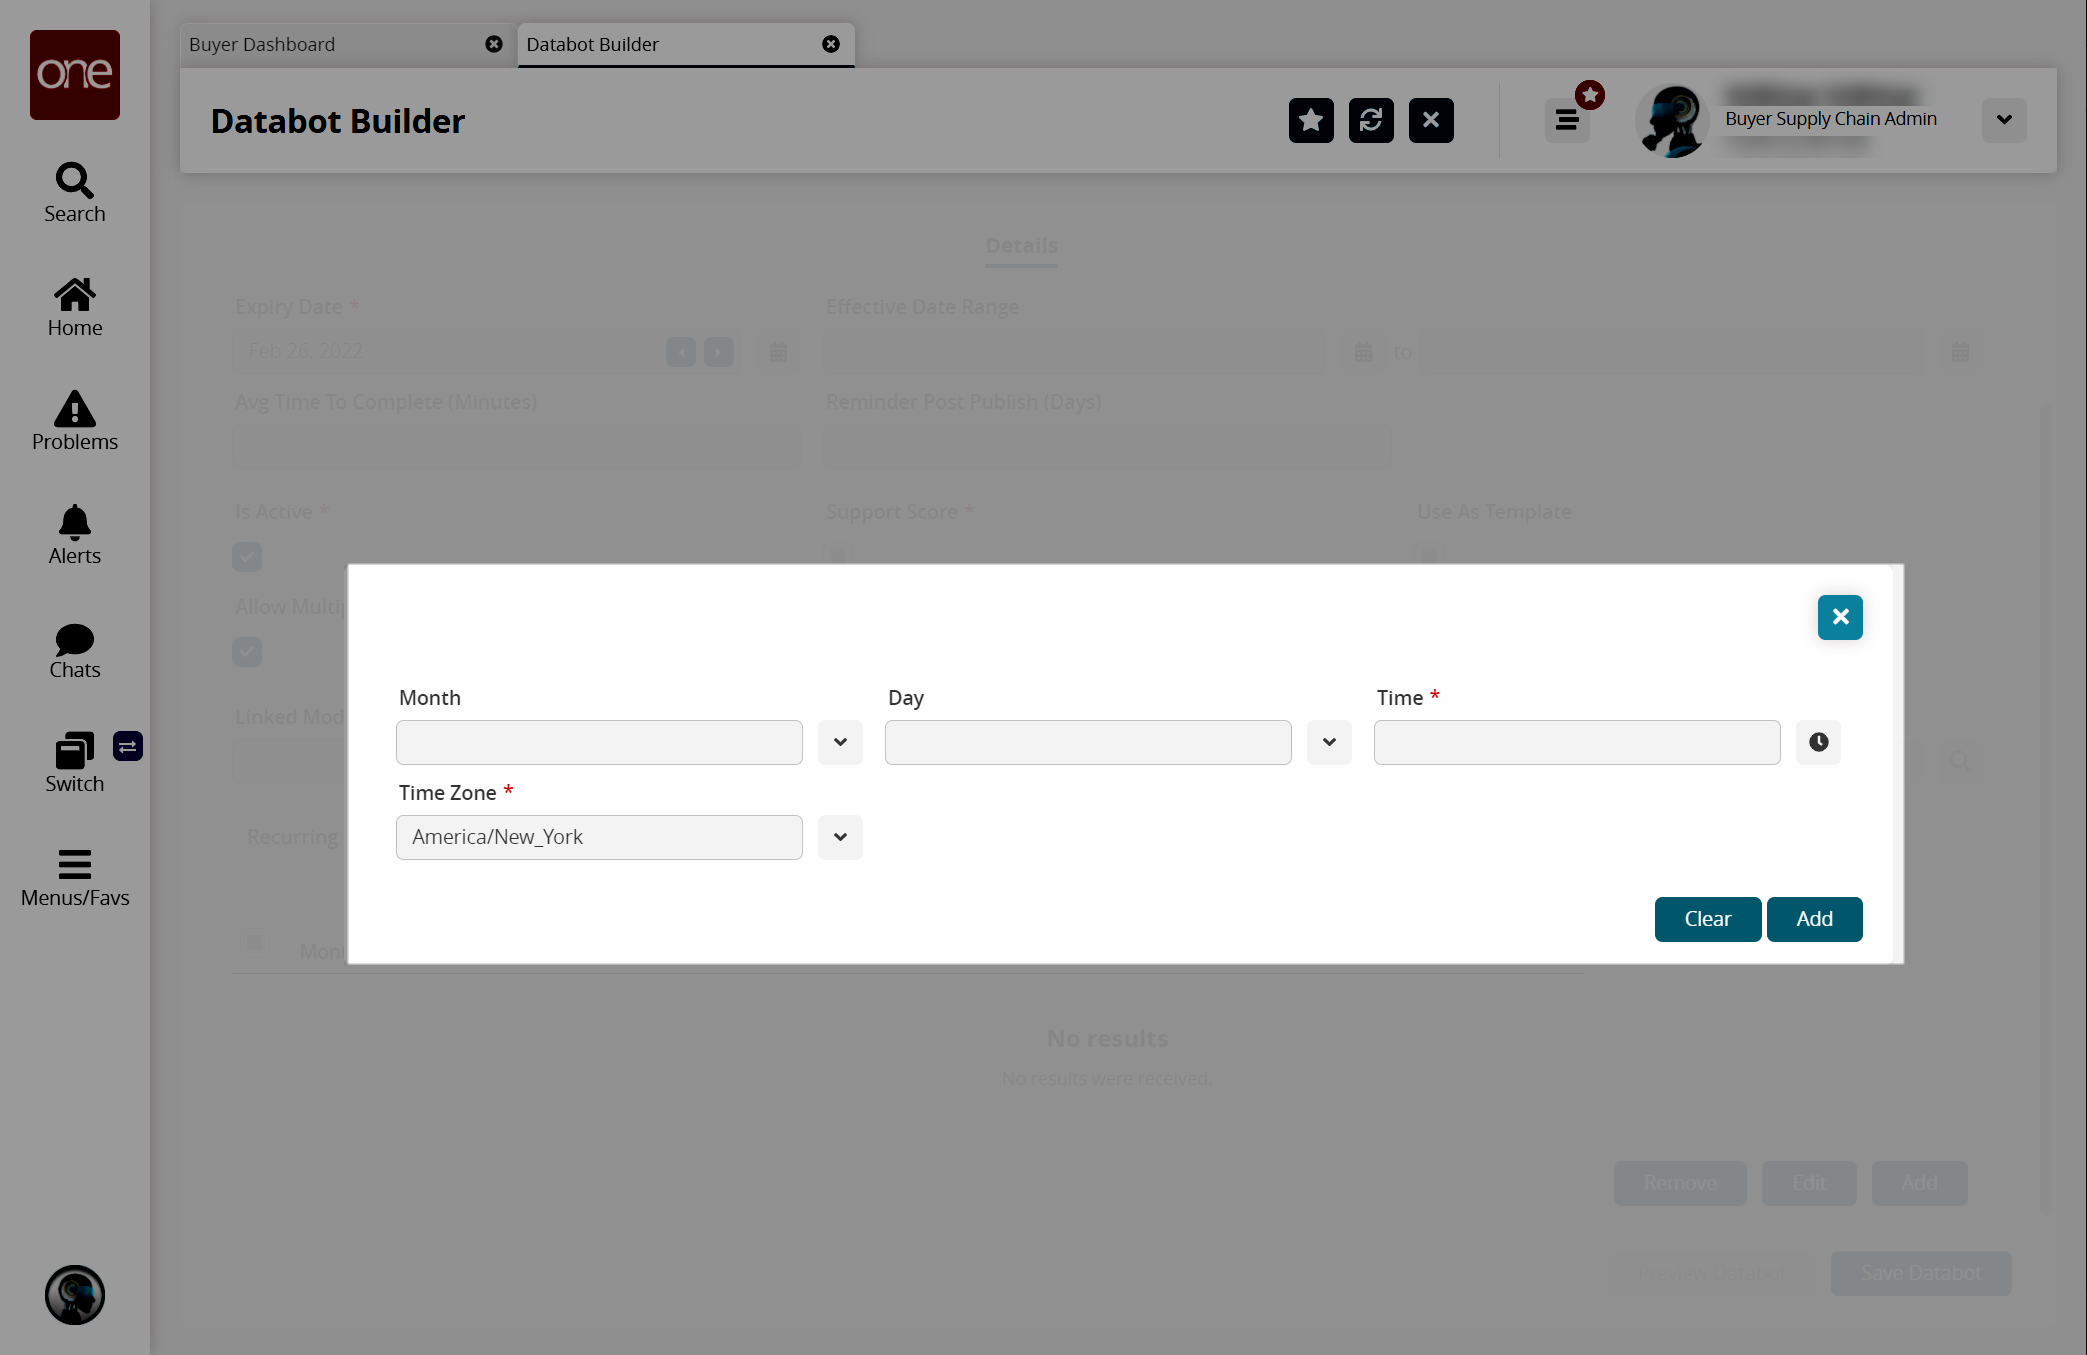
Enter values for fields described in the table below. Fields with an asterisk ( * ) are required.
Field
Description
Month
Select the month from the dropdown list or select Every Month.
Day
Select the day or date from the dropdown list. Other available options are Every Day and Last Day of Month.
Time *
Click the clock icon to select the hour at which the databot should automatically run.
Time Zone *
Select the applicable time zone from the dropdown list.
Click the Add button.
The databot recurrence appears on the Databot Builder screen.To edit a recurrence, select a schedule, click the Edit button, and update the schedule as needed.
To remove a recurrence, select a schedule and click the Remove button.
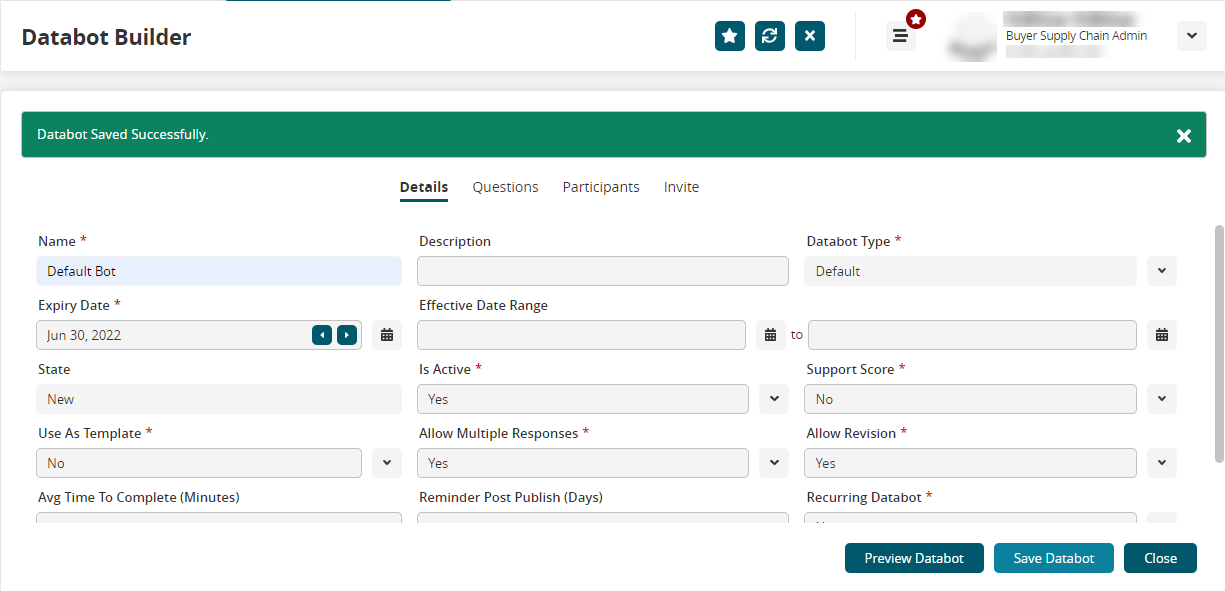
Click the Save Databot button.
A success message appears. The Save Databot button becomes active if changes are made.
Click the Preview Databot button to preview the databot in a separate tab.
Click the Questions, Participants, and Invite tabs to continue creating the databot. See the "Questions Tab", "Participants Tab", and "Invite Tab" sections in the Online Help for information on completing the databot.
Click the Close button to close the databot.