Creating Events
Users can create events related to Demand Planning in the ONE Network system.
Complete the following steps to create an event:
Log in to the ONE system.
Click Menus/Favs > Demand Planning > Events > Create Event.
The Create Event screen displays. In the NEO UI, users can click on the Menus/Favs icon on the left sidebar and type in the name of the screen in the menu search bar. For more information, see "Using the Menu Search Bar."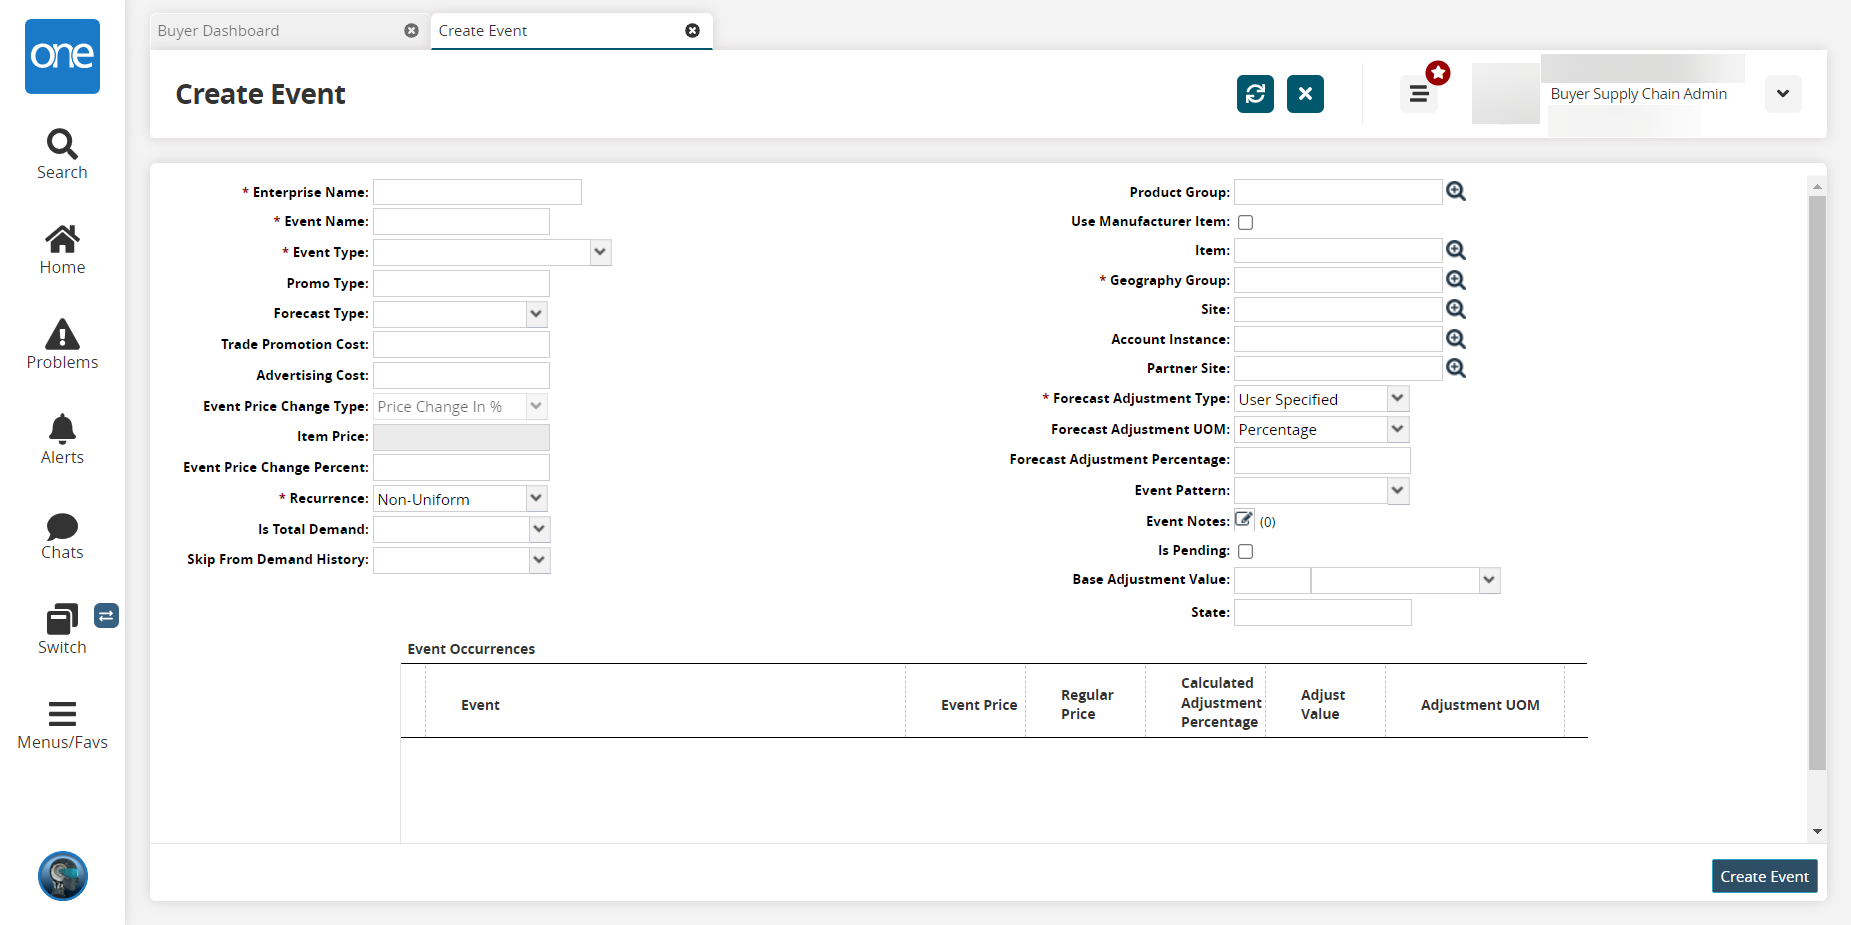
Enter values for fields described in the table below. Fields with an asterisk ( * ) are required.
Field
Description
* Enterprise
Select an enterprise to be associated with the new event.
* Event Name
Enter a name for the event.
* Event Type
Select an event type from the dropdown list.
Promo Type
Enter a promotion type.
Forecast Type
Select a forecast type from the dropdown list.
Trade Promotion Cost
Enter the cost for trade promotions.
Advertising Cost
Enter the cost for advertising.
Event Pricing Change Type
Select a pricing change type from the dropdown list. This field may be auto-populated based on the item selected; it is also context-sensitive and is not always available.
Item Price
Enter the price for the item. This item is only available based on the item selected.
Event Price Change Percent
Enter the percent for the price change using a value from 0 - 100 where 10 = 10%.
* Recurrence
Select the recurrence type from the dropdown list.
Is Total Demand
Select Yes or No from the dropdown list if this event is part of the total demand.
Skip from Demand History
Select Yes or No from the dropdown list if this even should be skipped from demand history.
Product Group
Use the picker tool to select the product group.
Use Manufacturer Item
Check the box to use the manufacturer's item.
Item
Use the picker tool to select an item associated with this event. If no item is selected, a confirmation popup window displays when you click Create Event to ensure that the field is intentionally left blank.
* Geography Group
Use the picker tool to select a geography group.
Site
Use the picker tool to select a site for the event.
Account Instance
Use the picker tool to select the account instance.
Partner Site
Use the picker tool to select the partner site.
* Forecast Adjust Type
Select the forecast adjustment type from the dropdown list.
Forecast Adjust UOM
Select the unit of measurement (UOM) from the dropdown list.
Forecast Adjust Percentage
Enter the percent for the forecast adjustment using a value from 0 - 100 where 10 = 10%.
Event Pattern
Select the pattern for how the event is loaded.
Event Notes
Click the icon to add a note to this event.
The Event Notes popup window displays.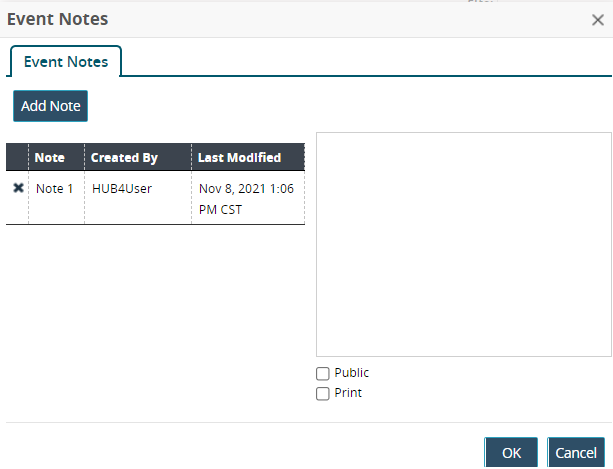
Enter text in the box.
Click the checkbox for Public if this is a public note.
Click the checkbox for Print if this is a note for printing.
Click the Add Note button.
A new note is added to the table of notes.Click the OK button.
The popup closes and an indicator for how many notes exist (next to the Event Notes icon) updates.
Is Pending
Click the checkbox if this event is still in a pending state.
Base Adjust Value
Enter a numerical value in the first field. Select a value of how the adjustment is determined in the second field.
State
Enter a state. This field may be edited based on selections in other fields.
Complete the following instructions to add Event Occurrences.
Click the Add link.
A new row is added to the table.Enter values for fields described in the table below. Fields with an asterisk ( * ) are required.
Field
Description
*Event
Use the calendar tool to select beginning and end dates for the event occurrence.
Event Price
Enter a price for the event.
Regular Price
Enter the regular price.
Calculated Adjust Percentage
Enter a percentage value using a value from 0 - 100 where 10 = 10%.
Adjust Value
Enter in a value for the adjusted amount.
Adjust UOM
Select an adjustment unit of measure from the dropdown list.
Click the Create Event button.
The screen refreshes to show the event's details with a green success bar.