Creating Issue Inventory
Users can create an issue inventory with various settings.
Complete the following steps to create an Issue Inventory:
Log in to the ONE application as a Warehouse Admin or a Warehouse Manager role.
Select Menu/Favs > Warehouse Mgmt > Issue Inventory.
The Issue Inventory screen appears with the Explorer pane on the left.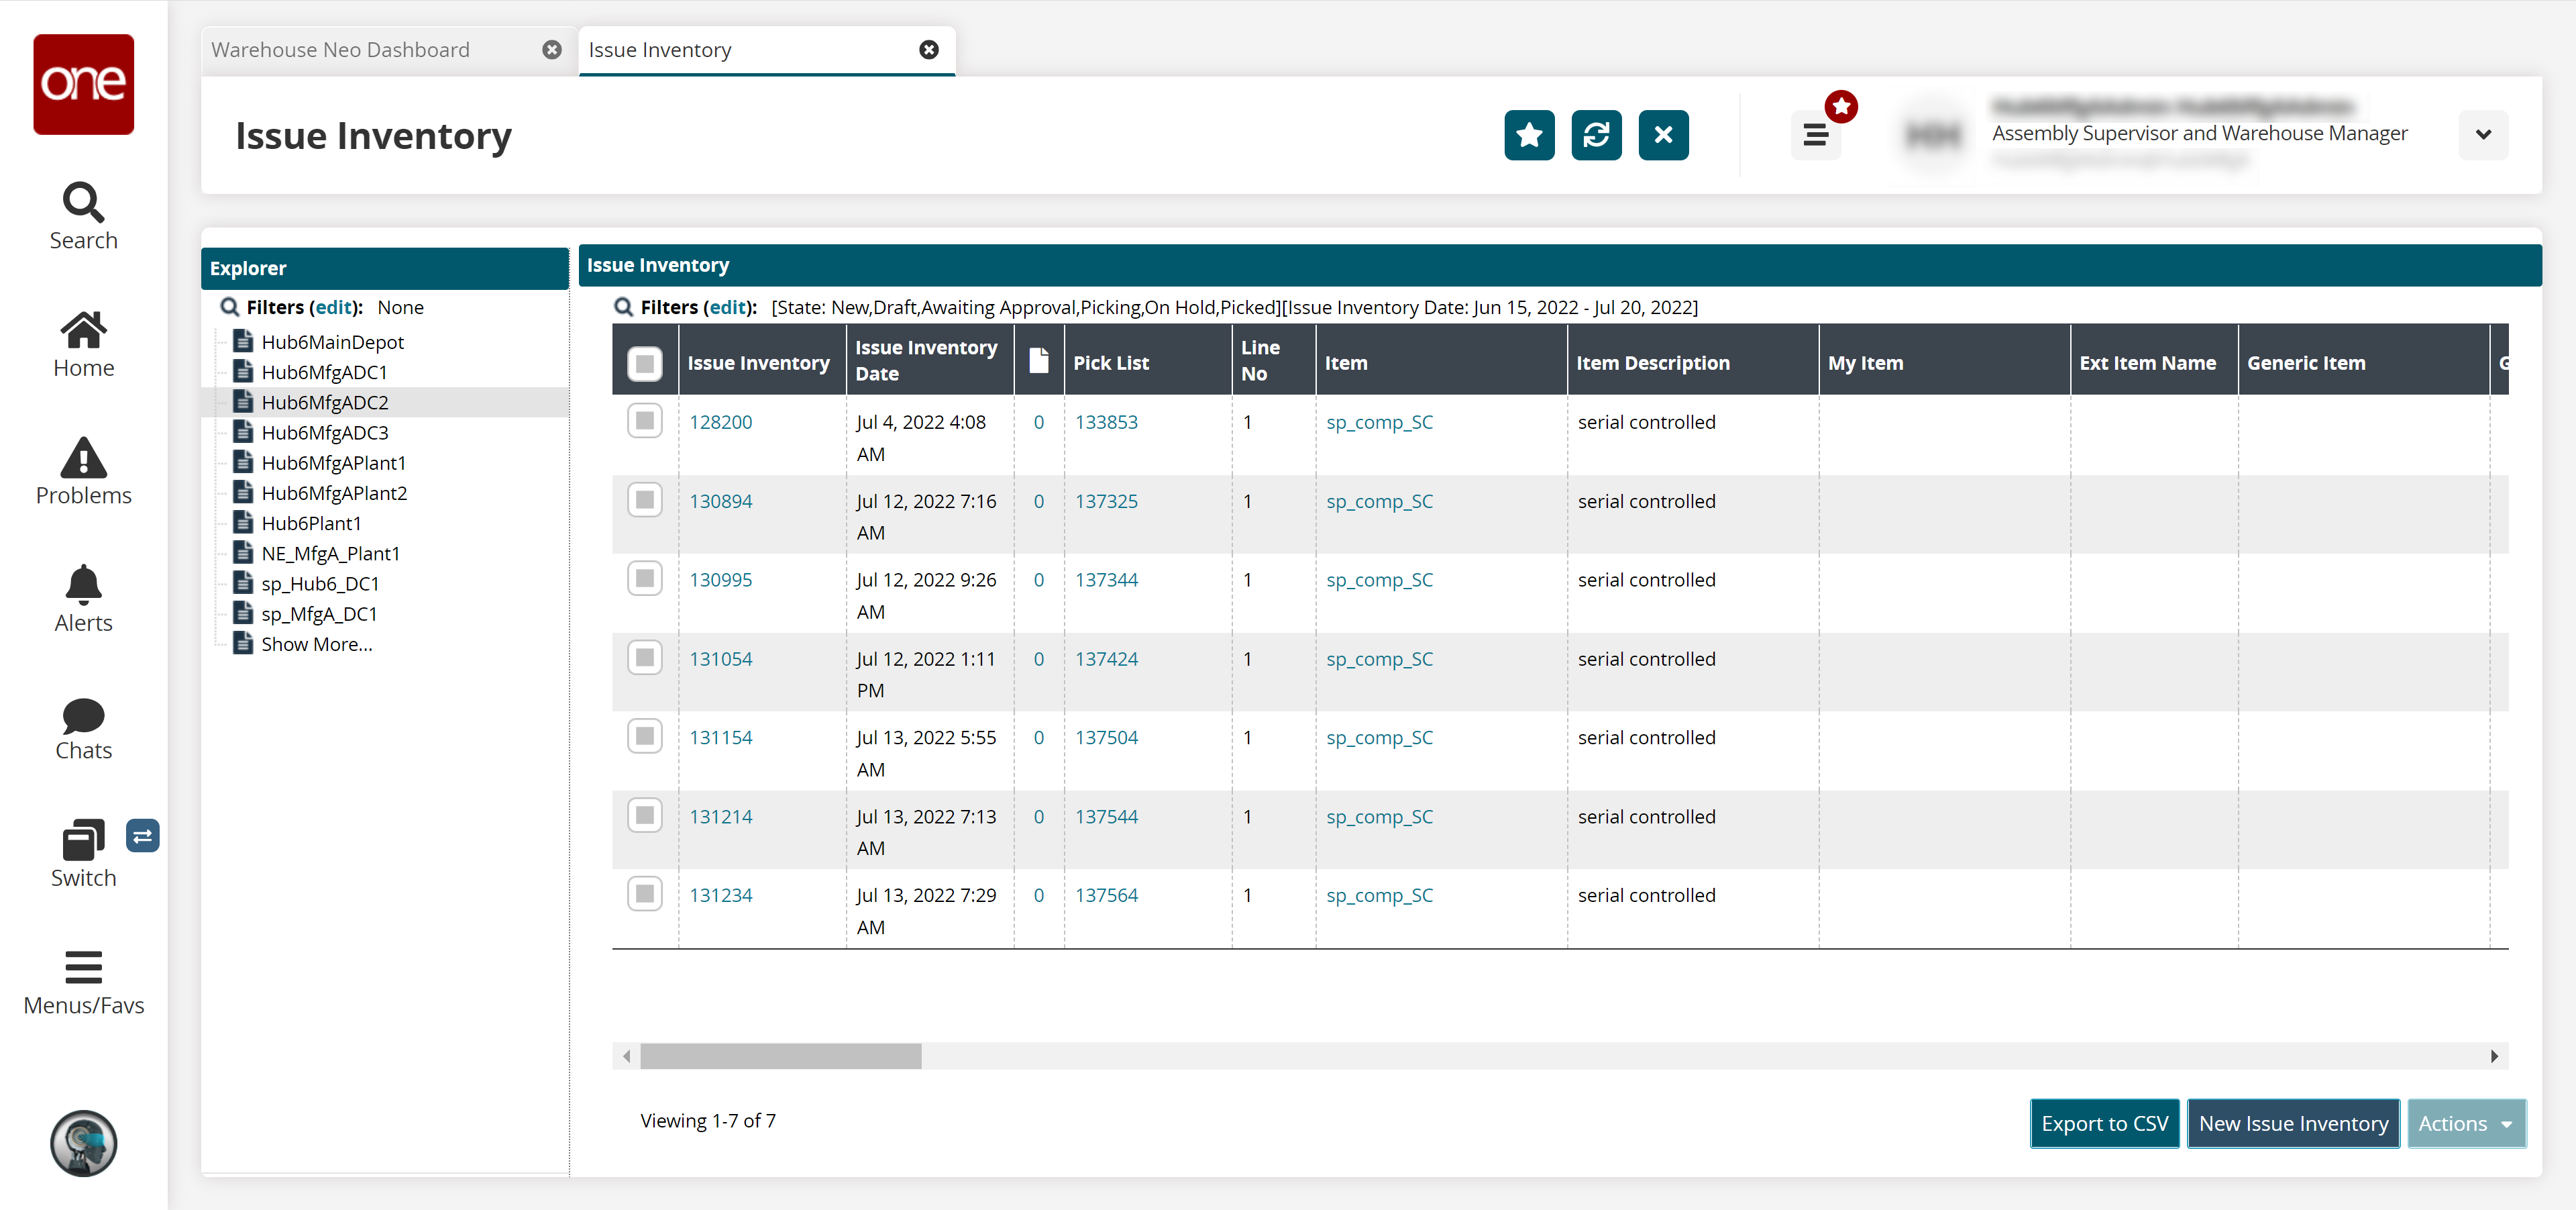
Select the site where the issued inventory will be created.
The Issue Inventory for the selected site appears to the right of the explorer pane.Click the New Issue Inventory button.
The New Issue Inventory screen appears.
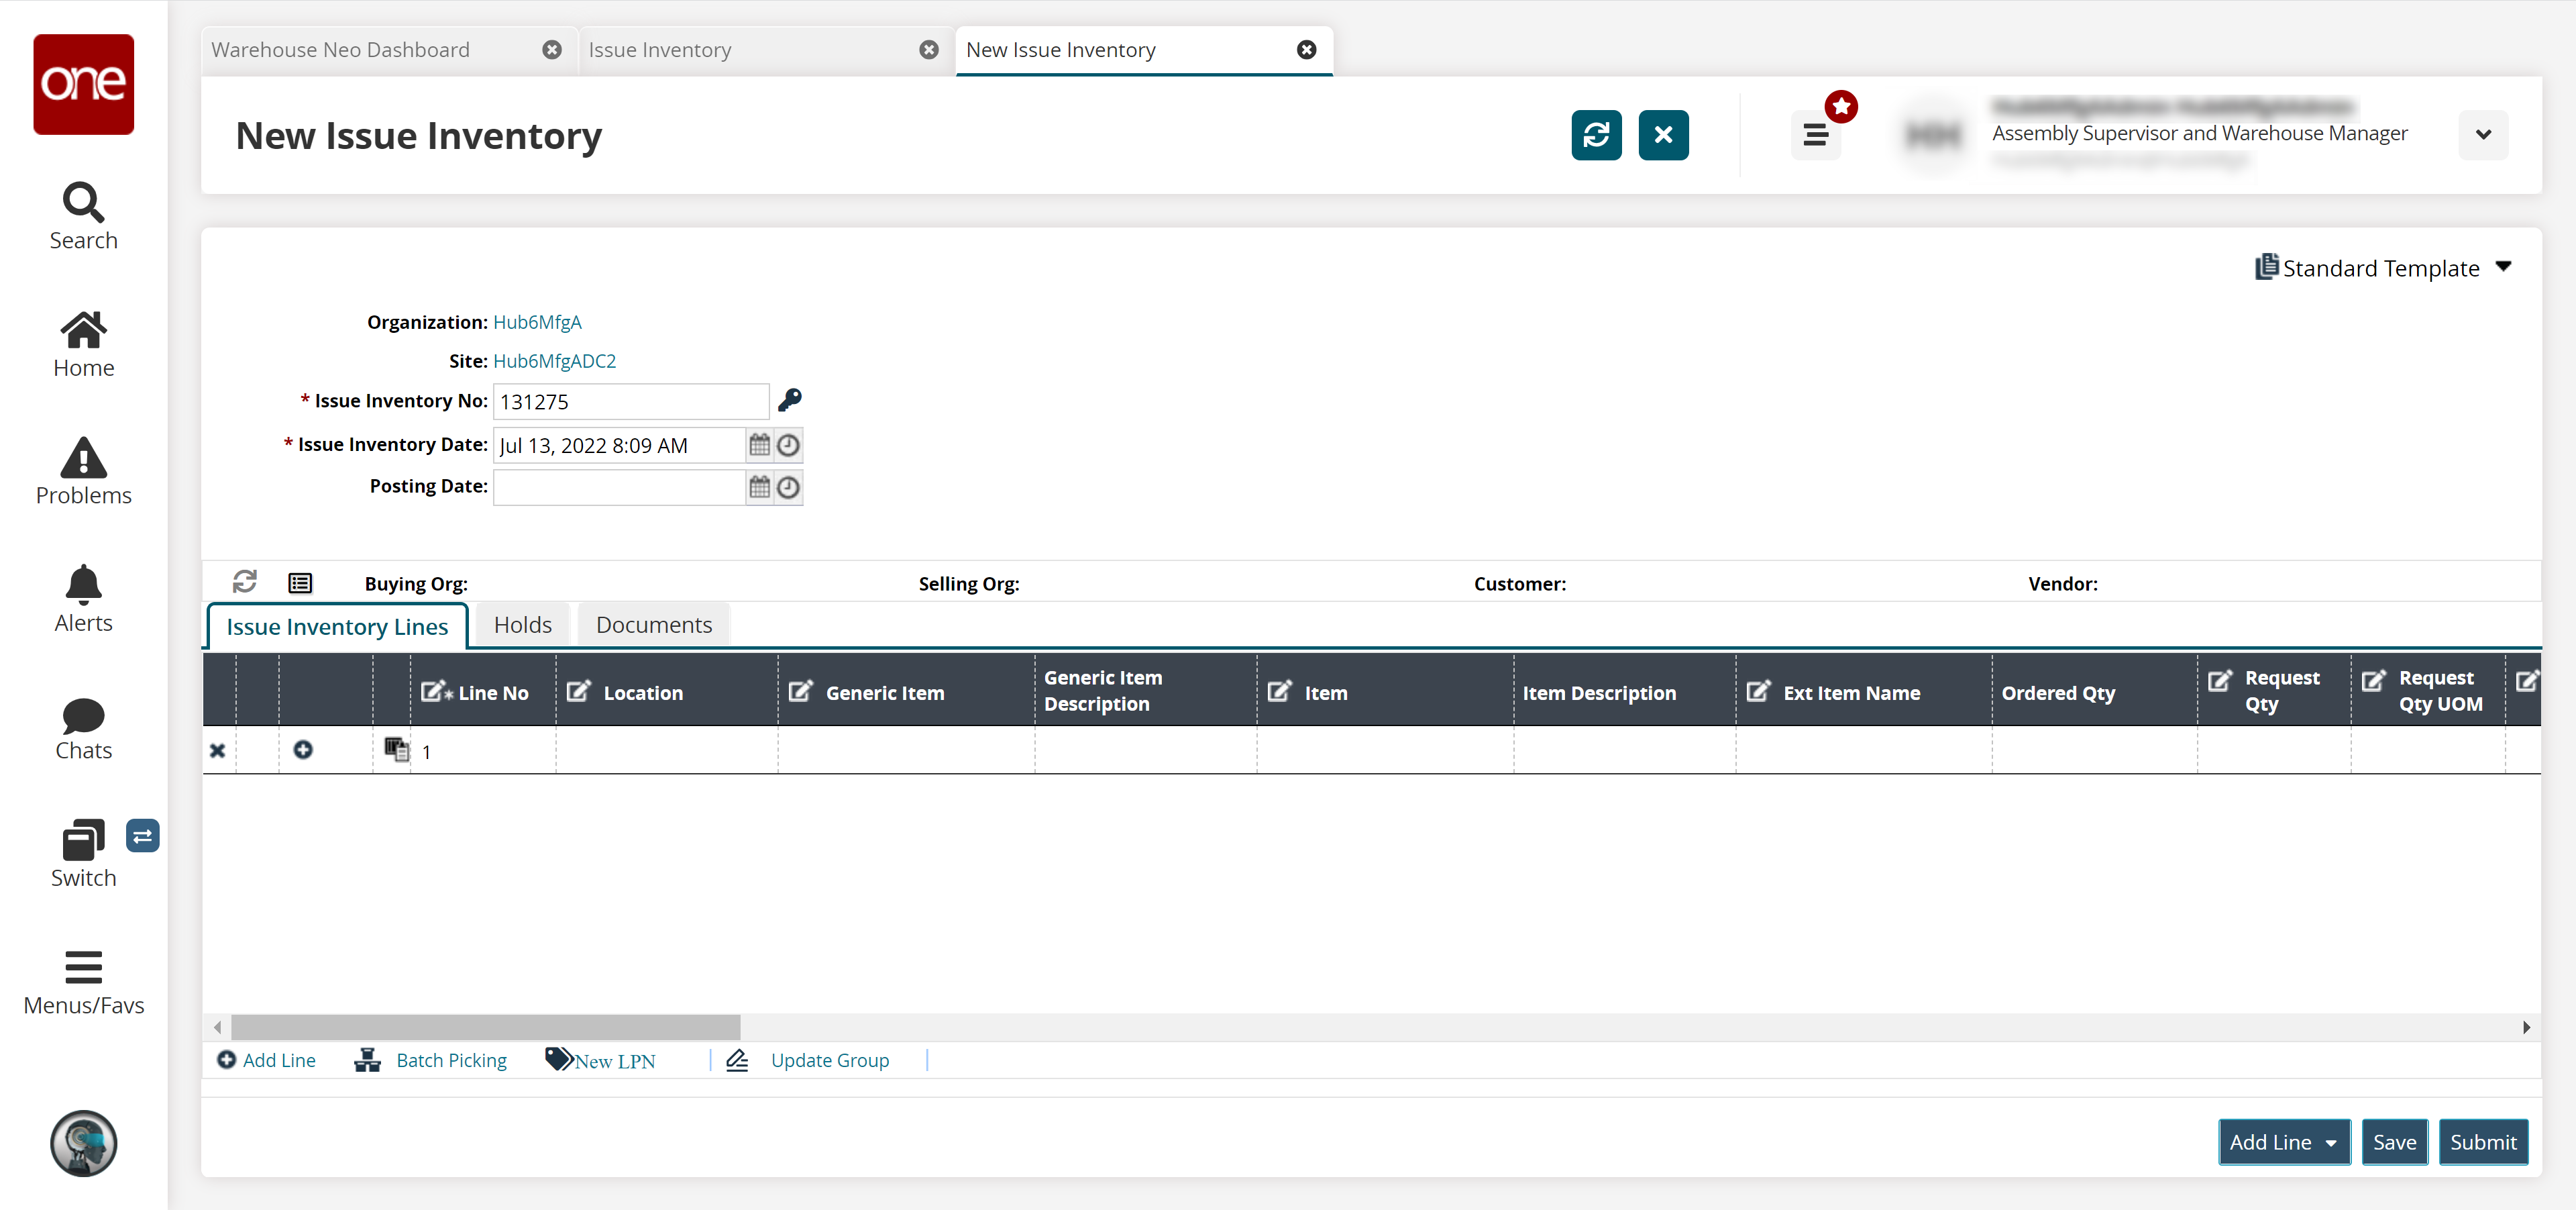
The Issue Inventory No and Issue Inventory Date fields are automatically populated.Click the key icon to generate an Issue Inventory No.
Click the date and time icons to select an Issue Inventory Date.
Click the date and time icons to select a Posting Date.
Click the Add Line link if you require more lines.
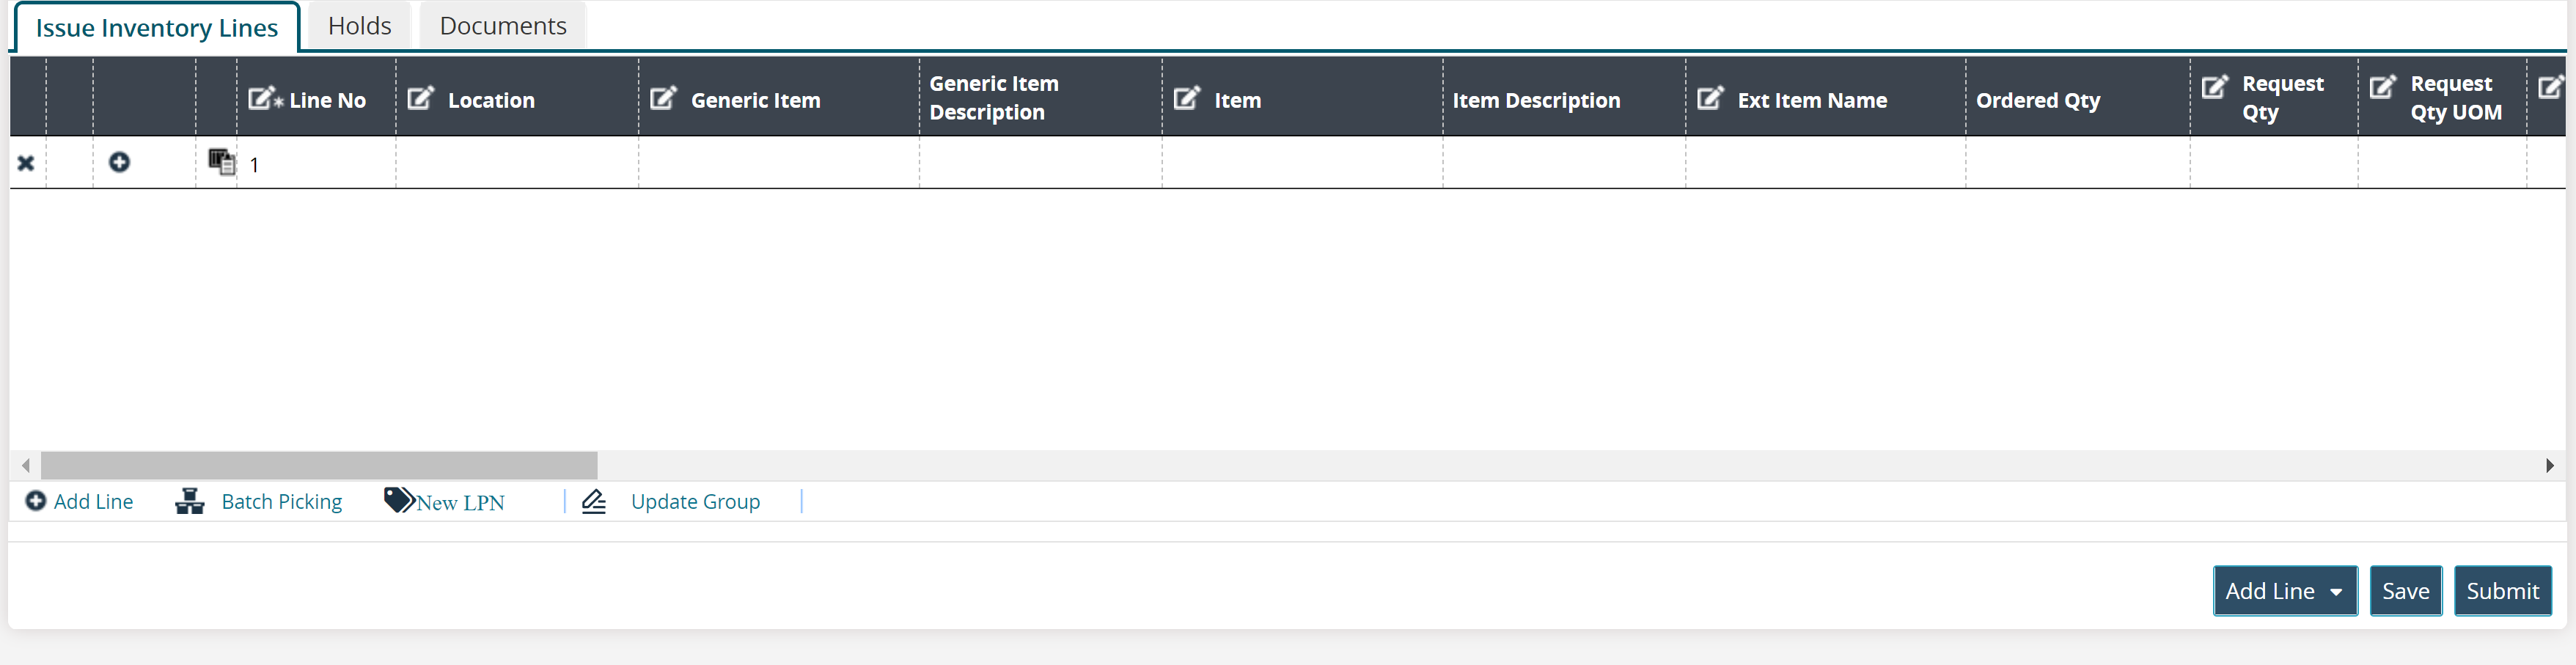
Click the Add Line button to add lines from the available options, such as From Purchase Order, From Sales Order, and so on.
Tip
If you create an issue inventory from a Work Order, you can select very specific tasks by applying Work Type or Task Type filters.
Add details like Item, Request Quantity, Request Qty UOM, as desired.
Note
You cannot update the requested quantity after the issued inventory is approved.
Click the Holds tab to add holds to the issued inventory.
Click Submit to submit the issued inventory or click Save to save the changes.
After submitting the issued inventory, click Actions and then click Approve to approve it or click Cancel to cancel the update.
A success message appears.