Creating Item Attributes
Complete the following steps to create item attributes:
L og in to the ONE system.
Click Menus/Favs > Administration > Item > Search Attribute Schema.
In the NEO UI, users can click on the Menus/Favs icon on the left sidebar and type in the name of the screen in the menu search bar. For more information, see "Using the Menu Search Bar."
The Search Attribute Schema screen appears.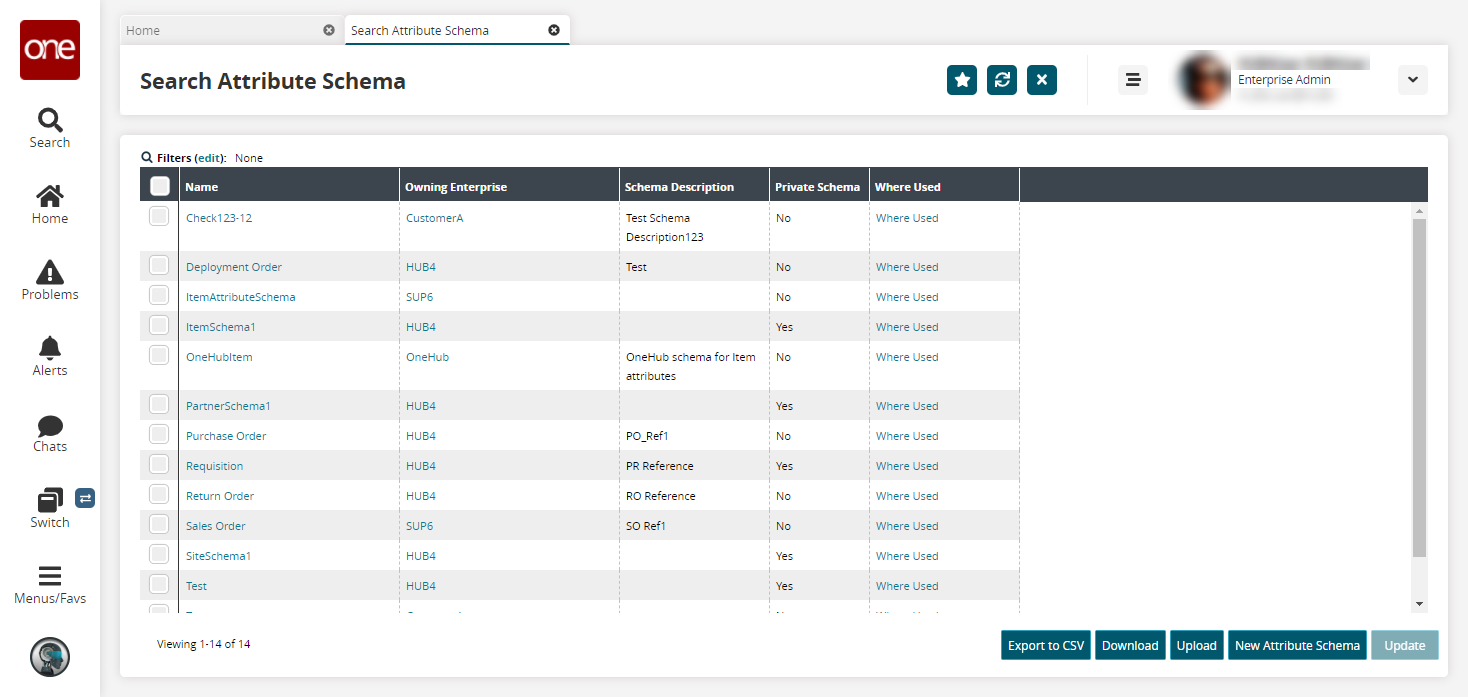
Click the New Attribute Schema button.
The New Attribute Schema page appears.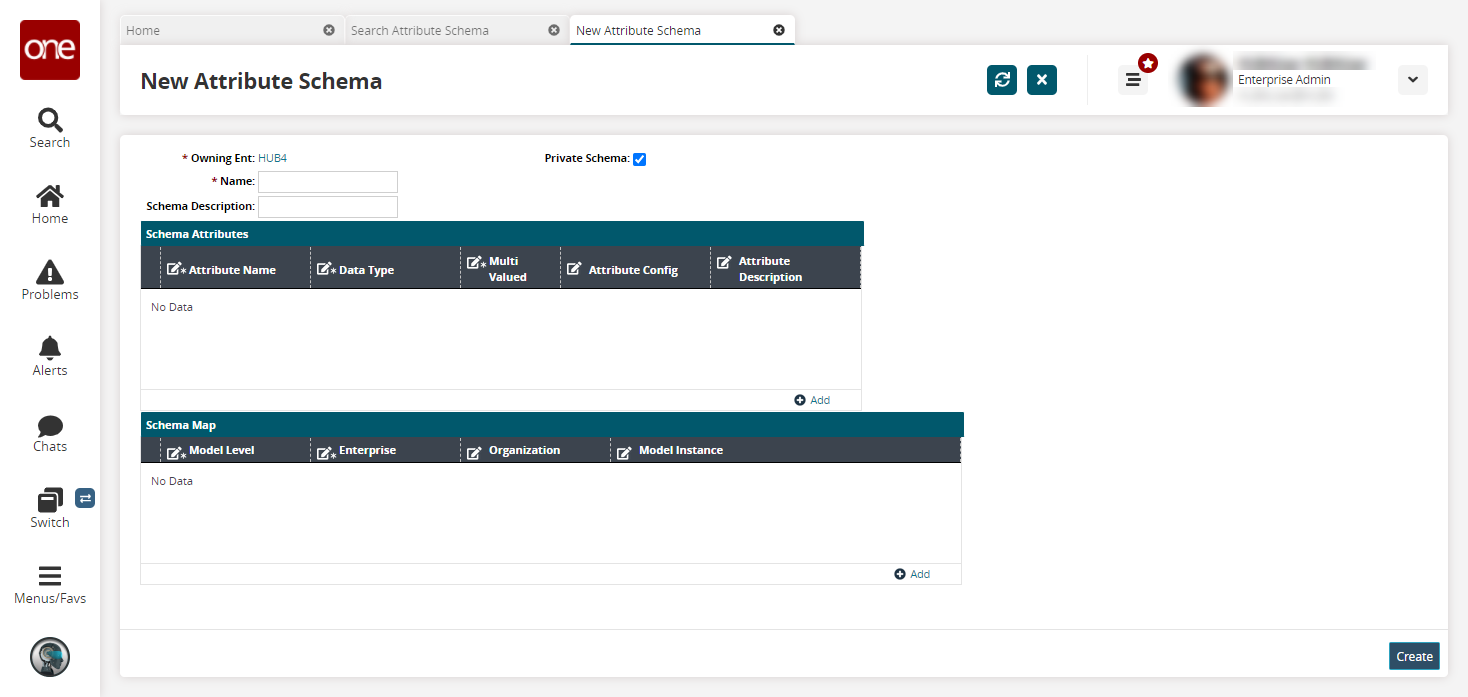
Enter values for the * Name and Schema Description fields.
Check the box for the Private Schema field to make this attribute private.
Click Add to add a schema attribute.
A new row appears in the Schema Attribute table.Fill out the following fields. Fields with an asterisk ( * ) are required.
Field
Description
*Attribute Name
Type in a name for the item's attribute.
*Data Type
Select a value for the data type from the dropdown menu. The following data types are available:
Boolean: A binary variable with two possible values, Yes and No.
Date: A calendar date.
Date Range: A calendar date range between two dates.
Double: A 64-bit integer. Decimal numbers allowed.
Integer: A 32-bit integer. Whole numbers only.
Long: A 64-bit integer. Whole numbers only.
String: Accepts text and alpha characters.
String Enumeration: This allows a user-defined list.
*Multi-Valued
Select Yes or No to allow users to assign multiple values.
Attribute Config
Provide the configuration for the attribute.
Attribute Description
Type in a description for the item attribute.
Click Add to add a schema map.
A new row appears in the Schema Map table.Select a value from the dropdown menu for the Model Level field.
Model Level
Description
Item
A model applicable only for a specific item.
Partner
A model applicable to all interactions with a partner.
Partner Group
A model applicable to all partners within a partner group.
Site
A model applicable to all interactions with a site.
Use the picker tool to select an Enterprise.
Select an Organization.
Select values for the Model Instance.
Click the Create button.
A green success bar displays.