Creating Items
You can create and add new items to your enterprise.
Complete the following steps to create and add new items:
Log in to the ONE system.
Click Menus/Favs > Administration > Item > New Item.
The New Item screen appears.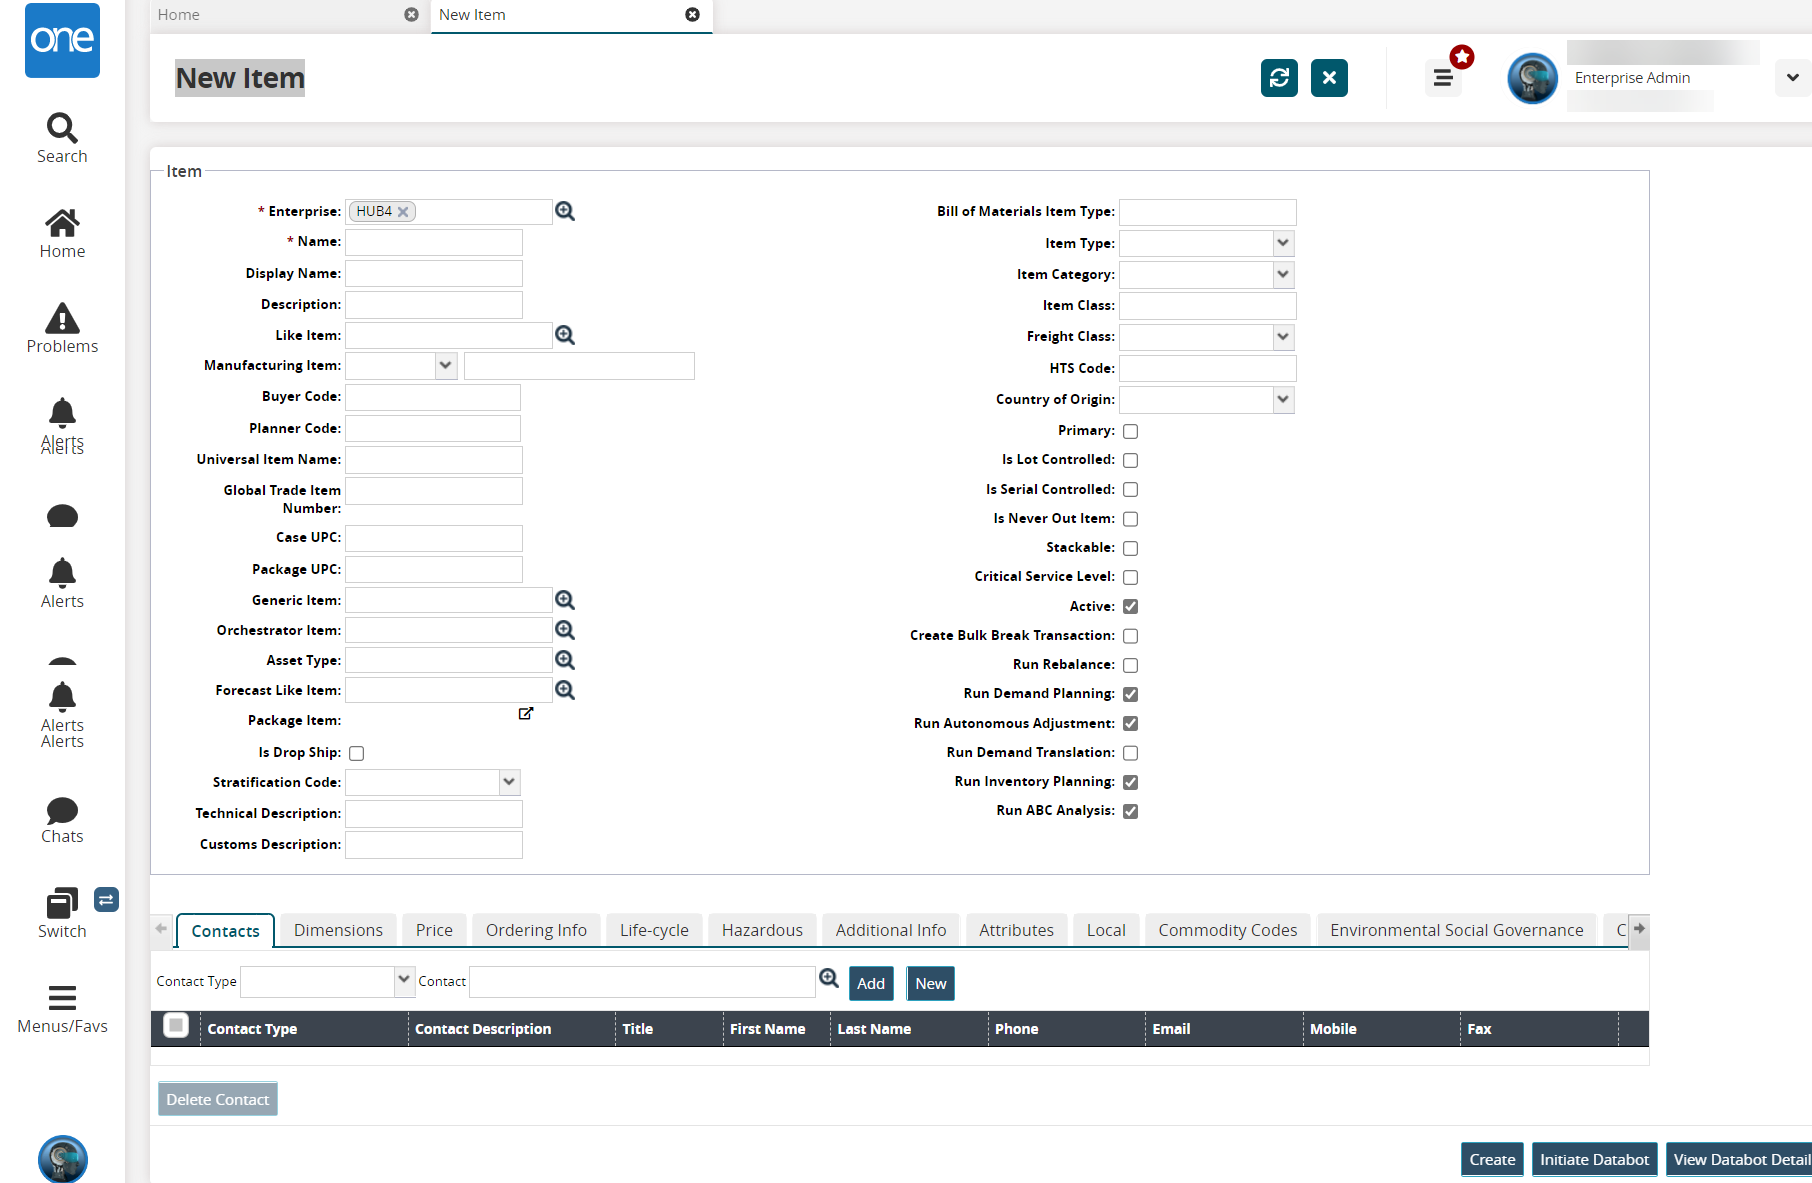
Fill out the following fields. Fields with an asterisk ( * ) are required.
Field
Description
* Enterprise
Begin typing and select one of the auto-complete options, or use the picker tool to select an option.
* Name
Enter a name for the new item.
Display Name
Enter a display name for the item.
Description
Enter a description for the item. For example, "Order Collaboration Item 1."
Like Item
Begin typing and select one of the auto-complete options, or use the picker tool to select an option.
Manufacturing Item
Select the type of manufacturing item from the dropdown list. In the text field, enter the manufacturing item name.
Buyer Code
Enter a buyer code.
Planner Code
Enter a planner code.
Universal Item Name
Enter a universal item name.
Global Trade Item Number
Enter a global trade item number.
Case UPC
Enter a case UPC number.
Package UPC
Enter a package UPC number.
Generic Item
Begin typing and select one of the auto-complete options, or, use the picker tool to select an option.
Orchestrator Item
Begin typing and select one of the auto-complete options, or, use the picker tool to select an option.
Asset Type
Begin typing and select one of the auto-complete options, or, use the picker tool to select an option.
Forecast Like Item
Begin typing and select one of the auto-complete options, or, use the picker tool to select an option.
Package Item
This field is auto-populated.
Is Drop Ship
Select this field to enable drop-shipping. When this field is enabled, the item is marked for drop-shipping, meaning the item is delivered directly to a customer instead of going to a warehouse first. When this field is disabled, the item is marked for traditional shipping (to a warehouse first). The field is disabled by default.
Stratification Code
Select a stratification code from the dropdown menu.
Technical Description
Enter a technical description.
Customs Description
Enter a customs description.
Bill of Materials Item Type
Enter a bill of materials item type.
Item Type
Select an item type from the dropdown menu.
If Phantom is selected, the item will be a phantom item. Phantom items are items that users do not want to track in inventory. For example, a phantom item may be a component of a finished item; it is a real item, but not necessarily an item that needs to be tracked. If an item is defined as a phantom item, then the Constrained Demand Translation (CDT) engine will not generate demand or supply for that item. However, any children items of a phantom item are considered. When creating work orders using a bill of materials (BOM), if an item is a phantom item and has a BOM, the BOM is exploded and task parts are created from the components. Also, if the Item Type is Phantom, the Item Supply Type field on a corresponding buffer is ignored.
Item Category
Select an item category from the dropdown menu.
Item Class
Enter an item class.
Freight Class
Select a freight class from the dropdown menu.
HTS Code
Enter an HTS code.
Country of Origin
Select a country of origin from the dropdown menu.
Primary
Select this checkbox if the item is a primary item.
Is Lot Controlled
Select this checkbox if the item is lot controlled.
Is Serial Controlled
Select this checkbox if the item is serial controlled.
Is Never Out Item
Select this checkbox if the item is a never-out item.
Stackable
Select this checkbox if the item is stackable.
Critical Service Level
Select this checkbox if the item is has a critical service level.
Active
Select this checkbox if the item is active.
Create Bulk Break Transaction
Select this checkbox to create breakbulk transactions.
Run Rebalance
Select this checkbox to run the rebalancing.
Run Demand Planning
Select this checkbox to run demand planning.
Run Autonomous Adjustment
Select this checkbox to run autonomous adjustment.
Run Demand Translation
Select this checkbox to run demand translation.
Run Inventory Planning
Select this checkbox to run inventory planning.
Run ABC Analysis
Select this checkbox to run ABC analysis.
Select the Contacts tab.

Select the contact type from the Contact Type dropdown list.
Select the Contact with the picker tool or click the Add button to add a contact.
Details like Contact, Contact Type, First Name, Last Name, Phone, Email, and so on are added in the below columns.Click the New button to create a new contact.
The created contact is added to the Contact field.Select the checkbox for the Contact Type and select the Delete Contact button to delete the contact.
Select the Dimensions tab.
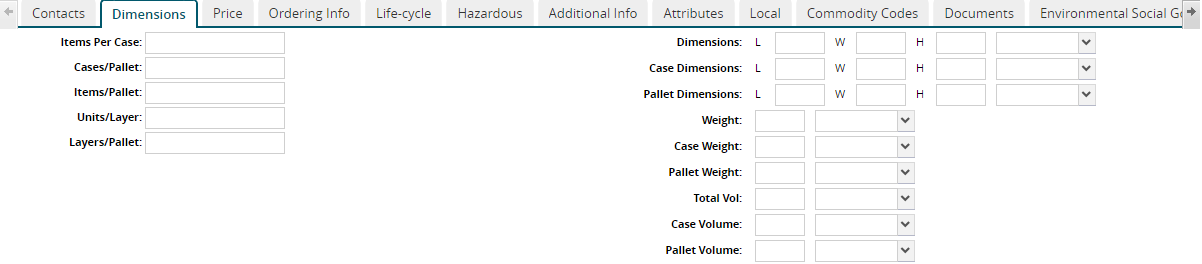
Fill out the following fields. Fields with an asterisk ( * ) are required.
Fields
Description
Items per Case
Enter the number of items per case.
Cases per Pallet
Enter the number of cases per pallet.
Items per Pallet
Enter the number of items per pallet.
Units per Layer
Enter the number of units per layer.
Layers per Pallet
Enter the number of layers per pallet.
Dimensions
Enter length, width, and height values and select a unit of measure from the dropdown menu.
Case Dimensions
Enter length, width, and height values and select a unit of measure from the dropdown menu.
Pallet Dimensions
Enter length, width, and height values and select a unit of measure from the dropdown menu.
Weight
Enter a numerical weight and select a unit of measure from the dropdown menu.
Case Weight
Enter a numerical case weight and select a unit of measure from the dropdown menu.
Pallet Weight
Enter a numerical pallet weight and select a unit of measure from the dropdown menu.
Total Vol
Enter a numerical total volume and select a unit of measure from the dropdown menu.
Case Volume
Enter a numerical case volume and select a unit of measure from the dropdown menu.
Pallet Volume
Enter a numerical pallet volume and select a unit of measure from the dropdown menu.
Select the Price tab.

Fill out the following fields as needed.
Field
Description
Item Price
Enter an item price and select a currency from the dropdown menu.
MSRP
Enter an MSRP.
Standard Cost
Enter a standard cost.
Total Landed Cost
Enter a total landed cost.
Select the Ordering Info tab.

Fill out the following fields. Fields with an asterisk ( * ) are required.
Field
Description
Ordering UOM
Select an ordering unit of measure from the dropdown menu.
Stocking UOM
Select a stocking unit of measure from the dropdown menu.
Ordering To Stocking Conversion Factor
Enter an ordering to stocking conversion factor.
Spaces
Enter a space.
Order Mgmt Org
Use the picker tool to select an order management organization.
Order UOM
Select an order unit of measure from the dropdown menu.
Select the Life-cycle tab.

Fill out the following fields. Fields with an asterisk ( * ) are required.
Field
Description
Activation Date
Select an activation date using the time and date picker.
Deactivation Date
Select a deactivation date using the time and date picker.
Launch Date
Select a launch date using the time and date picker.
Initial Duration
Enter a numerical initial duration and a unit of measure.
Growth Duration
Enter a numerical growth duration and a unit of measure.
Forecast Begin Date
Select a forecast begin date using the time and date picker.
Forecast End Date
Select a forecast end date using the time and date picker.
Maturity Duration
Enter a numerical maturity duration and a unit of measure.
Deadline Duration
Enter a numerical deadline duration and a unit of measure.
Shelf Life
Enter a numerical shelf life and a unit of measure.
Select the Hazardous tab.
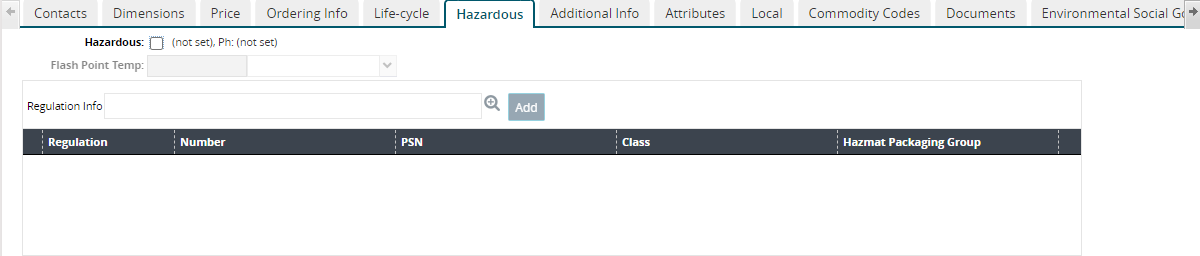
Click the Hazardous checkbox and select the not set link to enter the Name and Phone.
Enter the Flash Point Temp and select the unit of temperature from the dropdown list.
Select the Regulation Info with the picker
Click the Add button to add the regulation information details in the table below. The details like Regulation, Class, PSN, and so on are added.
Select the Additional Info tab.
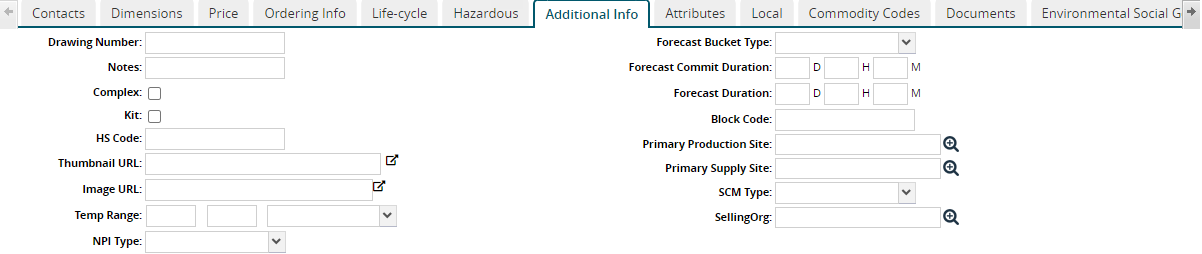
Fill out the following fields. Fields with an asterisk ( * ) are required.
Field
Description
Drawing Number
Enter a drawing number.
Notes
Enter notes.
Complex
Select this checkbox if the item is complex.
Kit
Select this checkbox if the item is part of a kit.
HS Code
Enter an HS code.
Thumbnail URL
Enter a thumbnail URL.
Image URL
Enter an image URL.
Temp Range
Enter a temperature range minimum, maximum, and select either Fahrenheit or Celcius from the dropdown menu.
NPI Type
Select an NPI type from the dropdown menu. The available options are Promotional Supplement, Replacement, or Standard.
Forecast Bucket Type
Enter a forecast bucket type from the dropdown menu. The available options are Daily, Fiscal_Monthly, Monthly, or Weekly.
Forecast Commit Duration
Enter a forecast commit duration in days, hours, and minutes.
Forecast Duration
Enter a forecast duration in days, hours, and minutes.
Block Code
Enter a block code.
Primary Production Site
Begin typing, and the system will automatically show primary production sites that match your text or use the picker tool to select a primary production site. Click a primary production site from the list.
Primary Supply Site
Begin typing, and the system will automatically show primary supply sites that match your text or use the picker tool to select a primary supply site. Click a primary supply site from the list.
SCM Type
Select an SCM type from the dropdown menu.
Selling Org
Begin typing, and the system will automatically show selling organizations that match your text or use the picker tool to select a selling organization. Click a selling organization from the list.
Select the Attributes tab.
The attributes related to the items are displayed here. No attributes are associated until the new item is saved by clicking the Create button.Select the Local tab.
The details like Local Item Name, Organization, Site, Scope, and Active are displayed here.Select the Commodity Codes tab.
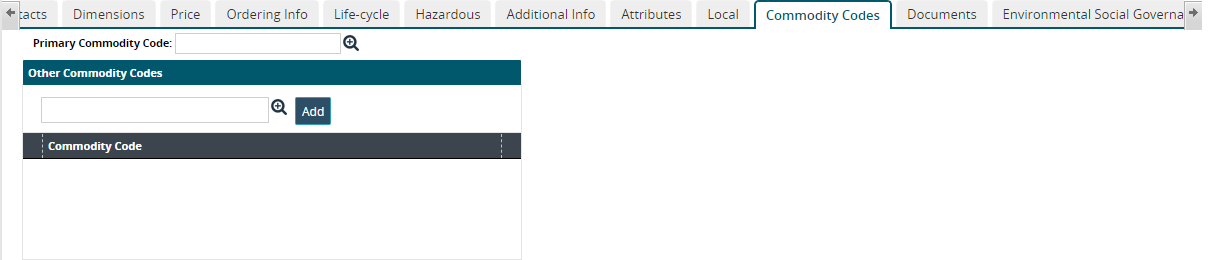
Select the Primary Commodity Code with the picker tool.
Select the Other Commodity Codes with the picker tool.
Click the Add button to add the other commodity code under the Commodity Code pane.
Select the Documents tab.
The documents related to the items are displayed here. No documents are associated until the new item is saved by clicking the Create button.Select the Environmental Social Governance tab.

In the Buyer Side Emissions field, enter the buyer side emission value and select a UOM from the dropdown list.
In the Sell Side Emissions field, enter the sell side emission value and select a UOM from the dropdown list.
Select the Customs tab.
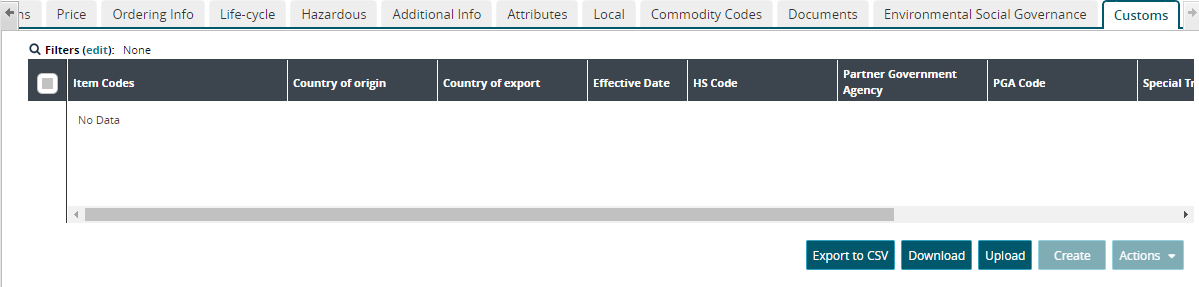
Click the Export to CSV button to export the customs list into a spreadsheet.
Click the Download button to download the customs list.
Click the Create button.
A green success bar displays.Click the Initiate Databot button to initiate a databot.
Click the View Databot Details button to select a databot and view its details.